全面解析 Keycloak:如何优雅集成到 Spring Boot 3 应用中?

开发 前端
本文详细介绍了如何通过 Keycloak 生成 JWT 令牌,并将其与 Spring Boot 集成,实现基于角色的权限控制。通过配置 Keycloak 生成令牌,设置 Spring Security 的 JWT 解析逻辑,以及定义基于角色的访问控制,我们构建了一个安全、高效的认证与授权机制。

Keycloak 是一种开源身份和访问管理工具,可以帮助用户以最小的努力为应用程序添加身份验证功能。

Keycloak 的一些主要特性

  1. 单点登录与单点注销 (Single Sign-On and Single Sign-Out):用户不需要为不同的应用程序设置不同的登录账号。
  2. 社交登录与身份代理 (Social Login and Identity Brokering):支持使用 Google、Facebook 等社交登录功能,并可以轻松配置已有的身份提供商。
  3. 用户联合 (User Federation):内置支持连接现有的 LDAP 和 Active Directory 服务器。
  4. 管理控制台 (Admin Console)。
  5. 授权服务 (Authorisation Services):帮助管理所有客户服务的权限,支持细粒度的权限控制。

了解 Keycloak 的几个重要术语

  1. Realm (领域):一个安全域,用于管理用户、应用程序、组和权限,便于资源、权限和配置的隔离与组织。
  2. Client (客户端):能够请求用户身份验证的应用程序或服务。
  3. Client Scopes (客户端范围):多个客户端之间共享的通用规则和权限。
  4. Realm Roles (领域角色):在当前领域范围内定义的角色。

Keycloak 入门

我们可以通过 Docker 启动 Keycloak 服务器。使用以下命令启动 Keycloak 服务器:

docker run -p8081:8080 -eKEYCLOAK_ADMIN=admin -eKEYCLOAK_ADMIN_PASSWORD=admin quay.io/keycloak/keycloak:25.0.4 start-dev
  • 1.

服务器将启动在 8081 端口。默认用户名和密码是 admin。可以通过浏览器访问 localhost:8081/admin。
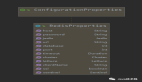
以下是管理控制台的界面:

图片图片

创建领域 (Realm)

首先,我们需要创建一个领域来管理用户和应用程序。创建领域的方法如下:

  1. 点击左侧的 Realm。
  2. 然后点击 Create。

图片

创建用户

创建用户的步骤如下:

  1. 点击左侧的 Users。
  2. 点击 Add User 按钮。接着会出现一个如下的表单:

图片

添加客户端 (Client)

可以按以下步骤添加我们的应用程序或服务:

  1. 点击左侧的 Clients。
  2. 点击 Create Client。
  3. 接下来会出现一个表单,如下图 Screenshot_1 所示。在连接 Spring Boot 应用程序和 Keycloak 时,ClientId 非常重要。
  4. 在 Root URL 中填写 Spring Boot 应用的基础 URL (参考下图 Screenshot_2)。
  5. 完成后的表单看起来如 Screenshot_3 所示。

图片图片

图片图片

图片图片

创建客户端后,可以为该客户端创建 Roles (角色)。

这些角色可以分配给用户,用户将根据权限访问不同的端点。

假设我们创建了两个用户 testadmin 和 testuser,同时创建了两个角色 client_admin 和 client_user。

图片图片

如何使用 Keycloak 生成 JWT Token?

您需要通过 HTTP POST 方法向以下 URL 发送请求:http://localhost:8081/realms/master/protocol/openid-connect/token (假设 Keycloak 服务器运行在 localhost:8081)

请求体

请求体应为 x-www-form-urlencoded 类型,并包含以下参数:

  • grant_type(文本)— 表示请求所用的授权类型。
  • client_id(文本)— 请求的客户端标识符。
  • username(文本)— 用于身份验证的用户名。
  • password(文本)— 用于身份验证的密码。

示例请求体

grant_type:password
client_id:keycloak-integration-app
username:testuser
password:testuser
  • 1.
  • 2.
  • 3.
  • 4.

如果请求成功,API 将返回一个包含 access token 的 JSON 响应。此 Token 可用于调用我们 Spring Boot 应用的各种接口。

将 Keycloak 集成到 Spring Boot 中

创建一个简单的 Spring Boot 应用,并添加以下依赖

  1. Spring Web
  2. Spring Security
  3. Lombok
  4. OAuth2 Authorization Server
<dependencies>
<dependency>
<groupId>org.springframework.boot</groupId>
<artifactId>spring-boot-starter-oauth2-resource-server</artifactId>
</dependency>
<dependency>
<groupId>org.springframework.boot</groupId>
<artifactId>spring-boot-starter-security</artifactId>
</dependency>
<dependency>
<groupId>org.springframework.boot</groupId>
<artifactId>spring-boot-starter-web</artifactId>
</dependency>

<dependency>
<groupId>org.projectlombok</groupId>
<artifactId>lombok</artifactId>
<optional>true</optional>
</dependency>
<dependency>
<groupId>org.springframework.boot</groupId>
<artifactId>spring-boot-starter-test</artifactId>
<scope>test</scope>
</dependency>
<dependency>
<groupId>org.springframework.security</groupId>
<artifactId>spring-security-test</artifactId>
<scope>test</scope>
</dependency>
</dependencies>
  • 1.
  • 2.
  • 3.
  • 4.
  • 5.
  • 6.
  • 7.
  • 8.
  • 9.
  • 10.
  • 11.
  • 12.
  • 13.
  • 14.
  • 15.
  • 16.
  • 17.
  • 18.
  • 19.
  • 20.
  • 21.
  • 22.
  • 23.
  • 24.
  • 25.
  • 26.
  • 27.
  • 28.
  • 29.
  • 30.

创建 SecurityConfig 类:

@Configuration
@EnableWebSecurity
@EnableMethodSecurity
@RequiredArgsConstructor
public class SecurityConfig {


    private final JwtConvertor jwtConvertor;


    @Bean
    public SecurityFilterChain securityFilterChain(HttpSecurity httpSecurity) throws Exception {


        httpSecurity
                .csrf(csrf -> csrf.disable())
                .authorizeHttpRequests(auth -> auth.anyRequest().authenticated());


        httpSecurity
                .oauth2ResourceServer(oauth2 -> oauth2
                        .jwt(jwt -> jwt
                                .jwtAuthenticationConverter(jwtConvertor)));


        httpSecurity
                .sessionManagement(sessMngmt ->
                        sessMngmt.sessionCreationPolicy(SessionCreationPolicy.STATELESS));


        return httpSecurity.build();
    }
}
  • 1.
  • 2.
  • 3.
  • 4.
  • 5.
  • 6.
  • 7.
  • 8.
  • 9.
  • 10.
  • 11.
  • 12.
  • 13.
  • 14.
  • 15.
  • 16.
  • 17.
  • 18.
  • 19.
  • 20.
  • 21.
  • 22.
  • 23.
  • 24.
  • 25.
  • 26.
  • 27.
  • 28.
  • 29.
  • 30.
  • 31.
  • 32.
  • 33.

创建 JwtConvertor 类以提取角色。

以下是解码 JWT 时的角色 JSON 示例:

"resource_access": {
"keycloak-integration-app": {
"roles": [
"client_admin"
]
},
"account": {
"roles": [
"manage-account",
"manage-account-links",
"view-profile"
]
}
}
  • 1.
  • 2.
  • 3.
  • 4.
  • 5.
  • 6.
  • 7.
  • 8.
  • 9.
  • 10.
  • 11.
  • 12.
  • 13.
  • 14.

为了获取角色,我们需要创建一个转换器类:

public class JwtConvertor implements Converter<Jwt, AbstractAuthenticationToken> {


    private final JwtGrantedAuthoritiesConverter jwtGrantedAuthoritiesConverter =
            new JwtGrantedAuthoritiesConverter();


    private String principleAttribute;


    @Override
    public AbstractAuthenticationToken convert(Jwt source) {
        Collection<GrantedAuthority> authorities = Stream.concat(
                jwtGrantedAuthoritiesConverter.convert(source).stream(),
                extractResourceRoles(source).stream()
        ).collect(Collectors.toSet());


        return new JwtAuthenticationToken(
                source,
                authorities,
                getPrincipleClaimName(source)
        );
    }


    private String getPrincipleClaimName(Jwt source) {
        String claimName = JwtClaimNames.SUB;
        if (principleAttribute != null) {
            claimName = principleAttribute;
        }
        return source.getClaim(claimName);
    }


    private Collection<? extends GrantedAuthority> extractResourceRoles(Jwt jwt) {
        Map<String, Object> resourceAccess;
        Map<String, Object> resource;
        Collection<String> resourceRoles;
        if (jwt.getClaim("resource_access") == null) {
            return Set.of();
        }
        resourceAccess = jwt.getClaim("resource_access");


        if (resourceAccess.get("keycloak-integration-app") == null) {
            return Set.of();
        }
        resource = (Map<String, Object>) resourceAccess.get("keycloak-integration-app");


        resourceRoles = (Collection<String>) resource.get("roles");
        return resourceRoles
                .stream()
                .map(role -> new SimpleGrantedAuthority("ROLE_" + role))
                .collect(Collectors.toSet());
    }
}
  • 1.
  • 2.
  • 3.
  • 4.
  • 5.
  • 6.
  • 7.
  • 8.
  • 9.
  • 10.
  • 11.
  • 12.
  • 13.
  • 14.
  • 15.
  • 16.
  • 17.
  • 18.
  • 19.
  • 20.
  • 21.
  • 22.
  • 23.
  • 24.
  • 25.
  • 26.
  • 27.
  • 28.
  • 29.
  • 30.
  • 31.
  • 32.
  • 33.
  • 34.
  • 35.
  • 36.
  • 37.
  • 38.
  • 39.
  • 40.
  • 41.
  • 42.
  • 43.
  • 44.
  • 45.
  • 46.
  • 47.
  • 48.
  • 49.
  • 50.
  • 51.
  • 52.
  • 53.
  • 54.
  • 55.
  • 56.
  • 57.
  • 58.

在 application.yml 中添加配置:

spring:
application:
name: keycloak-integration
security:
oauth2:
resourceserver:
jwt:
issuer-uri: sample_issuer_uri
jwk-set-uri: sample_cert
  • 1.
  • 2.
  • 3.
  • 4.
  • 5.
  • 6.
  • 7.
  • 8.
  • 9.

可以通过以下 GET API 获取 issuer-uri 和 jwk-set-uri:

http://localhost:8081/realms/{realm_name}/.well-known/openid-configuration

## 将 {realm_name} 替换为您的 Realm 名称
  • 1.
  • 2.
  • 3.

创建 REST Controller

@RestController
@RequestMapping(value = "/data")
public class DataController {


    @GetMapping(value = "/user")
    @PreAuthorize("hasRole('client_user')")
    public String userApi(){
        return "I am a user";
    }


    @GetMapping(value = "/admin")
    @PreAuthorize("hasRole('client_admin')")
    public String adminApi(){
        return "I am an Admin";
    }
}
  • 1.
  • 2.
  • 3.
  • 4.
  • 5.
  • 6.
  • 7.
  • 8.
  • 9.
  • 10.
  • 11.
  • 12.
  • 13.
  • 14.
  • 15.
  • 16.
  • 17.
  • 18.

我们的集成现在已经完成,可以通过生成 Keycloak 的 access token 来访问 API(如上所述)。

使用 testuser 的 JWT 调用 /data/admin 接口时,会返回 403,但可以正常访问 /data/user。对于 testadmin 用户也是如此。

资源

  1. Keycloak 入门文档请参阅 https://www.keycloak.org/guides#getting-started。
  2. JWT 官网https://jwt.io/

总结

本文详细介绍了如何通过 Keycloak 生成 JWT 令牌,并将其与 Spring Boot 集成,实现基于角色的权限控制。

通过配置 Keycloak 生成令牌,设置 Spring Security 的 JWT 解析逻辑,以及定义基于角色的访问控制,我们构建了一个安全、高效的认证与授权机制。

这套流程为应用的安全性和扩展性提供了保障,适用于多角色分布式系统开发。

责任编辑:武晓燕 来源: 路条编程
相关推荐

2021-07-09 06:48:29

Spring Boot应用Keycloak

2021-01-07 14:06:30

Spring BootJUnit5Java

2025-01-02 11:20:47

2020-07-14 11:00:12

Spring BootRedisJava

2022-10-26 07:14:25

Spring 6Spring业务

2021-08-26 11:00:54

Spring BootJUnit5Java

2024-12-06 09:27:28

2020-09-02 17:28:26

Spring Boot Redis集成

2024-10-11 11:46:40

2024-09-27 12:27:31

2021-03-09 13:18:53

加密解密参数

2023-11-01 08:58:10

2022-06-04 12:25:10

解密加密过滤器

2025-02-07 09:11:04

JSON对象策略

2024-10-08 09:27:04

SpringRESTfulAPI

2024-01-16 08:17:29

Mybatis验证业务

2022-05-12 11:38:26

Java日志Slf4j

2021-12-28 11:13:05

安全认证 Spring Boot

2024-11-06 11:33:09

2024-01-02 07:04:23

点赞
收藏

51CTO技术栈公众号