探索 Prometheus Agent + GreptimeDB:轻量级监控的未来

开发 开发工具
Prometheus 一直是 Kubernetes 生态中不可或缺的监控工具。然而,随着分布式系统的复杂性增加以及边缘计算、Serverless 技术的广泛应用,传统的 Prometheus Server 已不再适合所有场景。为了应对这些挑战,Prometheus 引入了一种轻量级运行模式:Prometheus Agent。

引言

紧接上篇的文章,我们继续往上盖大楼,现在我们已经盖到了第 500 楼了,不要往下看,除非你是勇者,不然你会吓到你自己。

这一篇的东西也是挺多的:Prometheus Agent。

Prometheus 一直是 Kubernetes 生态中不可或缺的监控工具。然而,随着分布式系统的复杂性增加以及边缘计算、Serverless 技术的广泛应用,传统的 Prometheus Server 已不再适合所有场景。为了应对这些挑战,Prometheus 引入了一种轻量级运行模式:Prometheus Agent。

Prometheus Agent 专注于指标的采集和推送,省去了存储和查询的功能,使其在资源受限的环境中更加高效。

本文将详细介绍 Prometheus Agent 的运行机制、使用场景以及部署方式,并分享一些最佳实践。

介绍

什么是 Prometheus Agent?

Prometheus Agent 是 Prometheus 自 v2.33.0 版本起引入的一种运行模式,其主要特点包括:

  • • 轻量化:专注于数据的采集与推送,不存储数据,也不提供查询能力。
  • • 高效:减少了本地存储和查询相关的资源占用。
  • • 推送模式:通过 remote_write 将采集到的指标推送到远程存储或中央 Prometheus Server。

这种模式特别适合边缘场景、Serverless 环境以及需要集中化监控的分布式系统。

Prometheus Agent 的适用场景

边缘计算

在边缘计算场景中,设备通常资源有限,难以运行完整的 Prometheus Server。Prometheus Agent 通过其轻量化特性,可以高效采集边缘设备的指标,并将数据推送到中央监控系统。

Serverless 环境

对于 Serverless 服务(如函数计算、API 网关等),Prometheus Agent 可以动态采集相关指标,并避免因存储和查询功能导致的资源浪费。

集中式监控

在大型分布式系统中,可通过在每个子系统中部署 Prometheus Agent,将所有数据集中推送到远程存储(如 Cortex、Thanos),实现统一的存储与查询。

高性能监控

对于大规模集群,Agent 模式可减少单点 Prometheus Server 的负载,将存储和查询功能卸载到远程存储。

为什么需要 Prometheus Agent

Prometheus Agent 其实只是 Prometheus 的一种特殊运行状态,在 prometheus-operator 中以 PrometheusAgent 这个 CRD 体现,但其内部控制逻辑与 Prometheus CRD 一致。

之所以需要 Prometheus Agent,我们其实可以从 Prometheus 的官方文档[1]一窥究竟。Prometheus Agent 本质上就是将时序数据库能力从 Prometheus 中剥离,并优化 Remote Write 性能,从而让其成为了一个支持 Prometheus 采集语义的高性能 Agent。这样一来,Prometheus Agent 还可以部署在一些资源受限的边缘场景进行数据采集。

“众所周知”,Prometheus 作为数据库而言,查询性能和可扩展性相对较弱,这也是为什么 Remote Write 会如此流行以至于又成为了一个事实上的标准:因为大家都希望将数据转存在性能更高的数据库上但又希望继续兼容 Prometheus 的采集逻辑(因为很好用)。Agent 模式其实如大家所意,禁用了查询、报警和本地存储功能,并用了一个特殊的 TSDB WAL 来临时存储数据,从而整体架构如下所示:
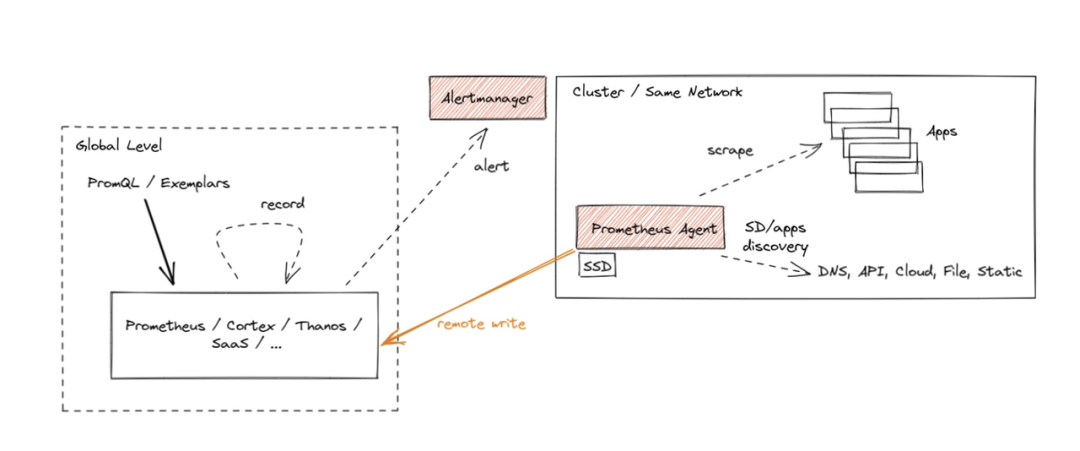
图片图片

这种架构某种程度是推拉结合的模式。Metrics 的采集采用 Pull 模式,而其存储则采用 Push 模式。对于高吞吐的写入,Push 模式其实对写入更友好。因为我们总是可以以 Batch 模式来集中向远端写入大批数据。这种模式下的 Prometheus 其实是无状态,更便于部署和 Scrape Job 的分片。

其实,这类兼容 Prometheus 采集语义的 Agent 社区有不少可供选择,比如 vmagent[2] 和 vector[3]。VictoriaMetrics 还曾经对 Prometheus Agent, vmagant 和 Grafana Agant 做过一个性能报告[4]。不过很快,Grafana Agent 就停止开发并转成维护模式[5]。Grafana 又造了另一个项目 Alloy[6],重点支持 OpenTelemetry,当然又造了一个与 Terraform 语法酷似的配置语言的 DSL。

从长期技术演技来看,Agent 总是兵家必争之地,因为可以守住数据入口可以做的事情比较多。大家总是希望 Agent 能:

• 具有极低的 CPU 和 Memory footprint,因为它们通常会以 sidecar 或者 daemonset 的形式进行部署,资源极度受限;

• 兼容更多的前端采集协议和后端写入逻辑;

• 具备一定的数据的编排能力(或者称为 pipeline ?),即采集后的数据能以一定的规则进行改写和转换;

• 技术中立;

Prometheus Agent 数据采集工作流程

采集目标的发现:

• 如果你使用 scrape_configs,Agent 会直接按照配置中的 targets 抓取数据。

• 如果你使用 ServiceMonitor 或 PodMonitor,Agent 会通过 Prometheus Operator 的自动发现机制,找到符合条件的服务或 Pod(我们使用这种方式)。 数据采集:

• Prometheus Agent 会周期性地访问这些目标的 /metrics 端点,抓取指标数据。 数据推送:

• Agent 使用 remote_write 将采集到的指标数据推送到远程存储(例如 Prometheus Server 或 GreptimeDB)。

开始

与 GreptimeDB 的集成

GreptimeDB[7] 作为一个新款的开源 TSDB 很早就支持了 Prometheus Remote Write[8]。我们其实可以直接使用 PrometheusAgent 这个 CRD 来定义基于 GreptimeDB Remote Write 的 Prometheus Agent。这样以来,用户其实无需做过多 CR 的改动就能直接将数据接入到 GreptimeDB 中。

这边的思路是所有的数据都存储在 远程存储 中,Prometheus 本身不存储数据

部署 greptimedb-operator[9]

helm repo add greptime https://greptimeteam.github.io/helm-charts/
helm repo update

helm upgrade \
  --install \
  --create-namespace \
  greptimedb-operator greptime/greptimedb-operator \
  -n greptimedb

greptimedb-operator[10] 同时支持管理 GreptimeDB Standalone 和 Cluster 模式,用户可以根据自己需要创建相应的 CR。

快速启动一个 Standalone 模式下的 GreptimeDB

用的资源比较多,毕竟需要存储大量数据,还要被 Prometheus 读取

apiVersion: greptime.io/v1alpha1
kind: GreptimeDBStandalone
metadata:
  name: greptimedb
  namespace: greptimedb-admin
spec:
  base:
    main:
      image: greptime/greptimedb:latest
      resources:
        limits:
          cpu: "4"
          memory: "7Gi"
        requests:
          cpu: "2"
          memory: "4Gi"

我们可以通过观察 GreptimeDBStandalone 的状态来判断其是否启动成功:

$ kubectl get all
NAME                             READY   STATUS    RESTARTS   AGE
pod/greptimedb-standalone-0   1/1     Running   0          23s

NAME                               TYPE        CLUSTER-IP        EXTERNAL-IP   PORT(S)                               AGE
service/kubernetes                 ClusterIP   192.168.194.129   <none>        443/TCP                               36d
service/greptimedb-standalone   ClusterIP   192.168.194.245   <none>        4001/TCP,4000/TCP,4002/TCP,4003/TCP   23s

NAME                                        READY   AGE
statefulset.apps/greptimedb-standalone   1/1     23s

Ingress:

apiVersion: networking.k8s.io/v1
kind: Ingress
metadata:
  name: greptimedb
  namespace: greptimedb-admin
spec:
  ingressClassName: nginx
  rules:
    - http:
        paths:
          - path: /
            pathType: Prefix
            backend:
              service:
                name: greptimedb-standalone
                port:
                  name: http
      host: greptimedb.kubernetes.click

优化 GreptimeDB 的配置文件:

jacobleo@Jacobs-MacBook-Air greptimedb % kgcm -ngreptimedb-admin
NAME                    DATA   AGE
kube-root-ca.crt        1      4d18h
greptimedb-standalone   1      50m

jacobleo@Jacobs-MacBook-Air greptimedb % k edit cm greptimedb-standalone -ngreptimdb-admin
# Please edit the object below. Lines beginning with a '#' will be ignored,
# and an empty file will abort the edit. If an error occurs while saving this file will be
# reopened with the relevant failures.
#
apiVersion: v1
data:
  config.toml: |2

    [logging]
      dir = "/data/greptimedb/logs"
      level = "debug" # 我们这里先改成 degub,获取更多的信息,生产建议使用 info 或者 warn
      log_format = "json" # 我们这里配置成 json,方便后面日志采集(ELK),或者其他之类的

    [storage]
      data_home = "/data/greptimedb"
      ttl = 27 # 我们这里配置了数据的保留天数

    [wal]
      dir = "/data/greptimedb/wal"
kind: ConfigMap
metadata:
  annotations:
    controller.greptime.io/last-applied-resource-spec: '{"config.toml":"\n[logging]\n  dir
      = \"/data/greptimedb/logs\"\n  level = \"info\"\n  log_format = \"text\"\n\n[storage]\n  data_home
      = \"/data/greptimedb\"\n\n[wal]\n  dir = \"/data/greptimedb/wal\"\n"}'
  creationTimestamp: "2025-01-14T03:33:43Z"
  name: greptimedb-standalone
  namespace: greptimedb-admin
  ownerReferences:
  - apiVersion: greptime.io/v1alpha1
    blockOwnerDeletion: true
    controller: true
    kind: GreptimeDBStandalone
    name: greptimedb
    uid: 1ae5a33d-f260-48ad-b6ca-609c1cbb262a
  resourceVersion: "318496"
  uid: baa0588e-1ab6-4453-8e37-2f5ea2c1b00d

更改完成后,等待 Pod 重启,如果不行,就手动重启

数据可视化

自 GreptimeDB v0.2.0 版本以来,控制台已经默认嵌入到 GreptimeDB 的 binary 文件中。在启动 GreptimeDB 单机版[11]或分布式集群[12]后,可以通过 URL http://localhost:4000/dashboard 访问控制台,我这边使用的 Ingress。控制台支持多种查询语言,包括 SQL 查询[13]和 PromQL 查询[14]。

提供不同种类的图表,可以根据不同的场景进行选择。当你有足够的数据时,图表的内容将更加丰富。
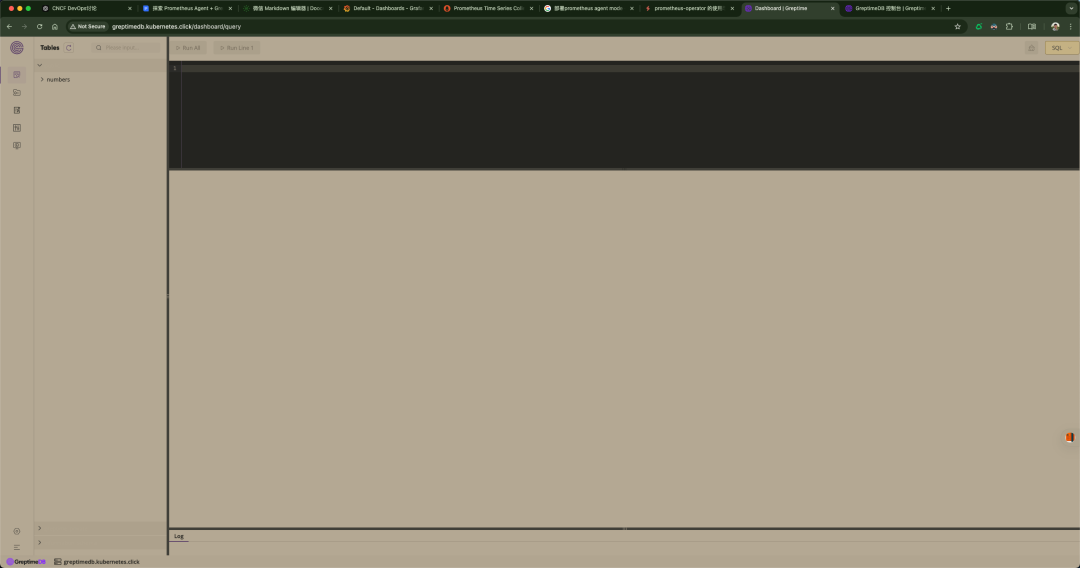
图片图片

可以看到并没有什么大问题,但是到后面我感觉到有一个 Bug,就是它有时候会莫名其妙地不能访问(可能是我 Mac 本地环境的原因,我使用的 OrbStack[15](可以帮助我迅速启动一个 K8s 集群, 只支持 Mac)),就是 404 Not Found,我后来就是在它的 YAML 文件换一下镜像,然后重新部署就好了,很奇怪,当时弄了半天。

看到这里,如果 GreptimeDB 的相关人员看到了,希望重视下这个问题。

创建 Promethus Agent 实例并将 Remote Write 设置为 GreptimeDB

apiVersion: v1
kind: ServiceAccount
metadata:
  name: prometheus-agent
  namespace: greptimedb-admin
---
apiVersion: rbac.authorization.k8s.io/v1
kind: ClusterRole
metadata:
  name: prometheus-agent
rules:
  - apiGroups: ["monitoring.coreos.com"]
    resources: 
      - servicemonitors
      - podmonitors
      - prometheuses
    verbs: ["get", "list", "watch"]
  - apiGroups: [""]
    resources:
      - nodes
      - nodes/metrics
      - services
      - endpoints
      - pods
    verbs: ["get", "list", "watch"]
  - apiGroups: [""]
    resources:
      - configmaps
    verbs: ["get"]
  - apiGroups:
      - discovery.k8s.io
    resources:
      - endpointslices
    verbs: ["get", "list", "watch"]
  - apiGroups:
      - networking.k8s.io
    resources:
      - ingresses
    verbs: ["get", "list", "watch"]
  - nonResourceURLs: ["/metrics"]
    verbs: ["get"]
---
apiVersion: rbac.authorization.k8s.io/v1
kind: ClusterRoleBinding
metadata:
  name: prometheus-agent
roleRef:
  apiGroup: rbac.authorization.k8s.io
  kind: ClusterRole
  name: prometheus-agent
subjects:
  - kind: ServiceAccount
    name: prometheus-agent
    namespace: greptimedb-admin
---
apiVersion: monitoring.coreos.com/v1alpha1
kind: PrometheusAgent
metadata:
  name: prometheus-agent
  namespace: greptimedb-admin
spec:
  image: quay.io/prometheus/prometheus:v2.53.0
  replicas: 1
  serviceAccountName: prometheus-agent

这边配置下 GreptimeDB,我是用 Ingress 给 GreptimeDB 做的域名解析,你自己可以选择

·····
  enableFeatures:
    - agent  # 启用 Prometheus Agent 模式
  remoteWrite:
    - url: http://greptimedb.kubernetes.click/v1/prometheus/write?db=public
      queueConfig:  # 可选配置,用于优化数据发送性能
        capacity: 5000 # 缓冲区容量
        maxSamplesPerSend: 10000 # 每次发送的样本数
        batchSendDeadline: 5s # 批量发送的最大等待时间
·····

如果你想要更严谨地找去你想要的数据,可以使用下面的,你们需要替换你们自己的 Label

serviceMonitorSelector:
    matchExpressions:
      - key: app
        operator: In
        values:
          - frontend
          - backend
      - key: environment
        operator: NotIn
        values:
          - dev
  podMonitorSelector:
    matchExpressions:
      - key: team
        operator: Exists
  namespaceSelector:
    matchNames:
      - default
      - monitoring

serviceMonitorSelector 和 podMonitorSelector:Prometheus-Agent 会根据这些选择器,动态发现并抓取符合条件的 ServiceMonitor 和 PodMonitor 还有 namespaceSelector 指定的指标。

matchExpressions 语法

• key: 标签的名称。

• operator:

a.In: 标签值必须在 values 列表中。

b.NotIn: 标签值不能在 values 列表中。

c.Exists: 标签必须存在。

d.DoesNotExist: 标签不能存在。

• values: 用于匹配的值列表(仅适用于 In 和 NotIn 操作符)。

示例逻辑

• 匹配 app 标签的值是 frontend 或 backend。

• 排除 environment 标签的值为 dev 的目标。

• 包含所有有 team 标签的 PodMonitor。

namespaceSelector

• 限定匹配的命名空间,例如 default 和 monitoring。

但是如果你想要匹配所有的话,可以这样:

serviceMonitorSelector: {}
  serviceMonitorNamespaceSelector: {}
  podMonitorNamespaceSelector: {}
  podMonitorSelector: {}

Resources 优化

它占用的资源也是挺多的

resources:
    limits:
      cpu: "2"       # 最大可使用的 2 个 CPU
      memory: "4Gi"  # 最大可使用 4GB 内存
    requests:
      cpu: "1"       # 最少需要 1 个 CPU
      memory: "2Gi"  # 最少需要 2GB 内存

完整 YAML 文件

apiVersion: v1
kind: ServiceAccount
metadata:
  name: prometheus-agent
  namespace: greptimedb-admin
---
apiVersion: rbac.authorization.k8s.io/v1
kind: ClusterRole
metadata:
  name: prometheus-agent
rules:
  - apiGroups: ["monitoring.coreos.com"]
    resources: 
      - servicemonitors
      - podmonitors
      - prometheuses
    verbs: ["get", "list", "watch"]
  - apiGroups: [""]
    resources:
      - nodes
      - nodes/metrics
      - services
      - endpoints
      - pods
    verbs: ["get", "list", "watch"]
  - apiGroups: [""]
    resources:
      - configmaps
    verbs: ["get"]
  - apiGroups:
      - discovery.k8s.io
    resources:
      - endpointslices
    verbs: ["get", "list", "watch"]
  - apiGroups:
      - networking.k8s.io
    resources:
      - ingresses
    verbs: ["get", "list", "watch"]
  - nonResourceURLs: ["/metrics"]
    verbs: ["get"]
---
apiVersion: rbac.authorization.k8s.io/v1
kind: ClusterRoleBinding
metadata:
  name: prometheus-agent
roleRef:
  apiGroup: rbac.authorization.k8s.io
  kind: ClusterRole
  name: prometheus-agent
subjects:
  - kind: ServiceAccount
    name: prometheus-agent
    namespace: greptimedb-admin
---
apiVersion: monitoring.coreos.com/v1alpha1
kind: PrometheusAgent
metadata:
  name: prometheus-agent
  namespace: greptimedb-admin
spec:
  image: quay.io/prometheus/prometheus:v2.53.0
  replicas: 1
  serviceAccountName: prometheus-agent
  enableFeatures: 
    - agent
  remoteWrite:
    - url: "http://greptimedb.kubernetes.click/v1/prometheus/write?db=public"
      queueConfig:
        capacity: 5000
        maxSamplesPerSend: 10000
        batchSendDeadline: 5s
  serviceMonitorSelector: {}
  serviceMonitorNamespaceSelector: {}
  podMonitorNamespaceSelector: {}
  resources:
    limits:
      cpu: "2"
      memory: "4Gi"
    requests:
      cpu: "1"
      memory: "2Gi"

Apply

$ kubectl apply -f prom-agent.yaml

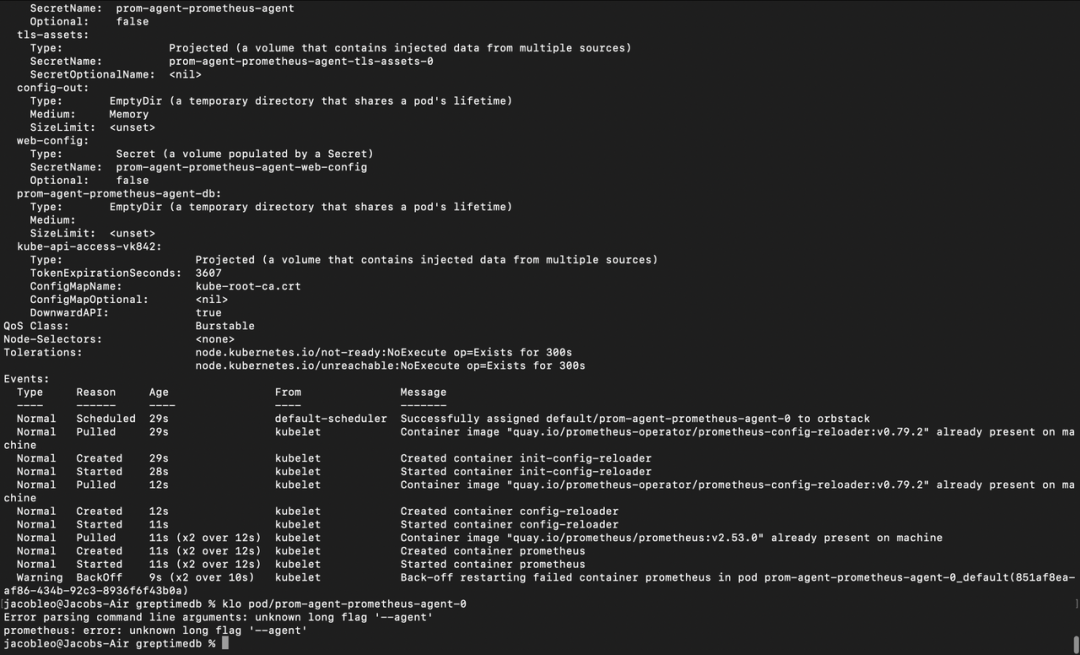
我部署完成之后,就一直报错,当时很纳闷:

图片图片

弄了半天,问题才发现是版本的问题。

我的 Prometheus-Operator 的 Prometheus 是 3.0.1 版本,而我的 Prometheus Agent 使用的版本是 2.53.0,所以,这边把我的 Prometheus Agent 的版本改成和 Prometheus 的版本,就可以了。

$ kg all
NAME                                READY   STATUS    RESTARTS   AGE
pod/greptimedb-standalone-0      1/1     Running   0          122m
pod/prom-agent-prometheus-agent-0   2/2     Running   0          81s

NAME                                TYPE        CLUSTER-IP        EXTERNAL-IP   PORT(S)                               AGE
service/kubernetes                  ClusterIP   192.168.194.129   <none>        443/TCP                               36d
service/greptimedb-standalone    ClusterIP   192.168.194.178   <none>        4001/TCP,4000/TCP,4002/TCP,4003/TCP   122m
service/prometheus-agent-operated   ClusterIP   None              <none>        9090/TCP                              82s

NAME                                           READY   AGE
statefulset.apps/greptimedb-standalone      1/1     122m
statefulset.apps/prom-agent-prometheus-agent   1/1     81s

更新 Prometheus YAML 文件

我这边使用的是 Prometheus-Operator 的 Github[16] 仓库,这边没有使用 Helm 安装,使用的 Manifest

····
  remoteWrite:     # 你这边也可以设置成 remoteRead,取决于你什么场景,然后 url 后面的也要换了
    - url: "http://greptimedb.kubernetes.click/v1/prometheus/write?db=public"
      queueConfig:
        capacity: 5000
        maxSamplesPerSend: 10000
        batchSendDeadline: 5s
  retention: 1h # 将数据保留时间设置为最短
  scrapeInterval: 10s
  storage:
    volumeClaimTemplate:    # 我这里没有指定 SC,如果没有指定,它就会使用我安装的默认的 SC
      spec:
        accessModes:
          - ReadWriteOnce
        resources:
          requests:
            storage: 1Gi
····

最后我们来看下我们上面两个 Pod 的资源占用情况

jacobleo@Jacobs-MacBook-Air greptimedb % k top pod -ngreptimedb-admin
NAME                                   CPU(cores)   MEMORY(bytes)   
greptimedb-operator-7c67868d4b-7vmtp   9m           71Mi
greptimedb-standalone-0                341m         5110Mi
prom-agent-prometheus-agent-0          72m          850Mi

可以看到,它们的资源占用还是挺夸张的

测试连接 GreptimeDB

安装 MySQL 客户端

我这边使用的是 Mac

在 Linux

如果你使用的是 Ubuntu 或其他基于 Debian 的发行版:

sudo apt update
sudo apt install mysql-client -y

如果你使用的是 CentOS 或基于 RedHat 的发行版:

sudo yum install mysql -y
在 macOS

你可以使用 Homebrew 来安装:

brew install mysql-client

注意:安装完成后,可能需要将 MySQL 客户端的路径加入环境变量。运行以下命令:

echo 'export PATH="/usr/local/opt/mysql-client/bin:$PATH"' >> ~/.zshrc
source ~/.zshrc

sudo ln -s /opt/homebrew/Cellar/mysql-client/9.1.0/bin/mysql /usr/local/bin/mysql
在 Windows

• 下载并安装 MySQL Shell 或 MySQL Workbench 客户端工具。

• 官方下载链接:MySQL Community Downloads[17]

使用 MySQL 客户端连接服务

一旦安装完成,你可以通过以下命令连接到目标服务:

通过 kubectl port-forward

确保你暴露了服务端口,例如:

kubectl port-forward service/greptimedb-standalone 4002:4002 -ngreptimedb-admin

然后使用 MySQL 客户端

mysql -h 127.0.0.1 -P 4002 -u root -p

测试数据

mysql> show databases;
+--------------------+
| Database           |
+--------------------+
| greptime_private   |
| information_schema |
| public             |
+--------------------+
3 rows in set (0.13 sec)


mysql> use public;
Database changed

mysql> show tables;  # 数据太多,省略了些
+-------------------------------------------------------------------------------------+
| Tables                                                                              |
+-------------------------------------------------------------------------------------+
| :node_memory_MemAvailable_bytes:sum                                                 |
| ALERTS                                                                              |
| ALERTS_FOR_STATE                                                                    |
| aggregator_discovery_aggregation_count_total                                        |
| aggregator_unavailable_apiservice                                                   |
| aggregator_unavailable_apiservice_total                                             |
| alertmanager_alerts                                                                 |
| alertmanager_alerts_invalid_total                                                   |
| alertmanager_alerts_received_total                                                  |
| alertmanager_build_info                                                             |
| alertmanager_cluster_alive_messages_total                                           |
| alertmanager_cluster_enabled                                                        |
| alertmanager_cluster_failed_peers                                                   |
| alertmanager_cluster_health_score                                                   |
| alertmanager_cluster_members                                                        |
| alertmanager_cluster_messages_pruned_total                                          |
| alertmanager_cluster_messages_queued                                                |
| alertmanager_cluster_messages_received_size_total                                   |
| alertmanager_cluster_messages_received_total                                        |
| alertmanager_cluster_messages_sent_size_total                                       |
| alertmanager_cluster_messages_sent_total                                            |
| alertmanager_cluster_peer_info                                                      |
| alertmanager_cluster_peers_joined_total                                             |
| alertmanager_cluster_peers_left_total                                               |
| alertmanager_cluster_peers_update_total                                             |
| alertmanager_cluster_pings_seconds_bucket                                           |
| alertmanager_cluster_pings_seconds_count                                            |
| alertmanager_cluster_pings_seconds_sum                                              |
| alertmanager_cluster_reconnections_failed_total                                     |
| alertmanager_cluster_reconnections_total                                            |
| alertmanager_cluster_refresh_join_failed_total                                      |
| alertmanager_cluster_refresh_join_total                                             |
| alertmanager_config_hash                                                            |
| alertmanager_config_last_reload_success_timestamp_seconds                           |

数据写入成功 !

使用 Grafana 渲染数据

我们可以直接跳过 Remote Read 直接对接 GreptimeDB,将其作为 Prometheus Datasource,设置对应的 URL 为:http://greptimedb.kubernetes.click/v1/prometheus/

我们这里配置我们的 YAML 文件,配置两个数据源,我们可以做个对比。

apiVersion: v1
kind: Secret
metadata:
  labels:
    app.kubernetes.io/component: grafana
    app.kubernetes.io/name: grafana
    app.kubernetes.io/part-of: kube-prometheus
    app.kubernetes.io/version: 11.4.0
  name: grafana-datasources
  namespace: monitoring
stringData:
  datasources.yaml: |-
    {
        "apiVersion": 1,
        "datasources": [
            {
                "access": "proxy",
                "editable": false,
                "name": "prometheus",
                "orgId": 1,
                "type": "prometheus",
                "url": "http://prom-kubernetes.click",
                "version": 1
            },
            {
                "access": "proxy",
                "editable": false,
                "name": "greptimedb",
                "orgId": 1,
                "type": "prometheus",
                "url": "http://greptimedb.kubernetes.click/v1/prometheus",
                "version": 1
            }
        ]
    }
type: Opaque

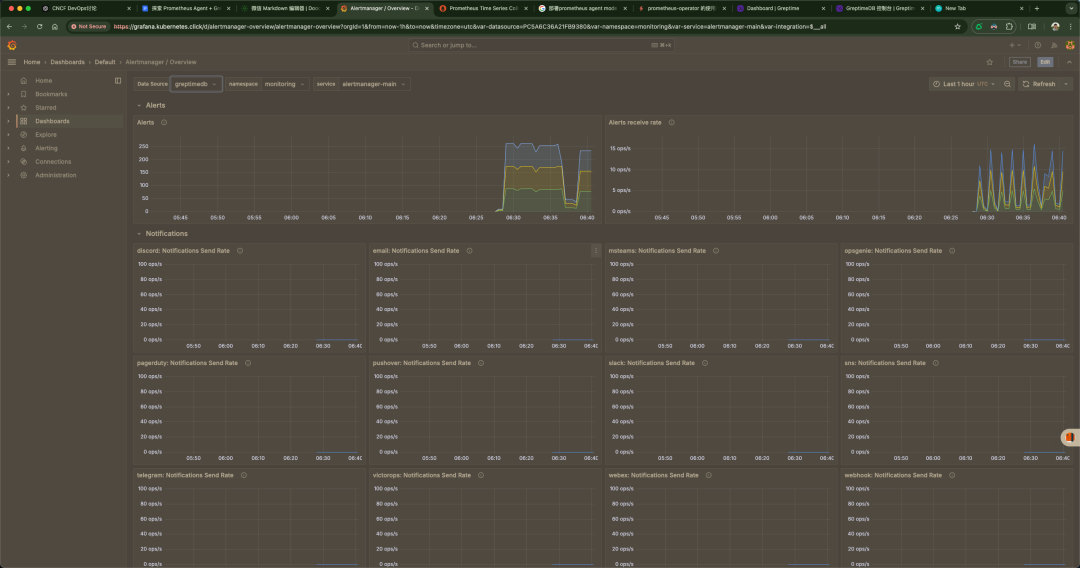
验证 Grafana

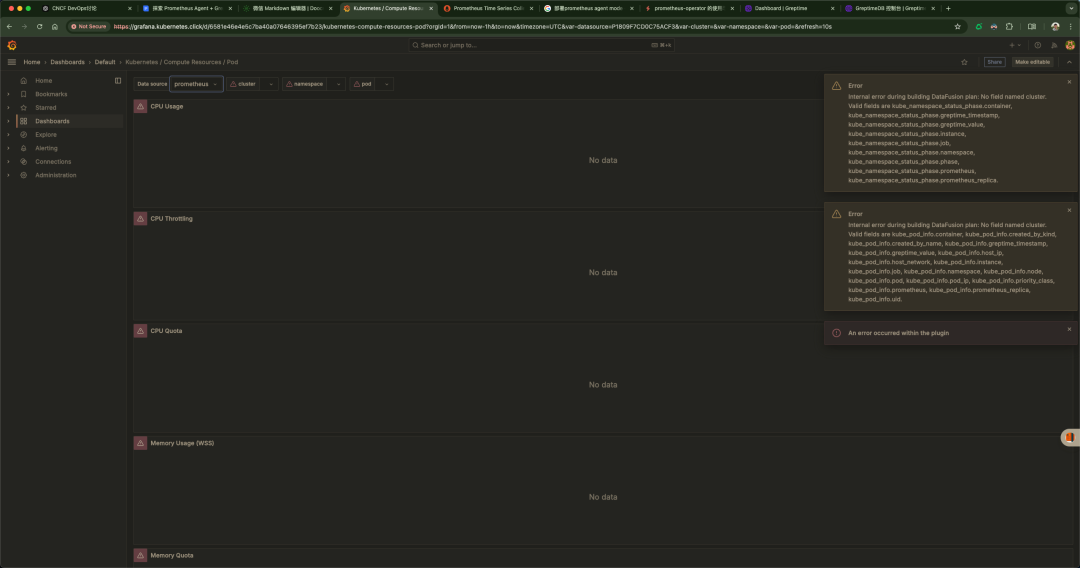
只有一小部分的 Dashboard 有数据,大部分都没有,真的很纳闷

没有数据的
图片图片

有数据的

图片

可以看到我们报错了,我这里使用 Prometheus 作为数据源没有问题,但是使用 GreptimeDB 就有点问题,但是我们确实有数据
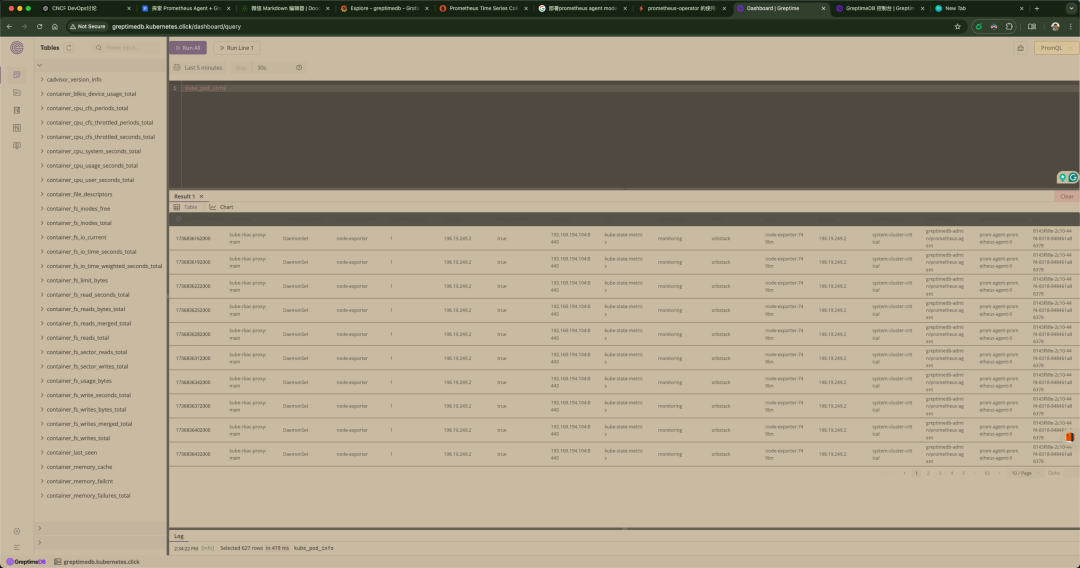
图片

我们大家可以思考下,这个问题我觉得涉及的范围还是挺大的,我感觉是权限的问题 RBAC 之类的,或者是 Prometheus 写入的问题,或者是 Prometheus-agent 搜集的问题

可能原因

数据源不匹配

当前的 Grafana Dashboard 是基于某些特定的数据源和字段(例如 cluster 字段)设计的。

但是,数据源(比如 Prometheus 或 GreptimeDB)中可能没有这些字段。

不完整的数据

如果 Prometheus 或 GreptimeDB 中没有完整的数据(比如缺少某些 Kubernetes 相关的指标),查询这些字段会导致错误。

比如,你的数据源中没有 kube_namespace_status_phase, kube_pod_info, 等字段。

GreptimeDB 的数据不兼容

如果通过 Prometheus Remote Write 将数据写入 GreptimeDB,但没有正确配置查询映射,GreptimeDB 中的数据结构可能与 Dashboard 的预期不匹配。

Dashboard 配置问题

使用的 Dashboard 是针对不同环境(或数据源)的。比如,这个 Dashboard 可能是为标准的 Prometheus 配置的,而不是你的特定场景。

字段不匹配

GreptimeDB 和 Prometheus 原始格式存在差异。当前的 Grafana Dashboard 很可能是为 Prometheus 数据源设计的,查询语句中引用了 cluster 等字段,而这些字段可能在 GreptimeDB 中不存在或没有被正确映射。

Prometheus Remote Write 不完整

如果 Prometheus 的 Remote Write 配置不正确,写入到 GreptimeDB 的数据可能不包含全部指标。例如,某些 Kubernetes 相关的指标可能被过滤掉了。

GreptimeDB 数据格式的差异

GreptimeDB 存储时可能对 Prometheus 的数据结构进行了优化或调整,导致字段名、格式等与 Dashboard 的查询不匹配。

GreptimeDB 的查询兼容性

GreptimeDB 是否完全兼容 PromQL(Prometheus Query Language)也需要验证。如果不完全兼容,则某些 Grafana 查询可能无法执行。

引用链接

[1] 官方文档:https://prometheus.io/blog/2021/11/16/agent/

[2]vmagent:https://github.com/VictoriaMetrics/VictoriaMetrics/blob/master/docs/vmagent.md

[3]vector:https://vector.dev/docs/reference/configuration/sources/prometheus_scrape/#how-it-works

[4]性能报告:https://victoriametrics.com/blog/comparing-agents-for-scraping/

[5]维护模式:https://github.com/grafana/agent

[6]Alloy:https://github.com/grafana/alloy

[7]GreptimeDB:https://github.com/GrepTimeTeam/greptimedb

[8]Prometheus Remote Write:https://docs.greptime.com/user-guide/write-data/prometheus

[9]部署 greptimedb-operator:https://github.com/GreptimeTeam/helm-charts/tree/main/charts/greptimedb-operator

[10]greptimedb-operator:https://github.com/GreptimeTeam/greptimedb-operator

[11]单机版:https://docs.greptime.com/zh/getting-started/installation/greptimedb-standalone[

12]分布式集群:https://docs.greptime.com/zh/getting-started/installation/greptimedb-cluster

[13]SQL 查询:https://docs.greptime.com/zh/user-guide/query-data/sql

[14]PromQL 查询:https://docs.greptime.com/zh/user-guide/query-data/promql

[15]OrbStack:https://orbstack.dev/

[16]Github:https://github.com/prometheus-operator/prometheus-operator[17]MySQL Community Downloads: https://dev.mysql.com/downloads/

责任编辑:武晓燕 来源: 云原生运维圈
相关推荐

2023-05-04 07:26:22

LXQt 1.3.0桌面

2024-12-23 06:10:00

RustRigAI Agent

2023-02-03 15:21:52

2023-08-18 17:25:45

掘力计划大语言模型

2009-07-17 14:38:51

轻量级Swing组件

2009-07-14 18:05:28

轻量级Swing组件

2022-07-15 16:39:19

PythonWhoosh工具

2023-06-27 16:42:18

Tinygrad深度学习工具

2022-12-29 09:49:06

轻量级架构决策

2014-06-11 20:46:51

Monitorix监控系统

2009-09-11 08:26:49

Linux系统CRUX 2.6Linux

2023-08-09 08:01:38

场景Redis接口

2020-06-19 15:38:08

分析工具GoatCounter开发

2018-07-19 11:18:45

饿了么时序数据库监控系统

2016-10-14 16:35:39

2023-12-22 14:07:00

Go轻量级Goroutines

2022-08-10 12:21:07

PythonWebBottle

2020-11-11 12:13:59

JS

2010-09-09 13:12:29

XML DOM
点赞
收藏

51CTO技术栈公众号