在日常工作中,总是听大家说使用依赖反转原则可以很好地让业务领域层与基础设施或框架层进行解耦。即使基础设施发生变动,也不会影响业务领域代码。那么架构中所说的依赖反转原则到底是什么呢?在写代码时,我们又该如何实施呢?这节课,我们就来一探究竟。
DIP 原则是什么?
首先,我们来看下架构中的依赖反转原则是什么。根据维基百科的描述,依赖反转原则(Dependency inversion principle,DIP)是指一种模块解耦的实现思想,它使得高层次的模块不依赖于低层次的模块的实现细节,从而使得低层次模块依赖于高层次模块的抽象。
这一原则的核心思想有如下两点:
- 高层次的模块不应该依赖于低层次的模块,两者都应该依赖于 抽象接口;
- 抽象接口不应该依赖于具体实现,而具体实现则应该依赖于抽象接口。
接下来,我们通过一个例子来深入理解一下这两点思想。
当Application模块需要使用Service模块提供的服务时,传统架构上的设计是在Service模块中定义ComputeService接口以及它的实现类ComputeServiceImpl。
这时Application模块要想使用Service模块的ComputeService服务,就需要在Application模块内引入Service模块,具体来说,在Java中是需要在Application模块的POM文件里引入Service模块的Maven仓库坐标,然后Application模块就可以引用到Service模块的服务了。
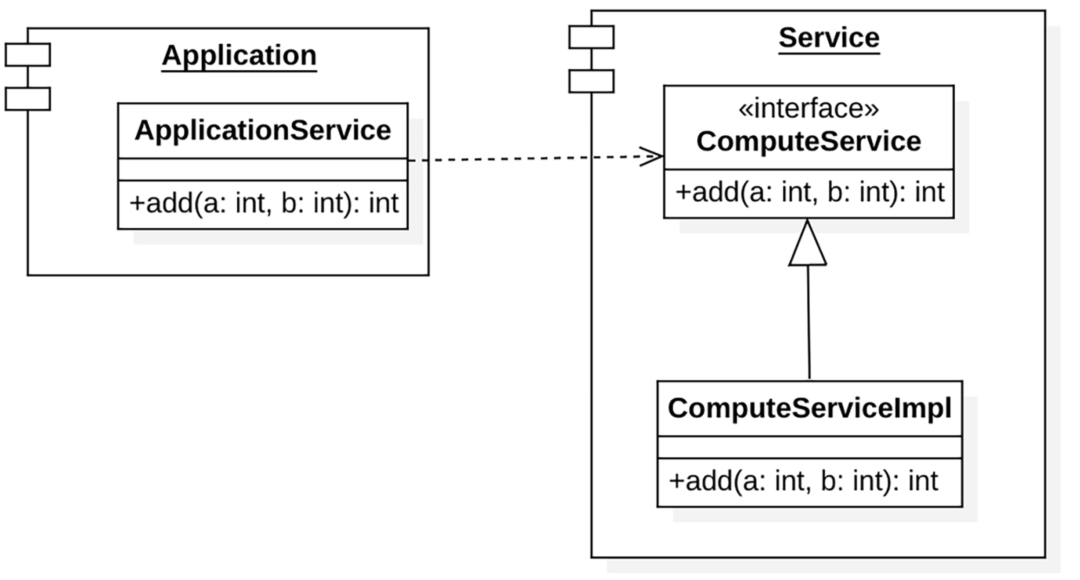
设计完毕后,我们会得到两个意义上的依赖关系。首先,从控制流上(代码运行时代码的执行时序上),Application模块会依赖Service模块;其次,代码依赖上,Application模块也会依赖Service模块。
由于这种设计会导致Application模块在源码上就依赖了Service模块,所以当Service模块修改、发布时,Application模块也需要修改和重新编译,这显然不是我们想要的。
而在采用DIP原则的情况下,相同场景下的设计如下图:
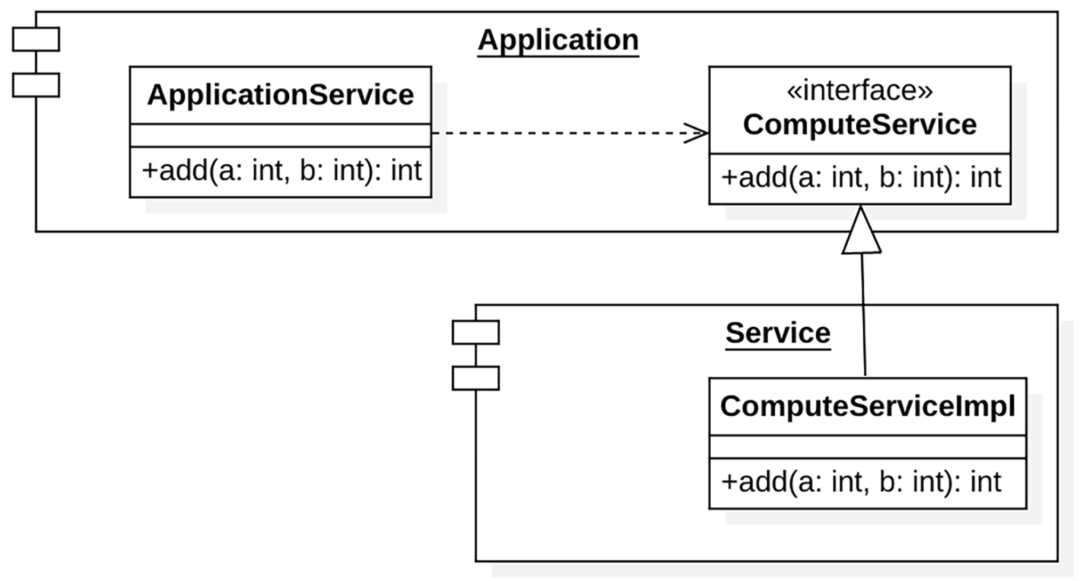
如图可知,我们把Application模块所需的ComputeService接口定义到了Application模块内部,而ComputeService接口的具体实现类ComputeServiceImpl则放到了Service模块。由于ComputeServiceImpl类需要实现ComputeService接口,所以Service模块必须在源码上依赖Application模块。在Java中则体现为Service模块的POM文件中要添加Application模块的maven仓库坐标,以及ComputeServiceImpl类要使用Application模块的ComputeService接口代码。
在基于DIP原则设计完毕后,我们也会得到两个意义上的依赖关系。首先,从控制流上,Application模块还是会依赖Service模块;从代码依赖上看,Service模块也依赖Application模块了。这体现了抽象接口(ComputeService)不应该依赖于具体实现(ComputeServiceImpl),而具体实现类(ComputeServiceImpl)则应该依赖于抽象接口(ComputeService)。另外,这里控制流上的依赖与源码的依赖关系是相反的,所以叫做依赖反转。
使用DIP原则,当低层次Service模块的ComputeServiceImpl类发生改动时,我们可以保证只需要修改和编译Service模块就可以了,Application模块并不会受到影响。当然如果ComputeService接口本身定义发生变化了,还是需要Application模块进行修改的。因此,请注意,使用DIP原则的前提也是接口是稳定的情况下进行讨论的。
如何在代码层面来实践 DIP 原则?
下面,我们通过一个代码示例来看看如何在实践上基于DIP原则实现上面的场景。
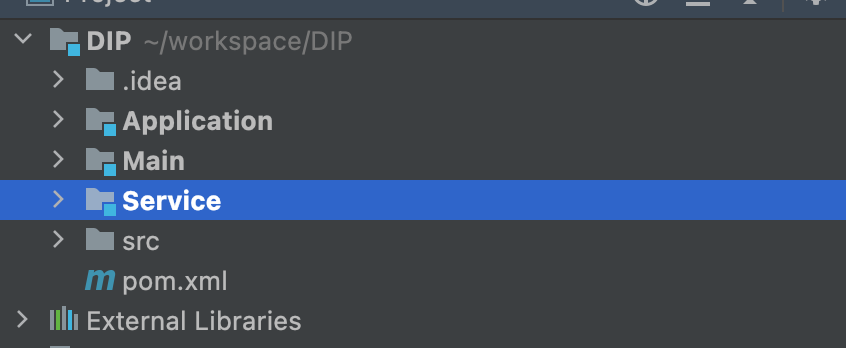
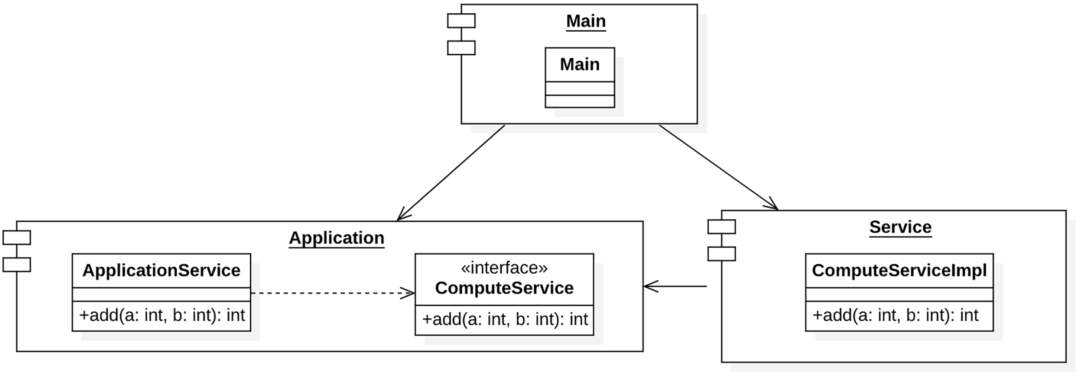
这个Demo分为三个模块,其中Application模块、Service模块分别对应我们前面一直讲解的两个模块,Main模块的作用是用来提供main函数入口,用来把Application模块和Service模块的功能串起来,实现一个可执行的程序。
三个模块之间的依赖关系如下图:
首先,我们来看下Application模块的内容。
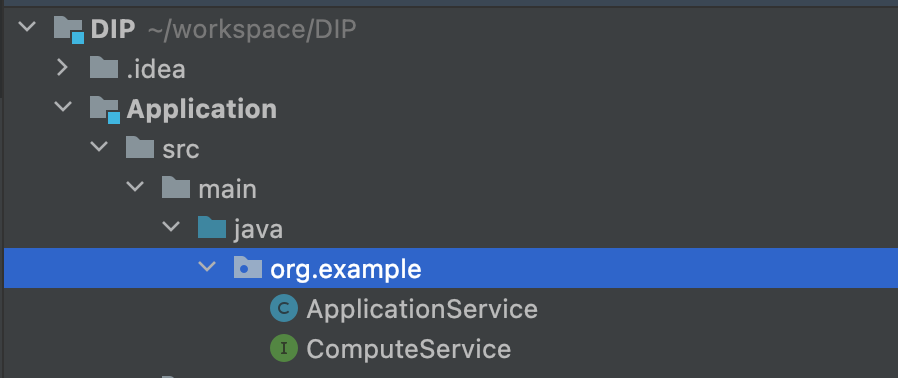
可以看到,Application模块下有两个类,其中ComputeService接口定义为:
public interface ComputeService {
  int add(int a, int b);
}
ApplicationService的代码如下:
public class ApplicationService {
  private ComputeService computeService;
  public ApplicationService(ComputeService computeService) {
    this.computeService = computeService;
  }
  public int add(int a, int b) {
    return computeService.add(a, b);
  }
}
ApplicationService服务依赖了ComputeService接口来具体实现add操作,这里ComputeService接口就是抽象接口。后面我们会讲到,无论Application模块还是Service模块,都只会依赖ComputeService这个抽象接口。
我们在 Application模块目录下执行mvn clean install命令,就可以把Application模块安装到本地Maven仓库,然后其他模块就可以通过它的Maven坐标引用这个服务了。
<dependency>
  <groupId>org.example</groupId>
  <artifactId>Application</artifactId>
  <version>1.0-SNAPSHOT</version>
  <scope>compile</scope>
</dependency>
然后我们看下Service模块的内容。
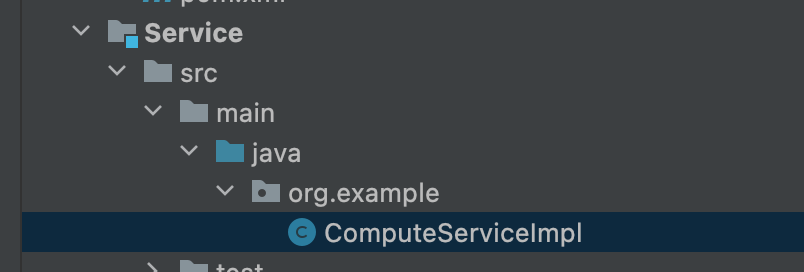
Service模块下只包含ComputeServiceImpl一个类,它的代码内容如下:
public class ComputeServiceImpl implements ComputeService {
  @Override
  public int add(int a, int b) {
    return a + b;
  }
}
可以看到,ComputeServiceImpl类实现了ComputeService抽象接口。由于ComputeServiceImpl类依赖ComputeService接口的源码,所以我们需要在Service模块的POM文件里面添加Application模块的依赖,也就是添加下面的Maven坐标:
<dependency>
  <groupId>org.example</groupId>
  <artifactId>Application</artifactId>
  <version>1.0-SNAPSHOT</version>
  <scope>compile</scope>
</dependency>
ComputeServiceImpl类的实现比较简单,就是简单计算加法,然后返回结果。这里我们需要知道的是,因为ComputeService接口的定义在Application模块,所以Service模块在源码上就依赖了Application模块。最后在Service模块的目录下执行mvn clean install 命令就可以把Service模块安装到本地Maven仓库,然后其他模块就可以通过其Maven坐标引用这个服务了。
<dependency>
  <groupId>org.example</groupId>
  <artifactId>Service</artifactId>
  <version>1.0-SNAPSHOT</version>
</dependency>
下面,我们再看Main模块的内容。
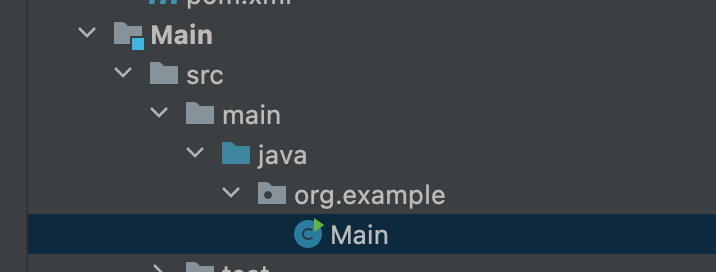
Main模块内就含有一个叫做Main的类,对应代码如下:
public class Main {
  public static void main(String[] args) {
    //1. 创建计算服务
    ComputeService computeService = new ComputeServiceImpl();
    //2. 创建应用服务
    ApplicationService applicationService = new ApplicationService(computeService);
    //3. 执行计算,并输出结果
    int result = applicationService.add(1,2);
    System.out.println(result);
  }
}
代码1创建了一个ComputeServiceImpl服务的实例,由于ComputeServiceImpl的实现在Service模块里,所以我们需要在Main组件的POM文件里,填写下面的Maven坐标:
<dependency>
  <groupId>org.example</groupId>
  <artifactId>Service</artifactId>
  <version>1.0-SNAPSHOT</version>
</dependency>
代码2则创建了一个ApplicationService实例,并且把代码1创建的ComputeServiceImpl实例作为参数。这里我们需要注意的是,ApplicationService的构造函数的入参为ComputeService接口,而不是ComputeServiceImpl。这体现了高层次的Application模块不应该依赖于低层次的Service模块(ComputeServiceImpl类),两者都应该依赖于 抽象接口(ComputeService)。
另外,代码2由于依赖ApplicationService的源码,所以Main组件还是需要依赖Application模块,这就需要在Main组件的POM文件中,添加Application模块的Maven坐标:
<dependency>
  <groupId>org.example</groupId>
  <artifactId>Application</artifactId>
  <version>1.0-SNAPSHOT</version>
  <scope>compile</scope>
</dependency>
代码3就比较简单了,我们直接调用Application模块的ApplicationService的add方法执行计算。调用ApplicationService的add方法后,add方法内部则会调用Service模块的ComputeServiceImpl类的add方法执行具体计算操作。
总结
这次我们先学习了什么是依赖反转原则。然后,通过一个小场景探讨了传统架构设计中存在的不足,以及如何基于依赖反转原则来对其进行改进。最后,我们基于Java代码示例来展示了如何在代码级别来实施依赖反转原则。


