解读 Spring Boot 核心知识点全览

开发
当我们深入探究 Spring Boot 的世界,会发现其中蕴含着丰富而关键的核心知识点,这些知识点犹如构建大厦的基石,支撑着整个应用的高效运行。

在当今的软件开发领域,Spring Boot 犹如一颗璀璨的明星,散发着耀眼的光芒。它以其强大的功能和便捷的特性,成为了众多开发者的首选框架。当我们深入探究 Spring Boot 的世界,会发现其中蕴含着丰富而关键的核心知识点,这些知识点犹如构建大厦的基石,支撑着整个应用的高效运行。

为什么需要Spring boot

Spring框架是轻量级Java框架,他完全可以基于配置+一些POJO(简单的Java对象,不是JavaBean, EntityBean 或者 SessionBean,无需担任任何的角色)即可完成一套web服务器开发。 尽管是轻量级,但是还是需要配置大量的xml,而Spring boot则将繁琐的配置全部封装起来,使得我们可以开箱即用。
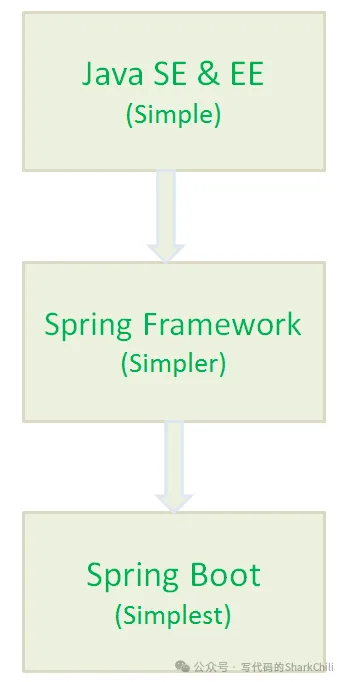
相较于原生的Spring他有着如下优点:

  1. 可以非常方便的开发出Spring应用容器。
  2. 基于Spring boot开发应用的时间比Spring要少很多,生产力明显提高了。
  3. 可以非常方便集成其他Spring组件,例如Spring JDBC、Spring ORM等。
  4. Spring boot内嵌了web容器,例如tomcat服务器,也可以改为jetty。
  5. Spring boot内部提供的CLI命令行工具,例如java或者Groovy。
  6. 无需编写大量的xml配置文件。
  7. Spring Boot 遵循“固执己见的默认配置”,以减少开发工作(默认配置可以修改)。
  8. Spring boot内部也提供了许多的插件,例如Maven 或Gradle,使得我们的可以快速的开发或者测试Spring应用。

什么是Spring Boot Starters

原本我们开发web应用需要手动引入mvc、jackson等各种依赖,有了Starters之后,我们只需引入一个Starters依赖即可完成所有Spring web应用的配置,非常方便。

<dependency>
    <groupId>org.springframework.boot</groupId>
    <artifactId>spring-boot-starter-web</artifactId>
</dependency>

SpringBoot应用Starters基本的一共有44种,具体如下:

1)spring-boot-starter 这是Spring Boot的核心启动器,包含了自动配置、日志和YAML。

2)spring-boot-starter-actuator 帮助监控和管理应用。

3)spring-boot-starter-amqp 通过spring-rabbit来支持AMQP协议(Advanced Message Queuing Protocol)。

4)spring-boot-starter-aop 支持面向方面的编程即AOP,包括spring-aop和AspectJ。

5)spring-boot-starter-artemis 通过Apache Artemis支持JMS的API(Java Message Service API)。

6)spring-boot-starter-batch 支持Spring Batch,包括HSQLDB数据库。

7)spring-boot-starter-cache 支持Spring的Cache抽象。

8)spring-boot-starter-cloud-connectors 支持Spring Cloud Connectors,简化了在像Cloud Foundry或Heroku这样的云平台上连接服务。

9)spring-boot-starter-data-elasticsearch 支持ElasticSearch搜索和分析引擎,包括spring-data-elasticsearch。

10)spring-boot-starter-data-gemfire 支持GemFire分布式数据存储,包括spring-data-gemfire。

11)spring-boot-starter-data-jpa 支持JPA(Java Persistence API),包括spring-data-jpa、spring-orm、hibernate。

12)spring-boot-starter-data-MongoDB 支持MongoDB数据,包括spring-data-mongodb。

13)spring-boot-starter-data-rest 通过spring-data-rest-webmvc,支持通过REST暴露Spring Data数据仓库。

14)spring-boot-starter-data-solr 支持Apache Solr搜索平台,包括spring-data-solr。

15)spring-boot-starter-freemarker 支持FreeMarker模板引擎。

16)spring-boot-starter-groovy-templates 支持Groovy模板引擎。

17)spring-boot-starter-hateoas 通过spring-hateoas支持基于HATEOAS的RESTful Web服务。

18)spring-boot-starter-hornetq 通过HornetQ支持JMS。

19)spring-boot-starter-integration 支持通用的spring-integration模块。

20)spring-boot-starter-jdbc 支持JDBC数据库。

21)spring-boot-starter-jersey 支持Jersey RESTful Web服务框架。

22)spring-boot-starter-jta-atomikos 通过Atomikos支持JTA分布式事务处理。

23)spring-boot-starter-jta-bitronix 通过Bitronix支持JTA分布式事务处理。

24)spring-boot-starter-mail 支持javax.mail模块。

25)spring-boot-starter-mobile 支持spring-mobile。

26)spring-boot-starter-mustache 支持Mustache模板引擎。

27)spring-boot-starter-Redis 支持Redis键值存储数据库,包括spring-redis。

28)spring-boot-starter-security 支持spring-security。

29)spring-boot-starter-social-facebook 支持spring-social-facebook

30)spring-boot-starter-social-linkedin 支持pring-social-linkedin

31)spring-boot-starter-social-twitter 支持pring-social-twitter

32)spring-boot-starter-test 支持常规的测试依赖,包括JUnit、Hamcrest、Mockito以及spring-test模块。

33)spring-boot-starter-thymeleaf 支持Thymeleaf模板引擎,包括与Spring的集成。

34)spring-boot-starter-velocity 支持Velocity模板引擎。

35)spring-boot-starter-web S支持全栈式Web开发,包括Tomcat和spring-webmvc。

36)spring-boot-starter-websocket 支持WebSocket开发。

37)spring-boot-starter-ws 支持Spring Web Services。

Spring Boot应用启动器面向生产环境的还有2种,具体如下:

38)spring-boot-starter-actuator 增加了面向产品上线相关的功能,比如测量和监控。

39)spring-boot-starter-remote-shell 增加了远程ssh shell的支持。

最后,Spring Boot应用启动器还有一些替换技术的启动器,具体如下:

40)spring-boot-starter-jetty 引入了Jetty HTTP引擎(用于替换Tomcat)。

41)spring-boot-starter-log4j 支持Log4J日志框架。

42)spring-boot-starter-logging 引入了Spring Boot默认的日志框架Logback。

43)spring-boot-starter-tomcat 引入了Spring Boot默认的HTTP引擎Tomcat。

44)spring-boot-starter-undertow 引入了Undertow HTTP引擎(用于替换Tomcat)。

Spring Boot 支持哪些内嵌 Servlet

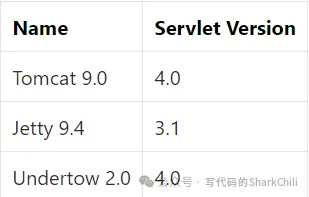
Spring支持的内嵌Servlet有3种:

  • Tomcat (这个是默认的容器)
  • Jetty
  • Undertow

正是因为Spring boot内嵌了web容器,使得我们启动web程序就像启动普通Java程序的一样方便,由于Spring boot默认使用的web容器是Tomcat ,如果我们想修改可以使用下面这种方式排除tomcat容器,再引入其他容器

<!--从Web启动器依赖中排除Tomcat-->
<dependency>
    <groupId>org.springframework.boot</groupId>
    <artifactId>spring-boot-starter-web</artifactId>
    <exclusions>
        <exclusion>
            <groupId>org.springframework.boot</groupId>
            <artifactId>spring-boot-starter-tomcat</artifactId>
        </exclusion>
    </exclusions>
</dependency>
<!--添加Jetty依赖-->
<dependency>
    <groupId>org.springframework.boot</groupId>
    <artifactId>spring-boot-starter-jetty</artifactId>
</dependency>

详解@SpringBootApplication 这个注解

这个注解我们完全可以通过源码就知道它大概做的实际,如下所示,可以看到SpringBootApplication 主要是由SpringBootConfiguration、EnableAutoConfiguration、ComponentScan构成。这三个注解分别是意思是:

  • SpringBootConfiguration内部有一个Configuration注解,所以它的意思是允许在上下文开启额外bean或者其他配置类。
  • EnableAutoConfiguration启用Spring boot自动配置机制。
  • ComponentScan自动扫描当前类的包下的所有被@Component (@Service,@Controller)注解的类。
@Target({ElementType.TYPE})
@Retention(RetentionPolicy.RUNTIME)
@Documented
@Inherited
@SpringBootConfiguration
@EnableAutoConfiguration
@ComponentScan(
    excludeFilters = {@Filter(
    type = FilterType.CUSTOM,
    classes = {TypeExcludeFilter.class}
), @Filter(
    type = FilterType.CUSTOM,
    classes = {AutoConfigurationExcludeFilter.class}
)}
)
public @interface SpringBootApplication {
.....
}

Spring是如何启动的(重点)

总结一下大概有9个步骤:

  1. 创建监听,并准备监听。
  2. 容器环境预配置。
  3. 打印banner。
  4. 创建应用上下文即applicationContextFactory。
  5. 容器刷新前置处理:进行应用上下文各种配置初始化,拿到我们的启动类元信息生成BeanDefinition存入beanDefinitionMap中。
  6. 容器刷新,即走到Spring的IOC逻辑,手机配置、注解中的bean信息存入beanDefinitionMap,然后进行bean的创建和注入。
  7. 容器刷新后置处理,默认为空。
  8. 发出容器刷新结束事件ApplicationReadyEvent通知。
  9. 调用callRunners获取所有容器中的ApplicationRunner和CommandLineRunner的run方法并执行。

对应的我们给出源码即SpringApplication下的run方法,读者可参考上述流程阅读一下下面这段源码:

public ConfigurableApplicationContext run(String... args) {
  //......
  // 1. 获取并启动监听
  SpringApplicationRunListeners listeners = getRunListeners(args);
  listeners.starting(bootstrapContext, this.mainApplicationClass);
  try {
   ApplicationArguments applicationArguments = new DefaultApplicationArguments(args);
   //2. 项目环境environment 预配置
   ConfigurableEnvironment environment = prepareEnvironment(listeners, bootstrapContext, applicationArguments);
   configureIgnoreBeanInfo(environment);
   //打印banner,此时控制台会输出一个banner
   Banner printedBanner = printBanner(environment);
   //3. 创建Sring容器
   context = createApplicationContext();
   context.setApplicationStartup(this.applicationStartup);
   //4. 容器刷新前置处理,进行应用上下文各种配置信息初始化,并将当前启动类存入beanDefinitionMap中
   prepareContext(bootstrapContext, context, environment, listeners, applicationArguments, printedBanner);
   //5.刷新容器,这里会进行IOC相关操作
   refreshContext(context);
   //6. 容器刷新后置操作,默认空实现
   afterRefresh(context, applicationArguments);
   Duration timeTakenToStartup = Duration.ofNanos(System.nanoTime() - startTime);
   if (this.logStartupInfo) {
    new StartupInfoLogger(this.mainApplicationClass).logStarted(getApplicationLog(), timeTakenToStartup);
   }
   // 7. 发出执行结束的ApplicationReadyEvent事件通知
   listeners.started(context, timeTakenToStartup);
   //8. 调用runner,完成启动后的特定命令
   callRunners(context, applicationArguments);
  }
  catch (Throwable ex) {
   //......
  }
  
  //9. 返回上下文
  return context;
 }

Spring Boot 的自动装配是如何实现的

关于spring自动装配的原理和使用,建议阅读笔者这篇文章,里面有详尽的分析和实践:

Spring Boot 自动装配原理以及实践

为什么会有yml格式的文件,和properties区别是什么

相比于properties,yml格式的文件结构更加清晰,更易于阅读和理解,但是缺点也很明显,因为格式的严格要求,很可能因为格式原因导致配置无法读取,以笔者为例,线上配置seata配置时明明注册地址,但是服务始终读取不到配置,导致启动失败,这种问题是肉眼无法观察的:
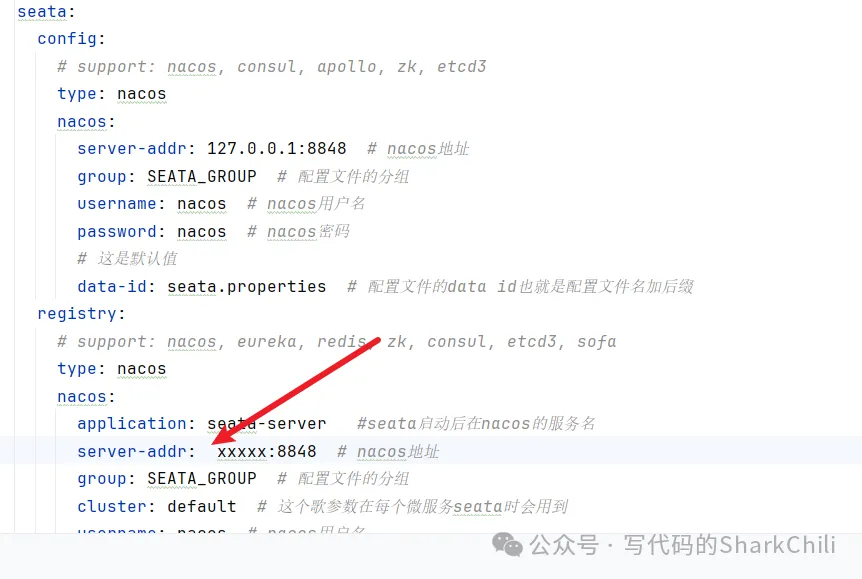
而且yml还有一个缺点即@PropertySource 这个注解无法读取yml格式的配置数据。

Spring Boot 常用的读取配置文件的方法

通过 @value 读取简单直观的配置:为了演示这种读取方式,我们可以在resource目录下建立一个 application.yml文件
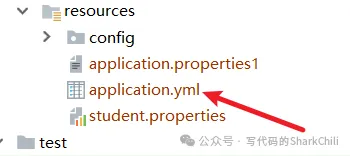
配置文件内容为:

myConfig: 这个是helloworld配置的具体内容哦

后续如果我们希望获取到myConfig这个值的话,只需按照下面这种方式引入即可,注意value注解获取配置值的方式,Spring并不推荐使用。

 @Value("${myConfig}")
 private String value;

(1) 通过@ConfigurationProperties读取并与 bean 绑定:

这种方式相较于上面那种更加强大,可以与bean绑定,例如我们yml的配置文件内容如下(注意配置名称必须全小写,否则会报一些奇怪的错误)

myobj:
  name: out-side-config
  email: out-side-config@qq.com

那么我们就可以编写一个类,代码如下所示,使用ConfigurationProperties引入前缀为myobj的配置内容即可,该配置就会将myobj前缀下的所有配置和我们的类绑定

/**
 * 注意 yml配置文件不能有大写字母
 */
@ConfigurationProperties(prefix = "myobj")
public class MyObj {

    private String name;

    private String email;


    //......get、set
}

(2) @PropertySource读取指定的 properties 文件

有时候我们希望指定配置文件和类进行绑定,那么我们就可以使用PropertySource注解,例如我们在resource目录下有个student.properties文件,内容为:

name:xiaoming
no:18 

我们只需使用PropertySource执行路径以及配置文件名,再配合value即可完成属性绑定。

@Component
@PropertySource("classpath:student.properties")
public class Student {

    @Value("${name}")
    private String name;
    @Value("${no}")
    private String no;


     //......get、set
}

Spring Boot 加载配置文件的优先级

大体来说优先考虑外部、properties或者yml指明profile的文件:

  • 命令行参数。所有的配置都可以在命令行上进行指定。
  • 操作系统环境变量 。
  • jar包外部的application-{profile}.properties或带spring.profile的application.yml配置文件
  • jar包内部的application-{profile}.properties或带spring.profile的application.yml配置文件,再来加载不带profile。
  • jar包外部的application.properties或不带spring.profile的application.yml配置文件
  • jar包内部的application.properties或不带spring.profile的application.yml配置文件

常用的 Bean 映射工具有哪些

常见的是:MapStruct、ModelMapper、Dozer、Orika、JMapper 这几种吧。

最常用的还是MapStruct,它的工作原理也很简单,我们声明一个转换接口后,它会在编译期为了我们生成转换实现类的字节码文件。

对此我们不妨距离一下它的使用方式,首先引入版本号、依赖、插件。

  • 版本号:
 <properties>
        <java.version>1.8</java.version>
        <org.mapstruct.version>1.5.3.Final</org.mapstruct.version>
    </properties>
  • 依赖:
<!--mapstruct依赖-->
        <dependency>
            <groupId>org.mapstruct</groupId>
            <artifactId>mapstruct</artifactId>
            <version>${org.mapstruct.version}</version>
        </dependency>
        <dependency>
            <groupId>org.projectlombok</groupId>
            <artifactId>lombok</artifactId>
            <version>1.18.12</version>
        </dependency>
  • 插件:
            <plugin>
                <groupId>org.apache.maven.plugins</groupId>
                <artifactId>maven-compiler-plugin</artifactId>
                <version>3.8.1</version>
                <configuration>
                    <source>1.8</source>
                    <target>1.8</target>
                    <annotationProcessorPaths>
                        <path>
                            <groupId>org.mapstruct</groupId>
                            <artifactId>mapstruct-processor</artifactId>
                            <version>${org.mapstruct.version}</version>
                        </path>
                    </annotationProcessorPaths>
                </configuration>
            </plugin>

例如我们现在有个Doctor 希望转为DoctorDTO类,代码如下所示:

public class Doctor {
    private Integer id;

    private String name;

    private String srcAddr;


    //......get、set
    }
}

DoctorDTO 类,可以看出地址的字段名为dstAddr,和上面的srcAddr有区别:

public class DoctorDTO {

    private Integer id;

    private String name;

    private String dstAddr;


    //......get、set
}

所以我们编写一个接口,如下所示,对于字段名不一样的,我们使用Mapping手动配置映射关系:

import org.mapstruct.Mapper;
import org.mapstruct.Mapping;
import org.mapstruct.factory.Mappers;


@Mapper
public interface DoctorMapper {

    DoctorMapper INSTANCE = Mappers.getMapper(DoctorMapper.class);

    /**
     * 会在编译期生成
     * @param doctor
     * @return
     */
    @Mapping(source = "srcAddr", target = "dstAddr")
    DoctorDTO toDTO(Doctor doctor);
}

测试代码,可以看到bean转换完成:

@Test
 public void testToDTO() {
  Integer doctorId = 15;
  String doctorName = "xiaoming";

  Doctor doctor = new Doctor();
  doctor.setId(doctorId);
  doctor.setName(doctorName);
  doctor.setSrcAddr("中国北京");

  DoctorDTO doctorDTO = DoctorMapper.INSTANCE.toDTO(doctor);

  // 输出结果 DoctorDTO{id=15, name='xiaoming', dstAddr='中国北京'}
        System.out.println(doctorDTO);
  assertEquals(doctorId, doctorDTO.getId());
  assertEquals(doctorName, doctorDTO.getName());
 }

通过源码我们可以看到这个接口的实现类会在编译器生成:

Spring Boot 如何监控系统实际运行状况

引入spring-boot-starter-actuator的依赖:

<dependency>
    <groupId>org.springframework.boot</groupId>
    <artifactId>spring-boot-starter-actuator</artifactId>
</dependency>

然后键入下面的地址即可查看对应端点的信息:http://localhost:8080/actuator

Spring Boot 如何做请求参数校验

有两种校验框架,一个是Hibernate Validator,还有一个是JSR(Java Specification Requests)校验,后者比较常用,无需引入特殊的依赖。就例如我们现在有个Person类,希望名字不为空,性别是是数字最大值为2,而email必须为邮箱格式,那么我们就可以基于JSR的注解进行说明。

public class Person {

    @NotNull(message = "姓名不可为空")
    @Size(max = 10, message = "姓名长度不可超过10位")
    private String name;

    @Max(value = 2, message = "性别最大值只能为2")
    private int sex;
    @Email(message = "邮箱格式不正确")
    private String email;

    public String getName() {
        return name;
    }

    public void setName(String name) {
        this.name = name;
    }

    public int getSex() {
        return sex;
    }

    public void setSex(int sex) {
        this.sex = sex;
    }

    public String getEmail() {
        return email;
    }

    public void setEmail(String email) {
        this.email = email;
    }

    @Override
    public String toString() {
        return "Person{" +
                "name='" + name + '\'' +
                ", sex='" + sex + '\'' +
                ", email='" + email + '\'' +
                '}';
    }
}

当他作为controller的requestBody的参数时,用法如下所示:

 @PostMapping("/test/hello")
    public void hello(@Valid Person person) {
        logger.info("hello {}", person.getName());
    }

假如我们想校验路径参数时,我们只需在Controller上方加一个注解@Validated,然后对于路径参数加入校验注解Valid +校验规则注解即可即可。

@GetMapping("/test/hello2/{id}")
    public void hello2(@Valid @PathVariable("id") @Max(value = 5,message = "最大值为5") Integer  id) {
        logger.info("hello {}", id);
    }

补充一下常见的一些校验注解:

1. @NotEmpty 被注释的字符串的不能为 null 也不能为空
2. @NotBlank 被注释的字符串非 null,并且必须包含一个非空白字符
3. @Null 被注释的元素必须为 null
4. @NotNull 被注释的元素必须不为 null
5. @AssertTrue 被注释的元素必须为 true
6. @AssertFalse 被注释的元素必须为 false
7. @Pattern(regex=,flag=)被注释的元素必须符合指定的正则表达式
8. @Email 被注释的元素必须是 Email 格式。
9. @Min(value)被注释的元素必须是一个数字,其值必须大于等于指定的最小值
10. @Max(value)被注释的元素必须是一个数字,其值必须小于等于指定的最大值
11. @DecimalMin(value)被注释的元素必须是一个数字,其值必须大于等于指定的最小值
12. @DecimalMax(value) 被注释的元素必须是一个数字,其值必须小于等于指定的最大值
13. @Size(max=, min=)被注释的元素的大小必须在指定的范围内
14. @Digits(integer, fraction)被注释的元素必须是一个数字,其值必须在可接受的范围内
15. @Past被注释的元素必须是一个过去的日期
16. @Future 被注释的元素必须是一个将来的日期

如何使用 Spring Boot 进行全局异常处理

通过@ControllerAdvice将控制器声明为增强器,然后通过ExceptionHandler 对自己自己的异常进行处理。 例如我们想处理所有控制器的BindException,代码如下所示:

/**
 * 统一异常处理、数据预处理等
 */
@ControllerAdvice
public class ControllerExceptionHandler {

    private static final Logger LOG = LoggerFactory.getLogger(ControllerExceptionHandler.class);

    /**
     * 校验异常统一处理
     * @param e
     * @return
     */
    @ExceptionHandler(value = BindException.class)
    @ResponseBody
    public CommonResp validExceptionHandler(BindException e) {
        CommonResp commonResp = new CommonResp();
        LOG.warn("参数校验失败:{}", e.getBindingResult().getAllErrors().get(0).getDefaultMessage());
        commonResp.setSuccess(false);
        commonResp.setMessage(e.getBindingResult().getAllErrors().get(0).getDefaultMessage());
        return commonResp;
    }


}

Spring Boot 中如何实现定时任务

首先在启动类中添加@EnableScheduling注解,然后编写一个定时任务bean,然后在定时任务的方法上添加@Scheduled注解:

@Component
@EnableAsync
//@EnableAsync 和 @Async 使定时任务并行执行
public class AsyncScheduledTasks {
    private static final Logger log = LoggerFactory.getLogger(AsyncScheduledTasks.class);
    private static final SimpleDateFormat dateFormat = new SimpleDateFormat("HH:mm:ss");
    private List<Integer> index = Arrays.asList(6, 6, 2, 3);
    int i = 0;

    @Scheduled(fixedRate = 5000)
    @Async
    public void reportCurrentTimeWithFixedRate() {
        log.info("Current Thread : {}", Thread.currentThread().getName());

        if (i == 0) {
            log.info("Start time is {}", dateFormat.format(new Date()));
        }
        if (i < 4) {
            try {
                TimeUnit.SECONDS.sleep(index.get(i));
                log.info("Fixed Rate Task : The time is now {}", dateFormat.format(new Date()));
            } catch (InterruptedException e) {
                e.printStackTrace();
            }
            i++;
        }
    }

}
责任编辑:赵宁宁 来源: 写代码的SharkChili
相关推荐

2021-04-13 08:25:12

测试开发Java注解Spring

2021-12-30 08:17:27

Springboot数据访问DataSourceB

2021-01-15 08:35:49

Zookeeper

2020-11-06 00:50:16

JavaClassLoaderJVM

2020-10-26 10:40:31

Axios前端拦截器

2021-01-06 13:52:19

zookeeper开源分布式

2024-11-04 09:00:00

Java开发

2024-04-23 14:25:16

Python备忘清单

2020-05-19 14:40:08

Linux互联网核心

2022-10-29 08:55:19

页面react

2016-05-30 17:31:34

Spring框架

2022-04-08 07:51:31

JavaJVM垃圾回收

2024-06-04 14:07:00

2023-08-07 14:44:56

Socket文件描述符

2021-12-27 10:20:46

JavaNetty网络

2017-03-07 13:03:34

AndroidView知识问答

2024-07-29 11:21:24

2021-09-27 08:56:44

NettyChannelHand架构

2010-08-17 14:56:00

HCNE认证

2011-04-15 12:25:21

BGP路由
点赞
收藏

51CTO技术栈公众号