本文将介绍如何通过Python中的YOLO(ou Only Look Once)和EasyOCR(光学字符识别)技术来实现从视频文件中检测车牌。本技术依托于深度学习,以实现车牌的即时检测与识别。
从视频文件中检测车牌
先决条件
在我们开始之前,请确保已安装以下Python包:
pip install opencv-python ultralytics easyocr Pillow numpy实施步骤
步骤1:初始化库
我们将首先导入必要的库。我们将使用OpenCV进行视频处理,使用YOLO进行目标检测,并使用EasyOCR读取检测到的车牌上的文字。
import cv2
from ultralytics import YOLO
import easyocr
from PIL import Image
import numpy as np

# Initialize EasyOCR reader
reader = easyocr.Reader(['en'], gpu=False)

# Load your YOLO model (replace with your model's path)
model = YOLO('best_float32.tflite', task='detect')

# Open the video file (replace with your video file path)
video_path = 'sample4.mp4'
cap = cv2.VideoCapture(video_path)

# Create a VideoWriter object (optional, if you want to save the output)
output_path = 'output_video.mp4'
fourcc = cv2.VideoWriter_fourcc(*'mp4v')
out = cv2.VideoWriter(output_path, fourcc, 30.0, (640, 480))  # Adjust frame size if necessary
步骤2:处理视频帧
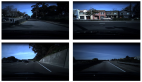
我们将从视频文件中读取每一帧,处理它以检测车牌,然后应用OCR来识别车牌上的文字。为了提高性能,我们可以跳过每第三帧的处理。
# Frame skipping factor (adjust as needed for performance)
frame_skip = 3 # Skip every 3rd frame
frame_count = 0
while cap.isOpened():
ret, frame = cap.read() # Read a frame from the video
if not ret:
break # Exit loop if there are no frames left
# Skip frames
if frame_count % frame_skip != 0:
frame_count += 1
continue # Skip processing this frame
# Resize the frame (optional, adjust size as needed)
frame = cv2.resize(frame, (640, 480)) # Resize to 640x480
# Make predictions on the current frame
results = model.predict(source=frame)
# Iterate over results and draw predictions
for result in results:
boxes = result.boxes # Get the boxes predicted by the model
for box in boxes:
class_id = int(box.cls) # Get the class ID
confidence = box.conf.item() # Get confidence score
coordinates = box.xyxy[0] # Get box coordinates as a tensor
# Extract and convert box coordinates to integers
x1, y1, x2, y2 = map(int, coordinates.tolist()) # Convert tensor to list and then to int
# Draw the box on the frame
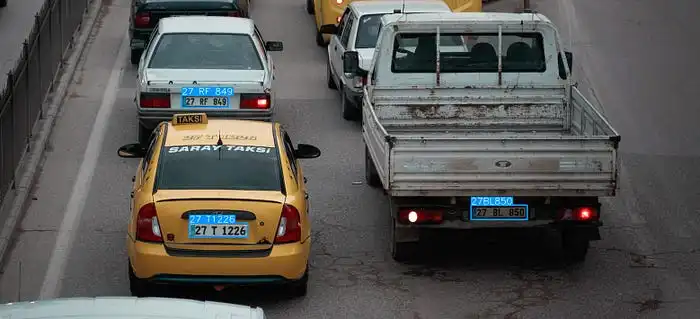
cv2.rectangle(frame, (x1, y1), (x2, y2), (0, 255, 0), 2) # Draw rectangle
# Try to apply OCR on detected region
try:
# Ensure coordinates are within frame bounds
r0 = max(0, x1)
r1 = max(0, y1)
r2 = min(frame.shape[1], x2)
r3 = min(frame.shape[0], y2)
# Crop license plate region
plate_region = frame[r1:r3, r0:r2]
# Convert to format compatible with EasyOCR
plate_image = Image.fromarray(cv2.cvtColor(plate_region, cv2.COLOR_BGR2RGB))
plate_array = np.array(plate_image)
# Use EasyOCR to read text from plate
plate_number = reader.readtext(plate_array)
concat_number = ' '.join([number[1] for number in plate_number])
number_conf = np.mean([number[2] for number in plate_number])
# Draw the detected text on the frame
cv2.putText(
img=frame,
text=f"Plate: {concat_number} ({number_conf:.2f})",
org=(r0, r1 - 10),
fontFace=cv2.FONT_HERSHEY_SIMPLEX,
fontScale=0.7,
color=(0, 0, 255),
thickness=2
)
except Exception as e:
print(f"OCR Error: {e}")
pass
# Show the frame with detections
cv2.imshow('Detections', frame)
# Write the frame to the output video (optional)
out.write(frame)
if cv2.waitKey(1) & 0xFF == ord('q'):
break # Exit loop if 'q' is pressed
frame_count += 1 # Increment frame count
# Release resources
cap.release()
out.release() # Release the VideoWriter object if used
cv2.destroyAllWindows()代码解释:
- 启动EasyOCR:设置EasyOCR以识别英文字符。
- 导入YOLO模型:从特定路径载入YOLO模型,需替换为模型的实际路径。
- 视频帧读取:利用OpenCV打开视频文件,若需保存输出,则启动VideoWriter。
- 帧尺寸调整与处理:逐帧读取并调整尺寸,随后使用模型预测车牌位置。
- 绘制识别结果:在视频帧上标出识别到的车牌边界框,并裁剪出车牌区域以进行OCR识别。
- 执行OCR:EasyOCR识别裁剪后的车牌图像中的文本,并在帧上展示识别结果及置信度。
- 视频输出:处理后的视频帧可显示在窗口中,也可以选择保存为视频文件。
结论
本段代码展示了如何综合运用YOLO和EasyOCR技术,从视频文件中检测并识别车牌。遵循这些步骤,你可以为自己的需求构建相似的系统。根据实际情况,灵活调整参数和优化模型性能。