大家好,我是码哥,《Redis 高手心法》作者。
SpringBoot 已经成为 Java 开发的首选框架,今天码哥跟大家聊一聊 Spring Boot3 如何与 Swagger3 集成打造一个牛逼轰轰的接口文档。
为什么要用 Swagger
唐二婷:我最讨厌两件事:
- 别人接口不写注释;
- 自己写接口注释。
我们都被接口文档折磨过,前端抱怨后端的接口文档一坨屎;后端觉得写接口文档浪费时间。
每个项目都有成百上千个接口调用,这时候再要求人工编写接口文档并且保证文档的实时更新几乎是一件不可能完成的事,所以这时候我们迫切需要一个工具,一个能帮我们自动化生成接口文档以及自动更新文档的工具。
它就是 Swagger。
Swagger 的核心思想是通过定义和描述 API 的规范、结构和交互方式,以提高 API 的可读性、可靠性和易用性,同时降低 API 开发的难度和开发者之间的沟通成本。
这里我采用了 Swagger3.0(Open API 3.0)的方式集成到 SpringBoot。springfox-boot-start 和 springfox-swagger2 都是基于 Swagger2.x 的。
这里将介绍 springdoc-openapi-ui,它是 SpringBoot 基于 Open API 3.0(Swagger3.0)
SpringFox 与 Swagger 的关系
Springfox 是一套可以帮助 Java 开发者自动生成 API 文档的工具,它是基于 Swagger 2.x 基础上开发的。
除了集成 Swagger 2.x,Springfox 还提供了一些额外功能,例如自定义 Swagger 文档、API 版本控制、请求验证等等。
但是随着时间的推移,Swagger2.x 终究成为历史,所以我们可以看出 springfox-boot-starter 的坐标从 3.0.0 版本(2020 年 7 月 14 日)开始就一直没有更新;
也得注意的是 springfox-swagger2 坐标和 springfox-boot-start 是一样的,但 springfox-boot-start 只有 3.0.0 版本。这里我就不在使用 Swagger2.x 版本
SpringDoc(推荐)
SpringDoc 对应坐标是 springdoc-openapi-ui,它是一个集成 Swagger UI 和 ReDoc 的接口文档生成工具,在使用上与 springfox-boot-starter 类似,但提供了更为灵活、功能更加强大的工具。
其中除了可以生成 Swagger UI 风格的接口文档,还提供了 ReDoc 的文档渲染方式,可以自动注入 OpenAPI 规范的 JSON 描述文件,支持 OAuth2、JWT 等认证机制,并且支持全新的 OpenAPI 3.0 规范。
SpringBoot 3 集成 Swagger3.0
唐二婷:开干吧,Spring Boot3 如何集成这么吊炸天的工具。
需要注意的是,我们一般不会选择原生的 Swagger maven 坐标来集成 Swagger。而是通过 springdoc-openapi-ui 的 Maven 坐标。
它可以很好的和 Spring 或 SpringBoot 项目集成;这个坐标也被 Spring 社区广泛支持和认可,并被认为是集成 Swagger UI 和 OpenAPI 规范的一个优秀选择。
引入 Maven
在该示例中,我使用 Spring Boot 3.0.2 集成 Swagger 3.0。
springdoc-openapi-starter-webmvc-ui:目前最新版本是 2.6.0,适用于 Spring Boot 3.x 和 Spring Framework 6。支持 Jakarta 命名空间(例如,jakarta.validation),适合 Spring Boot 3 的 Jakarta EE 转换。
<dependencies>
    <dependency>
        <groupId>org.springframework.boot</groupId>
        <artifactId>spring-boot-starter-web</artifactId>
    </dependency>
    <dependency>
        <groupId>org.springframework.boot</groupId>
        <artifactId>spring-boot-starter-validation</artifactId>
    </dependency>
    <dependency>
        <groupId>org.springdoc</groupId>
        <artifactId>springdoc-openapi-starter-webmvc-ui</artifactId>
        <version>2.6.0</version>
    </dependency>
    <dependency>
        <groupId>org.projectlombok</groupId>
        <artifactId>lombok</artifactId>
    </dependency>

</dependencies>
配置 SwaggerOpenApiConfig
我们通过配置类的方式创建一个 OpenAPI 的 Bean 对象就可以创建 Swagger3.0 的文档说明。
import io.swagger.v3.oas.models.ExternalDocumentation;
import io.swagger.v3.oas.models.OpenAPI;
import io.swagger.v3.oas.models.info.Info;
import io.swagger.v3.oas.models.info.License;
import org.springframework.context.annotation.Bean;
import org.springframework.context.annotation.Configuration;

@Configuration
public class Swagger3Config {
    @Bean
    public OpenAPI springShopOpenAPI() {
        return new OpenAPI()
                .info(new Info().title("码哥跳动 Swagger3 详解")
                        .description("Swagger3 Spring Boot 3.0 application")
                        .version("v0.0.1")
                        .license(new License().name("Apache 2.0").url("http://springdoc.org")))
                .externalDocs(new ExternalDocumentation()
                        .description("swagger 3 详解")
                        .url("https://springshop.wiki.github.org/docs"));
    }


}
OpenAPI 对象是 Swagger 中的核心类之一,用于描述整个 API 的结构和元数据。
Swagger2 和 Swagger3 使用的是完全不同的两套注解,所以原本使用 Swagger2 相关注解的代码页需要完全迁移,改为使用 Swagger3 的注解。
Swagger2 | Swagger3 |
@Api | @Tag |
@ApiOperation | @Operation |
@ApiImplicitParams | @Parameters |
@ApiImplicitParam | @Parameter |
@ApiModel | @Schema |
@ApiModelProperty | @Schema |
@ApiResponses | @ApiResponses |
@ApiResponse | @ApiResponse |
@ApiIgnore | @Hidden 或者 其他注解的 hidden = true 属性 |
配置文件
通过以下配置来控制 swagger 的开关和访问地址:WEB 界面的显示基于解析 JSON 接口返回的结果, 如果 api-docs 关闭, swagger-ui 即使 enable 也无法使用。
server:
  port: 8013

spring:
  application:
    name: magebyte-swagger

springdoc:
  api-docs:
    enabled: true # 开启OpenApi接口
    path: /v3/api-docs  # 自定义路径,默认为 "/v3/api-docs"
  swagger-ui:
    enabled: true # 开启swagger界面,依赖OpenApi,需要OpenApi同时开启
    path: /swagger-ui.html # 自定义路径,默认为"/swagger-ui/index.html"
    # Packages to include,多个用 , 分割
    packagesToScan: zero.magebyte.magebyte.swagger.controller
需要注意的是,packagesToScan 用于指定 Controller 接口包路径。
@Schema
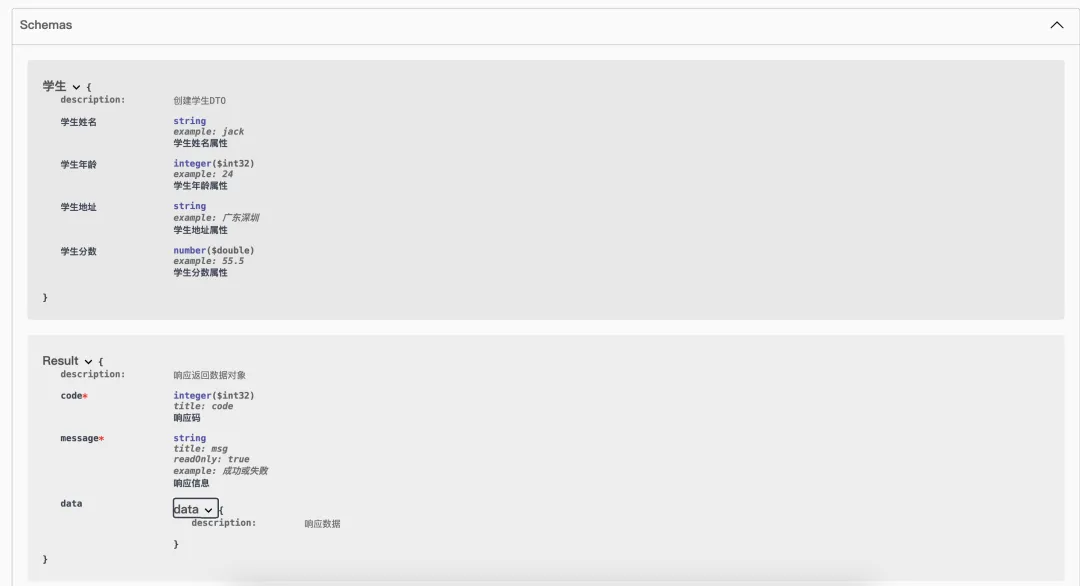
Swagger3 用 @Schema 注解对象和字段, 以及接口中的参数类型。
@Setter
@Getter
@Schema(description = "响应返回数据对象")
public class Result<T> implements Serializable {

    @Schema(
            title = "code",
            description = "响应码",
            format = "int32",
            requiredMode = Schema.RequiredMode.REQUIRED
    )
    private Integer code;

    @Schema(
            title = "msg",
            description = "响应信息",
            accessMode = Schema.AccessMode.READ_ONLY,
            example = "成功或失败",
            requiredMode = Schema.RequiredMode.REQUIRED
    )
    private String message;

    @Schema(title = "data", description = "响应数据", accessMode = Schema.AccessMode.READ_ONLY)
    private T data;
}
返回对象定义。
@Data
@AllArgsConstructor
@Schema(title = "学生模型VO", description = "响应视图学生模型VO")
public class StudentVO implements Serializable {
    @Schema(name = "学生ID", description = "学生ID属性", format = "int64", example = "1")
    private Long id;            // 学生ID
    @Schema(name = "学生姓名", description = "学生姓名属性", example = "jack")
    private String name;        // 学生姓名
    @Schema(name = "学生年龄", description = "学生年龄属性", format = "int32", example = "24")
    private Integer age;        // 学生年龄
    @Schema(name = "学生地址", description = "学生地址属性", example = "安徽合肥")
    private String address;     // 学生地址
    @Schema(name = "学生分数", description = "学生分数属性", format = "double", example = "55.50")
    private Double fraction;    // 学生分数
    @Schema(name = "学生爱好", description = "学生爱好属性(List类型)",
            type = "array", example = "[\"玩\", \"写字\"]")
    private List<String> likes; // 学生爱好
}
@Paramete
@Parameter 注解用于描述方法参数。如果不希望显示某个参数, 用@Parameter(hidden = true)修饰。
@Parameters({
    @Parameter(name = "currentPage", description = "当前页码", required = true),
    @Parameter(name = "size", description = "当前页大小", example = "10"),
    @Parameter(name = "queryUser", description = "用户查询条件")
})
Controller 接口定义
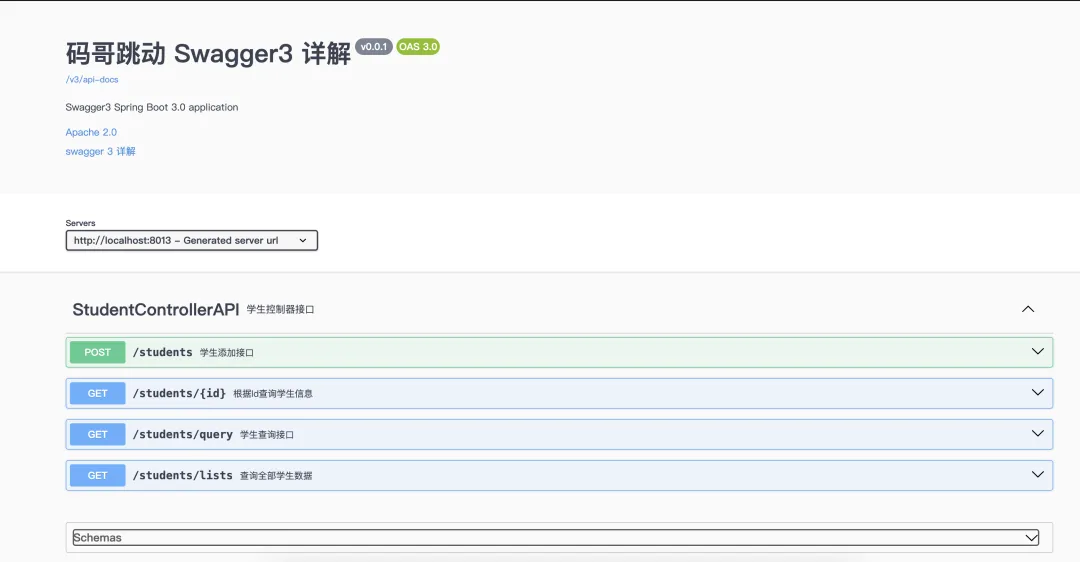
启动项目,打开链接:http://localhost:8013/swagger-ui/index.html
@RestController
@RequestMapping("/students")
@Tag(name = "StudentControllerAPI", description = "学生控制器接口"
        , externalDocs = @ExternalDocumentation(description = "这是一个接口文档介绍"))
public class StudentController {


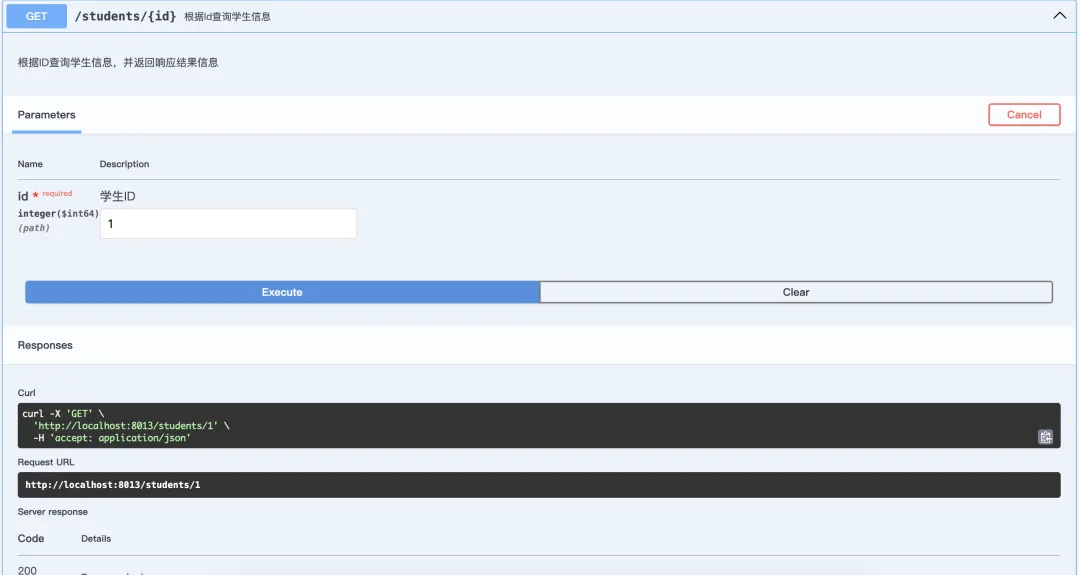
    @Operation(
            summary = "根据Id查询学生信息", description = "根据ID查询学生信息,并返回响应结果信息",
            parameters = {
                    @Parameter(name = "id", description = "学生ID", required = true, example = "1")
            },
            responses = {
                    @ApiResponse(
                            responseCode = "200",
                            description = "响应成功",
                            content = @Content(
                                    mediaType = "application/json",
                                    schema = @Schema(
                                            title = "Resul和StudentVO组合模型",
                                            description = "返回实体,AjaxResult内data为StudentVO模型",
                                            anyOf = {Result.class, StudentVO.class}
                                    )
                            )
                    ),
                    @ApiResponse(
                            responseCode = "500",
                            description = "响应失败",
                            content = @Content(
                                    mediaType = "application/json",
                                    schema = @Schema(
                                            title = "Resul模型",
                                            description = "返回实体,Result内 data为空",
                                            implementation = Result.class
                                    )
                            )
                    )
            }
    )
    @GetMapping("/{id}")
    public Result<StudentVO> findOneStudent(@PathVariable(value = "id") Long id) {
        //模拟学生数据
        List<String> likes = Arrays.asList("抓鱼", "爬山", "写字");
        StudentVO studentVO = new StudentVO(id, "张三", 22, "惠州", 93.5, likes);
        return new Result<StudentVO>(200, "成功", studentVO);
    }


    @Operation(
            summary = "查询全部学生数据",
            description = "查询学生信息,并返回响应结果信息",
            responses = {
                    @ApiResponse(
                            responseCode = "200",
                            description = "响应成功",
                            content = @Content(
                                    mediaType = "application/json",
                                    schema = @Schema(
                                            title = "AjaxResul和StudentVO组合模型",
                                            description = "返回实体,Result内data为StudentVO模型(并且StudentVO为集合)",
                                            anyOf = {Result.class, StudentVO.class}
                                    )
                            )
                    )
            }

    )
    @GetMapping("/lists")
    public Result<List<StudentVO>> findAllStudent() {
        //模拟学生数据
        List<String> likes = Arrays.asList("抓鱼", "爬山", "写字");
        StudentVO student1 = new StudentVO(1L, "张三", 22, "深圳", 93.5, likes);
        StudentVO student2 = new StudentVO(2L, "李四", 24, "惠州", 99.5, likes);
        return new Result(200, "成功", Arrays.asList(student1, student2));
    }

    @Operation(summary = "学生查询接口", description = "学生查询接口")
    @GetMapping("/query")
    public Result<List<StudentVO>> queryStudent(QueryStudentDTO queryStudentDTO) {
        //模拟学生数据
        List<String> likes = Arrays.asList("抓鱼", "爬山", "写字");
        StudentVO student1 = new StudentVO(1L, "张三", 22, "广东深圳", 93.5, likes);
        StudentVO student2 = new StudentVO(2L, "李四", 24, "广东惠州", 99.5, likes);
        return new Result<List<StudentVO>>(200, "成功", Arrays.asList(student1, student2));
    }

    @Operation(summary = "学生添加接口", description = "学生添加接口")
    @PostMapping
    public Result saveStudent(@RequestBody StudentDTO studentDTO) {
        System.out.println("成功添加数据:" + studentDTO);
        return new Result(200, "成功", null);
    }


}


