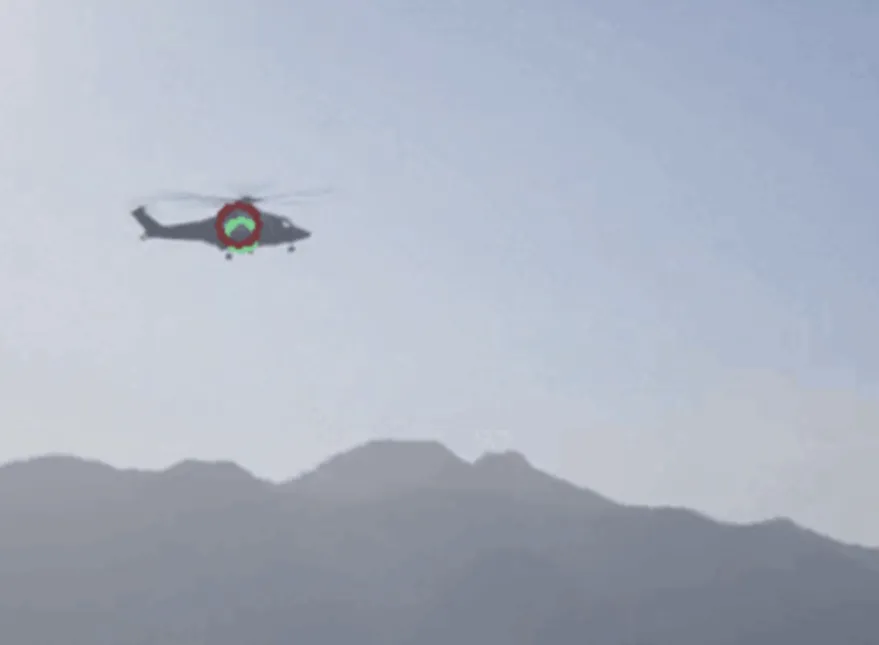
对于目标跟踪,有诸如FAST、SURF、SIFT和ORB等特征提取算法。在从目标物体提取特征后,可以尝试对每一帧的这些特征进行跟踪,通过这种方式,可以创建一个简单的目标跟踪器。但是,如何预测物体的运动呢?可能想知道1秒后目标物体将位于何处。仅使用特征提取算法是无法做到的,但不用担心,卡尔曼滤波器非常适合运动预测任务。在本文中,我将展示如何使用卡尔曼滤波器和FAST算法来跟踪物体并预测物体的运动。

红色圆圈 → 运动预测
卡尔曼滤波器和FAST算法
卡尔曼滤波器使用过去的数据来预测物体的运动。使用卡尔曼滤波器时,必须跟踪一个物体,因为卡尔曼滤波器需要位置数据,基于这些位置数据,它预测物体的位置。
使用FAST算法,我将跟踪物体,提取中心坐标,并使用这些数据与卡尔曼滤波器一起预测物体的位置。
NOTE: 关于FAST算法的文章,后续我们有机会将进行详细解读。
代码/跟踪和预测物体的运动 → FAST + 卡尔曼滤波器
主要有5个步骤,我将逐一解释它们。
# Import Necessary Libraries

import cv2
import numpy as np
import matplotlib.pyplot as plt
import time
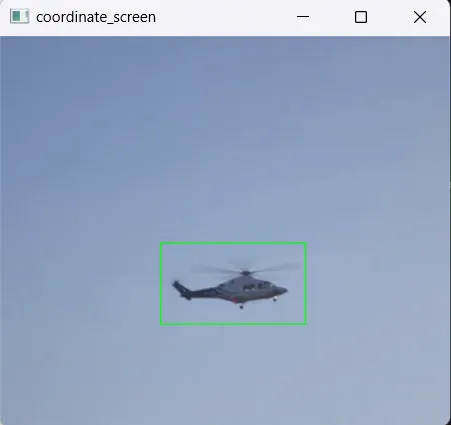
1.使用FAST算法提取跟踪特征:用鼠标左键在目标物体周围画一个矩形框,将从这个矩形框中提取特征。
# Path to video
video_path = r"videos/helicopter3.mp4"
video = cv2.VideoCapture(video_path)

# read only the first frame for drawing a rectangle for the desired object
ret,frame = video.read()

# I am giving  big random numbers for x_min and y_min because if you initialize them as zeros whatever coordinate you go minimum will be zero
x_min,y_min,x_max,y_max=36000,36000,0,0


def coordinat_chooser(event,x,y,flags,param):
    global go , x_min , y_min, x_max , y_max

    # when you click the right button, it will provide coordinates for variables
    if event==cv2.EVENT_LBUTTONDOWN:

        # if current coordinate of x lower than the x_min it will be new x_min , same rules apply for y_min
        x_min=min(x,x_min)
        y_min=min(y,y_min)

         # if current coordinate of x higher than the x_max it will be new x_max , same rules apply for y_max
        x_max=max(x,x_max)
        y_max=max(y,y_max)

        # draw rectangle
        cv2.rectangle(frame,(x_min,y_min),(x_max,y_max),(0,255,0),1)


    """
        if you didn't like your rectangle (maybe if you made some misscliks),  reset the coordinates with the middle button of your mouse
        if you press the middle button of your mouse coordinates will reset and you can give a new 2-point pair for your rectangle
    """
    if event==cv2.EVENT_MBUTTONDOWN:
        print("reset coordinate  data")
        x_min,y_min,x_max,y_max=36000,36000,0,0

cv2.namedWindow('coordinate_screen')
# Set mouse handler for the specified window, in this case, "coordinate_screen" window
cv2.setMouseCallback('coordinate_screen',coordinat_chooser)


while True:
    cv2.imshow("coordinate_screen",frame) # show only first frame

    k = cv2.waitKey(5) & 0xFF # after drawing rectangle press ESC
    if k == 27:
        cv2.destroyAllWindows()
        break
绘制矩形框以定位目标
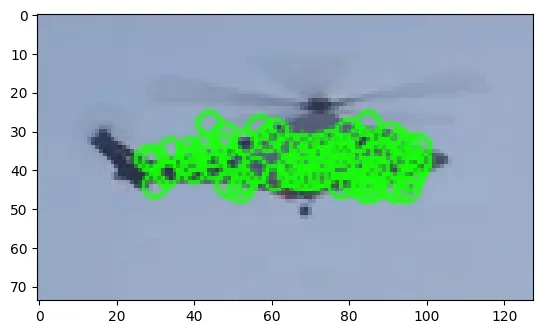
2. 显示提取的特征:使用FAST算法从矩形框中提取特征。
# take region of interest ( take inside of rectangle )
roi_image=frame[y_min+2:y_max-2,x_min+2:x_max-2]
roi_rgb=cv2.cvtColor(roi_image,cv2.COLOR_BGR2RGB)

# convert roi to grayscale, SIFT Algorithm works with grayscale images
roi_gray=cv2.cvtColor(roi_image,cv2.COLOR_BGR2GRAY)

# Initialize the FAST detector and BRIEF descriptor extractor
fast = cv2.FastFeatureDetector_create(threshold=1)
brief = cv2.xfeatures2d.BriefDescriptorExtractor_create()


# detect keypoints
keypoints_1 = fast.detect(roi_gray, None)
# descriptors
keypoints_1, descriptors_1 = brief.compute(roi_gray, keypoints_1)

# draw keypoints for visualizing
keypoints_image = cv2.drawKeypoints(roi_rgb, keypoints_1, outImage=None, color=(23, 255, 10))
# display keypoints
plt.imshow(keypoints_image,cmap="gray")
提取的特征
3.创建一个提取目标物体中心位置的函数
# matcher object
bf = cv2.BFMatcher()

def detect_target_fast(frame):
    # convert frame to gray scale
    frame_gray = cv2.cvtColor(frame, cv2.COLOR_BGR2GRAY)

    # Detect keypoints using FAST
    keypoints_2 = fast.detect(frame_gray, None)

    # Compute descriptors using BRIEF
    keypoints_2, descriptors_2 = brief.compute(frame_gray, keypoints_2)

    """
    Compare the keypoints/descriptors extracted from the
    first frame (from target object) with those extracted from the current frame.
    """
    if descriptors_2 is not None:
        matches = bf.match(descriptors_1, descriptors_2)

        if matches:
            # Initialize sums for x and y coordinates
            sum_x = 0
            sum_y = 0
            match_count = 0

            for match in matches:
                # .trainIdx gives keypoint index from current frame
                train_idx = match.trainIdx

                # current frame keypoints coordinates
                pt2 = keypoints_2[train_idx].pt

                # Sum the x and y coordinates
                sum_x += pt2[0]
                sum_y += pt2[1]
                match_count += 1

            # Calculate average of the x and y coordinates
            avg_x = sum_x / match_count
            avg_y = sum_y / match_count

    return int(avg_x),int(avg_y)
4.初始化卡尔曼滤波器
# Initialize Kalman filter parameters
kalman = cv2.KalmanFilter(4, 2)

kalman.measurementMatrix = np.array([[1, 0, 0, 0], [0, 1, 0, 0]], np.float32)
kalman.transitionMatrix = np.array([[1, 0, 1, 0], [0, 1, 0, 1], [0, 0, 1, 0], [0, 0, 0, 1]], np.float32)
kalman.processNoiseCov = np.eye(4, dtype=np.float32) * 0.03  # Process noise
kalman.measurementNoiseCov = np.eye(2, dtype=np.float32) * 0.5  # Measurement noise
5.读取视频并使用卡尔曼滤波器和FAST算法
# Startcapturing the video from file
cap = cv2.VideoCapture(video_path)

while True:
    ret, frame = cap.read()
    if not ret:
        break

    # Predict the new position of the ball
    predicted = kalman.predict()
    predicted_x, predicted_y = int(predicted[0]), int(predicted[1])
    predicted_dx, predicted_dy = predicted[2], predicted[3]  # Predicted velocity

    print(predicted_x, predicted_y )
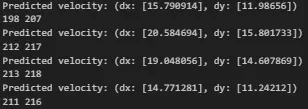
    print(f"Predicted velocity: (dx: {predicted_dx}, dy: {predicted_dy})")


    # Detect the ball in the current frame
    ball_position = detect_target_fast(frame)

    if ball_position:
        measured_x, measured_y = ball_position
        # Correct the Kalman Filter with the actual measurement
        kalman.correct(np.array([[np.float32(measured_x)], [np.float32(measured_y)]]))
        # Draw the detected ball
        cv2.circle(frame, (measured_x, measured_y), 6, (0, 255, 0), 2) # green --> correct position

    # Draw the predicted position (Kalman Filter result)
    cv2.circle(frame, (predicted_x, predicted_y), 8, (0, 0, 255), 2) # red --> predicted position

    # Show the frame
    cv2.imshow("Kalman Ball Tracking", frame)

    # Break on 'q' key press
    if cv2.waitKey(30) & 0xFF == ord('q'):  # 30 ms delay for smooth playback
        break

cap.release()
cv2.destroyAllWindows()
终端输出

跟踪和预测飞机


