背景
java nio中文件读写不管是普通文件读写,还是基于mmap实现零拷贝,都离不开FileChannel这个类。
随便打开RocketMQ 源码搜索FileChannel。
就可以看到使用频率。
 图片
图片
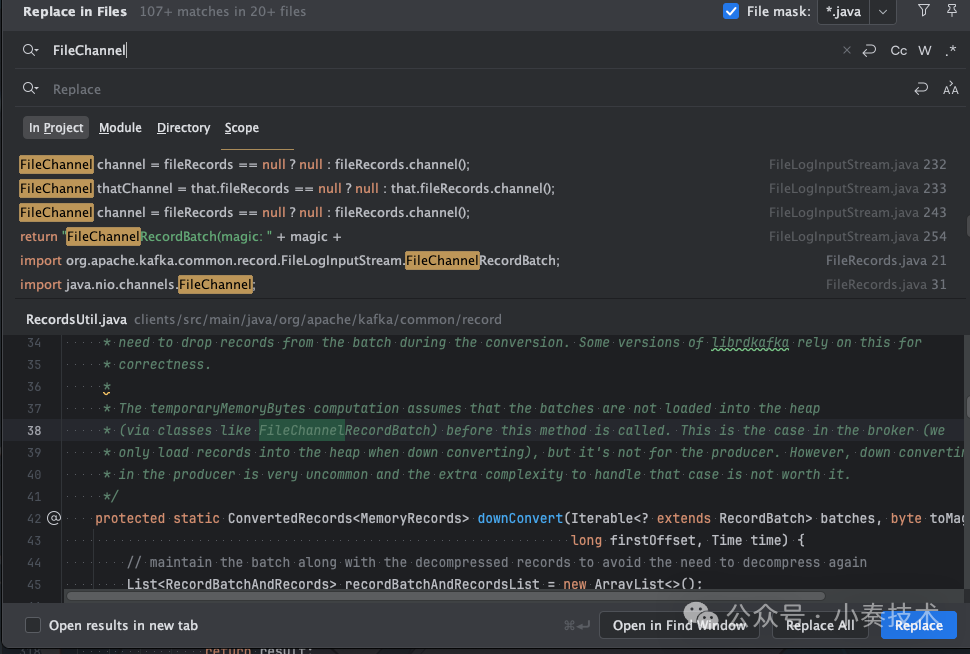
kafka也是。
 图片
图片
所以在java中文件读写FileChannel尤为重用。
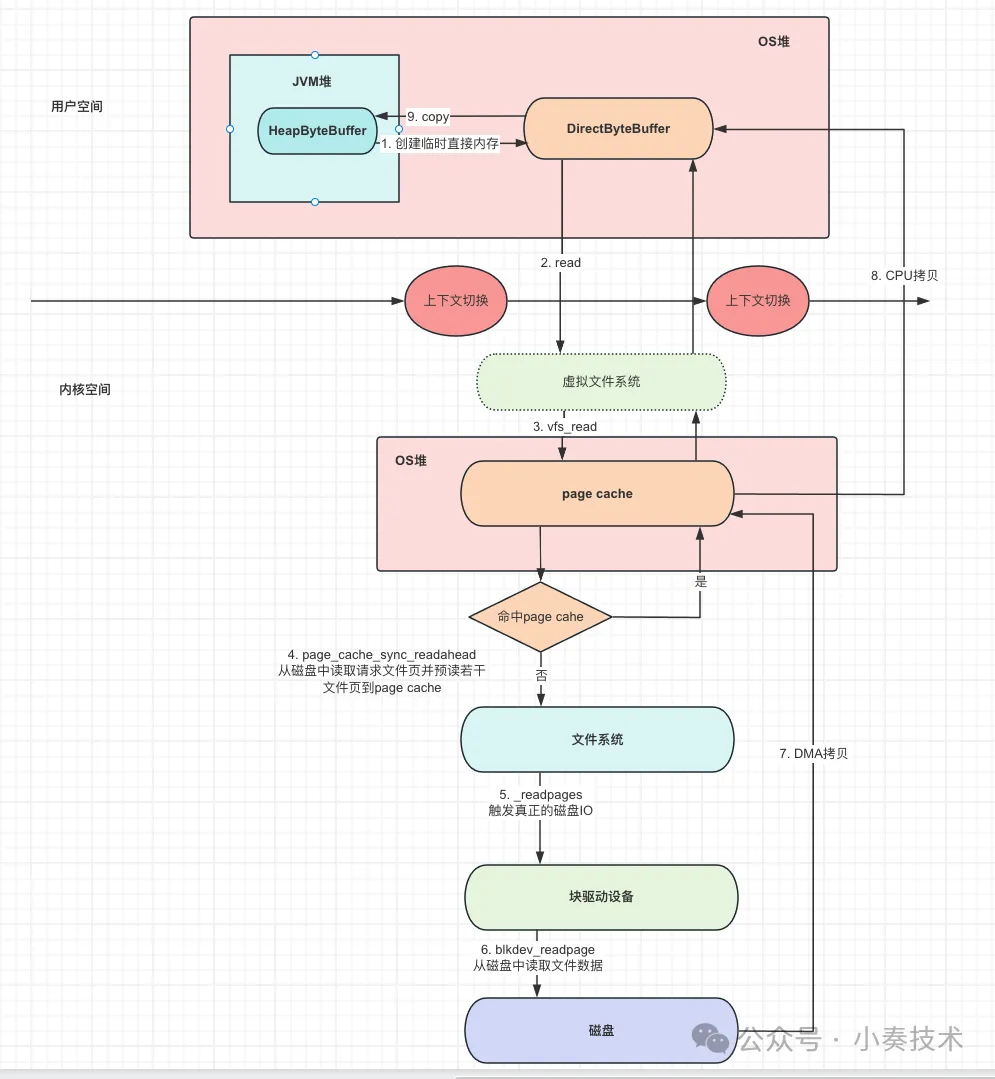
java文件读写全流程
 图片
图片
这里说的仅仅是FileChannel基于堆内存(HeapByteBuffer)的文件读写。
如果是mmap或者堆外内存,可能有些步骤会省略,相当于有一些优化。
- FileChannel调用read,将HeapByteBuffer拷贝到DirectByteBuffer。
- JVM在native层使用read系统调用进行文件读取, 这里需要进行上下文切换,从用户态进入内核态。
- JVM 进程进入虚拟文件系统层,查看文件数据再page cache是否缓存,如果有则直接从page cache读取并返回到DirectByteBuffer。
- 如果请求文件数据不在page caceh,则进入文件系统。通过块驱动设备进行真正的IO,并进行文件预读,比如读取的文件可能只有1-10,但是会将1-20都读取。
- 磁盘控制器DMA将磁盘中的数据拷贝到page cache中。这里发生了一次数据拷贝(非CPU拷贝)。
- CPU将page cache数据拷贝到DirectByteBuffer,因为page cache属于内核空间,JVM进程无法直接寻址。这里是发生第二次数据拷贝。
- JVM进程从内核态切换回用户态,这里如果使用的是堆内存(HeapByteBuffer),实际还需要将堆外内存DirectByteBuffer拷贝到堆内存(HeapByteBuffer)。
FileChannel读写文件(非MMAP)
public static void main(String[] args) {
        String filename = "小奏技术.txt";
        String content = "Hello, 小奏技术.";
        // 写入文件
        writeFile(filename, content);
        // 读取文件
        System.out.println("Reading from file:");
        readFile(filename);
    }

    public static void writeFile(String filename, String content) {
        // 创建文件对象
        File file = new File(filename);
        // 确保文件存在
        if (!file.exists()) {
            try {
                boolean created = file.createNewFile();
                if (!created) {
                    System.err.println("Unable to create file: " + filename);
                    return;
                }
            } catch (Exception e) {
                System.err.println("An error occurred while creating the file: " + e.getMessage());
                return;
            }
        }
        // 使用FileChannel写入文件
        try (RandomAccessFile randomAccessFile = new RandomAccessFile(file, "rw");
             FileChannel fileChannel = randomAccessFile.getChannel()) {

            ByteBuffer buffer = ByteBuffer.allocate(content.getBytes().length);
            buffer.put(content.getBytes());
            buffer.flip(); // 切换到读模式
            while (buffer.hasRemaining()) {
                fileChannel.write(buffer);
            }
        } catch (Exception e) {
            System.err.println("An error occurred while writing to the file: " + e.getMessage());
        }
    }

    public static void readFile(String filename) {
        // 使用FileChannel读取文件
        try (RandomAccessFile randomAccessFile = new RandomAccessFile(filename, "r");
             FileChannel fileChannel = randomAccessFile.getChannel()) {

            ByteBuffer buffer = ByteBuffer.allocate((int) fileChannel.size());

            while (fileChannel.read(buffer) > 0) {
                // Do nothing, just read
            }

            // 切换到读模式
            buffer.flip();

           /* while (buffer.hasRemaining()) {

                System.out.print((char) buffer.get());
            }*/
            Charset charset = StandardCharsets.UTF_8;
            String fileContent = charset.decode(buffer).toString();
            System.out.print(fileContent);

        } catch (Exception e) {
            System.err.println("An error occurred while reading the file: " + e.getMessage());
        }
    }
这里需要注意的一个细节 我们分配的内存的方式是:
ByteBuffer.allocate()这里我们可以进入看看源码:
 图片
图片
实际构造的是HeapByteBuffer,也就是JVM的堆内存。
如果我们使用:
ByteBuffer.allocateDirect()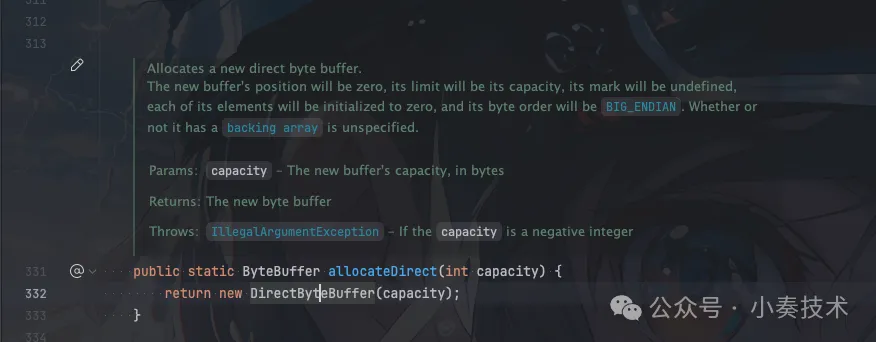 图片
图片
则构造的是堆外内存DirectByteBuffer。
HeapByteBuffer和DirectByteBuffer文件读写区别
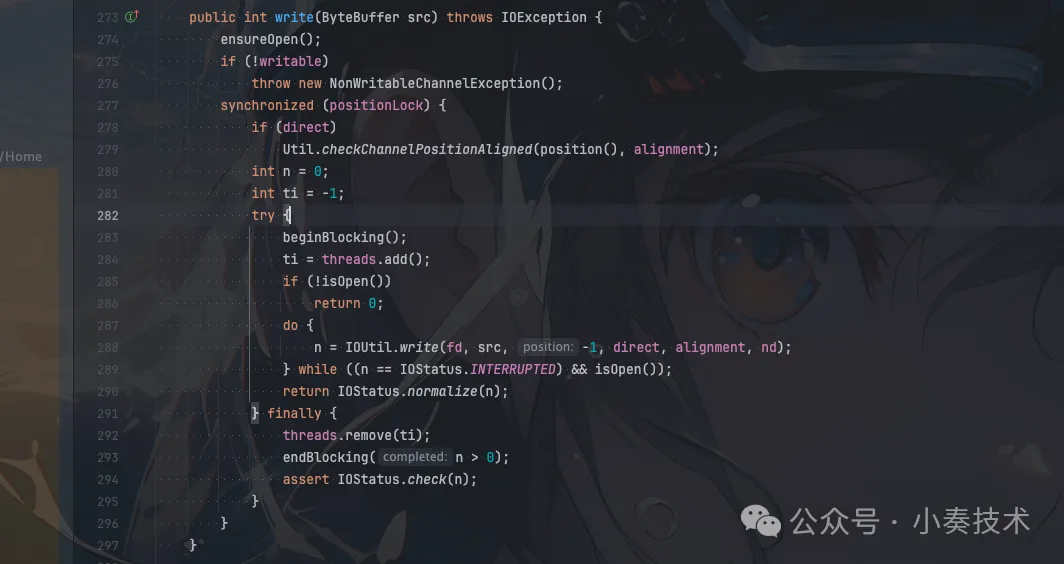
我们看看FileChannel read方法:
 图片
图片
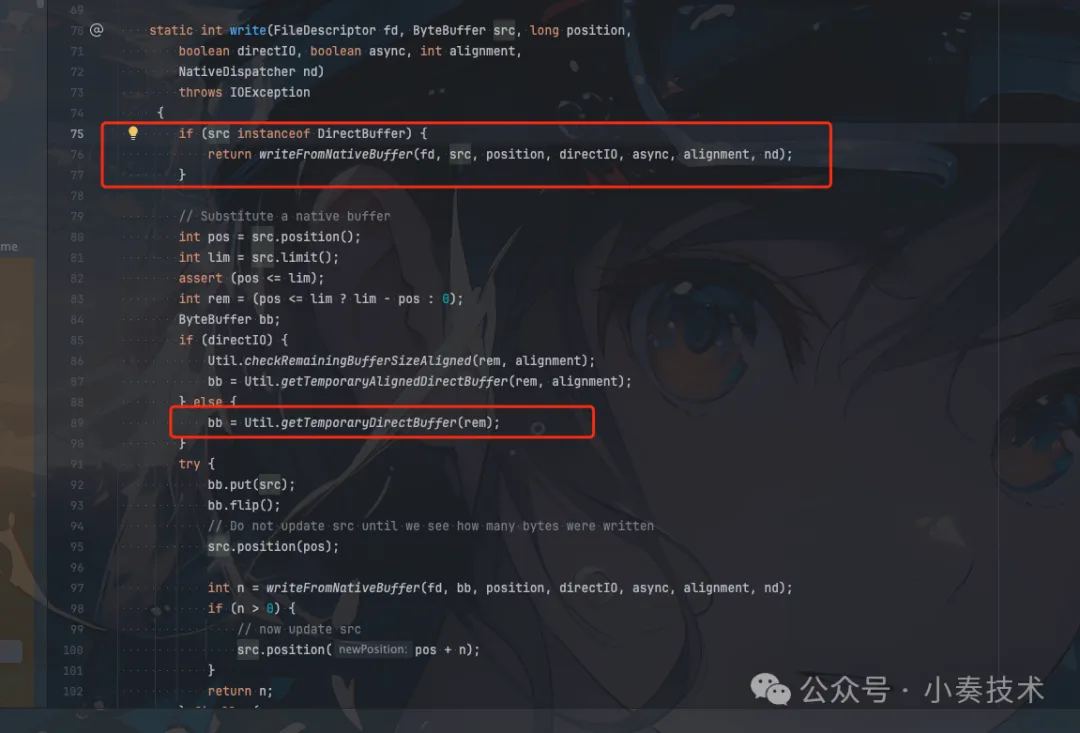
发现IO相关的处理被封装在IOUtil,我们继续看看IOUtil的write方法:
 图片
图片
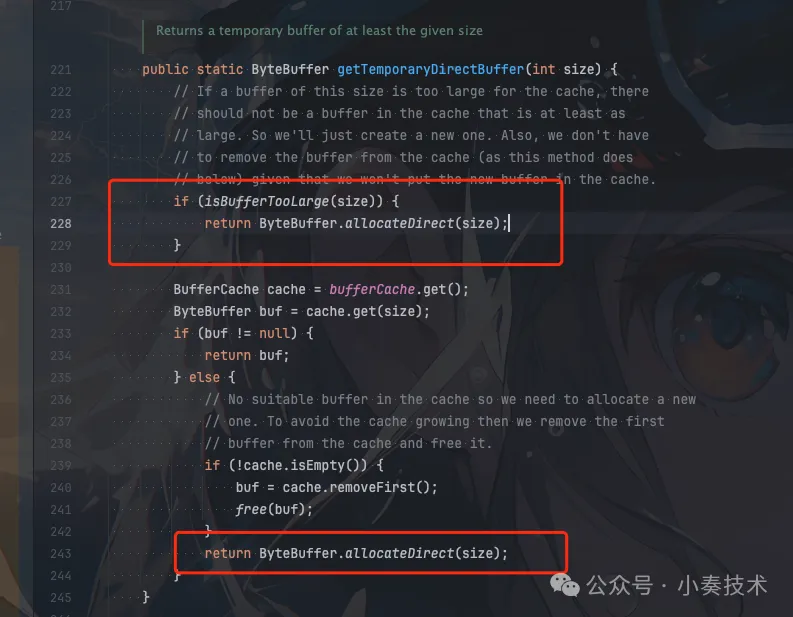
可以看到如果是DirectBuffer则可以直接写。如果是HeapByteBuffer则需要转换为DirectByteBuffer。
 图片
图片
为什么要在DirectByteBuffer做一层转换
主要是HeapByteBuffer受JVM管理,也就是会受到GC影响。如果在进行native调用的时候发生了GC,会导致HeapByteBuffer的内容出现错误。具体详细的说明可以看看这篇MappedByteBuffer VS FileChannel:从内核层面对比两者的性能差异。讲解的非常清晰。
参考
- MappedByteBuffer VS FileChannel:从内核层面对比两者的性能差异


