一、spring boot内嵌web容器介绍
Spring Boot 支持以下内嵌的 Web 容器:
- Tomcat:Spring Boot 默认使用的 Web 容器,也是最常用的选择。Tomcat 是一个流行的开源 Servlet 容器,具有广泛的应用和良好的性能。
- Jetty:另一个常用的 Web 容器,它具有轻量级和高效的特点。Spring Boot 也提供了对 Jetty 的支持。
- Undertow:一个高性能的 Web 容器,特别适合处理高并发和大规模的应用。Spring Boot 也可以与 Undertow 集成。
这些内嵌的 Web 容器都可以在 Spring Boot 应用中直接使用,无需额外的安装和配置。Spring Boot 会自动根据项目的依赖和配置来选择合适的 Web 容器,并进行相应的配置和启动。
你可以根据项目的需求和特点选择适合的 Web 容器。例如,如果对性能有较高要求,可以考虑使用 Undertow;如果需要与现有 Tomcat 环境集成,则可以选择 Tomcat。
二、如何切换spring boot内嵌web容器
以jetty为例,我们只需要将默认的tomcat依赖排除,并将jetty依赖引入,即可完成内嵌web容器的切换。
<dependency>
    <groupId>org.springframework.boot</groupId>
    <artifactId>spring-boot-starter-web</artifactId>
    <!--1、移除tomcat依赖(exclusions:排除)-->
    <exclusions>
        <exclusion>
            <artifactId>spring-boot-starter-tomcat</artifactId>
            <groupId>org.springframework.boot</groupId>
        </exclusion>
    </exclusions>
</dependency>

<!--2、加入jetty依赖-->
<dependency>
    <groupId>org.springframework.boot</groupId>
    <artifactId>spring-boot-starter-jetty</artifactId>
</dependency>
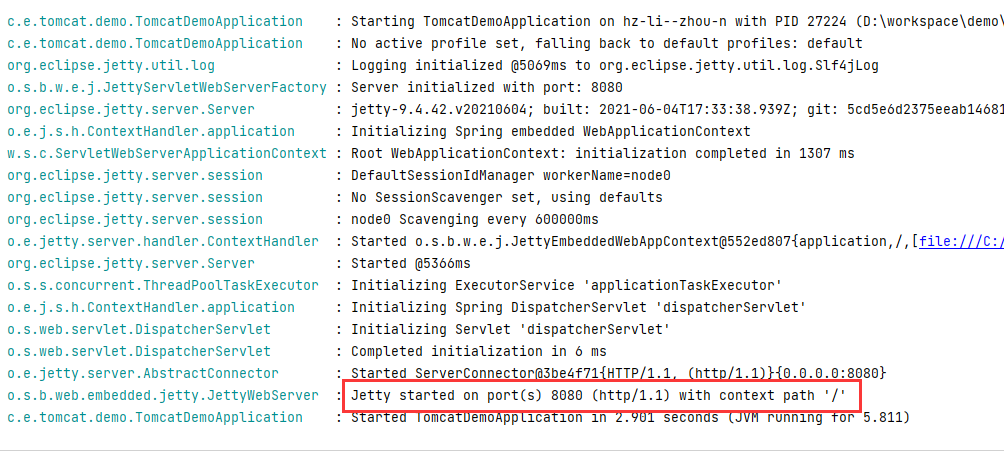
启动项目,我们可以看到,jetty确实启动了。

三、spring boot内嵌web容器启动原理
Spring Boot 内嵌 Web 容器的启动原理可以概括为以下几个步骤:
- 依赖注入:Spring Boot 在启动时,会自动扫描项目中的依赖,并将相关的 Web 容器依赖注入到应用程序中。
- 容器初始化:Spring Boot 会根据配置文件或默认设置,初始化所选的内嵌 Web 容器。这包括创建容器实例、设置端口号、上下文路径等。
- 组件扫描和注册:Spring Boot 会扫描项目中的组件(如控制器、服务等),并将它们注册到 Web 容器中,以便处理 HTTP 请求。
- 配置加载:Spring Boot 会加载应用程序的配置信息,包括端口号、上下文路径、静态资源路径等,并将这些配置应用到 Web 容器中。
- 启动容器:一旦容器初始化完成并配置好,Spring Boot 会启动内嵌的 Web 容器,使其开始监听指定的端口,并准备处理 HTTP 请求。
- 应用程序运行:此时,应用程序已经在所选的内嵌 Web 容器中运行,可以通过访问指定的端口来访问应用程序的功能。
相关源码如下:
SpringApplication类createApplicationContext方法,根据当前web应用的类型选择匹配的应用上下文类型,这边会创建AnnotationConfigServletWebServerApplicationContext。
protected ConfigurableApplicationContext createApplicationContext() {
		Class<?> contextClass = this.applicationContextClass;
		if (contextClass == null) {
			try {
				switch (this.webApplicationType) {
				case SERVLET:
					contextClass = Class.forName(DEFAULT_SERVLET_WEB_CONTEXT_CLASS);
					break;
				case REACTIVE:
					contextClass = Class.forName(DEFAULT_REACTIVE_WEB_CONTEXT_CLASS);
					break;
				default:
					contextClass = Class.forName(DEFAULT_CONTEXT_CLASS);
				}
			}
			catch (ClassNotFoundException ex) {
				throw new IllegalStateException(
						"Unable create a default ApplicationContext, please specify an ApplicationContextClass", ex);
			}
		}
		return (ConfigurableApplicationContext) BeanUtils.instantiateClass(contextClass);
	}
AnnotationConfigServletWebServerApplicationContext类createWebServer方法,会创建我们配置的web容器。
private void createWebServer() {
		WebServer webServer = this.webServer;
		ServletContext servletContext = getServletContext();
		if (webServer == null && servletContext == null) {
			ServletWebServerFactory factory = getWebServerFactory();
			this.webServer = factory.getWebServer(getSelfInitializer());
			getBeanFactory().registerSingleton("webServerGracefulShutdown",
					new WebServerGracefulShutdownLifecycle(this.webServer));
			getBeanFactory().registerSingleton("webServerStartStop",
					new WebServerStartStopLifecycle(this, this.webServer));
		}
		else if (servletContext != null) {
			try {
				getSelfInitializer().onStartup(servletContext);
			}
			catch (ServletException ex) {
				throw new ApplicationContextException("Cannot initialize servlet context", ex);
			}
		}
		initPropertySources();
	}
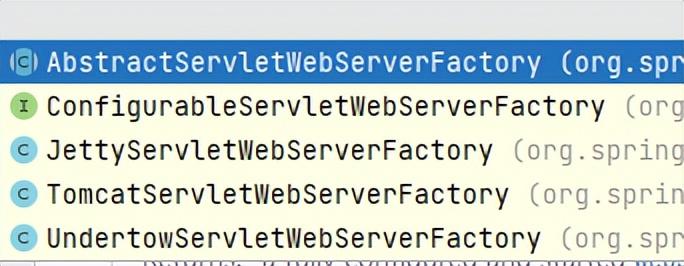
这边使用了工厂模式,不同的web容器有自己的工厂。

这边我们以TomcatServletWebServerFactory为例,看下它的getWebServerFactory方法。
public WebServer getWebServer(ServletContextInitializer... initializers) {
		if (this.disableMBeanRegistry) {
			Registry.disableRegistry();
		}
		Tomcat tomcat = new Tomcat();
		File baseDir = (this.baseDirectory != null) ? this.baseDirectory : createTempDir("tomcat");
		tomcat.setBaseDir(baseDir.getAbsolutePath());
		Connector connector = new Connector(this.protocol);
		connector.setThrowOnFailure(true);
		tomcat.getService().addConnector(connector);
		customizeConnector(connector);
		tomcat.setConnector(connector);
		tomcat.getHost().setAutoDeploy(false);
		configureEngine(tomcat.getEngine());
		for (Connector additionalConnector : this.additionalTomcatConnectors) {
			tomcat.getService().addConnector(additionalConnector);
		}
		prepareContext(tomcat.getHost(), initializers);
		return getTomcatWebServer(tomcat);
	}
这边创建了tomcat容器并初始化,然后返回。


