在过去的几年里,前端开发发生了革命性的变化,变得更高效、更快,当然也更大。 SPA 框架的引入使 Web 开发发生了重大变化。更多繁重的工作转移到了前端,需要处理更多的事情,例如动态 UI、路由、状态管理等。因此,程序员习惯于使用新方法和第三方来减轻一些繁重的工作。当然,它有它的优点,但也有缺点,让我们变得更懒惰。但是如果我告诉你,在前端的这段时间里,你可能错过了一些基本功能,而不是使用它们,而是使用第三方包甚至更糟糕的是,自定义样式来实现基本的东西?是的,当然,让我们从 HTML 中您可能不知道的 15 个功能的基础开始,它们将帮助您轻松实现友好的 UI。事不宜迟,我们开始学习吧!
1、内容可编辑属性
contenteditable 是可以在元素上设置以使内容可编辑的属性。它适用于 DIV、P、UL 等元素。您需要这样 <element contenteditable=”true|false”> 设置它。
<h2> Earth 616 superheroes </h2>
<ul class="content-editable" contenteditable="true">
 <li> 1. Iron Man</li>
 <li> 2. Captain America</li>
 <li> 3. Black Panther</li>
</ul>
2、详情标签(Details)
<details> 标签向用户提供按需详细信息。默认情况下,小部件是折叠的。打开时,它会展开并显示其中的内容。
<summary> 标签与 <details> 一起使用实现一个可以折叠打开标题及详情内容。
<details>
<summary>Click here to see more from Earth 616</summary>
<table>
  <tr>
    <th>ID</th>
    <th>Name</th>
    <th>Location</th>
    <th>Job</th>
  </tr>
  <tr>
    <td>1</td>
    <td>John Doe</td>
    <td>Earth</td>
    <td>Human</td>
 </tr>
</table>
</details>
3、Datalist 标签
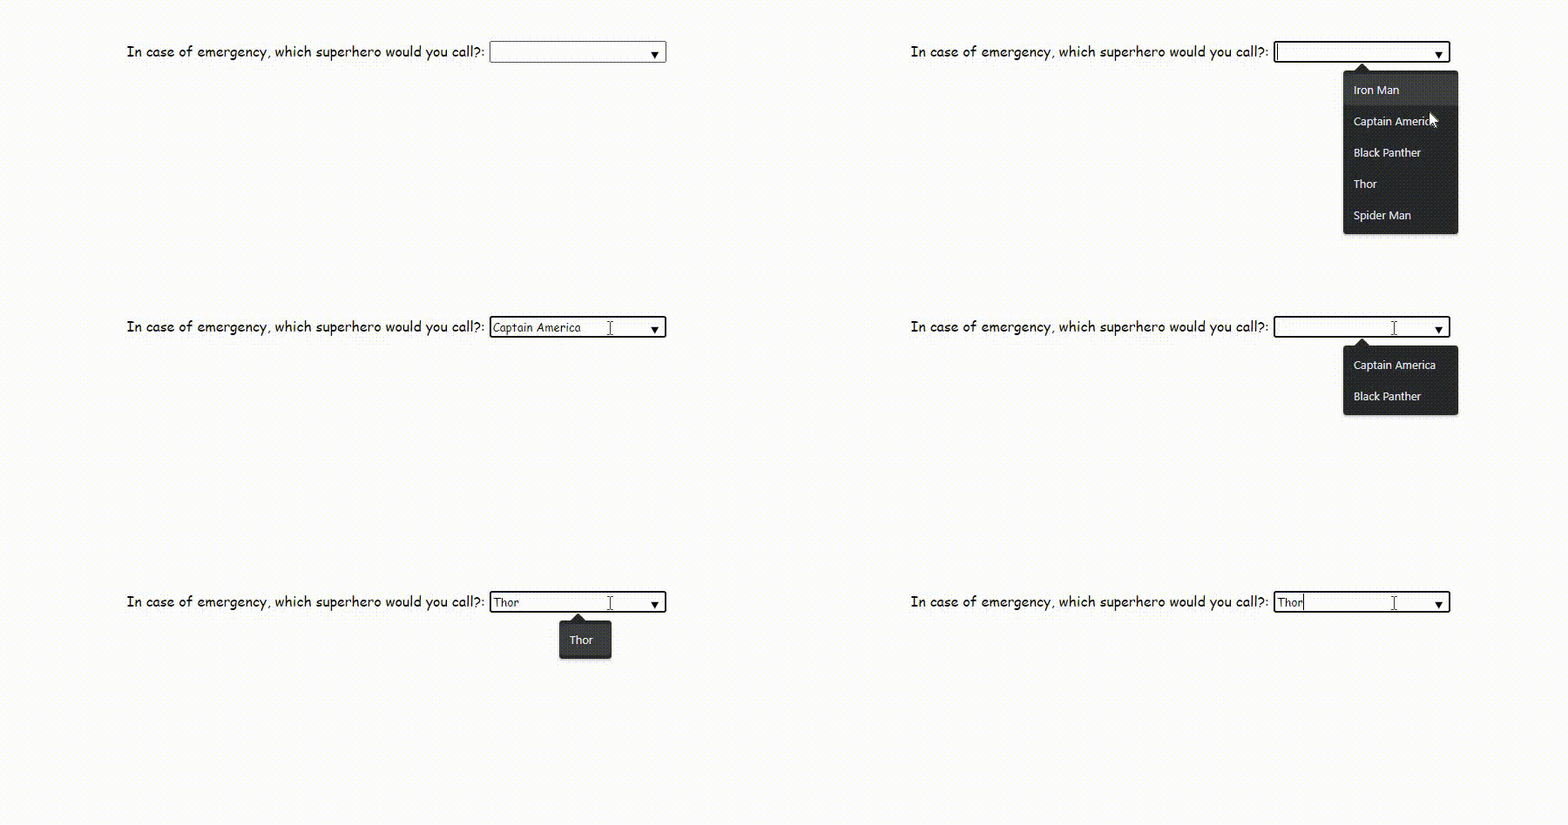
<datalist> 标记指定预定义选项列表并提供自动完成功能。
<label for=”superhero”>In case of emergency, which superhero would you call?:</label>
<input list=”superheroes” name=”superhero” id=”superhero”>
<datalist id=”superheroes”>
 <option value=”Iron Man”>
 <option value=”Captain America”>
 <option value=”Black Panther”>
 <option value=”Thor”>
 <option value=”Spider Man”>
</datalist>
4、Range 属性
范围输入类型的表单类似于滑块范围选择器。
<head>
    <script>
        function changeValue(event) {
            let value = event.target.value;
            let output = document.getElementById('output');
            output.value = value;
        }
    </script>
</head>
<body>
    <form method="post">
        <input
             type="range"
             name="range"
             min="0"
             max="100"
             step="1"
             value=""
             onchange="changeValue(event)"/>
     </form>
     <div class="range">
          <output id="output" name="result">  </output>
     </div>
</body>
5、Meter 标签
<meter> 标签定义了定义范围内的标量测量值或分数值
<label for="home">Cloud storage</label>
<meter id="home" value="0.4">40%</meter><br>
<label for="root">Internal storage</label>
<meter id="root" value="0.6">60%</meter><br>
6、 Progress 标签
<progress> 标签表示任务的进度。
<label for="home">6/10 tasks done</label>
<progress value="60" max="100" id="home"></progress>
7、颜色选择器
一个简单的颜色选择器。
<p id="colorPicker">Color Picker!</p>
<input type="color" onchange="showColor(event)">
8、标记内容标签
使用 <mark> 标记突出显示任何文本内容。
<p>Did you know that <mark>not all heroes wear capes.</mark></p>
9、块引用和引用
如果您要包含来自不同来源的内容,您绝对应该引用该来源。
<figure>
  <blockquote>
    <p>It's an imperfect world, but its the only one we've got.</p>
  </blockquote>
  <figcaption>--TONY STARK, <cite>IRON MAN</cite></figcaption>
</figure>
10、缩写标签(Abbreviation)
“abbr”是abbreviation的简称!这里的想法是,如果您使用标题(例如“Mr.”)或首字母缩略词(例如“SHIELD”),abbr 标签会准确指示该缩写的含义。
<p>Agent Phil Coulson leads a team of highly skilled agents from the
global law-enforcement organisation known as
<abbr title="Strategic Homeland Intervention, Enforcement,
and Logistics Division">SHIELD</abbr>.
</p>
11、 and
实际上有一个标记用于带删除线的文本,另一个标记表示替换文本。
<p><del>Iron Man</del>
<ins>Captain America</ins>
is ehmmm.. yea the captain!</p>
12、Output 标签
<output> 标签表示计算的结果。通常,此元素定义一个区域,该区域将用于显示某些计算的文本输出。
<form notallow="x.value=parseInt(a.value) * parseInt(b.value)">
    <input type="number" id="a" value="0">
      * <input type="number"  id="b" value="0">
    = <output name="x" for="a b"></output>
</form>
13、Hidden 属性
在隐藏元素方面,我们都尝试过不同的方法,比如使用 opacity:0, visibility:hidden, height:0; width:0, display:none 在我们的 CSS 文件中。每一个都有自己的用例,适用于不同的布局。另一个与它们类似的选项是隐藏的 HTML 属性。如果一个元素在其上指定了隐藏,它将被隐藏。我碰巧有用于存储值的隐藏输入,所以如果您也需要它,请不要吃惊。
<div hidden>...</div>14、Time 标签
<time> 标记定义特定时间(或日期时间)。
该元素的 datetime 属性用于将时间转换为机器可读的格式,以便浏览器可以提供通过用户日历添加日期提醒,搜索引擎可以产生更智能的搜索结果。
<p>The next assemble meeting is postponed on
  <time datetime="2022-12-01">2022-12-01</time>.</p>
15、Audio 标签
<audio> 标签将定义一种声音,该标签可以与三个支持的文件一起使用。它们是 MP3、WAV 和 OGG。然后浏览器将选择它支持的第一个。
<audio controls>
  <source src=”introduction.ogg” type=”audio/ogg”>
  <source src=”introduction.mp3” type=”audio/mpeg”>
  Your browser does not support this audio
</audio>
结束
好了,今天的分享就到这里,通过本文的学习,你可以轻松的使用HTML原生标签能力,就能够实现以前复杂的第三方UI组件提供的功能。


