Python 凭借其简单性和多功能性,已经成为最流行的编程语言之一。被广泛应用于从 web 开发到数据科学的各个领域。
在本教程中,我们将探索用于创建图形用户界面(GUIs)的 Python 内置库:
Tkinter:无论你是初学者还是经验丰富的开发人员,了解如何创建 Python GUI 都可以增强你构建交互式应用程序的能力。
Tkinter 是 Python 附带的标准 GUI 工具包。它提供了一组用于创建图形用户界面的工具和小部件。
一、从创建一个简单的 Hello World 开始
让我们从一个基本的例子开始了解 Tkinter。打开你最喜欢的 Python 编辑器(我的是 Pycharm)并创建一个新文件,例如就叫 hello_tkinter.py。编写以下代码:
import tkinter as tk


def say_hello():
    label.config(text="Hello, Tkinter!")


# Create the main window
root = tk.Tk()
root.title("Tkinter Hello World")

# Create a label widget
label = tk.Label(root, text="Welcome to Tkinter!")

# Pack the label into the main window
label.pack(pady=10)

# Create a button widget
button = tk.Button(root, text="Say Hello", command=say_hello)

# Pack the button into the main window
button.pack(pady=10)

# Start the Tkinter event loop
root.mainloop()
输出:
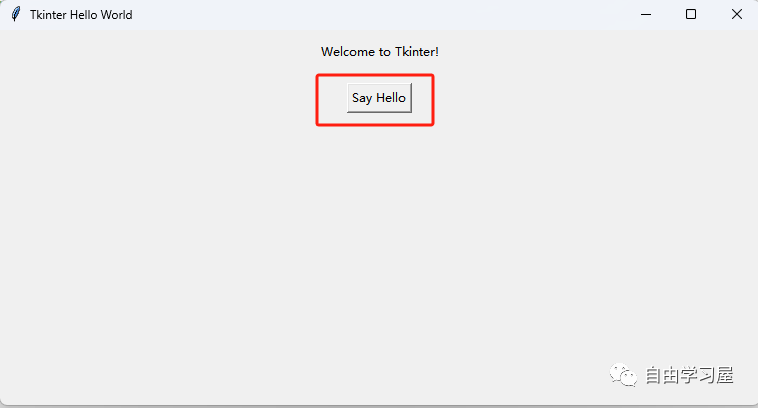
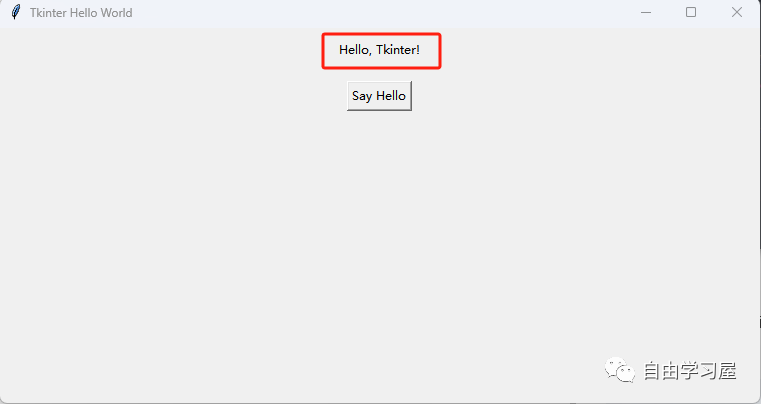
保存文件并运行它,你应该会看到一个带有标签和按钮的窗口,点击该按钮将把标签文本更改为"Hello, Tkinter!":
 图片
图片
 图片
图片
二、Tkinter 基础
现在我们已经创建了一个简单的 Tkinter 应用程序,让我们深入研究一些基本概念和小部件。
2.1 小部件(Widgets)
小部件是 Tkinter GUI 的构建模块。它们可以是按钮、标签、输入字段等等。比如在前面的例子中我们已经使用了 Label 和 Button 小部件。
输入小部件(Entry Widget)
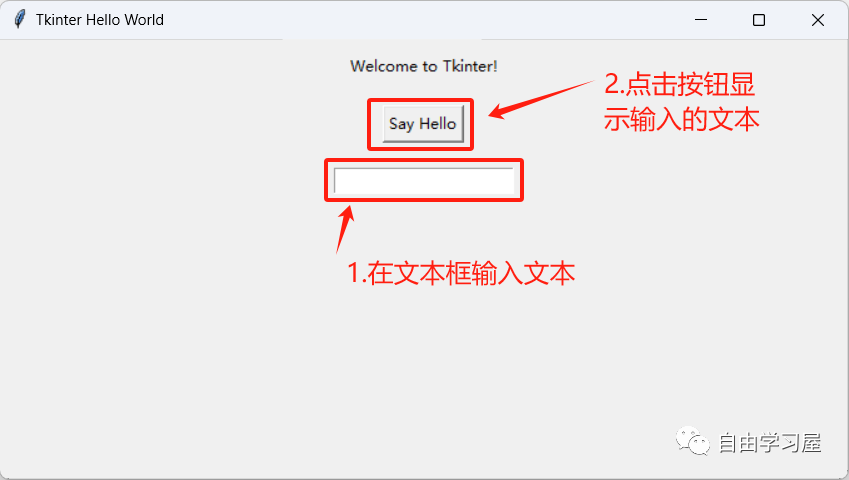
Entry Widget 允许用户输入一行文本。现在让我们扩展我们的 Hello, Tkinter! 的示例,通过添加一个 Entry Widget 来获取用户名:
import tkinter as tk


def say_hello():
    name = entry.get()
    label.config(text=f"Hello, {name}!")


# Create the main window
root = tk.Tk()
root.title("Tkinter Hello World")

# Create a label widget
label = tk.Label(root, text="Welcome to Tkinter!")

# Pack the label into the main window
label.pack(pady=10)

# Create a button widget
button = tk.Button(root, text="Say Hello", command=say_hello)

# Pack the button into the main window
button.pack(pady=10)

# Create an entry widget
entry = tk.Entry(root)

# Pack the entry widget into the main window
entry.pack(pady=10)

# Start the Tkinter event loop
root.mainloop()
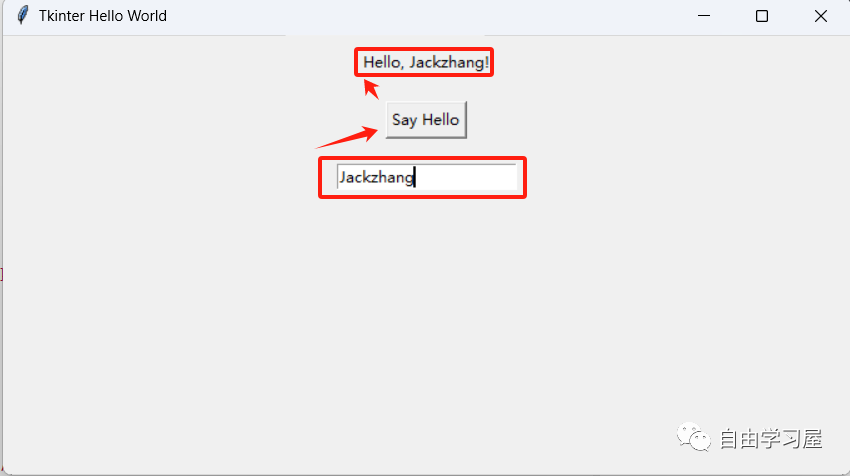
通过这个修改,用户可以在 Entry Widget 中输入他们的名字,点击 Say Hello 按钮将会向他们打招呼。
演示:
 图片
图片
 图片
图片
2.2 布局管理(Layout Management)
Tkinter 提供多种几何管理器来组织窗口内的小部件。我们前面使用的 pack() 方法就是其中之一。此外,你还可以使用 grid() 和 place() 进行更复杂的布局。
网格布局(Grid Layout)
你可以使用 grid() 方法创建类似网格的布局。让我们在我们的示例中加入网格布局:
# ...

# Pack the label and entry widgets into the main window using the grid layout
label.grid(row=0, column=0, pady=10)
entry.grid(row=1, column=0, pady=10)

# ...
注意:不能将 grid() 和 pack() 混合使用,否则运行程序会报如下错误:_tkinter.TclError: cannot use geometry manager grid inside . which already has slaves managed by pack。
2.3 事件及事件处理(Events and Event Handling)
在前面的示例中,我们使用 command 参数指定单击按钮时要调用的函数。Tkinter 允许你将函数绑定到各种事件,例如单击按钮、按键或鼠标移动。
让我们在 Entry Widget 中添加一个事件处理程序,以便在用户按下 Enter 键时向用户表示欢迎:
# ...

def on_enter(event):
    say_hello()

# Bind the on_enter function to the Enter key press event
entry.bind("<Return>", on_enter)

# ...
现在,在 Entry Widget 中按 Enter 将触发 say_hello 函数。
三、中级 Tkinter 概念
前面我们已经了解 Tkinter 的基础知识,现在让我们探索其中更高级的概念吧!
3.1 菜单(Menu)
Tkinter 可以让你为应用程序创建菜单。菜单通常包含 File、Edit 和 Help 等菜单项,并且每个菜单项都可以有子菜单和命令。
# ...

def exit_app():
    root.destroy()

# Create a menu bar
menu_bar = tk.Menu(root)
root.config(menu=menu_bar)

# Create a File menu
file_menu = tk.Menu(menu_bar, tearoff=0)
menu_bar.add_cascade(label="File", menu=file_menu)

# Add an "Exit" command to the File menu
file_menu.add_command(label="Exit", command=exit_app)

# ...
现在,运行程序后将会有一个带有 Edit 选项的 File 菜单。点击 Edit 将会关闭应用程序。
3.2 框架(Frames)
框架是用于分组和组织小部件的容器,它们有助于实现更干净、更有组织的布局。
# ...

# Create a frame
frame = tk.Frame(root)
frame.pack(pady=10)

# Create widgets inside the frame
label_in_frame = tk.Label(frame, text="Inside the Frame")
button_in_frame = tk.Button(frame, text="Click me!")

# Pack widgets inside the frame
label_in_frame.pack()
button_in_frame.pack()

# ...
在这里,我们创建了一个框架并对其中的小部件进行打包。框架在需要将界面划分为多个部分时特别有用。
3.3 对话框(Dialog Box)
对话框是提示用户输入或提供信息的弹出窗口。Tkinter 提供了一种使用 tkinter.messagebox 模块创建对话框的简单方法。
# ...

from tkinter import messagebox

def show_info():
    messagebox.showinfo("Information", "This is an information message.")

# ...

# Create a button to show the information dialog
info_button = tk.Button(root, text="Show Info", command=show_info)
info_button.pack(pady=10)

# ...
点击 Show Info 按钮将显示一个信息对话框:
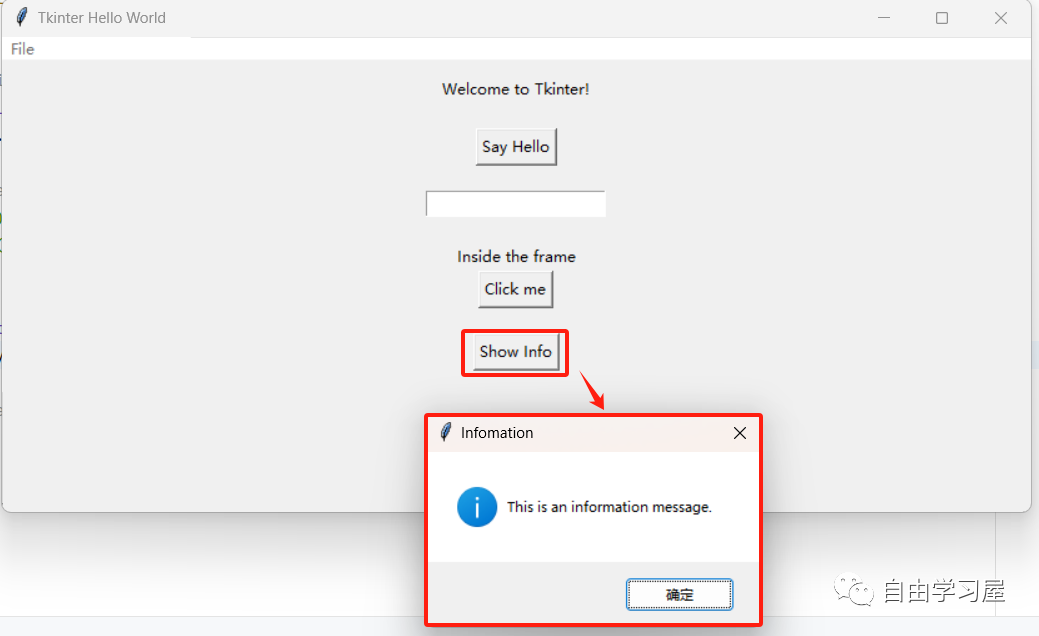 图片
图片
四、高级 Tkinter 特征(Advanced Tkinter Features)
4.1 图片使用(Using Images)
Tkinter 支持各种格式的图像显示,你可以使用 PhotoImage 类来加载和显示图像。
# ...

# Load an image
image = tk.PhotoImage(file="path/to/image.png")

# Create a label to display the image
image_label = tk.Label(root, image=image)
image_label.pack(pady=10)

# ...
用你的图片地址替换“path/to/image.png”即可。但实际测试时发现有的 png 图片可以正常展示,但是有的却不能,会报如下错误:
_tkinter.TclError: couldn't recognize data in image file "images/beutiful_girl.jpg"网上说 Tkinter 只支持 gif 格式的图片,要加载 png 或 jpg 格式的图片应该用 PIL 包的 Image,同时用 ImageTK.PhotoImage 替换 tk.PhotoImage:
from PIL import Image, ImageTk
image = ImageTk.PhotoImage(Image.open("images/beutiful_girl.jpg"))
测试后发现确实可以解决上述报错问题,如果你也遇到同样的错误,可以尝试使用这个解决方法。
4.2 自定义样式(Customizing Styles)
Tkinter 允许你使用样式自定义小部件的外观,你可以为按钮、标签和其他小部件定义样式。
# ...

# Create a button with the custom style
styled_button = tk.Button(root, text="Styled Button",
                          foreground="green", fnotallow=("Arial", 12))
styled_button.pack(pady=10)

# ...
在本例中,我们为按钮创建了自定义样式(绿色文本和指定的字体)。
五、总结(Conclusion)
这个全面的教程涵盖了 Python 内置 GUI 库 Tkinter 的基础和高级功能。从创建一个简单的“Hello, Tkinter!”应用程序来探索菜单、框架和对话框等高级概念,现在你对构建交互式和用户友好的应用程序已经有一个扎实的基础。
记住,实践是掌握 GUI 开发的关键。尝试不同的小部件、布局和样式,为您的 Python 应用程序创建完美的界面。Tkinter 的文档是进一步探索和微调的优秀资源。Happy coding!


