在Vue.js中有一种使用event emitters通过父组件在两个子组件之间进行通信的方法。在子组件中设置事件并在父组件中设置侦听器时,响应式将通过父组件向下传递到嵌套组件。
虽然这是一个有价值的解决方案,但随着项目的发展,它可能会变得笨拙。事件总线是一个 Vue.js 实例,它可以在一个组件中发出事件,然后直接侦听并响应另一个组件中发出的事件——无需父组件的帮助。事件总线比发射器更高效,因为它需要更少的代码来运行。
在本教程中,我们将在 Vue.js 项目中创建一个事件总线,以促进两个组件之间通过私有通道进行通信。这通常称为发布-订阅方法。
先决条件
这篇文章适合所有阶段的开发人员,包括初学者。在阅读本文之前,您应该已经具备以下几点:
- 已安装版本 14.18+ 及更高版本的Node.js。您可以通过在终端/命令提示符下运行以下命令来验证您是否具有此版本:
node -v - 安装了 npm 版本 6.x 及更高版本。在终端中使用以下命令验证安装的版本:
npm -v - Visual Studio Code Editor 或类似的代码编辑器
- 运行以下命令来搭建 Vite 和 Vue 项目的基架:
# npm 6.x
npm create vite@latest event-bus-tutorial --template vue

# npm 7+, extra double-dash is needed:
npm create vite@latest event-bus-tutorial -- --template vue- 导航到 event-bus-tutorial 目录并使用 npm 安装所需的依赖项:
cd event-bus-tutorial
npm install
在 Vue 2 中使用事件总线模式
在 Vue 2.x 中,Vue 实例可用于触发通过事件发射器 API($on、$off 和$once) 强制附加的处理程序。
为了使用事件总线模式,你所要做的就是创建一个 Vue 构造函数的新实例,将该实例分配给一个名为 eventBus 的常量变量,然后将其导出。这个实例充当事件总线,允许 Vue 应用程序中的不同组件相互通信:
// eventBus.js
const eventBus = new Vue()
export default eventBus
导入 eventBus 实例并在要接收事件的组件中,添加事件侦听器:
// ChildComponent.vue
import eventBus from './eventBus'

export default {
  mounted() {
    // adding eventBus listener
    eventBus.$on('custom-event', () => {
      console.log('Custom event triggered!')
    })
  },
  beforeDestroy() {
    // removing eventBus listener
    eventBus.$off('custom-event')
  }
}导入eventBus实例并在要发送事件的组件中,添加事件发射器:
// ParentComponent.vue
import eventBus from './eventBus'

export default {
  methods: {
    sendCustomEvent() {
      // sending the event
      eventBus.$emit('custom-event')
    }
  }
}
Vue 3 中的事件总线入门
在 Vue 3 中, $on 、 $off 和 $once 方法已从 Vue 实例中完全删除。因此,为了使用事件总线模式,必须安装外部事件发射器和侦听器包,例如 mitt。
使用以下命令安装 mitt 包并开始提供应用程序:
npm install --save mitt
npm run dev
main.js 打开位于目录 src 中的文件,并修改其中的代码,如下所示:
import { createApp } from 'vue'
import mitt from 'mitt'
import App from './App.vue'

const emitter = mitt()
const app = createApp(App)

app.config.globalProperties.emitter = emitter
app.mount('#app')
这段代码通过创建一个发射器实例,使其通过 Vue 应用程序实例全局访问,并将应用程序挂载到 DOM 中,将 mitt 事件发射器库与 Vue 3 应用程序集成。这允许组件使用发射器发出和侦听事件,而无需直接导入。
创建我们的子组件
在我们的演示中,我们将创建两个子组件,它们需要在不使用父组件作为中介的情况下相互通信。首先,在 components 目录中创建一个名为Child1.vue的新文件,并将以下代码块粘贴到其中:
<template>
  <div>
    <button>Increment</button>
  </div>
</template>

<script >
export default {
  name: "Child1",
  data: () => ({
    counter: 0,
  }),
  methods: {},
};
</script>

<style scoped>
button {
  margin: 4rem 0 0;
  padding: 1rem;
  background-color: #0d6efd;
  color: white;
  border-radius: 1rem;
  font-size: 2rem;
}
</style>
总体而言,此代码呈现一个 <div> 包含样式的 <button>。该组件还具有内部数据属性counter 设置为0和空methods属性。
在components目录中创建一个名为Child2.vue的新文件,并在其中粘贴以下代码块:
<template>
  <div>
    <h1>{{ counter }}</h1>
  </div>
</template>

<script>
export default {
  name: "Child2",
  data: () => ({
    counter: 0,
  }),
};
</script>

<style scoped>
h1 {
  margin: 5rem 0 0;
  font-size: 10.5rem;
}
</style>
这个 Vue 组件渲染一个 <div> 包含样式标题 <h1> 的组件。该 counter 值动态显示在标题中。
现在,转到您的App.vue文件并将其整个代码替换为以下内容:
<template>
  <div id="app">
    <Child2 />
    <Child1 />
  </div>
</template>
<script>
import Child1 from "./components/Child1.vue";
import Child2 from "./components/Child2.vue";
export default {
  name: "app",
  components: {
    Child1,
    Child2,
  },
};
</script>
<style>
#app {
  font-family: "Avenir", Helvetica, Arial, sans-serif;
  -webkit-font-smoothing: antialiased;
  -moz-osx-font-smoothing: grayscale;
  text-align: center;
  color: #2c3e50;
  margin-top: 5rem;
}
</style>
在 App.vue 组件内部,代码导入并呈现样式化的父 div 中的 Child1和Child2 组件。
设置事件
现在,两个组件已准备就绪,您可以在组件中侦听 Child2 事件时,通过在 Child1 组件中发出来设置事件。打开文件 Child1.vue 并将以下代码块复制到其中:
<template>
  <div>
    <button v-on:click="sendEvent">Increment</button>
  </div>
</template>

<script >
export default {
  name: "Child1",
  data: () => ({
    counter: 0,
  }),
  methods: {
    sendEvent() {
      this.counter += 1;
      this.emitter.emit("increment", { msg: this.counter });
    },
  },
};
</script>

<style scoped>
button {
  margin: 4rem 0 0;
  padding: 1rem;
  background-color: #0d6efd;
  color: white;
  border-radius: 1rem;
  font-size: 2rem;
}
</style>在这里,onclick事件侦听器被添加到 button 元素中。触发此事件时,将调用名为 sendEvent() 的方法。
该方法 sendEvent() 将计数器值递增 1,并使用全局事件发射器向任何父组件或同级组件发出具有更新 counter 值的事件 increment 。
监听和响应事件
设置事件后,我们需要让第二个组件侦听并响应事件。打开文件 Child2.vue 并复制到以下代码块中:
<template>
  <div>
    <h1>{{ counter }}</h1>
  </div>
</template>

<script>
export default {
  name: "Child2",
  data: () => ({
    counter: 0,
  }),
  mounted() {
    this.emitter.on("increment", (data) => {
      this.counter = data.msg;
    });
  },
};
</script>

<style scoped>
h1 {
  margin: 5rem 0 0;
  font-size: 10.5rem;
}
</style>该代码使用mounted生命周期挂钩在应用程序挂载到 DOM 上时初始化侦听过程。
该emitter.on语句现在正在侦听 increment 事件,向下传递data参数,并将其设置为新计数器:

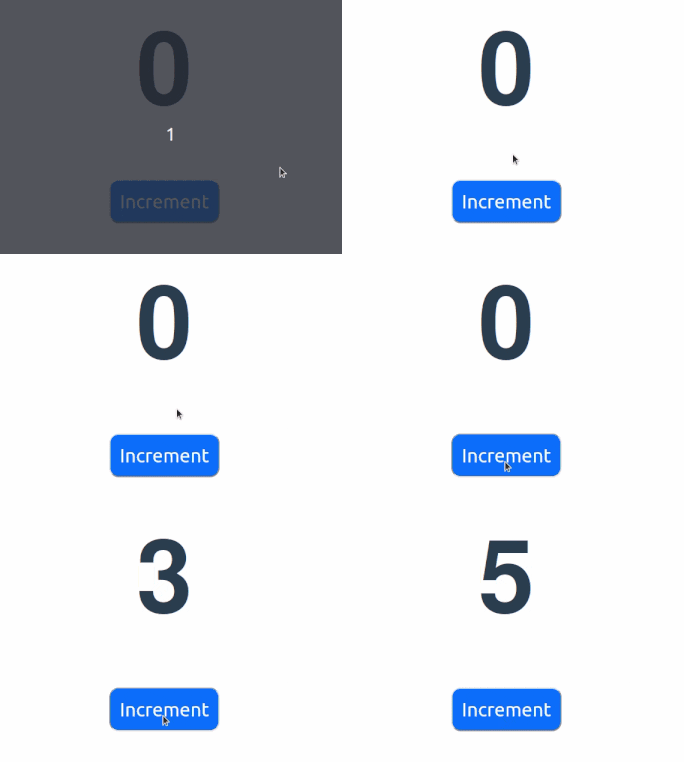
单击组件上的“Increment”按钮时, increment 事件将与更新 counter 的值一起发送到 Child2和 Child1 组件。
Vue.js中事件总线的当前状态
在大多数情况下,不建议使用全局事件总线来促进组件之间的通信。虽然它最初似乎是最简单的解决方案,但随着时间的推移,它经常导致重大的维护挑战。
根据具体情况,Vue 开发团队推荐了几种替代方法,而不是依赖事件总线:
- 优先使用 props 和事件作为父组件和子组件之间通信的主要方式。如有必要,兄弟姐妹可以通过其共同的父母进行交流
- 使用provide/inject允许组件及其插槽内容之间的通信。这对于始终一起使用的紧密耦合组件特别有用
- provide/inject还可以促进组件层次结构中相距甚远的组件之间的通信。它可以帮助消除对props传递过深的需求,其中props通过多个级别的组件向下传递,而这些组件本身不需要这些props本身。
- 为避免props传递过深,请考虑重构代码库以利用slot。如果中间组件不需要某些props,则可能表明存在责任分离问题。在该组件中引入插槽使父组件能够直接提供内容,从而允许传递 props 而不涉及中间组件
- 像 Pinia 这样的全局状态管理库可用于跨组件管理全局状态。这些库提供了一种集中的状态管理方法,允许组件访问和修改共享状态,而无需显式传递 prop
总结
这是对 Vue.js 中事件总线的介绍。事件总线充当组件之间易于实现的独立通信,无需通过中央组件或父组件。
虽然事件总线最初似乎是组件间通信的便捷方法,但建议探索替代选项,例如provide/inject或全局状态管理。这些替代方案为促进组件之间的通信提供了更强大且可维护的解决方案。


