环境:SpringBoot2.3.9.RELEASE + SpringBootAdmin2.3.1
说明:如果使用SpringBootAdmin2.4.*版本那么SpringBoot的版本也必须是2.4.*否则启动报错。
Spring Boot Admin(SBA)是一个管理和监视SpringBoot应用程序的社区项目。通过Spring Boot Admin Client(通过HTTP)注册我们的应用程序到Admin Server中,或者使用Spring Cloud®服务发现(例如Eureka、Consul)。
★ 配置Spring Boot Admin服务端
- 添加依赖
<dependencies>
  <dependency>
    <groupId>org.springframework.boot</groupId>
    <artifactId>spring-boot-starter-web</artifactId>
  </dependency>
  <dependency>
    <groupId>de.codecentric</groupId>
    <artifactId>spring-boot-admin-starter-server</artifactId>
    <version>2.3.1</version>
  </dependency>
</dependencies>- 启动类添加注解
启动类添加@EnableAdminServer注解
@SpringBootApplication
@EnableAdminServer
public class SpringBootAdminApplication {


  public static void main(String[] args) {
    SpringApplication.run(SpringBootAdminApplication.class, args);
  }


}- 应用配置文件
server:
  port: 8080
---
spring:
  application:
    name: admin-server
---
spring:
  boot:
    admin:
      context-path: /sba
非常简单,启动服务直接访问:http://localhost:8080/sba
 图片
图片
空空如也,现在我们还没有客户端注册上来,接下来写个客户端。
★ 客户端注册
- 添加依赖
<dependencies>
  <dependency>
    <groupId>org.springframework.boot</groupId>
    <artifactId>spring-boot-starter-web</artifactId>
  </dependency>
  <dependency>
    <groupId>de.codecentric</groupId>
    <artifactId>spring-boot-admin-starter-client</artifactId>
    <version>2.3.1</version>
  </dependency>
</dependencies>- 安全配置
放行所有的请求
@Configuration
public class SecurityPermitAllConfig extends WebSecurityConfigurerAdapter {

    @Override
    protected void configure(HttpSecurity http) throws Exception {
        http.authorizeRequests().anyRequest().permitAll()
            .and().csrf().disable();
    }
}- 应用配置文件
server:
  port: 8081
---
spring:
  application:
    name: admin-client
---
spring:
  boot:
    admin:
      client:
        url:
        - http://localhost:8080/sba
启动客户端(确保服务端已经启动)
 图片
图片
客户端已经注册上来了,但是这里显示的地址是主机名,修改配置显示ip地址
- 显示客户端IP
spring:
  boot:
    admin:
      client:
        url:
        - http://localhost:8080
        instance:
          prefer-ip: true
图片
图片
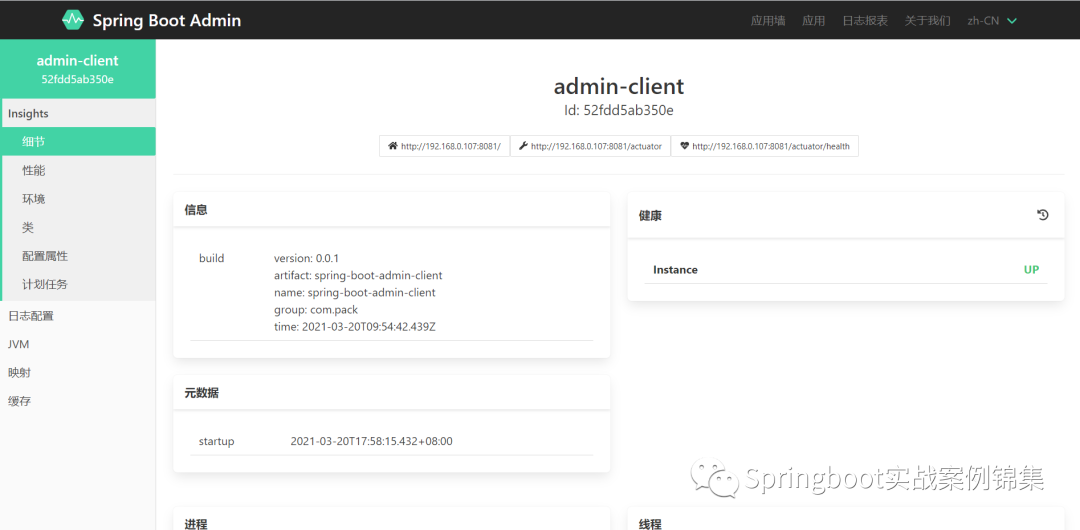
点击实例进入查看实例的详细信息
 图片
图片
- 查看日志
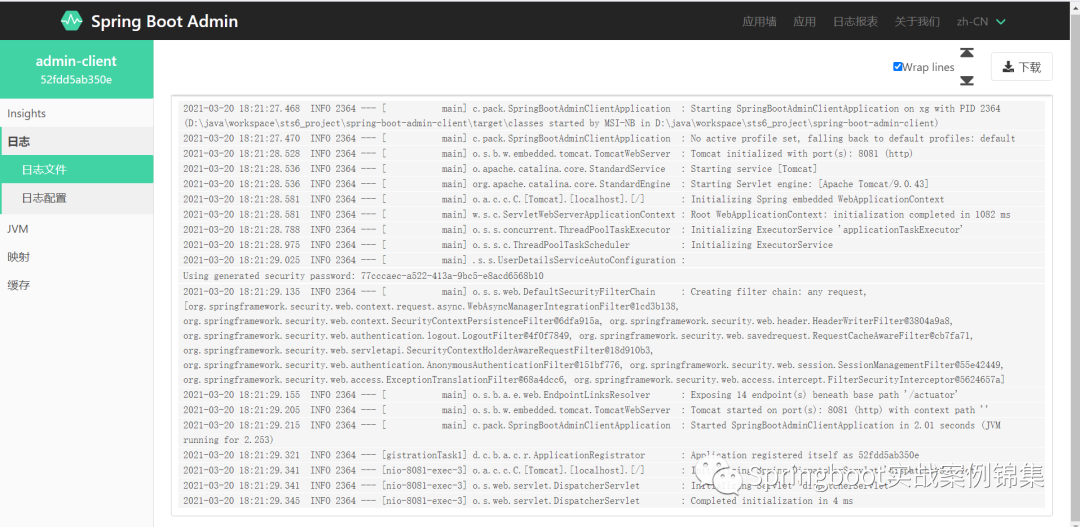
应用中配置日志功能,在应用配置文件中配置logging.file.path or logging.file.name两个只能配置一个
logging:
  file:
    path: d:/logs
  pattern:
    file: '%clr(%d{yyyy-MM-dd HH:mm:ss.SSS}){faint} %clr(%5p) %clr(${PID}){magenta} %clr(---){faint} %clr([%15.15t]){faint} %clr(%-40.40logger{39}){cyan} %clr(:){faint} %m%n%wEx'
这样配置完后重启,在实例的详细页面中就能查看日志信息了
 图片
图片
- 保护Server端,添加登录功能
加入依赖
<dependency>
  <groupId>org.springframework.boot</groupId>
  <artifactId>spring-boot-starter-security</artifactId>
</dependency>
安全配置
@Configuration(proxyBeanMethods = false)
public class SecurityConfig extends WebSecurityConfigurerAdapter {


  private final AdminServerProperties adminServer;


  private final SecurityProperties security;


  public SecurityConfig(AdminServerProperties adminServer, SecurityProperties security) {
    this.adminServer = adminServer;
    this.security = security;
  }


  @Override
  protected void configure(HttpSecurity http) throws Exception {
    SavedRequestAwareAuthenticationSuccessHandler successHandler = new SavedRequestAwareAuthenticationSuccessHandler();
    successHandler.setTargetUrlParameter("redirectTo");
    successHandler.setDefaultTargetUrl(this.adminServer.path("/"));


    http.authorizeRequests((authorizeRequests) -> authorizeRequests.antMatchers(this.adminServer.path("/assets/**"))
        .permitAll().antMatchers(this.adminServer.path("/actuator/info")).permitAll()
        .antMatchers(this.adminServer.path("/actuator/health")).permitAll()
        .antMatchers(this.adminServer.path("/login")).permitAll().anyRequest().authenticated())
        .formLogin((formLogin) -> formLogin.loginPage(this.adminServer.path("/login"))
            .successHandler(successHandler).and())
        .logout((logout) -> logout.logoutUrl(this.adminServer.path("/logout")))
        .httpBasic(Customizer.withDefaults())
        .csrf((csrf) -> csrf.csrfTokenRepository(CookieCsrfTokenRepository.withHttpOnlyFalse())
            .ignoringRequestMatchers(
                new AntPathRequestMatcher(this.adminServer.path("/instances"),
                    HttpMethod.POST.toString()),
                new AntPathRequestMatcher(this.adminServer.path("/instances/*"),
                    HttpMethod.DELETE.toString()),
                new AntPathRequestMatcher(this.adminServer.path("/actuator/**"))))
        .rememberMe((rememberMe) -> rememberMe.key(UUID.randomUUID().toString()).tokenValiditySeconds(1209600));
  }


  @Override
  protected void configure(AuthenticationManagerBuilder auth) throws Exception {
    auth.inMemoryAuthentication().withUser(security.getUser().getName())
        .password("{noop}" + security.getUser().getPassword()).roles("USER");
  }


}
应用配置文件
spring:
  boot:
    admin:
      context-path: /sba
  security:
    user:
      name: admin
      password: admin
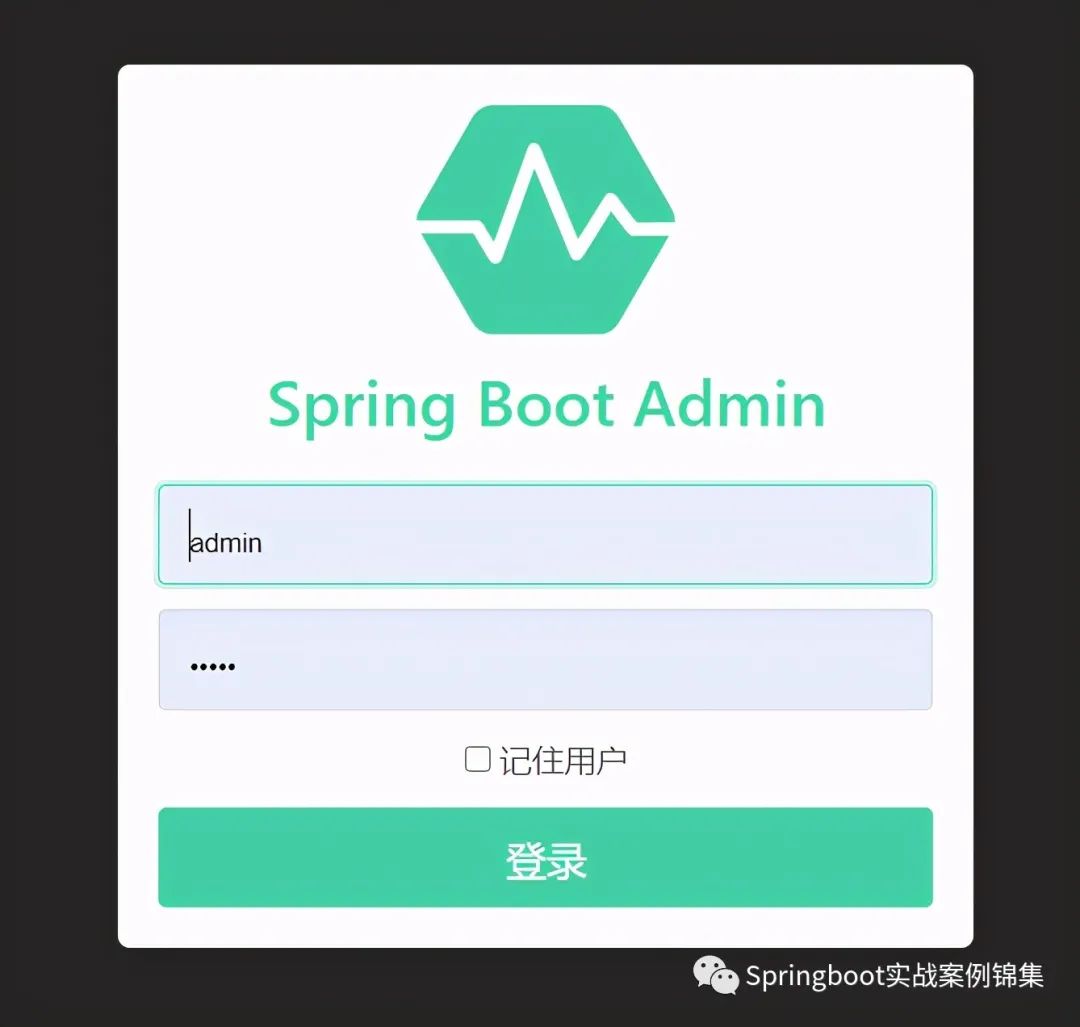
配置用户和密码
再次启动服务
 图片
图片
再次启动客户端,有如下错误
 图片
图片
修改客户端配置,需要配置admin server的认证信息
spring:
  boot:
    admin:
      client:
        username: admin
        password: admin
        url:
        - http://localhost:8080/sba
        instance:
          prefer-ip: true
添加spring.boot.admin.client.username和spring.boot.admin.client.password用户名密码
再次启动注册成功
 图片
图片
admin server是通过actuator来实时监控系统的,那如果客户端的设置了认证信息呢?会发生什么情况?
- 保护Client端认证信息
客户端加入security
<dependency>
  <groupId>org.springframework.boot</groupId>
  <artifactId>spring-boot-starter-security</artifactId>
</dependency>
配置认证信息
spring:
  security:
    user:
      name: ak
      password: 123456
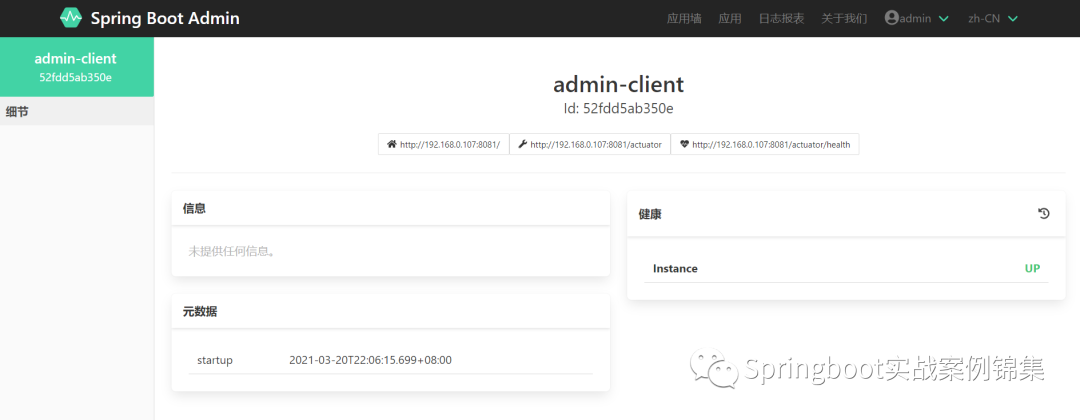
启动客户端
 图片
图片
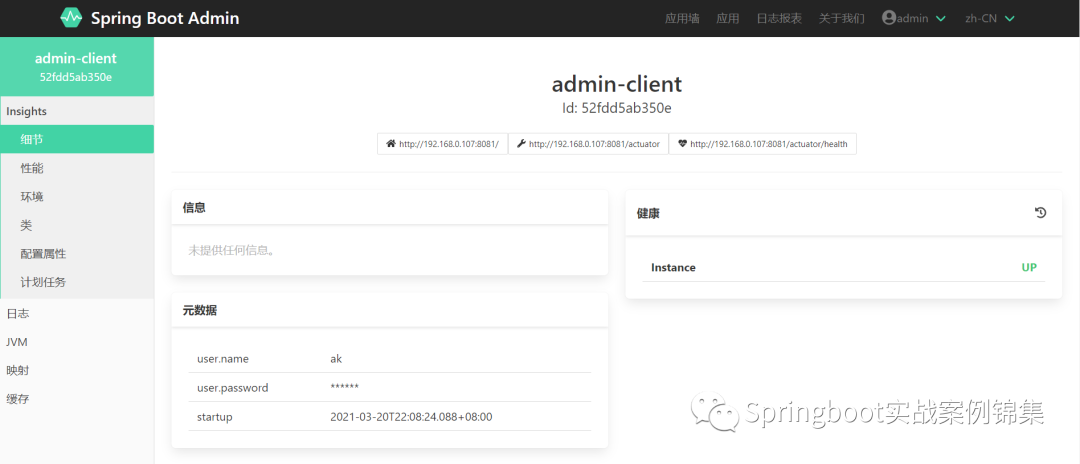
客户端是注册上来了,但是信息很少。修改客户端配置信息
spring:
  boot:
    admin:
      client:
        username: admin
        password: admin
        url:
        - http://localhost:8080/sba
        instance:
          prefer-ip: true
          metadata:
            user.name: ${spring.security.user.name}
            user.password: ${spring.security.user.password}
---
spring:
  security:
    user:
      name: ak
      password: 123456
注册的时候配置元信息
再次启动客户端
 图片
图片
现在完全正常了。
- 动态修改日志级别
定义一个接口,输出参数信息
@RestController
@RequestMapping("/demo")
public class DemoController {

  private static Logger logger = LoggerFactory.getLogger(DemoController.class) ;

  @GetMapping("/{id}")
  public Object index(@PathVariable("id") String id) {
    logger.debug("DEBUG接收到参数: {}", id) ;
    logger.info("INFO接收到参数:{}", id) ;
    return id ;
  }

}
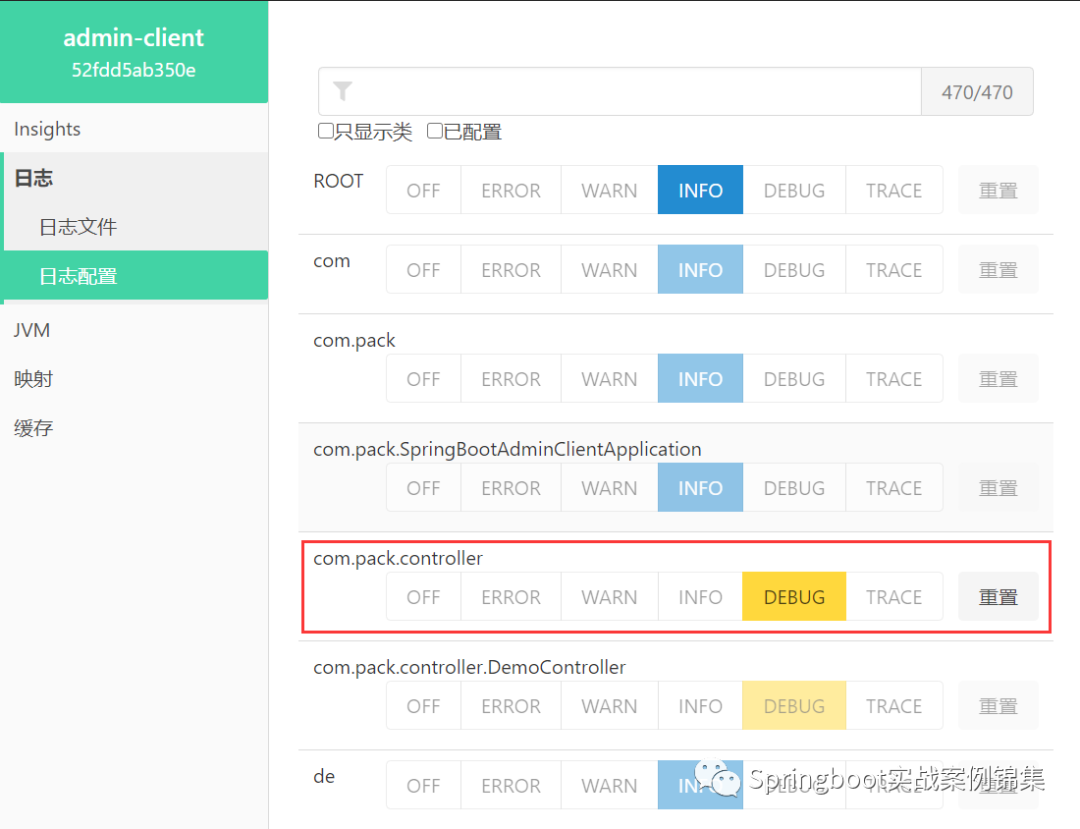
配置文件中加入日志级别
logging:
  level:
    '[com.pack.controller]': debug
监控端查看日志配置
 图片
图片
请求接口查看控制台输出

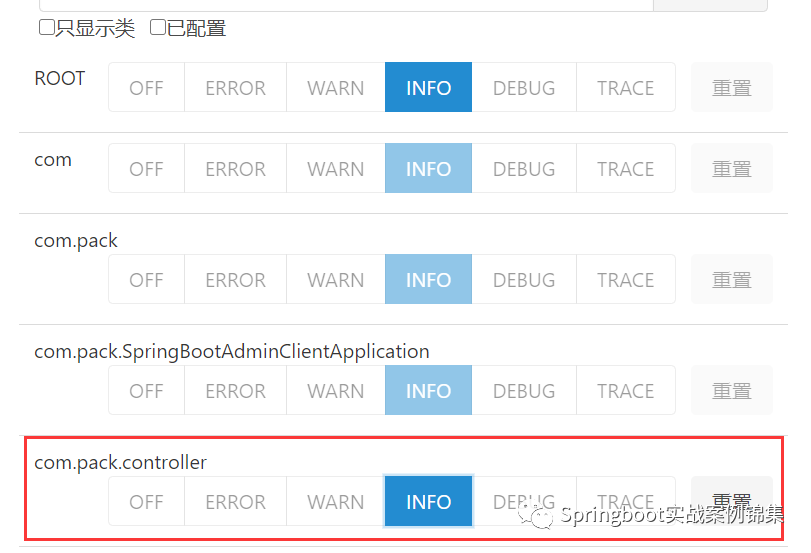
info, debug都输出了,通过监控端,修改日志级别
 图片
图片
再次请求,查看控制台输出
 图片
图片


