Hi3861作为AP模式(参考步骤一修改BUILD),可以使用手机连接开发板AP,可以在wifi_hotspot_demo.c文件中修改开发板AP的名称和passward。
想了解更多关于开源的内容,请访问:
51CTO 开源基础软件社区
https://ost.51cto.com
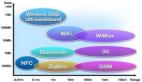
一、无线通信 1、Wifi (1)STA /AP 相关函数 主要学习Hi3861V100的STA和AP模式。常用接口函数如下:
复制 // STA 模式
1. 定义: int ConnectToHotspot (WifiDeviceConfig * apConfig );
功能: 连接WiFi
参数: WiFi相关参数比如SSID ,passward
返回值: 1 :成功
依赖: //foundation/communication/wifi_lite/interfaces/wifiservice
2. 定义: void DisconnectWithHotspot (int netId );
** 功能: 断开WiFi
参数: WiFi对应的netId
** 返回值: 无
依赖: //foundation/communication/wifi_lite/interfaces/wifiservic
// AP模式
1. 定义: int StartHotspot (const HotspotConfig * config );
功能: 开启AP
参数: AP参数包括:IP地址,默认网关,子网掩码
** 返回值: 0 :成功
依赖: //foundation/communication/wifi_lite/interfaces/wifiservice
2. 定义: void StopHotspot (void );
功能: 断开AP
参数: 无
返回值: 无
依赖: //foundation/communication/wifi_lite/interfaces/wifiservice 1. 2. 3. 4. 5. 6. 7. 8. 9. 10. 11. 12. 13. 14. 15. 16. 17. 18. 19. 20. 21. 22. 23. (2)STA\AP demo运行 第一步 ,将已有demo移动到app目录下:
将hi3861_hdu_iot_application/src/vendor/hisilicon/hispark_pegasus/demo/wifi_demo 修改applications/sample/wifi-iot/app/ wifi_demo/目录下的BUILD.gn,如果使用STA模式,将"wifi_starter.c"和"wifi_hotspot_demo.c"使用#注释,如果使用。 复制 static_library ("wifi_control" ) {
sources = [
#"wifi_connecter.c",
"wifi_starter.c" ,
#"wifi_connect_demo.c",
"wifi_hotspot_demo.c" ,
]第二步 ,修改applications/sample/wifi-iot/app/目录下的BUILD.gn,,在features字段中添加wifi_demo: wifi_control。
复制 import ("//build/lite/config/component/lite_component.gni" )
lite_component ("app" ) {
features = [ "wifi_demo:wifi_control" , ]
}第三步,步骤四:Hi3861V100作为STA模式(参考步骤2修改文件实现demo功能),使用开发板连接手机热点,可以在wifi_connect_demo.c修改热点名称和passward(注意:只支持4G网络),源码中的demo wifi名:“H”,passward:“12345678”,代码如下所示:
复制 static void WifiConnectTask (void )
{
osDelay (10 ); /* 10 = 100ms */
// setup your AP params
WifiDeviceConfig apConfig = { 0 };
strcpy (apConfig .ssid , "H" ); // 设置wifi ssid "h" Set wifi ssid
strcpy (apConfig .preSharedKey , "12345678" ); // 设置wifi passward "12345678" Set wifi password
apConfig .securityType = WIFI_SEC_TYPE_PSK ;
int netId = ConnectToHotspot (& apConfig );
int timeout = 60 ;
while (timeout -- ) {
printf ("After %d seconds I will disconnect with AP!\r\n" , timeout );
/* 100相当于1s,60后WiFi断开 */
/* 100 is equivalent to 1s, and the WiFi will be disconnected after 60 */
osDelay (100 );
}
DisconnectWithHotspot (netId );
}1. 2. 3. 4. 5. 6. 7. 8. 9. 10. 11. 12. 13. 14. 15. 16. 17. 18. 19. 编译运行之后,设置热点H,passward12345678,复位开发板,打开串口调试Monitor后,可以看到开发板已经连接到手机上。
Hi3861作为AP模式(参考步骤一修改BUILD),可以使用手机连接开发板AP,可以在wifi_hotspot_demo.c文件中修改开发板AP的名称和passward。demo AP名称:“HiSpark-AP”,passward为:“12345678”,代码如下所示。
复制 #include "wifi_starter.h"
static void WifiHotspotTask (void )
{
WifiErrorCode errCode ;
HotspotConfig config = { 0 };
// 设置AP的配置参数 set configuration parameters for AP
strcpy (config .ssid , "HiSpark-AP" ); // AP :HiSpark-AP
strcpy (config .preSharedKey , "12345678" ); // Password:12345678
config .securityType = WIFI_SEC_TYPE_PSK ;
config .band = HOTSPOT_BAND_TYPE_2G ;
config .channelNum = 7 ; /* 通道7 Channel 7 */
osDelay (10 ); /* 10 = 100ms */
printf ("starting AP ...\r\n" );
errCode = StartHotspot (& config );
printf ("StartHotspot: %d\r\n" , errCode );
int timeout = 60 ; /* 60 = 1 minute */
while (timeout -- ) {
printf ("After %d seconds Ap will turn off!\r\n" , timeout );
osDelay (100 ); /* 100 = 1s */
}
printf ("stop AP ...\r\n" );
StopHotspot ();
printf ("stop AP ...\r\n" );
osDelay (10 ); /* 10 = 100ms */
}1. 2. 3. 4. 5. 6. 7. 8. 9. 10. 11. 12. 13. 14. 15. 16. 17. 18. 19. 20. 21. 22. 23. 24. 25. 26. 27. 28. 29. 30. 31. 编译运行之后,手机上可以看到HiSpark的无线网络,点击后输入passward即可连接,串口可以看到连接信息。
2、MQTT (1)bearpi MQTT使用 mqtt目前已经移植到了OpenHarmony中,在源码vendor目录下bearpi、hihope等公司均有相应的应用demo。这里我先说如何使用bearpi的mqtt。
第一步 ,拷贝src\vendor\bearpi\bearpi_hm_nano\demo\D5_iot_mqtt文件夹到src\applications\sample\wifi-iot\app\下,该目录(D5_iot_mqtt).第二步 ,修改app目录下的BUILD.gn,让该工程参与编译,如下:复制 import ("//build/lite/config/component/lite_component.gni" )
lite_component ("app" ) {
features = [
# "startup",
# "iothardware:led_example",
# iothardware指的是工程目录
# :led_example指的是工程生成的静态库/文件
# "wifi_demo:wifi_control",
"D5_iot_mqtt:iot_mqtt" ,
]
}第三步 ,打开src\applications\sample\wifi-iot\app\D5_iot_mqtt\iot_mqtt.c文件,修改我们要连接的mqtt服务器(这里可以使用我的服务器120.55.170.12)也可以使用mqtt调试工具EMQX调试。连接的热点我们改为H passward为12345678。复制 static void MQTTDemoTask (void )
{
WifiConnect ("H" , "12345678" );
printf ("Starting ...\n" );
int rc , count = 0 ;
MQTTClient client ;第四步 ,如果使用我的服务器调试,那么对应的topic需要修改,如下:复制 printf ("MQTTSubscribe ...\n" );
// 下面这行 "substopic" 修改为 "web_fan_btn"
rc = MQTTSubscribe (& client , "web_fan_btn" , MQTT_QOS , messageArrived );
if (rc != 0 ) {
printf ("MQTTSubscribe: %d\n" , rc );
osDelay (MQTT_DELAY_2S );
}
····
·····
message .payloadlen = strlen (payload );
// 下面这行 "pubtopic" 修改为 "fan"
if ((rc = MQTTPublish (& client , "fan" , & message )) != 0 ) {
printf ("Return code from MQTT publish is %d\n" , rc );
NetworkDisconnect (& network );
MQTTDisconnect (& client );
}
osDelay (MQTT_DELAY_500_MS );
}
}
static void MQTTDemo (void )1. 2. 3. 4. 5. 6. 7. 8. 9. 10. 11. 12. 13. 14. 15. 16. 17. 18. 19. 20. 如果自己设定的mqtt服务器,需要约定好topic。编译运行后,测试如下图所示,点击风扇按钮,开发板可以接收到发送过来的数据。
(2)hihope MQTT使用 这个已经有详细教程,可参考连老师文章,https://ost.51cto.com/posts/10201。
想了解更多关于开源的内容,请访问:
51CTO 开源基础软件社区
https://ost.51cto.com