经过这篇文章文章,是不是对@Component的使用和实现原理一清二楚了呢,其实Spring中还有@Service、@Controller和@Repository等注解,他们和@Component有什么区别呢,你知道吗?
概述 想必@Component注解大家一直在使用,只要类上加上它,就可以被Spring容器管理,那大家有想过它是怎么实现的吗?本篇文章就带领到家揭秘。
注解介绍 用来标记的类是一个“组件”或者说是一个Bean,Spring会自动扫描标记@Component注解的类作为一个Spring Bean对象。
注解源码:
复制 @Target( ElementType.TYPE )
@Retention( RetentionPolicy.RUNTIME )
@Documented
@Indexed
public @interface Component {
/**
* The value may indicate a suggestion for a logical component name,
* to be turned into a Spring bean in case of an autodetected component.
* @return the suggested component name, if any (or empty String otherwise)
*/
String value( ) default "" ;
} 1. 2. 3. 4. 5. 6. 7. 8. 9. 10. 11. 12. 13. 14. 属性说明:
value: 自定义当前组件或者说bean的名称,可以不配置, 不配置的话默认为组件的首字母小写的类名。 元注解说明:
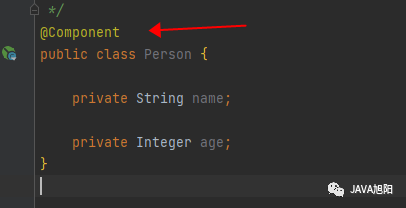
该注解只能使用在类,接口、枚举、其他注解上 该注解的生命周期是运行时JVM @Indexed元注解在spring 5.0引入,用于项目编译打包时,会在自动生成META-INF/spring.components文件,简历索引,从而提高组件扫描效率,减少应用启动时间。 注解使用 定义Person类,被@Component注解修饰
检查Person类是否在扫描路径下
获取bean验证
小结: 通过添加@Component能够将类转为Spring中的Bean对象,前提是能过够被扫描到。
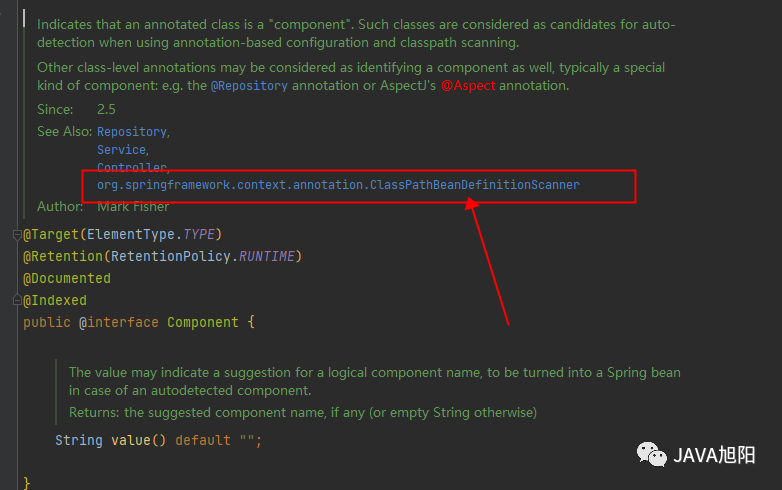
原理解析 阅读源码,我们查看@Component注解的源码,从中可以看到一个关键的类ClassPathBeanDefinitionScanner,我们可以从这个类下手,找到切入点。
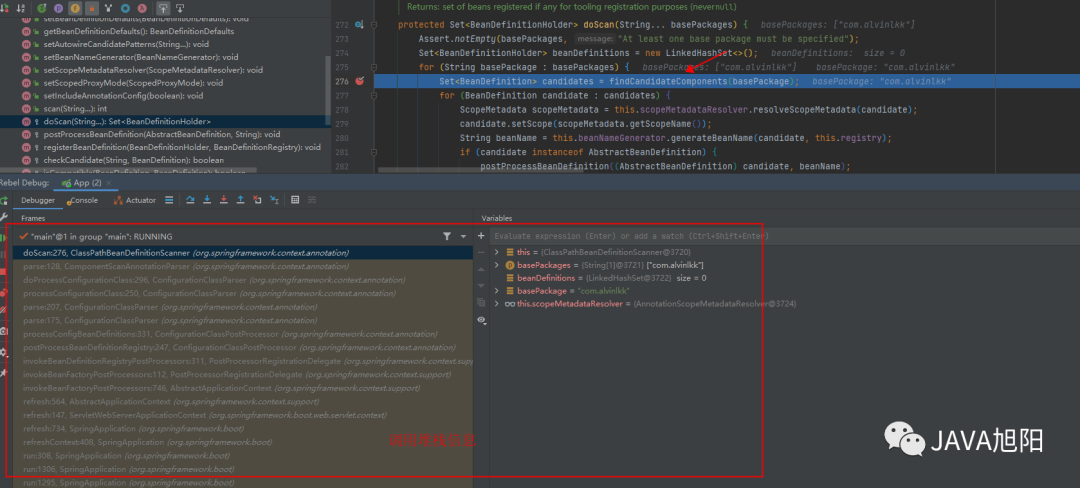
分析ClassPathBeanDefinitionScanner类,找到核心方法doscan, 打个断点,了解整个调用链路。
具体分析结果如下:
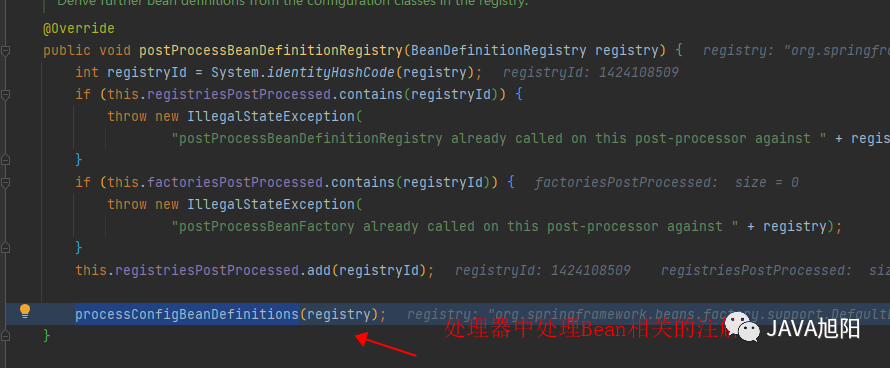
SpringBoot应用启动会注册ConfigurationClassPostProcessor这个Bean,它实现了BeanDefinitionRegistryPostProcessor接口,而这个接口是Spring提供的一个扩展点,可以往BeanDefinition Registry中添加BeanDefintion。所以,只要能够扫描到@Component注解的类,并且把它注册到BeanDefinition Registry中即可。
关键方法ConfigurationClassPostProcessor的postProcessBeanDefinitionRegistry,查找@Component的类,并进行注册。
我们直接跳到是如何查找@Component的类的,核心方法就是ClassPathBeanDefinitionScanner#doScan。 复制 protected Set < BeanDefinitionHolder> doScan( String... basePackages) {
Assert.notEmpty ( basePackages, "At least one base package must be specified" ) ;
Set < BeanDefinitionHolder> beanDefinitions = new LinkedHashSet<> ( ) ;
// 遍历多个扫描目录,如本例中的com.alvinlkk
for ( String basePackage : basePackages) {
// 核心方法查找所有符合条件的BeanDefinition, 该方法后面重点关注
Set < BeanDefinition> candidates = findCandidateComponents( basePackage) ;
// 遍历找到的BeanDefinition
for ( BeanDefinition candidate : candidates) {
ScopeMetadata scopeMetadata = this.scopeMetadataResolver .resolveScopeMetadata ( candidate) ;
candidate.setScope ( scopeMetadata.getScopeName ( ) ) ;
String beanName = this.beanNameGenerator .generateBeanName ( candidate, this.registry ) ;
if ( candidate instanceof AbstractBeanDefinition) {
postProcessBeanDefinition( ( AbstractBeanDefinition) candidate, beanName) ;
}
if ( candidate instanceof AnnotatedBeanDefinition) {
AnnotationConfigUtils.processCommonDefinitionAnnotations ( ( AnnotatedBeanDefinition) candidate) ;
}
// 验证BeanDefinition
if ( checkCandidate( beanName, candidate) ) {
BeanDefinitionHolder definitionHolder = new BeanDefinitionHolder( candidate, beanName) ;
definitionHolder =
AnnotationConfigUtils.applyScopedProxyMode ( scopeMetadata, definitionHolder, this.registry ) ;
beanDefinitions.add ( definitionHolder) ;
// 注册BeanDefinition到registry中
registerBeanDefinition( definitionHolder, this.registry ) ;
}
}
}
return beanDefinitions;
} 1. 2. 3. 4. 5. 6. 7. 8. 9. 10. 11. 12. 13. 14. 15. 16. 17. 18. 19. 20. 21. 22. 23. 24. 25. 26. 27. 28. 29. 30. 31. 重点关注ClassPathBeanDefinitionScanner#findCandidateComponents方法,找出候选的Bean Component。 复制 public Set < BeanDefinition> findCandidateComponents( String basePackage) {
// 判断组件是否加了索引,打包后默认会有索引,用于加快扫描
if ( this.componentsIndex != null && indexSupportsIncludeFilters( ) ) {
return addCandidateComponentsFromIndex( this.componentsIndex , basePackage) ;
}
// 重点查看else逻辑
else {
return scanCandidateComponents( basePackage) ;
}
} 复制 private Set < BeanDefinition> scanCandidateComponents( String basePackage) {
Set < BeanDefinition> candidates = new LinkedHashSet<> ( ) ;
try {
// 解析出需要扫描的路径,本例是classpath* : com/ alvinlkk/**/ * .class
String packageSearchPath = ResourcePatternResolver.CLASSPATH_ALL_URL_PREFIX +
resolveBasePackage( basePackage) + '/' + this.resourcePattern ;
// 根据扫描路径找到所有的Resource
Resource[ ] resources = getResourcePatternResolver( ) .getResources ( packageSearchPath) ;
boolean traceEnabled = logger.isTraceEnabled ( ) ;
boolean debugEnabled = logger.isDebugEnabled ( ) ;
// 遍历扫描路径
for ( Resource resource : resources) {
if ( traceEnabled) {
logger.trace ( "Scanning " + resource) ;
}
try {
// 解析出扫描到类的元数据信息,里面包含了注解信息
MetadataReader metadataReader = getMetadataReaderFactory( ) .getMetadataReader ( resource) ;
// 关键方法,判断是否候选组件
if ( isCandidateComponent( metadataReader) ) {
ScannedGenericBeanDefinition sbd = new ScannedGenericBeanDefinition( metadataReader) ;
sbd.setSource ( resource) ;
if ( isCandidateComponent( sbd) ) {
if ( debugEnabled) {
logger.debug ( "Identified candidate component class: " + resource) ;
}
candidates.add ( sbd) ;
}
else {
if ( debugEnabled) {
logger.debug ( "Ignored because not a concrete top-level class: " + resource) ;
}
}
}
else {
if ( traceEnabled) {
logger.trace ( "Ignored because not matching any filter: " + resource) ;
}
}
}
catch ( FileNotFoundException ex) {
if ( traceEnabled) {
logger.trace ( "Ignored non-readable " + resource + ": " + ex.getMessage ( ) ) ;
}
}
catch ( Throwable ex) {
throw new BeanDefinitionStoreException(
"Failed to read candidate component class: " + resource, ex) ;
}
}
}
catch ( IOException ex) {
throw new BeanDefinitionStoreException( "I/O failure during classpath scanning" , ex) ;
}
return candidates;
} 1. 2. 3. 4. 5. 6. 7. 8. 9. 10. 11. 12. 13. 14. 15. 16. 17. 18. 19. 20. 21. 22. 23. 24. 25. 26. 27. 28. 29. 30. 31. 32. 33. 34. 35. 36. 37. 38. 39. 40. 41. 42. 43. 44. 45. 46. 47. 48. 49. 50. 51. 52. 53. 54. 55. 56. 复制 // 判断是否候选的Bean Component
protected boolean isCandidateComponent( MetadataReader metadataReader) throws IOException {
// exclude过滤器, 在exclude过滤其中的,会直接排除掉,返回false
for ( TypeFilter tf : this.excludeFilters ) {
if ( tf.match ( metadataReader, getMetadataReaderFactory( ) ) ) {
return false ;
}
}
// include过滤器, 这里会看到有AnnotationTypeFilter, 注解类型过滤器
for ( TypeFilter tf : this.includeFilters ) {
// 调用AnnotationTypeFilter的match方法,来判断是否满足条件
if ( tf.match ( metadataReader, getMetadataReaderFactory( ) ) ) {
// 下面在进行Condition的判断,就是类上的@Conditional,这里不是重点
return isConditionMatch( metadataReader) ;
}
}
return false ;
} 1. 2. 3. 4. 5. 6. 7. 8. 9. 10. 11. 12. 13. 14. 15. 16. 17. 18.
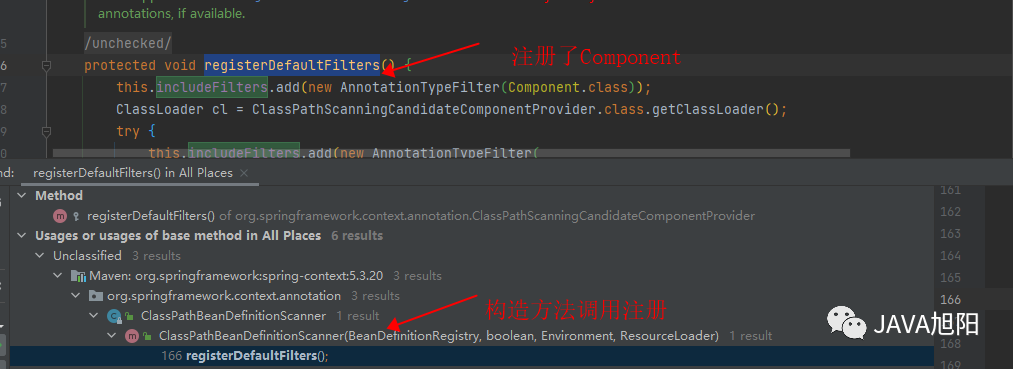
而这个AnnotationTypeFilter默认是在构造函数中注册进去的。
小结:
@Component到Spring bean容器管理过程如下:
初始化时设置了Component类型过滤器; 根据指定扫描包扫描.class文件,生成Resource对象; 解析.class文件并注解归类,生成MetadataReader对象; 使用第一步的注解过滤器过滤出有@Component类; 生成BeanDefinition对象; 把BeanDefinition注册到Spring容器。 总结 经过这篇文章文章,是不是对@Component的使用和实现原理一清二楚了呢,其实Spring中还有@Service、@Controller和@Repository等注解,他们和@Component有什么区别呢,你知道吗?
