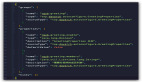
手把手教你写Spring Boot Starter

开发 前端
如果你看过 spring-kafka 的源代码,那么你会发现所有代码基本都是仿造其实现。一方面能够阅读 kafka client 在 spring 具体如何实现;同时通过编写自己的 spring starter 模块,学习 整个 starter 的实现过程。

哈喽,大家好,我是了不起。

之前写过关于 Apache Pulsar 的简单示例,用来了解如何使用 Pulsar 这个新生代的消息队列中间件,但是如果想要在项目中使用,还会欠缺很多,最明显的就是 集成复杂,如果你用过其他消息中间件,比如 Kafka、RabbitMq,只需要简单的引入 jar,就可以通过注解+配置快速集成到项目中。

开始一个 Pulsar Starter

既然已经了解了 Apache Pulsar,又认识了 spring-boot-starter,今天不妨来看下如何写一个 pulsar-spring-boot-starter 模块。

目标

写一个完整的类似 kafka-spring-boot-starter(springboot 项目已经集成到 spring-boot-starter 中),需要考虑到很多 kafka 的特性, 今天我们主要实现下面几个模板

  • 在项目中够通过引入 jar 依赖快速集成
  • 提供统一的配置入口
  • 能够快速发送消息
  • 能够基于注解实现消息的消费

定义结构

└── pulsar-starter
    ├── pulsar-spring-boot-starter
    ├── pulsar-spring-boot-autoconfigure
    ├── spring-pulsar
    ├── spring-pulsar-xx
    ├── spring-pulsar-sample
└── README.md
  • 1.
  • 2.
  • 3.
  • 4.
  • 5.
  • 6.
  • 7.

整个模块的结构如上其中pulsar-starter作为一个根模块,主要控制子模块依赖的其他 jar 的版本以及使用到的插件版本。类似于 Spring-Bom,这样我们在后续升级 时,就可以解决各个第三方 jar 的可能存在版本冲突导致的问题。

  • pulsar-spring-boot-starter

该模块作为外部项目集成的直接引用 jar,可以认为是 pulsar-spring-boot-starter 组件的入口,里面不需要写任何代码,只需要引入需要的依赖(也就是下面的子模块)即可

  • pulsar-spring-boot-autoconfigure

该模块主要定义了 spring.factories 以及 AutoConfigure、Properties。也就是自动配置的核心(配置项+Bean 配置)

  • spring-pulsar

该模块是核心模块,主要的实现都在这里

  • spring-pulsar-xx

扩展模块,可以对 spring-pulsar 做更细化的划分

  • spring-pulsar-sample

starter 的使用示例项目

实现

上面我们说到实现目标,现在看下各个模块应该包含什么内容,以及怎么实现我们的目标

  • 入口 pulsar-spring-boot-starter

上面说到 starter 主要是引入整个模块基础的依赖即可,里面不用写代码。

<dependencies>
    <dependency>
        <groupId>com.sucl</groupId>
        <artifactId>spring-pulsar</artifactId>
        <version>${project.version}</version>
    </dependency>

    <dependency>
        <groupId>com.sucl</groupId>
        <artifactId>pulsar-spring-boot-autoconfigure</artifactId>
        <version>${project.version}</version>
    </dependency>
</dependencies>
  • 1.
  • 2.
  • 3.
  • 4.
  • 5.
  • 6.
  • 7.
  • 8.
  • 9.
  • 10.
  • 11.
  • 12.
  • 13.
  • pulsar-spring-boot-autoconfigure
  1. 添加 spring-boot 基础的配置
<dependencies>
     <dependency>
         <groupId>org.springframework.boot</groupId>
         <artifactId>spring-boot</artifactId>
     </dependency>

     <dependency>
         <groupId>org.springframework.boot</groupId>
         <artifactId>spring-boot-starter-logging</artifactId>
     </dependency>

     <dependency>
         <groupId>org.springframework.boot</groupId>
         <artifactId>spring-boot-configuration-processor</artifactId>
         <optional>true</optional>
     </dependency>
</dependencies>
  • 1.
  • 2.
  • 3.
  • 4.
  • 5.
  • 6.
  • 7.
  • 8.
  • 9.
  • 10.
  • 11.
  • 12.
  • 13.
  • 14.
  • 15.
  • 16.
  • 17.
  1. 定义自动配置类PulsarAutoConfiguration:
  • 引入Properties,基于EnableConfigurationProperties与spring-boot-configuration-processor解析 Properties 生成对应spring-configuration-metadata.json文件,这样编写 application.yml 配置时就可以自动提示配置项的属性和值了。
  • 构建一些必须的 Bean,如 PulsarClient、ConsumerFactory、ConsumerFactory 等
  • Import 配置 PulsarAnnotationDrivenConfiguration,这个主要是一些额外的配置,用来支持后面的功能
@Configuration
@EnableConfigurationProperties({PulsarProperties.class})
@Import({PulsarAnnotationDrivenConfiguration.class})
public class PulsarAutoConfiguration {

    private final PulsarProperties properties;

    public PulsarAutoConfiguration(PulsarProperties properties) {
        this.properties = properties;
    }

    @Bean(destroyMethod = "close")
    public PulsarClient pulsarClient() {
        ClientBuilder clientBuilder = new ClientBuilderImpl(properties);
        return clientBuilder.build();
    }

    @Bean
    @ConditionalOnMissingBean(ConsumerFactory.class)
    public ConsumerFactory pulsarConsumerFactory() {
        return new DefaultPulsarConsumerFactory(pulsarClient(), properties.getConsumer().buildProperties());
    }

    @Bean
    @ConditionalOnMissingBean(ProducerFactory.class)
    public ProducerFactory pulsarProducerFactory() {
        return new DefaultPulsarProducerFactory(pulsarClient(), properties.getProducer().buildProperties());
    }

}
  • 1.
  • 2.
  • 3.
  • 4.
  • 5.
  • 6.
  • 7.
  • 8.
  • 9.
  • 10.
  • 11.
  • 12.
  • 13.
  • 14.
  • 15.
  • 16.
  • 17.
  • 18.
  • 19.
  • 20.
  • 21.
  • 22.
  • 23.
  • 24.
  • 25.
  • 26.
  • 27.
  • 28.
  • 29.
  • 30.
  1. 配置 spring.factory

在目录src/main/resources/META-INF下创建spring.factories,内容如下:

org.springframework.boot.autoconfigure.EnableAutoConfiguration=\
  com.sucl.pulsar.autoconfigure.PulsarAutoConfiguration
  • 1.
  • 2.
  • spring-pulsar
  1. 添加 pulsar-client 相关的依赖
<dependencies>
     <dependency>
         <groupId>org.apache.pulsar</groupId>
         <artifactId>pulsar-client</artifactId>
     </dependency>

     <dependency>
         <groupId>org.springframework.boot</groupId>
         <artifactId>spring-boot-autoconfigure</artifactId>
     </dependency>

     <dependency>
         <groupId>org.springframework</groupId>
         <artifactId>spring-messaging</artifactId>
     </dependency>
</dependencies>
  • 1.
  • 2.
  • 3.
  • 4.
  • 5.
  • 6.
  • 7.
  • 8.
  • 9.
  • 10.
  • 11.
  • 12.
  • 13.
  • 14.
  • 15.
  • 16.
  1. 定义 EnablePulsar,之前说到过,@Enable 注解主要是配合 AutoConfigure 来做功能加强,没有了自动配置,我们依然可以使用这些模块的功能。这里做了一件事,向 Spring 容器注册了两个 Bean
  • PulsarListenerAnnotationBeanProcessor 在 Spring Bean 生命周期中解析注解自定义注解 PulsarListener、PulsarHandler,
  • PulsarListenerEndpointRegistry 用来构建 Consumer 执行环境以及对 TOPIC 的监听、触发消费回调等等,可以说是最核心的 Bean
@Target({ElementType.TYPE})
@Retention(RetentionPolicy.RUNTIME)
@Import({PulsarListenerConfigurationSelector.class})
public @interface EnablePulsar {

}
  • 1.
  • 2.
  • 3.
  • 4.
  • 5.
  • 6.
  1. 定义注解,参考 RabbitMq,主要针对需要关注的类与方法,分别对应注解@PulsarListener、@PulsarHandler,通过这两个注解配合可以让我们监听到关注的 TOPIC, 当有消息产生时,触发对应的方法进行消费。
@Target({ElementType.TYPE})
@Retention(RetentionPolicy.RUNTIME)
public @interface PulsarListener {

    /**
     *
     * @return TOPIC 支持SPEL
     */
    String[] topics() default {};

    /**
     *
     * @return TAGS 支持SPEL
     */
    String[] tags() default {};
}

@Target({ElementType.METHOD})
@Retention(RetentionPolicy.RUNTIME)
public @interface PulsarHandler {

}
  • 1.
  • 2.
  • 3.
  • 4.
  • 5.
  • 6.
  • 7.
  • 8.
  • 9.
  • 10.
  • 11.
  • 12.
  • 13.
  • 14.
  • 15.
  • 16.
  • 17.
  • 18.
  • 19.
  • 20.
  • 21.
  • 22.
  1. 注解@PulsarListener 的处理流程比较复杂,这里用一张图描述,或者可以通过下面 github 的源代码查看具体实现

图片

flow

  • spring-pulsar-sample

按照下面的流程,你会发现通过简单的几行代码就能够实现消息的生产与消费,并集成到项目中去。

  1. 简单写一个 SpringBoot 项目,并添加 pulsar-spring-boot-starter
<dependencies>
    <dependency>
        <groupId>com.sucl</groupId>
        <artifactId>pulsar-spring-boot-starter</artifactId>
        <version>${project.version}</version>
    </dependency>

    <dependency>
        <groupId>org.springframework.boot</groupId>
        <artifactId>spring-boot-starter-web</artifactId>
    </dependency>
</dependencies>
  • 1.
  • 2.
  • 3.
  • 4.
  • 5.
  • 6.
  • 7.
  • 8.
  • 9.
  • 10.
  • 11.
  • 12.

2.添加配置

cycads:
  pulsar:
    service-url: pulsar://localhost:6650
  listener-topics: TOPIC_TEST
  • 1.
  • 2.
  • 3.
  • 4.

3.编写对应消费代码

@Slf4j
@Component
@PulsarListener(topics = "#{'${cycads.listener-topics}'.split(',')}")
public class PulsarDemoListener {

    @PulsarHandler
    public void onConsumer(Message message){
        log.info(">>> 接收到消息:{}", message.getPayload());
    }

}
  • 1.
  • 2.
  • 3.
  • 4.
  • 5.
  • 6.
  • 7.
  • 8.
  • 9.
  • 10.
  • 11.
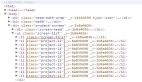
  1. 向 Pulsar Broker 发送消息进行测试
@Slf4j
@RunWith(SpringRunner.class)
@ContextConfiguration(classes = {ContextConfig.class})
@Import({PulsarAutoConfiguration.class})
public class ProducerTests {

    @Autowired
    private ProducerFactory producerFactory;

    @Test
    public void sendMessage() {
        Producer producer = producerFactory.createProducer("TOPIC_TEST");
        MessageId messageId = producer.send("this is a test message");
        log.info(">>>>>>> 消息发送完成:{}", messageId);
    }

    @Configuration
    @PropertySource(value = "classpath:application-test.properties")
    static class ContextConfig {
        //
    }
}
  • 1.
  • 2.
  • 3.
  • 4.
  • 5.
  • 6.
  • 7.
  • 8.
  • 9.
  • 10.
  • 11.
  • 12.
  • 13.
  • 14.
  • 15.
  • 16.
  • 17.
  • 18.
  • 19.
  • 20.
  • 21.
  • 22.
  1. 控制台可以看到这样的结果

2023-02-26 19:57:15.572  INFO 26520 --- [pulsar-01] c.s.p.s.listener.PulsarDemoListener : >>> 接收到消息:GenericMessage [payload=this is a test message, headers={id=f861488c-2afb-b2e7-21a1-f15e9759eec5, timestamp=1677412635571}]
  • 1.

知识点

  • Pulsar Client

基于 pulsar-client 提供的 ConfigurationData 扩展 Properties;了解 Pulsar Client 如何连接 Broker 并进行消息消费,包括同步消费、异步消费等等

  • spring.factories

实现 starter 自动配置的关键,基于 SPI 完成配置的自动加载

  • Spring Bean 生命周期

通过 Bean 生命周期相关扩展实现注解的解析与容器的启动,比如 BeanPostProcessor, BeanFactoryAware, SmartInitializingSingleton, InitializingBean, DisposableBean 等

  • Spring Messaging

基于回调与 MethodHandler 实现消息体的封装、参数解析以及方法调用;

源码示例

​https://github.com/sucls/pulsar-starter.git​

结束语

如果你看过 spring-kafka 的源代码,那么你会发现所有代码基本都是仿造其实现。一方面能够阅读 kafka client 在 spring 具体如何实现;同时通过编写自己的 spring starter 模块,学习 整个 starter 的实现过程。

责任编辑:武晓燕 来源: Java技术指北
相关推荐

2019-11-12 10:50:13

Spring BootstarterJava

2021-06-29 12:27:19

Spring BootCAS 登录

2025-02-19 08:00:00

SpringBootOllamaDeepSeek

2011-01-10 14:41:26

2011-05-03 15:59:00

黑盒打印机

2021-07-14 09:00:00

JavaFX开发应用

2018-05-16 15:46:06

Python网络爬虫PhantomJS

2018-05-16 13:50:30

Python网络爬虫Scrapy

2021-02-26 11:54:38

MyBatis 插件接口

2011-02-22 13:46:27

微软SQL.NET

2021-12-28 08:38:26

Linux 中断唤醒系统Linux 系统

2022-01-08 20:04:20

拦截系统调用

2023-04-26 12:46:43

DockerSpringKubernetes

2022-07-27 08:16:22

搜索引擎Lucene

2022-03-14 14:47:21

HarmonyOS操作系统鸿蒙

2022-12-07 08:42:35

2022-08-11 07:32:51

Starter自动装配

2018-05-22 16:28:46

Python网络爬虫URL去重

2021-06-22 10:43:03

Webpack loader plugin

2021-07-09 17:27:58

ButterKnife工具APT
点赞
收藏

51CTO技术栈公众号