想了解更多关于开源的内容,请访问:
51CTO 开源基础软件社区
https://ost.51cto.com
前言
大家好呀!由于前段时间学业较忙,断更了一段时间。现在开启续更!本文是关于web组件抽奖案例(ArkTS)的学习笔记,漫漫学习路,留下笔记巩固之余又便于温故而知新~话不多说,以下是我这次的小分享❀❀
概述
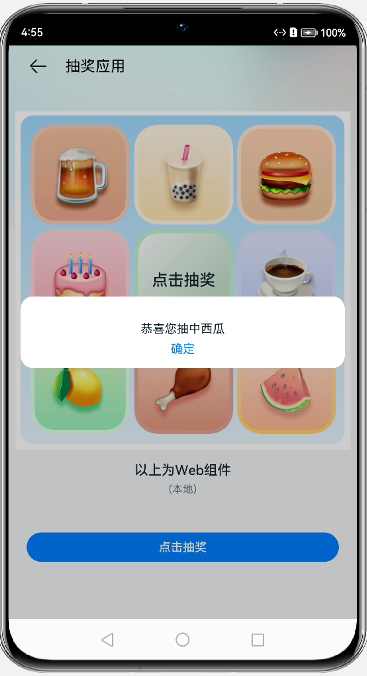
本文分享的案例是Web组件如何加载本地H5小程序。所加载的页面是一个由HTML+CSS+JavaScript实现的完整小应用。至于加载云端的H5小程序,实现步骤类似,可移步至codelabs-Web组件抽奖案例细览。
效果图如下:
正文
关键知识概念
- Web组件 :提供具有网页显示能力的Web组件。访问在线网页时需添加网络权限:ohos.permission.INTERNET.
- runJavaScript:异步执行JavaScript脚本,并通过回调方式返回脚本执行的结果。runJavaScript需要在loadUrl完成后,比如onPageEnd中调用。
runJavaScript(options: { script: string, callback?: (result: string) => void }) - onConfirm:网页调用confirm()告警时触发此回调。此案例是用于回显抽奖结果。
onConfirm(callback: (event?: { url: string; message: string; result: JsResult }) => boolean)
一、创建空项目
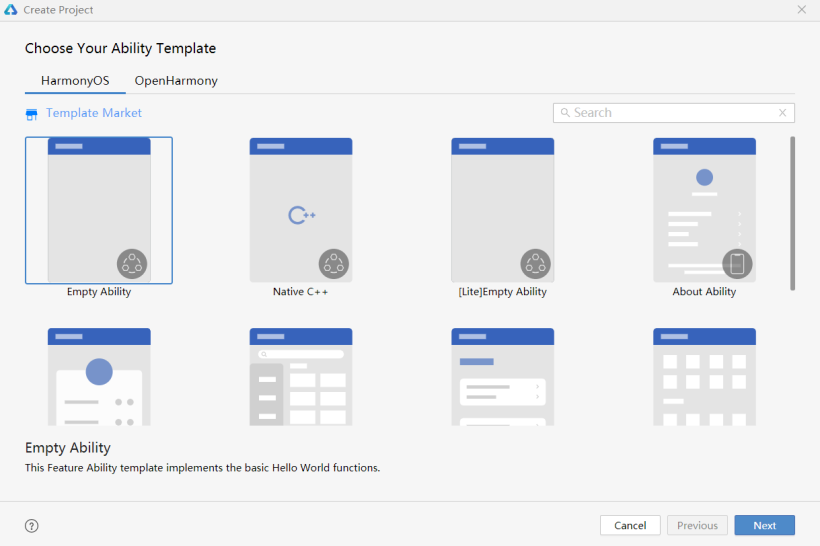
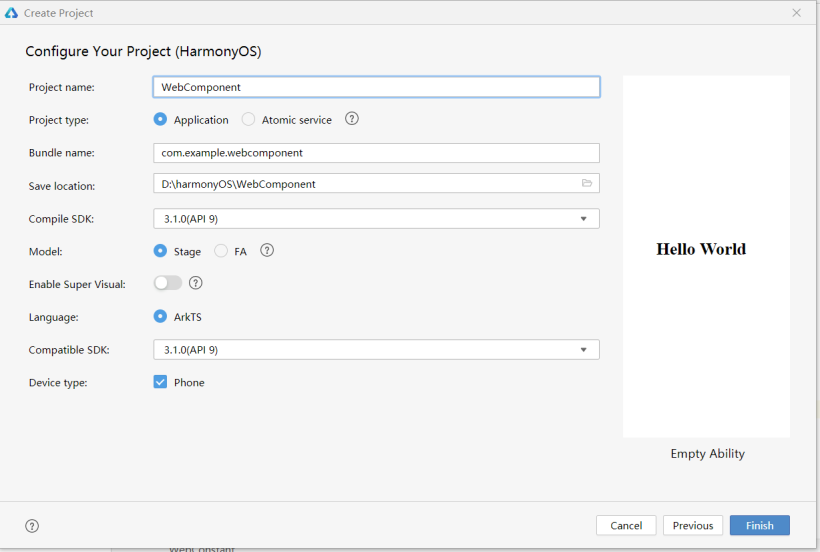
选择HarmonyOS模板,项目SDK选择为API9,选择模型为Stage模型。
如果要加载云端H5小程序的话,要记得在module.json5文件下添加网络权限:
"requestPermissions": [
      {
        "name": "ohos.permission.INTERNET"
      }
    ],
二、编写本地H5页面
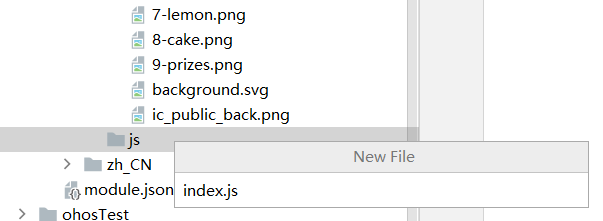
在src/main/resources/rawfile下分别创建:文件夹img用于存放抽奖展示的图片资源;文件index.html用于编写页面布局;css文件夹下再创建文件index.css,用于编写组件的样式;js文件夹下再创建文件index.js,用于编写抽奖的函数处理。
主要代码(抽奖功能实现):
// 旋转函数
function roll() {
    // 速度衰减
    speed -= 50;
    if (speed <= 10) {
        speed = 10;
    }

    // 每次调用都去掉全部active类名,即去掉选中单元格的效果
    for (let j = 0; j < allPrizesLi.length; j++) {
        allPrizesLi[j].classList.remove('active');
    }
    prizesPosition++;

    // 计算转圈次数,每至尾元素则圈数+1
    if (prizesPosition >= allPrizesLi.length - 1) {
        prizesPosition = 0;
        count++;
    }

    //为当前选中的单元格添加active类,以添加选中的效果样式
    allPrizesLi[prizesPosition].classList.add('active');
    let initSpeed = 500;
    let timer;  //定义定时器
    let totalCount = 5; // 至少转动的总圈数

    // 满足转圈数和指定位置就停止
    if (count >= totalCount && (prizesPosition + 1) == index) {
        clearTimeout(timer);
        isClick = true;
        speed = initSpeed;
        timer = setTimeout(openDialog, 1000); // 等待1s打开弹窗
    } else {
        timer = setTimeout(roll, speed); // 不满足条件时调用定时器
        // 最后一圈减速
        if (count >= totalCount - 1 || speed <= 50) {
            speed += 100;
        }
    }
}
// 抽奖开始函数
function startDraw() {
    // 防止抽奖多次触发
    if (isClick) {
        count = 0;

        // 随机产生中奖位置
        index = Math.floor(Math.random() * prizesArr.length + 1);
        roll();
        isClick = false;
    }
}

function openDialog() {
    confirm(prizesArr[prizesPosition]);
}
三、调用web组件
在pages文件下创建文件MainPage和WebPage,其中WebPage用于调用web组件,在MainPage中有用到一个自定义属性,觉得蛮有用的,记录一下:
@Extend(Button) function fancy (top: string) {
  .fontSize(16)
  .fontColor($r('app.color.start_window_background'))
  .width('86.7%')
  .height('5.1%')
  .margin({ top: top })
  .backgroundColor($r('app.color.blue'))
  .borderRadius('20')
}Navigator({ target:'pages/WebPage', type: NavigationType.Push }) {
Button($r('app.string.loadLocalH5'))
.fancy('10%')
}
.params({ path:$rawfile('index.html'), tips: $r('app.string.local') })
}通过navigator组件带参跳转至WebPage界面,使用web组件前要先创建一个web控制器,则添加以下代码。
其中,webviewController要将IDE升级到最新版本才能用,是API9+的接口,上述WebController接口在最新版本时弃用了。
webController: web_webview.WebviewController = new web_webview.WebviewController();
  @State params: object = router.getParams();

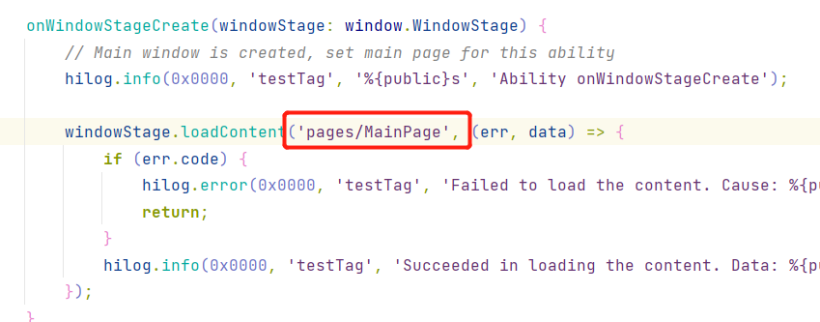
同时要注意在EntryAbility.ts文件下修改:,也要注意查看main_pages.json的配置。
WebPage中主要代码部分:
// web组件加载本地H5
          Web({ src: this.params['path'], controller: this.webController })
            .zoomAccess(false)
            .width('93.3%')
            .aspectRatio(1)
            .margin({ left: '3.3%', right: '3.3%', top:'7.1%'})
            .onConfirm((event) => {
              AlertDialog.show({
                message: '恭喜您抽中' + `${event.message}`,
                confirm: {
                  value: $r('app.string.web_alert_dialog_button_value'),
                  action: () => {
                    event.result.handleConfirm();
                  }
                },
                cancel: () => {
                  event.result.handleCancel();
                }
              });
              return true;
            })
下方的按钮,异步执行JavaScript脚本startDraw()。
Button($r('app.string.btnValue'))
            .fontSize(16)
            .fontColor($r('app.color.start_window_background'))
            .margin({ top: '10%' })
            .width('86.7%')
            .height('5.1%')
            .backgroundColor($r('app.color.blue'))
            .borderRadius('20')
            .onClick(() => {
              this.webController.runJavaScript('startDraw()');
            })
到此,然后就可以运行模拟器P50进行调试了!
文章相关附件可以点击下面的原文链接前往下载:
https://ost.51cto.com/resource/2553
https://ost.51cto.com/resource/2556
想了解更多关于开源的内容,请访问:
51CTO 开源基础软件社区
https://ost.51cto.com


