主要通过Canvas组件的drawImage方法实现图片显示。该方法需要输入9个参数,分别是图片对象,原图的X轴裁剪起点,原图的Y轴裁剪起点,裁剪的宽度,裁剪的高度,画布X轴画图的起点,画布Y轴画图的起点,画布的宽度,画布的高度。

想了解更多关于开源的内容,请访问:
51CTO 开源基础软件社区
https://ost.51cto.com
组件介绍
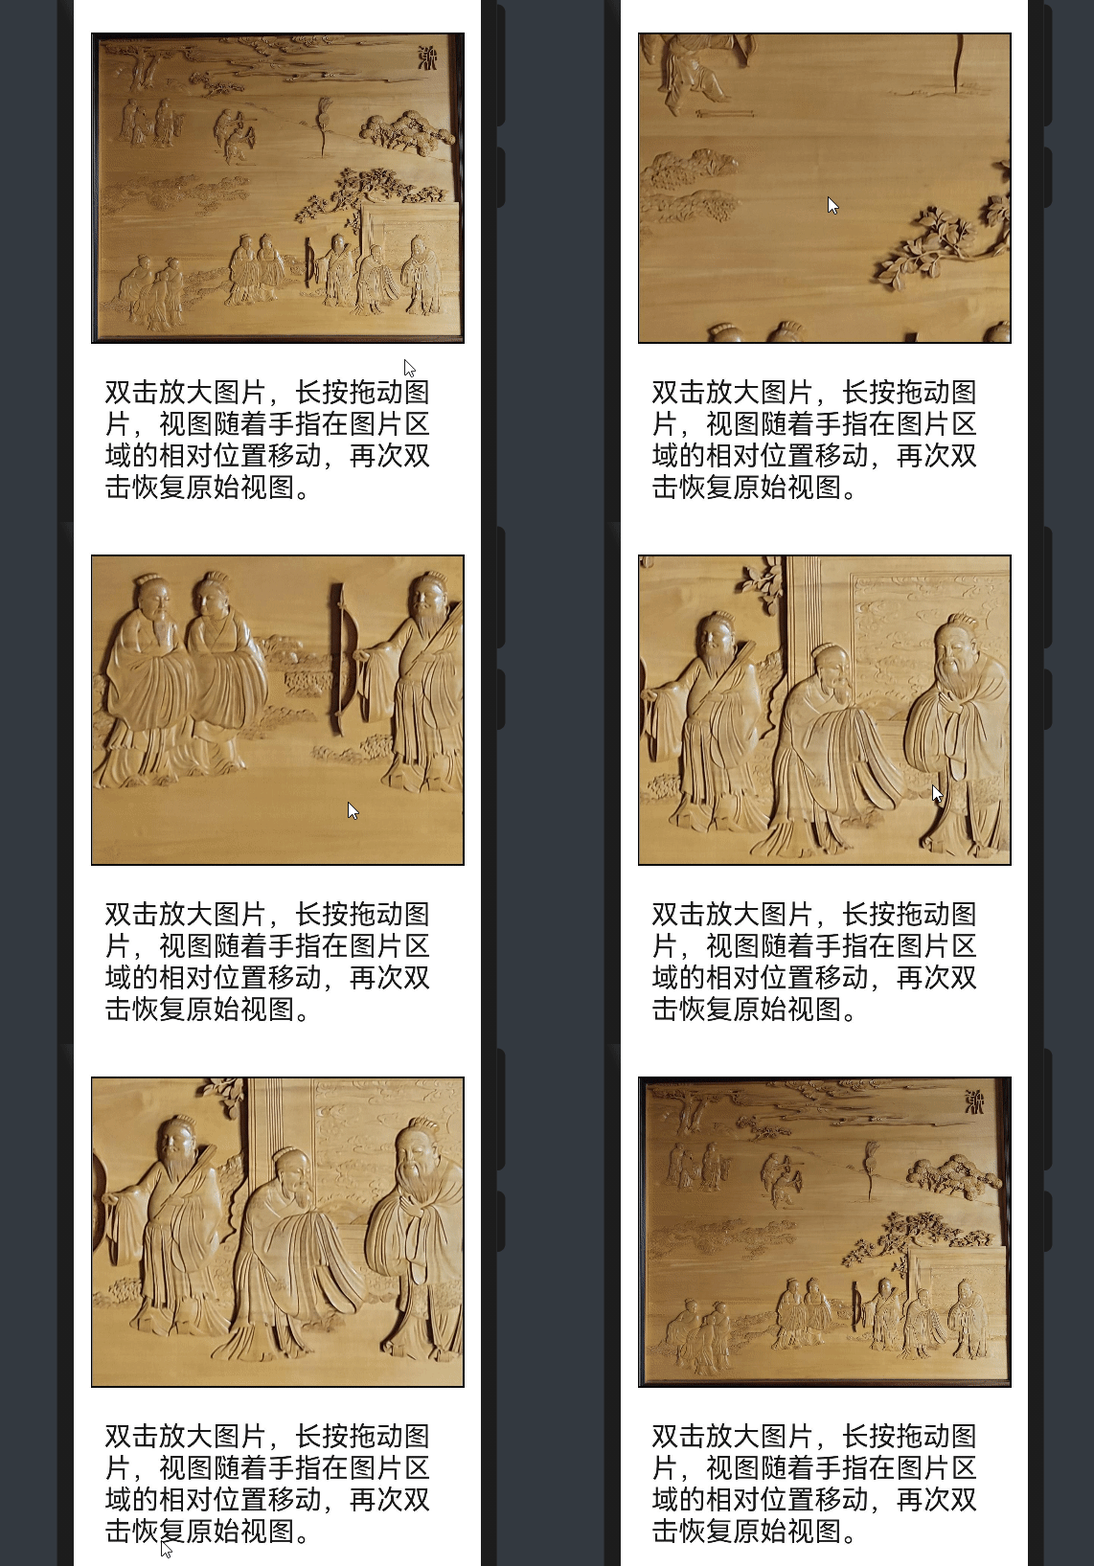
本图片组件在显示图片的基础上附带局部放大功能,在原本设定的图片区域将局部进行放大显示,在不占用其余布局空间的情况下,满足用户仔细欣赏图片细节的需要。实现效果如下:

项目结构

组件开发
页面布局
- 为组件绑定doubleclick双击事件和touchmove触屏移动事件,分别用于切换图片缩放和控制局部显示区域移动。
<div style="width: {{ imageWidth }}px; height: {{ imageHeight }}px;">
    <canvas src="{{ imageSrc }}" ref="zoom" class="canvas-border"
            @doubleclick="zoomswitch" @touchmove="getmove"></canvas>
</div>
组件属性参数设置
参数名
| 描述
| 参数类型
| 默认值
|
imageWidth
| 设置图片宽度
| Number
| 500
|
imageHeight
| 设置图片高度
| Number
| 500
|
imageSrc
| 设置图片地址
| String
| 无
|
scale
| 图片放大的比例
| Number
| 2
|
实现原理
- 主要通过canvas组件的drawImage方法实现图片显示。该方法需要输入9个参数,分别是图片对象,原图的X轴裁剪起点,原图的Y轴裁剪起点,裁剪的宽度,裁剪的高度,画布X轴画图的起点,画布Y轴画图的起点,画布的宽度,画布的高度。
ctx0.drawImage(changeview,
        this.initwidth / 2 - this.initwidth / this.scale / 2,
        this.initheight / 2 - this.initheight / this.scale / 2,
        changeview.width / this.scale,
        changeview.height / this.scale,
        0, 0,
        this.imageWidth, this.imageHeight);

- 给canvas组件绑定doubleclick双击事件,变化布尔型变量isZoom的值,用于切换局部放大模式和原始视图。
zoomswitch() {
        this.isZoom = !this.isZoom;
        let changeview = new Image();
        changeview.src = this.img.src;
        if (true == this.isZoom) {
            console.log("拉近镜头");
            changeview.onload = () => {
                ctx0.drawImage(changeview,
                    this.initwidth / 2 - this.initwidth / this.scale / 2,
                    this.initheight / 2 - this.initheight / this.scale / 2,
                    changeview.width / this.scale,
                    changeview.height / this.scale,
                    0, 0,
                    this.imageWidth, this.imageHeight);
            };
        }
        else {
            console.log("恢复全局视角");
            changeview.onload = () => {
                ctx0.drawImage(changeview,
                    0, 0,
                this.initwidth, this.initheight,
                    0, 0,
                this.imageWidth, this.imageHeight);
            };
        }
    },
- 1.
- 2.
- 3.
- 4.
- 5.
- 6.
- 7.
- 8.
- 9.
- 10.
- 11.
- 12.
- 13.
- 14.
- 15.
- 16.
- 17.
- 18.
- 19.
- 20.
- 21.
- 22.
- 23.
- 24.
- 25.
- 26.
- 27.
- 给canvas组件绑定touchmove事件,获取touchmove事件的触点坐标,经过计算得出drawImage方法中的几个关键参数值,并添加判断条件,当触点坐标过于接近边缘时设置极限值。
getmove(event) {
        if (false == this.isZoom) {
            return;
        }
        this.points.x = (event.touches[0].localX - this.imageWidth / this.scale / 2) / this.imageWidth * this.initwidth;
        this.points.y = (event.touches[0].localY - this.imageHeight / this.scale / 2) / this.imageHeight * this.initheight;
        if (((this.imageWidth / this.scale / 2) > event.touches[0].localX)
        || ((this.imageWidth - this.imageWidth / this.scale / 2) < event.touches[0].localX)) {
            if ((this.imageWidth / this.scale / 2) > event.touches[0].localX) {
                this.points.x = 0;
            }
            else {
                this.points.x = this.initwidth - this.initwidth / this.scale;
            }
        }
        if (((this.imageHeight / this.scale / 2) > event.touches[0].localY)
        || ((this.imageHeight - this.imageHeight / this.scale / 2) < event.touches[0].localY)) {
            if ((this.imageHeight / this.scale / 2) > event.touches[0].localY) {
                this.points.y = 0;
            }
            else {
                this.points.y = this.initheight - this.initheight / this.scale;
            }
        }
        let newview = new Image();
        newview.src = this.img.src;
        newview.onload = () => {
            ctx0.drawImage(newview,
            this.points.x, this.points.y,
                newview.width / this.scale, newview.height / this.scale,
                0, 0,
            this.imageWidth, this.imageHeight);
        };
    },
- 1.
- 2.
- 3.
- 4.
- 5.
- 6.
- 7.
- 8.
- 9.
- 10.
- 11.
- 12.
- 13.
- 14.
- 15.
- 16.
- 17.
- 18.
- 19.
- 20.
- 21.
- 22.
- 23.
- 24.
- 25.
- 26.
- 27.
- 28.
- 29.
- 30.
- 31.
- 32.
- 33.
- 34.
组件引用
<element name="zoomimage" src="common/zoomimage/zoomimage.hml"></element>
<zoomimage image-width="660" image-height="550" image-src="common/images/mural.jpg" scale="3"></zoomimage>
结语
假如大家有自定义组件的创意,可以自己试着实现一下,或是在其他的项目中学习下别人是如何设计开发一个组件的,从一些简单的组件入手对新手来说是很不错的选择。
项目仓库链接 https://gitee.com/zhan-weisong/zoom-image。
文章相关附件可以点击下面的原文链接前往下载:
https://ost.51cto.com/resource/2355。
想了解更多关于开源的内容,请访问:
51CTO 开源基础软件社区
https://ost.51cto.com。


