前言
在本期的内容中,我们会为此游戏添加计时功能,同时接入数据库保存通关记录。完成这些后,数独游戏项目便也竣工了。
正文
创建退出按钮与秒表
首先,我们需要在项目内导入图片:打开:entry\src\main\resources\base\media,将如下图片放置在media目录下(可以以复制粘贴的方式放置):

放置完成后,我们打开GameAbilitySlice,并在onstart()函数的合适位置放置如下代码:
//退出的弹窗
        CommonDialog Dialog_exit=new CommonDialog(getContext());
        Dialog_exit.setSize(800,400);
        Dialog_exit.setTitleText("  提示");
        Dialog_exit.setContentText("          游戏未完成,确认退出?");
        Dialog_exit.setButton(IDialog.BUTTON1,"确定",(iDialog, i) ->Dialog_exit.destroy() );
        Dialog_exit.setButton(IDialog.BUTTON2,"取消",(iDialog, i) ->Dialog_exit.hide() );
        Dialog_exit.setDestroyedListener(new CommonDialog.DestroyedListener() {
            @Override
            public void onDestroy() {  //组件销毁监听器
                terminate();  //当弹窗被销毁后,GameAbilitySlice也会被销毁,以实现页面退出的功能
            }
        });
//创建Image对象,并设置点击监听器
        Image exit=new Image(this);
        exit.setPixelMap(ResourceTable.Media_exit);
        exit.setScaleMode(Image.ScaleMode.CLIP_CENTER);
        exit.setComponentSize(130,130);
        exit.setPosition(50,25);
        exit.setClickedListener(new Component.ClickedListener() {
            @Override
            public void onClick(Component component) {
                    Dialog_exit.show();  //点击Image组件后,Dialog_exit会弹出
            }
        });
        layout1.addComponent(exit);
这里我们是先创建Dialog对象,再创建Image对象的,原因是:只有Dialog对象先生成,Image的点击监听器内才能调用已创建的Dialog对象的方法。
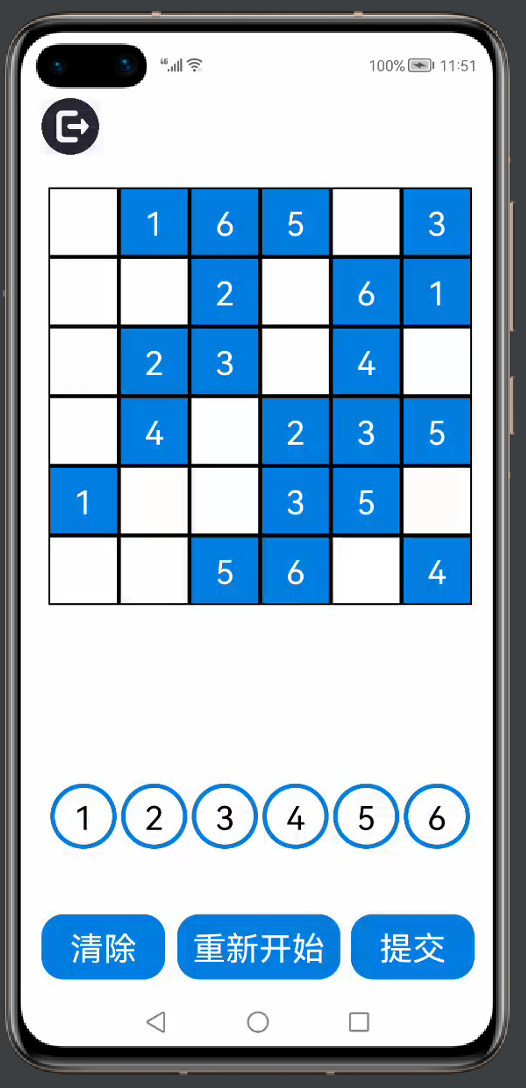
此时我们打开模拟机并随机进入一个关卡,可以看到,页面的左上角多了一个可点击图标:

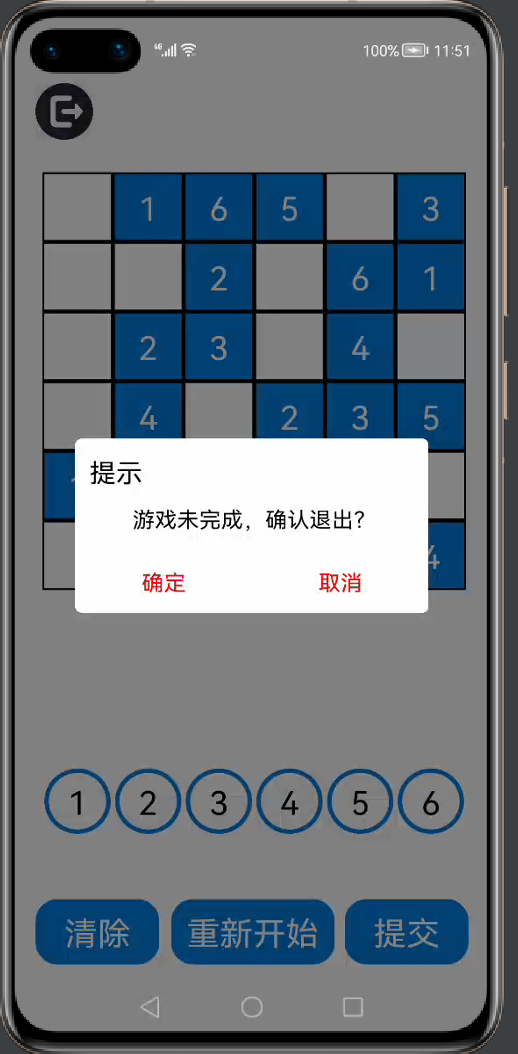
图标被点击后,系统会弹出一个提示弹窗:

计时器
成功加入退出的功能后,接下来要做的就是在游戏界面加入一个计时器。
首先,我们在合适的位置编写一个run()函数:
import ......
public class GameAbilitySlice extends AbilitySlice {
  ......
//同步计时器,用于输出时间
    private  Timer timer;
    int sec,min;
    public void running(){
        timer = new Timer();
        timer.schedule(new TimerTask() {
            @Override
            public void run() {
                getUITaskDispatcher().asyncDispatch(()->{
                    sec++;
                    if (sec >= 60) {
                        min++;
                        sec = sec % 60;
                        if (min >= 60) {
                            min = min % 60;
                        }
                    }
                });
            }
        },0,1000);
    }
  ......
      @Override
    protected void onStart(Intent intent) {
        super.onStart(intent);
        ......
加入计时器的功能:
@Override
    protected void onStart(Intent intent) {
        super.onStart(intent);
        ......
       //计时器
        Text time=new Text(this);
        time.setText("用时:");
        time.setTextSize(75);
        time.setTextColor(Color.RED);
        time.setPosition(260+360,40);
        layout1.addComponent(time);
        TickTimer ticktimer=new TickTimer(this);
        ticktimer.start();
        running();
        ticktimer.setTextSize(75);
        ticktimer.setTextColor(Color.BLACK);
        ticktimer.setPosition(465+360,40);
        layout1.addComponent(ticktimer);
数据库
首先实现页面设计。
在graphic目录下,创建一个背景元素文件,并命名为background_ability_record.xml,之后加入如下代码:
<?xml version="1.0" encoding="UTF-8" ?>
<shape
    xmlns:ohos="http://schemas.huawei.com/res/ohos"
    ohos:shape="rectangle">
    <solid
        ohos:color="#FFFFFF"/>
</shape>
在layout目录下,创建一个xml文件,并命名为background_ability.xml,之后加入如下代码:
<?xml version="1.0" encoding="utf-8"?>
<DirectionalLayout
    xmlns:ohos="http://schemas.huawei.com/res/ohos"
    ohos:height="match_parent"
    ohos:width="match_parent"
    ohos:alignment="center"
    ohos:orientation="vertical">
    <Text
        ohos:id="$+id:text_record1"
        ohos:height="match_content"
        ohos:width="match_content"
        ohos:background_element="$graphic:background_ability_record"
        ohos:layout_alignment="horizontal_center"
        ohos:text_size="30vp"
        ohos:margin="10vp"
        />
    <Text
        ohos:id="$+id:text_record2"
        ohos:height="match_content"
        ohos:width="match_content"
        ohos:background_element="$graphic:background_ability_record"
        ohos:layout_alignment="horizontal_center"
        ohos:text_size="30vp"
        ohos:margin="10vp"
        />
    <Text
        ohos:id="$+id:text_record3"
        ohos:height="match_content"
        ohos:width="match_content"
        ohos:background_element="$graphic:background_ability_record"
        ohos:layout_alignment="horizontal_center"
        ohos:text_size="30vp"
        ohos:margin="10vp"
        />
    <Text
        ohos:background_element="$graphic:select_text_exit"
        ohos:id="$+id:back_of_record"
        ohos:height="match_content"
        ohos:width="match_parent"
        ohos:text="返回"
        ohos:top_margin="90vp"
        ohos:text_alignment="horizontal_center"
        ohos:text_size="30vp"
        ohos:text_font="sans-serif"/>
</DirectionalLayout>
打开RecordAbilitySlice,制作基本的AbilitySlice框架:
import ...
public class RecordAbilitySlice extends AbilitySlice {        //继承
    @Override
    public void onStart(Intent intent) {
        super.onStart(intent);
        super.setUIContent(ResourceTable.Layout_ability_record); //与xmi文件绑定
    }
    @Override
    public void onActive() {
        super.onActive();
    }
    @Override
    public void onForeground(Intent intent) {
        super.onForeground(intent);
    }
    }
然后,在合适的位置定义一个数据库:
public class RecondAbilitySlice extends AbilitySlice {
    private Context context; //
    //定义数据库
    private Preferences center(){
        DatabaseHelper databaseHelper=new DatabaseHelper(this);
        Preferences  preferences=databaseHelper.getPreferences("DBM");
        return preferences;
    }
    @Override
    public void onStart(Intent intent) {
        ......
接着,设计UI界面:
......
    @Override
    public void onStart(Intent intent) {
        super.onStart(intent);
        super.setUIContent(ResourceTable.Layout_ability_record); //与xmi文件绑定
        Preferences preferences=center();
        int Min1=preferences.getInt("MIN_1",999);
        int Sec1=preferences.getInt("SEC_1",999);
        int Min2=preferences.getInt("MIN_2",999);
        int Sec2=preferences.getInt("SEC_2",999);
        int Min3=preferences.getInt("MIN_3",999);
        int Sec3=preferences.getInt("SEC_3",999);
            Text text1 = (Text) findComponentById(ResourceTable.Id_text_record1);
            if (Min1==999){
                text1.setText("初级" + "    " + "无记录");
            }else {
                text1.setText("初级" + "    " + String.valueOf(Min1) + "分" + String.valueOf(Sec1) + "秒");
            }
            Text text2 = (Text) findComponentById(ResourceTable.Id_text_record2);
            if (Min2==999){
                text2.setText("中级" + "    " + "无记录");
            }else {
                text2.setText("中级" + "    " + String.valueOf(Min2) + "分" + String.valueOf(Sec2) + "秒");
            }
            Text text3 = (Text) findComponentById(ResourceTable.Id_text_record3);
            if (Min3==999){
                text3.setText("高级" + "    " + "无记录");
            }else {
                text3.setText("高级" + "    " + String.valueOf(Min3) + "分" + String.valueOf(Sec3) + "秒");
            }
            Text text4=(Text) findComponentById(ResourceTable.Id_back_of_record);
            text4.setClickedListener(new Component.ClickedListener() {
                @Override
                public void onClick(Component component) {
                    terminate();
                }
            });
     }
    ......
最后打开MainAbilitySlice,实现“游戏记录”按钮的页面导航的逻辑:
@Override
    public void onActive() {
        super.onActive();
        ......
        Button button2=(Button)findComponentById(ResourceTable.Id_record);
        button2.setClickedListener(new Component.ClickedListener() {
            @Override
            public void onClick(Component component) {
                present(new RecordAbilitySlice(),new Intent());
            }
        });
    }
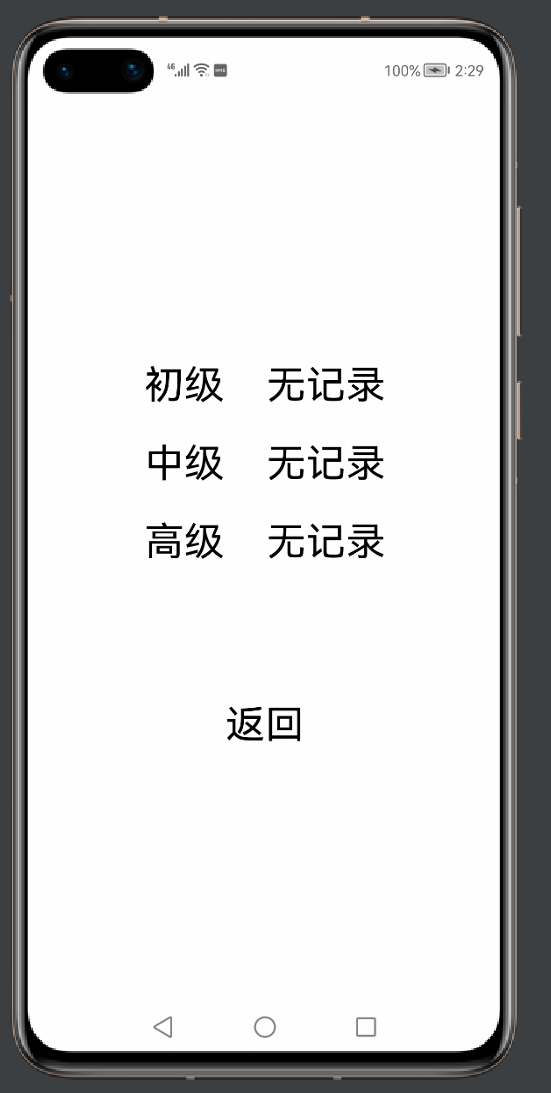
打开模拟器,在主界面点击“游戏记录”,可查看UI效果:

打开GameAbilitySlice,先定义一些对象:
public class GameAbilitySlice extends AbilitySlice {
  ......
   private Context context;//
   private DatabaseHelper databaseHelper;//
   private Preferences preferences;//
  ....
    @Override
    protected void onStart(Intent intent) {
        super.onStart(intent);
    ......
之后,创建一个轻量级数据库:
......
    @Override
    protected void onStart(Intent intent) {
        super.onStart(intent);
        //数据库
        context=getContext();
        databaseHelper=new DatabaseHelper(context);
        preferences=databaseHelper.getPreferences("DBM");
           ......
制作一个返回布尔值的比较函数compare():
int Min_record;
    int Sec_record;
    private int strsec;
    private int strmin;
    private String timing;
    //比较函数
    private boolean compare(){
        int nowtime=strmin+strsec*60;
        int mintime= Min_record +Sec_record*60;
        if(nowtime<mintime){
            return true;
        }
        return false;
    }
找到button_pr,完成记录时间的逻辑:
Button button_pr=new Button(this);
        ......
        button_pr.setClickedListener(new Component.ClickedListener() {
            @Override
            public void onClick(Component component) {
                if (Gamesuccess()){
                    ticktimer.stop();    //让计时器停止
                    timing=ticktimer.getText();//获得通关时间
                    strsec=sec;
                    strmin=min;
                    Dialog_win.setContentText("                      用时:"+timing);//让通过时间在弹窗中显示
                    Dialog_win.show();
                }else {
                    ticktimer.stop();  //让计时器停止
                    Dialog_fail.setContentText("           游戏未完成或答案不正确" );
                    Dialog_fail.show();
                }
            }
        });
     ......
找到对话框,加入指令:
//对话框
        CommonDialog Dialog_win=new CommonDialog(getContext());
        Dialog_win.setSize(800,400);
        Dialog_win.setTitleText(" 游戏解答成功!");
        Dialog_win.setButton(IDialog.BUTTON1,"返回主菜单",(iDialog, i) -> Dialog_win.destroy());
        Dialog_win.setDestroyedListener(new CommonDialog.DestroyedListener() {
            @Override
            public void onDestroy() {
//销毁监听器内加入指令
                if(L==1){
                    Min_record=preferences.getInt("MIN_1",60);
                    Sec_record=preferences.getInt("SEC_1",60);
                    if (compare()) {
                        preferences.putInt("MIN_1", strmin);
                        preferences.putInt("SEC_1",strsec);
                        preferences.flush();//清除缓冲区的缓存
                    }
                }
                if(L==2||L==3){
                    Min_record=preferences.getInt("MIN_2",60);
                    Sec_record=preferences.getInt("SEC_2",60);
                    if (compare()) {
                        preferences.putInt("MIN_2", strmin);
                        preferences.putInt("SEC_2",strsec);
                        preferences.flush();  //清除缓冲区的缓存
                    }
                }
                if(L==4){
                    Min_record=preferences.getInt("MIN_3",60);
                    Sec_record=preferences.getInt("SEC_3",60);
                    if (compare()) {

                        preferences.putInt("MIN_3", strmin);
                        preferences.putInt("SEC_3",strsec);
                        preferences.flush();
                    }
                }
                terminate();
            }
        });
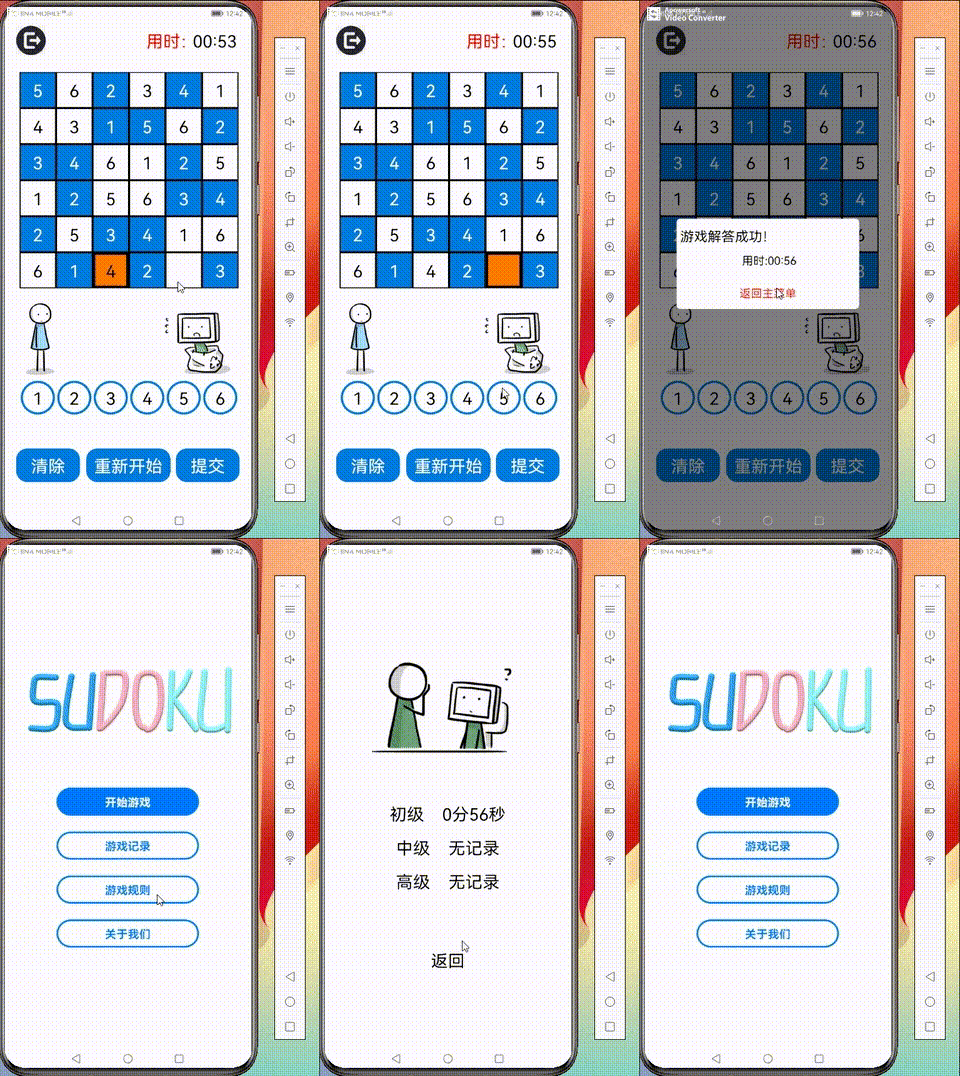
完成上述操作后,打开模拟器试玩游戏:

结语
恭喜你,你已经成功在IDE制作了一个小游戏项目。


