今天教大家借助一款框架快速实现一个数据库,这个框架就是Calcite,下面会带大家通过两个例子快速教会大家怎么实现,一个是可以通过 SQL 语句的方式可以直接查询文件内容,第二个是模拟 Mysql 查询功能,以及最后告诉大家怎么实现 SQL 查询 Kafka 数据。
Calcite
Calcite 是一个用于优化异构数据源的查询处理的可插拔基础框架(他是一个框架),可以将任意数据(Any data, Anywhere)DML 转换成基于 SQL 的 DML 引擎,并且我们可以选择性的使用它的部分功能。
Calcite能干什么
- 使用 SQL 访问内存中某个数据
- 使用 SQL 访问某个文件的数据
- 跨数据源的数据访问、聚合、排序等(例如 Mysql 和 Redis 数据源中的数据进行join)
当我们需要自建一个数据库的时候,数据可以为任何格式的,比如text、word、xml、mysql、es、csv、第三方接口数据等等,我们只有数据,我们想让这些数据支持 SQL 形式动态增删改查。
另外,像Hive、Drill、Flink、Phoenix 和 Storm 等项目中,数据处理系统都是使用 Calcite 来做 SQL 解析和查询优化,当然,还有部分用来构建自己的 JDBC driver。
名词解释
Token
就是将标准 SQL(可以理解为Mysql)关键词以及关键词之间的字符串截取出来,每一个token,会被封装为一个SqlNode,SqlNode会衍生很多子类,比如Select会被封装为SqlSelect,当前 SqlNode 也能反解析为 SQL 文本。
RelDataTypeField
某个字段的名称和类型信息
RelDataType
多个 RelDataTypeField 组成了 RelDataType,可以理解为数据行
Table
一个完整的表的信息
Schema
所有元数据的组合,可以理解为一组 Table 或者库的概念
开始使用
1. 引入包
<dependency>
    <groupId>org.apache.calcite</groupId>
    <artifactId>calcite-core</artifactId>
    <!-- 目前最新版本 2022-09-10日更新-->
    <version>1.32.0</version>
</dependency>- 1.
- 2.
- 3.
- 4.
- 5.
- 6.
2. 创建model.json文件和表结构csv
model.json 里面主要描述或者说告诉 Calcite 如何创建 Schema,也就是告诉框架怎么创建出库。
{
"version": "1.0",
"defaultSchema": "CSV",
"schemas": [
        {
          "name": "CSV",
          "type": "custom",
          "factory": "csv.CsvSchemaFactory",
          "operand": {
          "directory": "csv"
                }
        }
      ]
}- 1.
- 2.
- 3.
- 4.
- 5.
- 6.
- 7.
- 8.
- 9.
- 10.
- 11.
- 12.
- 13.
- 14.
接下来还需要定义一个 csv 文件,用来定义表结构。
NAME:string,MONEY:string
aixiaoxian,10000万
xiaobai,10000万
adong,10000万
maomao,10000万
xixi,10000万
zizi,10000万
wuwu,10000万
kuku,10000万- 1.
- 2.
- 3.
- 4.
- 5.
- 6.
- 7.
- 8.
- 9.
整个项目的结构大概就是这样:

3. 实现Schema的工厂类
在上述文件中指定的包路径下去编写 CsvSchemaFactory 类,实现 SchemaFactory 接口,并且实现里面唯一的方法 create 方法,创建Schema(库)。
public class CsvSchemaFactory implements SchemaFactory {

    @Override
    public Schema create(SchemaPlus parentSchema, String name,
                         Map<String, Object> operand) {
        final String directory = (String) operand.get("directory");
        File directoryFile = new File(directory);
        return new CsvSchema(directoryFile, "scannable");
    }
}- 1.
- 2.
- 3.
- 4.
- 5.
- 6.
- 7.
- 8.
- 9.
- 10.
4. 自定义Schma类
有了 SchemaFactory,接下来需要自定义 Schema 类。
自定义的 Schema 需要实现 Schema 接口,但是直接实现要实现的方法太多,我们去实现官方的 AbstractSchema 类,这样就只需要实现一个方法就行(如果有其他定制化需求可以实现原生接口)。
核心的逻辑就是createTableMap方法,用于创建出 Table 表。
他会扫描指定的Resource下面的所有 csv 文件,将每个文件映射成Table对象,最终以map形式返回,Schema接口的其他几个方法会用到这个对象。
@Override
    protected Map<String, Table> getTableMap() {
        if (tableMap == null) {
            tableMap = createTableMap();
        }
        return tableMap;
    }
  private Map<String, Table> createTableMap() {

        final Source baseSource = Sources.of(directoryFile);

        File[] files = directoryFile.listFiles((dir, name) -> {
            final String nameSansGz = trim(name, ".gz");
            return nameSansGz.endsWith(".csv");
        });
        if (files == null) {
            System.out.println("directory " + directoryFile + " not found");
            files = new File[0];
        }

        final ImmutableMap.Builder<String, Table> builder = ImmutableMap.builder();
        for (File file : files) {
            Source source = Sources.of(file);
            final Source sourceSansCsv = source.trimOrNull(".csv");
            if (sourceSansCsv != null) {
                final Table table = createTable(source);
                builder.put(sourceSansCsv.relative(baseSource).path(), table);
            }
        }
        return builder.build();
}- 1.
- 2.
- 3.
- 4.
- 5.
- 6.
- 7.
- 8.
- 9.
- 10.
- 11.
- 12.
- 13.
- 14.
- 15.
- 16.
- 17.
- 18.
- 19.
- 20.
- 21.
- 22.
- 23.
- 24.
- 25.
- 26.
- 27.
- 28.
- 29.
- 30.
- 31.
5. 自定义 Table
Schema 有了,并且数据文件 csv 也映射成 Table 了,一个 csv 文件对应一个 Table。
接下来我们去自定义 Table,自定义 Table 的核心是我们要定义字段的类型和名称,以及如何读取 csv文件。
先获取数据类型和名称,即单表结构,从csv文件头中获取(当前文件头需要我们自己定义,包括规则我们也可以定制化)。
public abstract class CsvTable extends AbstractTable {
    protected final Source source;
    protected final @Nullable RelProtoDataType protoRowType;
    private @Nullable RelDataType rowType;
    private @Nullable List<RelDataType> fieldTypes;


    CsvTable(Source source, @Nullable RelProtoDataType protoRowType) {
        this.source = source;
        this.protoRowType = protoRowType;
    }

    @Override
    public RelDataType getRowType(RelDataTypeFactory typeFactory) {
        if (protoRowType != null) {
            return protoRowType.apply(typeFactory);
        }
        if (rowType == null) {
            rowType = CsvEnumerator.deduceRowType((JavaTypeFactory) typeFactory, source,
                    null);
        }
        return rowType;
    }


    public List<RelDataType> getFieldTypes(RelDataTypeFactory typeFactory) {
        if (fieldTypes == null) {
            fieldTypes = new ArrayList<>();
            CsvEnumerator.deduceRowType((JavaTypeFactory) typeFactory, source,
                    fieldTypes);
        }
        return fieldTypes;
    }

   public static RelDataType deduceRowType(JavaTypeFactory typeFactory,
                                            Source source, @Nullable List<RelDataType> fieldTypes) {
        final List<RelDataType> types = new ArrayList<>();
        final List<String> names = new ArrayList<>();
        try (CSVReader reader = openCsv(source)) {
            String[] strings = reader.readNext();
            if (strings == null) {
                strings = new String[]{"EmptyFileHasNoColumns:boolean"};
            }
            for (String string : strings) {
                final String name;
                final RelDataType fieldType;

                final int colon = string.indexOf(':');
                if (colon >= 0) {
                    name = string.substring(0, colon);
                    String typeString = string.substring(colon + 1);
                    Matcher decimalMatcher = DECIMAL_TYPE_PATTERN.matcher(typeString);
                    if (decimalMatcher.matches()) {
                        int precision = Integer.parseInt(decimalMatcher.group(1));
                        int scale = Integer.parseInt(decimalMatcher.group(2));
                        fieldType = parseDecimalSqlType(typeFactory, precision, scale);
                    } else {
                        switch (typeString) {
                            case "string":
                                fieldType = toNullableRelDataType(typeFactory, SqlTypeName.VARCHAR);
                                break;
                            case "boolean":
                                fieldType = toNullableRelDataType(typeFactory, SqlTypeName.BOOLEAN);
                                break;
                            case "byte":
                                fieldType = toNullableRelDataType(typeFactory, SqlTypeName.TINYINT);
                                break;
                            case "char":
                                fieldType = toNullableRelDataType(typeFactory, SqlTypeName.CHAR);
                                break;
                            case "short":
                                fieldType = toNullableRelDataType(typeFactory, SqlTypeName.SMALLINT);
                                break;
                            case "int":
                                fieldType = toNullableRelDataType(typeFactory, SqlTypeName.INTEGER);
                                break;
                            case "long":
                                fieldType = toNullableRelDataType(typeFactory, SqlTypeName.BIGINT);
                                break;
                            case "float":
                                fieldType = toNullableRelDataType(typeFactory, SqlTypeName.REAL);
                                break;
                            case "double":
                                fieldType = toNullableRelDataType(typeFactory, SqlTypeName.DOUBLE);
                                break;
                            case "date":
                                fieldType = toNullableRelDataType(typeFactory, SqlTypeName.DATE);
                                break;
                            case "timestamp":
                                fieldType = toNullableRelDataType(typeFactory, SqlTypeName.TIMESTAMP);
                                break;
                            case "time":
                                fieldType = toNullableRelDataType(typeFactory, SqlTypeName.TIME);
                                break;
                            default:
                                LOGGER.warn(
                                        "Found unknown type: {} in file: {} for column: {}. Will assume the type of "
                                                + "column is string.",
                                        typeString, source.path(), name);
                                fieldType = toNullableRelDataType(typeFactory, SqlTypeName.VARCHAR);
                                break;
                        }
                    }
                } else {

                    name = string;
                    fieldType = typeFactory.createSqlType(SqlTypeName.VARCHAR);
                }
                names.add(name);
                types.add(fieldType);
                if (fieldTypes != null) {
                    fieldTypes.add(fieldType);
                }
            }
        } catch (IOException e) {

        }
        if (names.isEmpty()) {
            names.add("line");
            types.add(typeFactory.createSqlType(SqlTypeName.VARCHAR));
        }
        return typeFactory.createStructType(Pair.zip(names, types));
    }
}- 1.
- 2.
- 3.
- 4.
- 5.
- 6.
- 7.
- 8.
- 9.
- 10.
- 11.
- 12.
- 13.
- 14.
- 15.
- 16.
- 17.
- 18.
- 19.
- 20.
- 21.
- 22.
- 23.
- 24.
- 25.
- 26.
- 27.
- 28.
- 29.
- 30.
- 31.
- 32.
- 33.
- 34.
- 35.
- 36.
- 37.
- 38.
- 39.
- 40.
- 41.
- 42.
- 43.
- 44.
- 45.
- 46.
- 47.
- 48.
- 49.
- 50.
- 51.
- 52.
- 53.
- 54.
- 55.
- 56.
- 57.
- 58.
- 59.
- 60.
- 61.
- 62.
- 63.
- 64.
- 65.
- 66.
- 67.
- 68.
- 69.
- 70.
- 71.
- 72.
- 73.
- 74.
- 75.
- 76.
- 77.
- 78.
- 79.
- 80.
- 81.
- 82.
- 83.
- 84.
- 85.
- 86.
- 87.
- 88.
- 89.
- 90.
- 91.
- 92.
- 93.
- 94.
- 95.
- 96.
- 97.
- 98.
- 99.
- 100.
- 101.
- 102.
- 103.
- 104.
- 105.
- 106.
- 107.
- 108.
- 109.
- 110.
- 111.
- 112.
- 113.
- 114.
- 115.
- 116.
- 117.
- 118.
- 119.
- 120.
- 121.
- 122.
- 123.
- 124.
获取文件中的数据,上面把Table的表结构字段名称和类型都获取到了以后,就剩最后一步了,获取文件中的数据。我们需要自定义一个类,实现 ScannableTable 接口,并且实现里面唯一的方法 scan 方法,其实本质上就是读文件,然后把文件的每一行的数据和上述获取的 fileType 进行匹配。
@Override
    public Enumerable<Object[]> scan(DataContext root) {
        JavaTypeFactory typeFactory = root.getTypeFactory();
        final List<RelDataType> fieldTypes = getFieldTypes(typeFactory);
        final List<Integer> fields = ImmutableIntList.identity(fieldTypes.size());
        final AtomicBoolean cancelFlag = DataContext.Variable.CANCEL_FLAG.get(root);
        return new AbstractEnumerable<@Nullable Object[]>() {
            @Override
            public Enumerator<@Nullable Object[]> enumerator() {

                return new CsvEnumerator<>(source, cancelFlag, false, null,
                        CsvEnumerator.arrayConverter(fieldTypes, fields, false));
            }
        };
    }


 public CsvEnumerator(Source source, AtomicBoolean cancelFlag, boolean stream,
                         @Nullable String @Nullable [] filterValues, RowConverter<E> rowConverter) {
        this.cancelFlag = cancelFlag;
        this.rowConverter = rowConverter;
        this.filterValues = filterValues == null ? null
                : ImmutableNullableList.copyOf(filterValues);
        try {

            this.reader = openCsv(source);

            this.reader.readNext();
        } catch (IOException e) {
            throw new RuntimeException(e);
        }
    }

     @Override
    public E current() {
        return castNonNull(current);
    }

    @Override
    public boolean moveNext() {
        try {
            outer:
            for (; ; ) {
                if (cancelFlag.get()) {
                    return false;
                }
                final String[] strings = reader.readNext();
                if (strings == null) {
                    current = null;
                    reader.close();
                    return false;
                }
                if (filterValues != null) {
                    for (int i = 0; i < strings.length; i++) {
                        String filterValue = filterValues.get(i);
                        if (filterValue != null) {
                            if (!filterValue.equals(strings[i])) {
                                continue outer;
                            }
                        }
                    }
                }
                current = rowConverter.convertRow(strings);
                return true;
            }
        } catch (IOException e) {
            throw new RuntimeException(e);
        }
    }

        protected @Nullable Object convert(@Nullable RelDataType fieldType, @Nullable String string) {
            if (fieldType == null || string == null) {
                return string;
            }
            switch (fieldType.getSqlTypeName()) {
                case BOOLEAN:
                    if (string.length() == 0) {
                        return null;
                    }
                    return Boolean.parseBoolean(string);
                case TINYINT:
                    if (string.length() == 0) {
                        return null;
                    }
                    return Byte.parseByte(string);
                case SMALLINT:
                    if (string.length() == 0) {
                        return null;
                    }
                    return Short.parseShort(string);
                case INTEGER:
                    if (string.length() == 0) {
                        return null;
                    }
                    return Integer.parseInt(string);
                case BIGINT:
                    if (string.length() == 0) {
                        return null;
                    }
                    return Long.parseLong(string);
                case FLOAT:
                    if (string.length() == 0) {
                        return null;
                    }
                    return Float.parseFloat(string);
                case DOUBLE:
                    if (string.length() == 0) {
                        return null;
                    }
                    return Double.parseDouble(string);
                case DECIMAL:
                    if (string.length() == 0) {
                        return null;
                    }
                    return parseDecimal(fieldType.getPrecision(), fieldType.getScale(), string);
                case DATE:
                    if (string.length() == 0) {
                        return null;
                    }
                    try {
                        Date date = TIME_FORMAT_DATE.parse(string);
                        return (int) (date.getTime() / DateTimeUtils.MILLIS_PER_DAY);
                    } catch (ParseException e) {
                        return null;
                    }
                case TIME:
                    if (string.length() == 0) {
                        return null;
                    }
                    try {
                        Date date = TIME_FORMAT_TIME.parse(string);
                        return (int) date.getTime();
                    } catch (ParseException e) {
                        return null;
                    }
                case TIMESTAMP:
                    if (string.length() == 0) {
                        return null;
                    }
                    try {
                        Date date = TIME_FORMAT_TIMESTAMP.parse(string);
                        return date.getTime();
                    } catch (ParseException e) {
                        return null;
                    }
                case VARCHAR:
                default:
                    return string;
            }
}- 1.
- 2.
- 3.
- 4.
- 5.
- 6.
- 7.
- 8.
- 9.
- 10.
- 11.
- 12.
- 13.
- 14.
- 15.
- 16.
- 17.
- 18.
- 19.
- 20.
- 21.
- 22.
- 23.
- 24.
- 25.
- 26.
- 27.
- 28.
- 29.
- 30.
- 31.
- 32.
- 33.
- 34.
- 35.
- 36.
- 37.
- 38.
- 39.
- 40.
- 41.
- 42.
- 43.
- 44.
- 45.
- 46.
- 47.
- 48.
- 49.
- 50.
- 51.
- 52.
- 53.
- 54.
- 55.
- 56.
- 57.
- 58.
- 59.
- 60.
- 61.
- 62.
- 63.
- 64.
- 65.
- 66.
- 67.
- 68.
- 69.
- 70.
- 71.
- 72.
- 73.
- 74.
- 75.
- 76.
- 77.
- 78.
- 79.
- 80.
- 81.
- 82.
- 83.
- 84.
- 85.
- 86.
- 87.
- 88.
- 89.
- 90.
- 91.
- 92.
- 93.
- 94.
- 95.
- 96.
- 97.
- 98.
- 99.
- 100.
- 101.
- 102.
- 103.
- 104.
- 105.
- 106.
- 107.
- 108.
- 109.
- 110.
- 111.
- 112.
- 113.
- 114.
- 115.
- 116.
- 117.
- 118.
- 119.
- 120.
- 121.
- 122.
- 123.
- 124.
- 125.
- 126.
- 127.
- 128.
- 129.
- 130.
- 131.
- 132.
- 133.
- 134.
- 135.
- 136.
- 137.
- 138.
- 139.
- 140.
- 141.
- 142.
- 143.
- 144.
- 145.
- 146.
- 147.
- 148.
- 149.
- 150.
6. 最后
至此我们需要准备的东西:库、表名称、字段名称、字段类型都有了,接下来我们去写我们的 SQL 语句查询我们的数据文件。
创建好几个测试的数据文件,例如上面项目结构中我创建 2 个 csv 文件USERINFO.csv、ASSET.csv,然后创建测试类。
这样跑起来,就可以通过 SQL 语句的方式直接查询数据了。
public class Test {
    public static void main(String[] args) throws SQLException {
        Connection connection = null;
        Statement statement = null;
        try {
            Properties info = new Properties();
            info.put("model", Sources.of(Test.class.getResource("/model.json")).file().getAbsolutePath());
            connection = DriverManager.getConnection("jdbc:calcite:", info);
            statement = connection.createStatement();
            print(statement.executeQuery("select * from asset "));

            print(statement.executeQuery(" select * from userinfo "));

            print(statement.executeQuery(" select age from userinfo where name ='aixiaoxian' "));

            print(statement.executeQuery(" select * from userinfo where age >60 "));

            print(statement.executeQuery(" select * from userinfo where name like 'a%' "));
        } finally {
            connection.close();
        }
    }

    private static void print(ResultSet resultSet) throws SQLException {
        final ResultSetMetaData metaData = resultSet.getMetaData();
        final int columnCount = metaData.getColumnCount();
        while (resultSet.next()) {
            for (int i = 1; ; i++) {
                System.out.print(resultSet.getString(i));
                if (i < columnCount) {
                    System.out.print(", ");
                } else {
                    System.out.println();
                    break;
                }
            }
        }
    }
}- 1.
- 2.
- 3.
- 4.
- 5.
- 6.
- 7.
- 8.
- 9.
- 10.
- 11.
- 12.
- 13.
- 14.
- 15.
- 16.
- 17.
- 18.
- 19.
- 20.
- 21.
- 22.
- 23.
- 24.
- 25.
- 26.
- 27.
- 28.
- 29.
- 30.
- 31.
- 32.
- 33.
- 34.
- 35.
- 36.
- 37.
- 38.
- 39.
查询结果:

这里在测试的时候踩到2个坑,大家如果自己实验的时候可以避免下。
Calcite 默认会把你的 SQL 语句中的表名和类名全部转换为大写,因为默认的 csv(其他文件也一样)文件的名称就是表名,除非你自定义规则,所以你的文件名要写成大写。
Calcite 有一些默认的关键字不能用作表名,不然会查询失败,比如我刚开始定的user.csv就一直查不出来,改成USERINFO就可以了,这点和Mysql 的内置关键字差不多,也可以通过个性化配置去改。
演示Mysql
首先,还是先准备Calcite 需要的东西:库、表名称、字段名称、字段类型。
如果数据源使用Mysql的话,这些都不用我们去 JAVA 服务中去定义,直接在 Mysql 客户端创建好,这里直接创建两张表用于测试,就和我们的csv文件一样。
CREATE TABLE `USERINFO1` (
  `NAME` varchar(255) CHARACTER SET utf8mb3 COLLATE utf8_general_ci DEFAULT NULL,
  `AGE` int DEFAULT NULL
) ENGINE=InnoDB DEFAULT CHARSET=utf8mb3;

CREATE TABLE `ASSET` (
  `NAME` varchar(255) CHARACTER SET utf8mb3 COLLATE utf8_general_ci DEFAULT NULL,
  `MONEY` varchar(255) CHARACTER SET utf8mb3 COLLATE utf8_general_ci DEFAULT NULL
) ENGINE=InnoDB DEFAULT CHARSET=utf8mb3;- 1.
- 2.
- 3.
- 4.
- 5.
- 6.
- 7.
- 8.
- 9.
上述csv 案例中的 SchemaFactory 以及 Schema 这些都不需要创建,因为 Calcite 默认提供了 Mysql 的 Adapter适配器。
其实,上述两步都不需要做,我们真正要做的是,告诉Calcite 你的 JDBC 的连接信息就行了,也是在 model.json 文件中定义。
{
  "version": "1.0",
  "defaultSchema": "Demo",
  "schemas": [
    {
      "name": "Demo",
      "type": "custom",

      "factory": "org.apache.calcite.adapter.jdbc.JdbcSchema$Factory",
      "operand": {

        "jdbcDriver": "com.mysql.cj.jdbc.Driver",
        "jdbcUrl": "jdbc:mysql://localhost:3306/irving",
        "jdbcUser": "root",
        "jdbcPassword": "123456"
      }
    }
  ]
}- 1.
- 2.
- 3.
- 4.
- 5.
- 6.
- 7.
- 8.
- 9.
- 10.
- 11.
- 12.
- 13.
- 14.
- 15.
- 16.
- 17.
- 18.
- 19.
在项目中引入 Mysql 的驱动包
<dependency>
  <groupId>mysql</groupId>
  <artifactId>mysql-connector-java</artifactId>
  <version>8.0.30</version>
</dependency>- 1.
- 2.
- 3.
- 4.
- 5.
写好测试类,这样直接就相当于完成了所有的功能了。
public class TestMysql {
    public static void main(String[] args) throws SQLException {
        Connection connection = null;
        Statement statement = null;
        try {
            Properties info = new Properties();
            info.put("model", Sources.of(TestMysql.class.getResource("/mysqlmodel.json")).file().getAbsolutePath());
            connection = DriverManager.getConnection("jdbc:calcite:", info);
            statement = connection.createStatement();
            statement.executeUpdate(" insert into  userinfo1 values ('xxx',12) ");
            print(statement.executeQuery("select * from asset "));

            print(statement.executeQuery(" select * from userinfo1 "));

            print(statement.executeQuery(" select age from userinfo1 where name ='aixiaoxian' "));

            print(statement.executeQuery(" select * from userinfo1 where age >60 "));

            print(statement.executeQuery(" select * from userinfo1 where name like 'a%' "));
        } finally {
            connection.close();
        }

    }

    private static void print(ResultSet resultSet) throws SQLException {
        final ResultSetMetaData metaData = resultSet.getMetaData();
        final int columnCount = metaData.getColumnCount();
        while (resultSet.next()) {
            for (int i = 1; ; i++) {
                System.out.print(resultSet.getString(i));
                if (i < columnCount) {
                    System.out.print(", ");
                } else {
                    System.out.println();
                    break;
                }
            }
        }
    }
}- 1.
- 2.
- 3.
- 4.
- 5.
- 6.
- 7.
- 8.
- 9.
- 10.
- 11.
- 12.
- 13.
- 14.
- 15.
- 16.
- 17.
- 18.
- 19.
- 20.
- 21.
- 22.
- 23.
- 24.
- 25.
- 26.
- 27.
- 28.
- 29.
- 30.
- 31.
- 32.
- 33.
- 34.
- 35.
- 36.
- 37.
- 38.
- 39.
- 40.
- 41.
查询结果:

Mysql实现原理
上述我们在 model.json 文件中指定了org.apache.calcite.adapter.jdbc.JdbcSchema$Factory类,可以看下这个类的代码。
这个类是把 Factory 和 Schema 写在了一起,其实就是调用schemafactory类的create方法创建一个 schema 出来,和我们上面自定义的流程是一样的。
其中JdbcSchema类也是 Schema 的子类,所以也会实现getTable方法(这个我们上述也实现了,我们当时是获取表结构和表的字段类型以及名称,是从csv文件头中读文件的),JdbcSchema的实现是通过连接 Mysql 服务端查询元数据信息,再将这些信息封装成 Calcite需要的对象格式。
这里同样要注意 csv方式的2个注意点,大小写和关键字问题。
public static JdbcSchema create(
      SchemaPlus parentSchema,
      String name,
      Map<String, Object> operand) {
    DataSource dataSource;
    try {
      final String dataSourceName = (String) operand.get("dataSource");
      if (dataSourceName != null) {
        dataSource =
            AvaticaUtils.instantiatePlugin(DataSource.class, dataSourceName);
      } else {

        final String jdbcUrl = (String) requireNonNull(operand.get("jdbcUrl"), "jdbcUrl");
        final String jdbcDriver = (String) operand.get("jdbcDriver");
        final String jdbcUser = (String) operand.get("jdbcUser");
        final String jdbcPassword = (String) operand.get("jdbcPassword");
        dataSource = dataSource(jdbcUrl, jdbcDriver, jdbcUser, jdbcPassword);
      }
    } catch (Exception e) {
      throw new RuntimeException("Error while reading dataSource", e);
    }
    String jdbcCatalog = (String) operand.get("jdbcCatalog");
    String jdbcSchema = (String) operand.get("jdbcSchema");
    String sqlDialectFactory = (String) operand.get("sqlDialectFactory");

    if (sqlDialectFactory == null || sqlDialectFactory.isEmpty()) {
      return JdbcSchema.create(
          parentSchema, name, dataSource, jdbcCatalog, jdbcSchema);
    } else {
      SqlDialectFactory factory = AvaticaUtils.instantiatePlugin(
          SqlDialectFactory.class, sqlDialectFactory);
      return JdbcSchema.create(
          parentSchema, name, dataSource, factory, jdbcCatalog, jdbcSchema);
    }
  }

  @Override public @Nullable Table getTable(String name) {
    return getTableMap(false).get(name);
  }

  private synchronized ImmutableMap<String, JdbcTable> getTableMap(
      boolean force) {
    if (force || tableMap == null) {
      tableMap = computeTables();
    }
    return tableMap;
  }

  private ImmutableMap<String, JdbcTable> computeTables() {
    Connection connection = null;
    ResultSet resultSet = null;
    try {
      connection = dataSource.getConnection();
      final Pair<@Nullable String, @Nullable String> catalogSchema = getCatalogSchema(connection);
      final String catalog = catalogSchema.left;
      final String schema = catalogSchema.right;
      final Iterable<MetaImpl.MetaTable> tableDefs;
      Foo threadMetadata = THREAD_METADATA.get();
      if (threadMetadata != null) {
        tableDefs = threadMetadata.apply(catalog, schema);
      } else {
        final List<MetaImpl.MetaTable> tableDefList = new ArrayList<>();

        final DatabaseMetaData metaData = connection.getMetaData();
        resultSet = metaData.getTables(catalog, schema, null, null);
        while (resultSet.next()) {

          final String catalogName = resultSet.getString(1);
          final String schemaName = resultSet.getString(2);
          final String tableName = resultSet.getString(3);
          final String tableTypeName = resultSet.getString(4);
          tableDefList.add(
              new MetaImpl.MetaTable(catalogName, schemaName, tableName,
                  tableTypeName));
        }
        tableDefs = tableDefList;
      }

      final ImmutableMap.Builder<String, JdbcTable> builder =
          ImmutableMap.builder();
      for (MetaImpl.MetaTable tableDef : tableDefs) {
        final String tableTypeName2 =
            tableDef.tableType == null
            ? null
            : tableDef.tableType.toUpperCase(Locale.ROOT).replace(' ', '_');
        final TableType tableType =
            Util.enumVal(TableType.OTHER, tableTypeName2);
        if (tableType == TableType.OTHER  && tableTypeName2 != null) {
          System.out.println("Unknown table type: " + tableTypeName2);
        }

        final JdbcTable table =
            new JdbcTable(this, tableDef.tableCat, tableDef.tableSchem,
                tableDef.tableName, tableType);
        builder.put(tableDef.tableName, table);
      }
      return builder.build();
    } catch (SQLException e) {
      throw new RuntimeException(
          "Exception while reading tables", e);
    } finally {
      close(connection, null, resultSet);
    }
}- 1.
- 2.
- 3.
- 4.
- 5.
- 6.
- 7.
- 8.
- 9.
- 10.
- 11.
- 12.
- 13.
- 14.
- 15.
- 16.
- 17.
- 18.
- 19.
- 20.
- 21.
- 22.
- 23.
- 24.
- 25.
- 26.
- 27.
- 28.
- 29.
- 30.
- 31.
- 32.
- 33.
- 34.
- 35.
- 36.
- 37.
- 38.
- 39.
- 40.
- 41.
- 42.
- 43.
- 44.
- 45.
- 46.
- 47.
- 48.
- 49.
- 50.
- 51.
- 52.
- 53.
- 54.
- 55.
- 56.
- 57.
- 58.
- 59.
- 60.
- 61.
- 62.
- 63.
- 64.
- 65.
- 66.
- 67.
- 68.
- 69.
- 70.
- 71.
- 72.
- 73.
- 74.
- 75.
- 76.
- 77.
- 78.
- 79.
- 80.
- 81.
- 82.
- 83.
- 84.
- 85.
- 86.
- 87.
- 88.
- 89.
- 90.
- 91.
- 92.
- 93.
- 94.
- 95.
- 96.
- 97.
- 98.
- 99.
- 100.
- 101.
- 102.
- 103.
- 104.
SQL执行流程
OK,到这里基本上两个简单的案例已经演示好了,最后补充一下整个Calcite架构和整个 SQL 的执行流程。

整个流程如下:SQL解析(Parser)=> SQL校验(Validator)=> SQL查询优化(optimizer)=> SQL生成 => SQL执行
SQL Parser
所有的 SQL 语句在执行前都需要经历 SQL 解析器解析,解析器的工作内容就是将 SQL 中的 Token 解析成抽象语法树,每个树的节点都是一个 SqlNode,这个过程其实就是 Sql Text => SqlNode 的过程。
我们前面的 Demo 没有自定义 Parser,是因为 Calcite 采用了自己默认的 Parser(SqlParserImpl)。


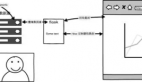
SqlNode
SqlNode是整个解析中的核心,比如图中你可以发现,对于每个比如select、from、where关键字之后的内容其实都是一个SqlNode。

parserConfig方法主要是设置 SqlParserFactory 的参数,比如我们上面所说的我本地测试的时候踩的大小写的坑,就可以在这里设置。
直接调用setCaseSensitive=false即不会将 SQL 语句中的表名列名转为大写,下面是默认的,其他的参数可以按需配置。

SQL Validator
SQL 语句先经过 Parser,然后经过语法验证器,注意 Parser 并不会验证语法的正确性。

其实 Parser 只会验证 SQL 关键词的位置是否正确,我们上述2个 Parser 的例子中都没有创建 schema 和 table 这些,但是如果这样写,那就会报错,这个错误就是 parser 检测后抛出来的(ParseLocationErrorTest)。
真正的校验在 validator 中,会去验证查询的表名是否存在,查询的字段是否存在,类型是否匹配,这个过程比较复杂,默认的 validator 是SqlValidatorImpl。
查询优化
比如关系代数,比如什么投影、笛卡尔积这些,Calcite提供了很多内部的优化器,也可以实现自己的优化器。
适配器
Calcite 是不包含存储层的,所以提供一种适配器的机制来访问外部的数据存储或者存储引擎。
最后,进阶
官网里面写了未来会支持Kafka适配器到公共Api中,到时候使用起来就和上述集成Mysql一样方便,但是现在还没有支持,我这里给大家提供个自己实现的方式,这样就可以通过 SQL 的方式直接查询 Kafka 中的 Topic 数据等信息。
这里我们内部集成实现了KSQL的能力,查询结果是OK的。

还是像上述步骤一样,我们需要准备库、表名称、字段名称、字段类型、数据源(多出来的地方)。
自定义Sql解析,之前我们都没有自定义解析,这里需要自定义解析,是因为我需要动态解析sql的where条件里面的partation。
- 配置解析器,就是之前案例中提到的配置大小写之类的
- 创建解析器,使用的默认SqlParseImpl
- 开始解析,生成AST,我们可以基于生成的SqlNode做一些业务相关的校验和参数解析
适配器获取数据源
public class KafkaConsumerAdapter {
       public static List<KafkaResult> executor(KafkaSqlInfo kafkaSql) {
           Properties props = new Properties();
           props.put(CommonClientConfigs.BOOTSTRAP_SERVERS_CONFIG, kafkaSql.getSeeds());
           props.put(ConsumerConfig.KEY_DESERIALIZER_CLASS_CONFIG, StringDeserializer.class.getCanonicalName());
           props.put(ConsumerConfig.VALUE_DESERIALIZER_CLASS_CONFIG, StringDeserializer.class.getCanonicalName());
           props.put(ConsumerConfig.AUTO_OFFSET_RESET_CONFIG, "earliest");
           KafkaConsumer<String, String> consumer = new KafkaConsumer<>(props);
           List<TopicPartition> topics = new ArrayList<>();
           for (Integer partition : kafkaSql.getPartition()) {
               TopicPartition tp = new TopicPartition(kafkaSql.getTableName(), partition);
               topics.add(tp);
           }
           consumer.assign(topics);
           for (TopicPartition tp : topics) {
               Map<TopicPartition, Long> offsets = consumer.endOffsets(Collections.singleton(tp));
               long position = 500;
               if (offsets.get(tp).longValue() > position) {
                   consumer.seek(tp, offsets.get(tp).longValue() - 500);
               } else {
                   consumer.seek(tp, 0);
               }
           }
           List<KafkaResult> results = new ArrayList<>();
           boolean flag = true;
           while (flag) {
               ConsumerRecords<String, String> records = consumer.poll(Duration.ofMillis(100));
               for (ConsumerRecord<String, String> record : records) {

                   KafkaResult result = new KafkaResult();
                   result.setPartition(record.partition());
                   result.setOffset(record.offset());
                   result.setMsg(record.value());
                   result.setKey(record.key());
                   results.add(result);
               }
               if (!records.isEmpty()) {
                   flag = false;
               }
           }
           consumer.close();
           return results;
       }

}- 1.
- 2.
- 3.
- 4.
- 5.
- 6.
- 7.
- 8.
- 9.
- 10.
- 11.
- 12.
- 13.
- 14.
- 15.
- 16.
- 17.
- 18.
- 19.
- 20.
- 21.
- 22.
- 23.
- 24.
- 25.
- 26.
- 27.
- 28.
- 29.
- 30.
- 31.
- 32.
- 33.
- 34.
- 35.
- 36.
- 37.
- 38.
- 39.
- 40.
- 41.
- 42.
- 43.
- 44.
- 45.
执行查询,就可以得到我们想要的效果了。
public class TestKafka {
       public static void main(String[] args) throws Exception {
           KafkaService kafkaService = new KafkaService();

           KafkaSqlInfo sqlInfo = kafkaService.parseSql("select * from `cmdb-calltopo` where `partition` in (0,1,2) limit 1000 ");

           List<KafkaResult> results = KafkaConsumerAdapter.executor(sqlInfo);

           query(sqlInfo.getTableName(), results, sqlInfo.getSql());

           sqlInfo = kafkaService.parseSql("select * from `cmdb-calltopo` where `partition` in (0,1,2) AND msg like '%account%'  limit 1000 ");
           results = KafkaConsumerAdapter.executor(sqlInfo);
           query(sqlInfo.getTableName(), results, sqlInfo.getSql());


           sqlInfo = kafkaService.parseSql("select count(*) AS addad  from `cmdb-calltopo` where `partition` in (0,1,2) limit 1000 ");
           results = KafkaConsumerAdapter.executor(sqlInfo);
           query(sqlInfo.getTableName(), results, sqlInfo.getSql());
       }

       private static void query(String tableName, List<KafkaResult> results,
                                 String sql) throws Exception {

           String model = createTempJson();

           KafkaTableSchema.generateSchema(tableName, results);
           Properties info = new Properties();
           info.setProperty("lex", Lex.JAVA.toString());
           Connection connection = DriverManager.getConnection(Driver.CONNECT_STRING_PREFIX + "model=inline:" + model, info);
           Statement st = connection.createStatement();

           ResultSet result = st.executeQuery(sql);
           ResultSetMetaData rsmd = result.getMetaData();
           List<Map<String, Object>> ret = new ArrayList<>();
           while (result.next()) {
               Map<String, Object> map = new LinkedHashMap<>();
               for (int i = 1; i <= rsmd.getColumnCount(); i++) {
                   map.put(rsmd.getColumnName(i), result.getString(rsmd.getColumnName(i)));
               }
               ret.add(map);
           }
           result.close();
           st.close();
           connection.close();
       }

       private static void print(ResultSet resultSet) throws SQLException {
           final ResultSetMetaData metaData = resultSet.getMetaData();
           final int columnCount = metaData.getColumnCount();
           while (resultSet.next()) {
               for (int i = 1; ; i++) {
                   System.out.print(resultSet.getString(i));
                   if (i < columnCount) {
                       System.out.print(", ");
                   } else {
                       System.out.println();
                       break;
                   }
               }
           }
       }

       private static String createTempJson() throws IOException {
           JSONObject object = new JSONObject();
           object.put("version", "1.0");
           object.put("defaultSchema", "QAKAFKA");
           JSONArray array = new JSONArray();
           JSONObject tmp = new JSONObject();
           tmp.put("name", "QAKAFKA");
           tmp.put("type", "custom");
           tmp.put("factory", "kafka.KafkaSchemaFactory");
           array.add(tmp);
           object.put("schemas", array);
           return object.toJSONString();
       }
}- 1.
- 2.
- 3.
- 4.
- 5.
- 6.
- 7.
- 8.
- 9.
- 10.
- 11.
- 12.
- 13.
- 14.
- 15.
- 16.
- 17.
- 18.
- 19.
- 20.
- 21.
- 22.
- 23.
- 24.
- 25.
- 26.
- 27.
- 28.
- 29.
- 30.
- 31.
- 32.
- 33.
- 34.
- 35.
- 36.
- 37.
- 38.
- 39.
- 40.
- 41.
- 42.
- 43.
- 44.
- 45.
- 46.
- 47.
- 48.
- 49.
- 50.
- 51.
- 52.
- 53.
- 54.
- 55.
- 56.
- 57.
- 58.
- 59.
- 60.
- 61.
- 62.
- 63.
- 64.
- 65.
- 66.
- 67.
- 68.
- 69.
- 70.
- 71.
- 72.
- 73.
- 74.
- 75.
- 76.
生成临时的model.json,之前是基于文件,现在基于text字符串,mode=inline模式
设置我的表结构、表名称、字段名、字段类型等,并放置在内存中,同时将适配器查询出来的数据也放进去table里面
获取连接,执行查询,完美!