项目介绍
本项目基于OpenHarmony的ArkUI框架:TS扩展的声明式开发范式,关于语法和概念直接看官网官方文档地址:基于TS扩展的声明式开发范式,因为OpenHarmony的API相对于HarmonyOS的API,功能上比较完善和成熟的,有些新的技术也早早接触到,所以本项目直接使用OpenHarmony SDK开发。
工具版本: DevEco Studio 3.0 Beta4
SDK版本: 3.1.6.6(API Version 8 Release)
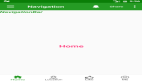
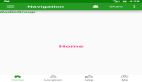
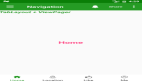
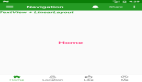
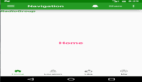
效果演示
声明式开发之底部导航栏-开源基础软件社区")
主要API
路径绘制组件Path 属性方法: commands(" 路径绘制的命令 ")。
命令 | 参数 | 解释 |
M | x,y | 移动到指定的点x,y |
L | x,y | 绘制一条线到指定点x,y |
Q | x1,y1 x,y | 绘制x,y的二次贝塞尔曲线,x1,y1是控制点 |
A | rx,ry x-rotation flag1 flag2 x,y | 画椭圆,解释如下 |
A命令解释:
- rx,ry:指所在椭圆的半轴大小
- x-rotation:指椭圆的X轴与水平方向顺时针方向夹角
- flag1:有两个值,1表示大角度弧线,0为小角度弧线。
- flag2:有两个值,确定从起点至终点的方向,1为顺时针,0为逆时针
- x,y: 为终点坐标
实现步骤
1、绘制底部背景
底部背景:使用Path组件,根据路径命令绘制,矩形中间掏空一个半圆。
@Entry
@Component
struct Index {
  @State pathValue: string = ''
  build() {
    Row() {
      Path()
        .width('100%').height(60).fill('#FFD33C').commands(this.pathValue)
        .onAreaChange((oldValue: Area, newValue: Area) => {
          // 获取组件的宽高
          const width = vp2px(parseInt(newValue.width.toString()))
          const height = vp2px(parseInt(newValue.height.toString()))
          // 更改路径绘制的命令
          this.pathValue = `M0,0 L${width/2 - vp2px(40)},0
            A1,1 0 0 0 ${width/2 + vp2px(40)},0
            L${width},0 L${width},${height} L0,${height}`
        })
    }
    .justifyContent(FlexAlign.Center)
    .width('100%').height('100%')
  }
}
2、绘制实心圆
实心圆、设置圆角:borderRadius 圆角半径为宽高一半,设置位置position,使其居中显示。
@Entry
@Component
struct Index {
  private navWidth = 0
  private navHeight = 0
  @State offsetX: number = 0
  @State pathValue: string = ''
  build() {
    Column() {
      Stack({ alignContent: Alignment.TopStart }) {
        // 背景
        Path()
          .width('100%').height('100%').fill('#FFD33C').commands(this.pathValue)
          .onAreaChange((oldValue: Area, newValue: Area) => {
            this.navWidth = vp2px(parseInt(newValue.width.toString()))
            this.navHeight = vp2px(parseInt(newValue.height.toString()))
            this.updateData(px2vp(this.navWidth / 2))
          })
        // 实心圆
        Row()
          .width(60).height(60).borderRadius(30)
          .backgroundColor('#FFD33C')
          .position({ x: this.offsetX - vp2px(10), y: -30 })
          .shadow({ radius: 15, color: '#ffaaaaaa' })

      }.width('100%').height(60)
    }
    .justifyContent(FlexAlign.Center)
    .width('100%').height('100%')
  }
  // 更新数据
  updateData(x) {
    this.offsetX = x
    this.pathValue = `M0,0 L${vp2px(x) - vp2px(40)},0
            A1,1 0 0 0 ${vp2px(x) + vp2px(40)},0
            L${this.navWidth},0 L${this.navWidth},${this.navHeight} L0,${this.navHeight}`
  }
}
3、圆位置改变动画
添加触摸事件,更改x坐标点,使用 显式动画 添加动画效果。
@Entry
@Component
struct Index {
  private navWidth = 0
  private navHeight = 0
  @State offsetX: number = 0
  @State pathValue: string = ''
  build() {
    Column() {
      Stack({ alignContent: Alignment.TopStart }) {
        // 背景
        Path()
          .width('100%').height('100%').fill('#FFD33C').commands(this.pathValue)
          .onAreaChange((oldValue: Area, newValue: Area) => {
            this.navWidth = vp2px(parseInt(newValue.width.toString()))
            this.navHeight = vp2px(parseInt(newValue.height.toString()))
            this.updateData(px2vp(this.navWidth / 2))
          })
          .onTouch((event: TouchEvent) => this.touchEvent(event))
        // 实心圆
        Row()
          .width(60).height(60).borderRadius(30)
          .backgroundColor('#FFD33C')
          .position({ x: this.offsetX - vp2px(10), y: -30 })
          .shadow({ radius: 15, color: '#ffaaaaaa' })

      }.width('100%').height(60)
    }
    .justifyContent(FlexAlign.Center)
    .width('100%').height('100%')
  }
  // 触摸事件
  touchEvent(event: TouchEvent) {
    let x = event.touches[0].x
    if (event.type === TouchType.Up) {
      // 显式动画
      animateTo({ delay: 50, duration: 300 }, () => {
        this.updateData(x)
      })
    }
  }
  // 更新数据
  updateData(x) {
    this.offsetX = x
    this.pathValue = `M0,0 L${vp2px(x) - vp2px(40)},0
            A1,1 0 0 0 ${vp2px(x) + vp2px(40)},0
            L${this.navWidth},0 L${this.navWidth},${this.navHeight} L0,${this.navHeight}`
  }
}
4、图标文字布局动画
添加点击事件,更改选中索引,设置item中的Y轴offset偏移量,使用 属性动画 添加动画效果。(示例代码)
@Entry
@Component
struct Index {
  @State itemWidth: number = 0
  @State selectIndex: number = 0
  private listItem = ['首页', '分类', '购物车', '我的']
  build() {
    Column() {
      Text().layoutWeight(1)
      Row() {
        ForEach(this.listItem, (item, index) => {
          Column() {
            Image($r('app.media.icon'))
              .width(30).height(30)
              .margin({ top: 15, bottom: 24 })
            Text(item)
              .fontSize(12)
          }.backgroundColor('#FFD33C')
          .width(this.itemWidth)
          .height('100%')
          .offset({ y: this.selectIndex === index ? -23 : 0 })// Y轴偏移量
          .animation({ duration: 350 })// 属性动画
          .onClick(() => {
            // 点击更改选中的索引
            this.selectIndex = index
          })
        }, item => item)
      }.width('100%')
      .height(60)
      .backgroundColor('#FFD33C')
    }
    .width('100%')
    .height('100%')
    .onAreaChange((oldValue: Area, newValue: Area) => {
      this.itemWidth = parseInt(newValue.width.toString()) / 4
    })
  }
}
总结
本项目只用到了两种动画的基础功能,难点主要是组件Path中路径绘制命令(本项目只用到几个命令)感兴趣的可以去查下其他命令,各种命令搭配使用能做出比较炫酷的效果。