前言
Httpclient以人们耳熟能详的OKHTTP为基础,整合Android-async-http,AutobahnAndroid,OkGo等库的功能特性,致力于在OpenHarmony 打造一款高效易用,功能全面的网络请求库。当前版本的httpclient依托系统提供的网络请求能力和上传下载能力!
一、安装HttpClient
1、打开第三方组件库
https://repo.harmonyos.com/#/cn/application/atomService?q=http%20keyword%3AOpenHarmony- 1.
2、找到我们需要的httpclient

3、安装
代码:
npm install /httpclient --save- 1.

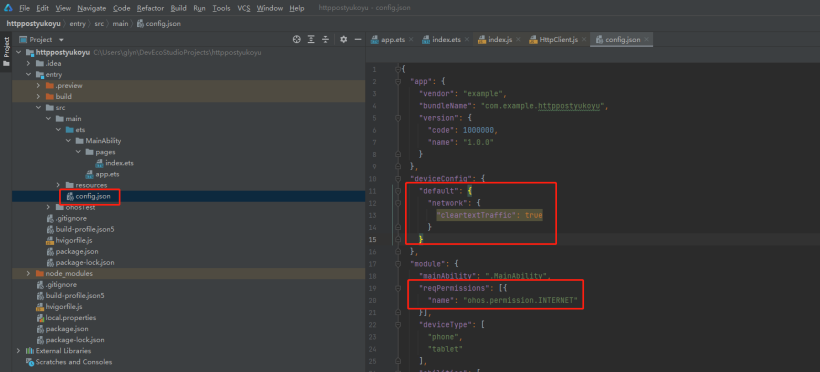
二、添加权限
添加权限参考这文章: https://ost.51cto.com/posts/13219。

三、编写代码
1、eTS代码
import httpclient from '@ohos/httpclient';
import TimeUnit from '@ohos/httpclient'
let httpClientImpl = new httpclient.HttpClient.Builder().setConnectTimeout(15, TimeUnit.TimeUnit.SECONDS).setReadTimeout(15, TimeUnit.TimeUnit.SECONDS).build();
struct Index {
message: string = 'post 测试';
srtbutton: string = '';
build() {
Row() {
Column() {
Text(this.message)
.fontSize(50)
.fontWeight(FontWeight.Bold)
Text(this.srtbutton)
.fontSize(50)
.fontWeight(FontWeight.Bold)
Button() { //按钮控件
Text('点击')
.fontSize(50)
.fontWeight(FontWeight.Bold)
}.type(ButtonType.Capsule)
.margin({
top: 200
})
.width('50%')
.height('10%')
.backgroundColor('#0D9FFB')
.onClick(() => { //点击事件
let body = { //带参数
"data": "hi!",
};
let requestBody = httpclient.RequestBody.create(JSON.stringify(body));
let request = new httpclient.Request.Builder()
.url("http://192.168.0.141:5000/")
.method('POST')
.body(requestBody)
.addHeader("Content-Type", "application/json")
.params("token", "yukoyu")
.build();
httpClientImpl.newCall(request).enqueue((result) => {
console.log("success: " + JSON.stringify(result))
this.srtbutton = JSON.stringify(result.data)
}, (error) => {
console.log("error: " + JSON.stringify(error))
})
})
}
.width('100%')
}
.height('100%')
}
}- 1.
- 2.
- 3.
- 4.
- 5.
- 6.
- 7.
- 8.
- 9.
- 10.
- 11.
- 12.
- 13.
- 14.
- 15.
- 16.
- 17.
- 18.
- 19.
- 20.
- 21.
- 22.
- 23.
- 24.
- 25.
- 26.
- 27.
- 28.
- 29.
- 30.
- 31.
- 32.
- 33.
- 34.
- 35.
- 36.
- 37.
- 38.
- 39.
- 40.
- 41.
- 42.
- 43.
- 44.
- 45.
- 46.
- 47.
- 48.
- 49.
- 50.
- 51.
- 52.
- 53.
2、服务器接口代码
import json
from flask import Flask, request
from flask_sqlalchemy import SQLAlchemy
from flask_migrate import Migrate
from flask_restful import Api
from flask_restful import Resource
import datetime
import config
app = Flask(__name__)
app.config.from_object(config)
db = SQLAlchemy(app)
api = Api(app)
'''
测试接口
'''
class hello(Resource):
    def post(self):
        data = json.loads(request.get_data())
        print(data)
        return { "data" : "hello post"}
    def get(self):
        return { "data" : "hello get"}
api.add_resource(hello, '/')
migrate = Migrate(app, db)- 1.
- 2.
- 3.
- 4.
- 5.
- 6.
- 7.
- 8.
- 9.
- 10.
- 11.
- 12.
- 13.
- 14.
- 15.
- 16.
- 17.
- 18.
- 19.
- 20.
- 21.
- 22.
- 23.
- 24.
四、测试
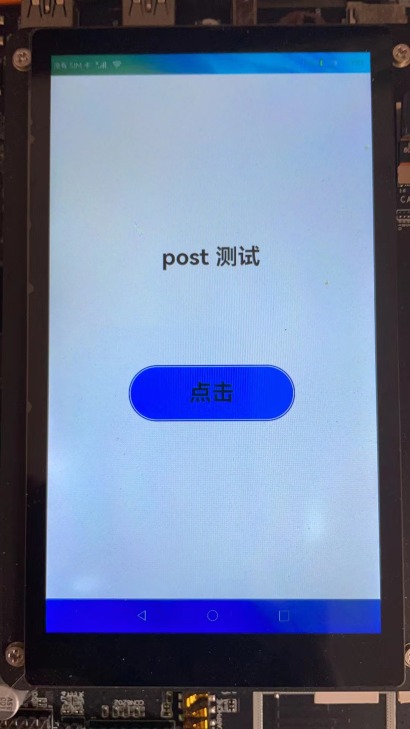
1、安装效果

2、点击效果

3、服务器打印post参数

测试成功!


