这篇文章不涉及 Webpack 的原理,只是观察下 Webpack 对 commonjs 和 esmodule 模块打包后的产物,读完后会对模块系统有个更深的了解。
环境配置
Webpack 只配置入口和出口,并且将 devtool 设置为 false,把 sourcemap 关掉。
// webpack.config.js
const path = require("path");

module.exports = {
    entry: "./src/commonjs/index.js",
    output: {
        path: path.resolve(__dirname, "./dist"),
        filename: "main.js",
    },
    devServer: {
        static: path.resolve(__dirname, "./dist"),
    },
    devtool: false,
};
npm 安装三个 node 包。
npm i -D webpack webpack-cli webpack-dev-server
更详细的过程可以参考 2021年从零开发前端项目指南。
小试牛刀
先简单写行代码测试一下:
// src/commonjs/index.js
document.write("hello, liang");
打包产物:
(() => {
    var __webpack_exports__ = {};
    document.write("hello, liang");
})();
只是简单的包了层 IIFE 。
commonjs 模块
写一个 add 模块函数。
// src/commonjs/add.js
console.log("add开始引入");
module.exports.add = (a, b) => {
    return a + b;
};
exports.PI = 3.14;
然后 index.js 进行调用。
// src/commonjs/index.js
console.log("commonjs开始执行");
const { add } = require("./add");
document.write("1+1=", add(1, 1));
分析一下打包产物。
变成了 key、value 的键值对,key 是文件名,value 是封装为一个函数的模块,提供 module 和 exports 参数。
这里我们只有一个模块,所以只有一个 key 。
var __webpack_modules__ = {
  "./src/commonjs/add.js": (module, exports) => {
    console.log("add开始引入");
    module.exports.add = (a, b) => {
      return a + b;
    };
    exports.PI = 3.14;
  },
};
提供一个 __webpack_require__ 方法用来导入上边 __webpack_modules__ 中的模块。
function __webpack_require__(moduleId) {
  var module  = {
    exports: {},
  });

  __webpack_modules__[moduleId](
    module,
    module.exports,
    __webpack_require__
  );

  return module.exports;
}
因为 module 和 exports 都是对象,所以在 __webpack_modules__ 中给 exports 添加值就是改变这里外边的值。
最后把 module.exports 返回即可。
此外,我们可以添加一个 __webpack_module_cache__ 变量来保存已经导出过的对象。
var __webpack_module_cache__ = {};

function __webpack_require__(moduleId) {
  // 如果已经被导出过,直接返回缓存
  var cachedModule = __webpack_module_cache__[moduleId];
  if (cachedModule !== undefined) {
    return cachedModule.exports;
  }

  // 缓存对象指向同一个值
  var module = (__webpack_module_cache__[moduleId] = {
    exports: {},
  });

  __webpack_modules__[moduleId](
    module,
    module.exports,
    __webpack_require__
  );

  return module.exports;
}
然后看下整体代码,index.js 中通过 __webpack_require__ 方法导入模块即可。
(() => {
    var __webpack_modules__ = {
        "./src/commonjs/add.js": (module, exports) => {
            console.log("add开始引入");
            module.exports.add = (a, b) => {
                return a + b;
            };
            exports.PI = 3.14;
        },
    };

    var __webpack_module_cache__ = {};

    function __webpack_require__(moduleId) {
        var cachedModule = __webpack_module_cache__[moduleId];
        if (cachedModule !== undefined) {
            return cachedModule.exports;
        }

        var module = (__webpack_module_cache__[moduleId] = {
            exports: {},
        });

        __webpack_modules__[moduleId](
            module,
            module.exports,
            __webpack_require__
        );

        return module.exports;
    }

    var __webpack_exports__ = {};

    (() => {
        console.log("commonjs开始执行");
        const { add } = __webpack_require__("./src/commonjs/add.js");

        document.write("1+1=", add(1, 1));
    })();
})();
esmodule 模块
我们把上边的 commonjs 模块改写一下。
// src/esmodule/add.js
console.log("add开始引入");
export const add = (a, b) => {
    return a + b;
};
export const PI = 3.14;
const test = 3;
export default test;
然后是 index.js 。
// src/esmodule/index.js
console.log("esmodule开始执行");
import { add } from "./add";
document.write("1+1=", add(1, 1));
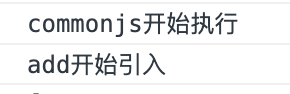
此时运行一下会发现和 commonjs 不同的地方,代码并没有按照我们写的顺序执行,屏幕中先输出的是 add开始引入 然后才是 esmodule开始执行。

看一下打包产物应该就可以理解为什么了。
和之前一样,会提供一个 __webpack_require__ 方法来引入模块。
var __webpack_module_cache__ = {};

function __webpack_require__(moduleId) {
  var cachedModule = __webpack_module_cache__[moduleId];
  if (cachedModule !== undefined) {
    return cachedModule.exports;
  }

  var module = (__webpack_module_cache__[moduleId] = {
    exports: {},
  });

  __webpack_modules__[moduleId](
    module,
    module.exports,
    __webpack_require__
  );

  return module.exports;
}
不同之处在于,额外提供了几个看起来比较奇怪的方法。
第一个是 d 方法,用来将 definition 上边的属性挂到 exports 上。
__webpack_require__.d = (exports, definition) => {
  for (var key in definition) {
    if (
      __webpack_require__.o(definition, key) &&
      !__webpack_require__.o(exports, key)
    ) {
      Object.defineProperty(exports, key, {
        enumerable: true,
        get: definition[key],
      });
    }
  }
};
第二个是 o 方法,判断 exports 方法是否有 key 属性。
__webpack_require__.o = (obj, prop) =>
 Object.prototype.hasOwnProperty.call(obj, prop);
第三个是 r 方法,给 exports 加一个 Symbol.toStringTag 属性,这样 exports.toString 返回的就是 '[object Module] 。
此外,再加一个 __esModule 属性,用来标识该模块是 esmodule 。
__webpack_require__.r = (exports) => {
  if (typeof Symbol !== "undefined" && Symbol.toStringTag) {
    Object.defineProperty(exports, Symbol.toStringTag, {
      value: "Module",
    });
  }
  Object.defineProperty(exports, "__esModule", {
    value: true,
  });
};
这几个方法啥时候用呢,会在我们的模块代码之前调用。
var __webpack_modules__ = {
        "./src/esmodule/add.js": (
            __unused_webpack_module,
            __webpack_exports__,
            __webpack_require__
        ) => {
            __webpack_require__.r(__webpack_exports__);// 标识该模块是 esmodule
            __webpack_require__.d(__webpack_exports__, {// 将该模块里的属性、方法挂到 __webpack_exports__ 上
                add: () => add,
                PI: () => PI,
                default: () => __WEBPACK_DEFAULT_EXPORT__,
            });
            console.log("add开始引入");
            const add = (a, b) => {
                return a + b;
            };
            const PI = 3.14;
            const test = 3;
            const __WEBPACK_DEFAULT_EXPORT__ = test;
        },
    };
我们把 add、PI、__WEBPACK_DEFAULT_EXPORT__ 属性都包了箭头函数 () => add ,因此可以先在 __webpack_require__.d 函数中使用它们, __webpack_require__.d 函数之后才去定义 add、PI、__WEBPACK_DEFAULT_EXPORT__ 这些变量的值。
然后是 index.js 的使用。
var __webpack_exports__ = {};

    (() => {
        __webpack_require__.r(__webpack_exports__);
        var _add__WEBPACK_IMPORTED_MODULE_0__ = __webpack_require__(
            "./src/esmodule/add.js"
        );
        console.log("esmodule开始执行");

        document.write(
            "1+1=",
            (0, _add__WEBPACK_IMPORTED_MODULE_0__.add)(1, 1)
        );
    })();
可以看到我们是通过 _add__WEBPACK_IMPORTED_MODULE_0__ 变量把 ./src/esmodule/add.js 的所有方法都拿到,然后再使用 _add__WEBPACK_IMPORTED_MODULE_0__.add 调用具体的方法。
上边还有一个奇怪的用法 (0, _add__WEBPACK_IMPORTED_MODULE_0__.add)(1, 1) ,通过逗号表达式可以改变 this 指向,参考 Why does babel rewrite imported function call to (0, fn)(...)?,
https://stackoverflow.com/questions/32275135/why-does-babel-rewrite-imported-function-call-to-0-fn
至于为什么这么用还不清楚,目前不重要先跳过了。
然后看下整体代码:
(() => {
    "use strict";
    var __webpack_modules__ = {
        "./src/esmodule/add.js": (
            __unused_webpack_module,
            __webpack_exports__,
            __webpack_require__
        ) => {
            __webpack_require__.r(__webpack_exports__);
            __webpack_require__.d(__webpack_exports__, {
                add: () => add,
                PI: () => PI,
                default: () => __WEBPACK_DEFAULT_EXPORT__,
            });
            console.log("add开始引入");
            const add = (a, b) => {
                return a + b;
            };
            const PI = 3.14;
            const test = 3;
            const __WEBPACK_DEFAULT_EXPORT__ = test;
        },
    };

    var __webpack_module_cache__ = {};

    function __webpack_require__(moduleId) {
        var cachedModule = __webpack_module_cache__[moduleId];
        if (cachedModule !== undefined) {
            return cachedModule.exports;
        }

        var module = (__webpack_module_cache__[moduleId] = {
            exports: {},
        });

        __webpack_modules__[moduleId](
            module,
            module.exports,
            __webpack_require__
        );

        return module.exports;
    }

    (() => {
        __webpack_require__.d = (exports, definition) => {
            for (var key in definition) {
                if (
                    __webpack_require__.o(definition, key) &&
                    !__webpack_require__.o(exports, key)
                ) {
                    Object.defineProperty(exports, key, {
                        enumerable: true,
                        get: definition[key],
                    });
                }
            }
        };
    })();

    (() => {
        __webpack_require__.o = (obj, prop) =>
            Object.prototype.hasOwnProperty.call(obj, prop);
    })();

    (() => {
        __webpack_require__.r = (exports) => {
            if (typeof Symbol !== "undefined" && Symbol.toStringTag) {
                Object.defineProperty(exports, Symbol.toStringTag, {
                    value: "Module",
                });
            }
            Object.defineProperty(exports, "__esModule", {
                value: true,
            });
        };
    })();

    var __webpack_exports__ = {};

    (() => {
        __webpack_require__.r(__webpack_exports__);
        var _add__WEBPACK_IMPORTED_MODULE_0__ = __webpack_require__(
            "./src/esmodule/add.js"
        );
        console.log("commonjs开始执行");

        document.write(
            "1+1=",
            (0, _add__WEBPACK_IMPORTED_MODULE_0__.add)(1, 1)
        );
    })();
})();
commonjs 和 esmodule 的不同
两个的打包产物对比:
// commonjs
var __webpack_modules__ = {
        "./src/commonjs/add.js": (module, exports) => {
            console.log("add开始引入");
            module.exports.add = (a, b) => {
                return a + b;
            };
            exports.PI = 3.14;
        },
    };

//esmodule
var __webpack_modules__ = {
        "./src/esmodule/add.js": (
            __unused_webpack_module,
            __webpack_exports__,
            __webpack_require__
        ) => {
            __webpack_require__.r(__webpack_exports__);// 标识该模块是 esmodule
            __webpack_require__.d(__webpack_exports__, {// 将该模块里的属性、方法挂到 __webpack_exports__ 上
                add: () => add,
                PI: () => PI,
                default: () => __WEBPACK_DEFAULT_EXPORT__,
            });
            console.log("add开始引入");
            const add = (a, b) => {
                return a + b;
            };
            const PI = 3.14;
            const test = 3;
            const __WEBPACK_DEFAULT_EXPORT__ = test;
        },
    };
一个最大的区别就是 commonjs 导出的就是普通的值,一旦导入就不会改变了。而 esmodule 导出的值通过函数包装了一层,因此是动态的,导入之后再次使用可能会变化。
举个例子,对于 esmodule。
// src/esmodule/add.js
console.log("add开始引入");
export let PI = 3.14;

export const add = (a, b) => {
    PI = 6;
    return a + b;
};
const test = 3;
export default test;

// src/esmodule/index.js
console.log("esmodule开始执行");
import { add, PI } from "./add";
console.log(PI, "1+1=", add(1, 1));
console.log(PI, "1+1=", add(1, 1));
如果只看 src/esmodule/index.js 的代码,我们并没有改变 PI 的值,但执行会发现 add 函数执行后 PI 的值就发生了改变:
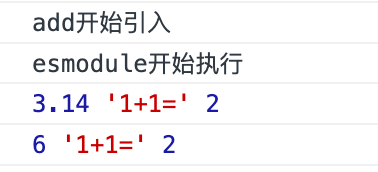
对于原始值, commonjs 就做不到上边的事情了,一般情况下也不要这样搞,以防出现未知 bug 。
此外,esmodule 在挂载属性的时候只定义了 get 。
__webpack_require__.d = (exports, definition) => {
  for (var key in definition) {
    if (
      __webpack_require__.o(definition, key) &&
      !__webpack_require__.o(exports, key)
    ) {
      Object.defineProperty(exports, key, {
        enumerable: true,
        get: definition[key],
      });
    }
  }
};
所以我们如果在 esmodule 模块中的去修改导入的值,会直接抛错。
console.log("esmodule开始执行");
import { add, PI } from "./add";
PI = 3;
console.log(PI, "1+1=", add(1, 1));

在 commonjs 中就无所谓了,但同样也不要这样搞,以防出现未知 bug 。
总结
简单对比了下 commonjs 和 esmodule 模块的产物,其中 commonjs 比较简单,就是普通的导出对象和解构对象。但对于 esmodule 的话,导出的每一个属性会映射到一个函数,因此值是可以动态改变的。
此外 require 会按我们代码中的顺序执行,但 import 会被提升到代码最前边首先执行。