在Linux服务器中如果我们希望所有Linux服务器都具有正确的时间,则必须配置一些NTP客户端,该客户端将始终从远程NTP服务器获取正确的时间。
安装 chrony
使用下面命令在Centos8中安装chrony:
[root@server1 ~]# yum -y install chrony
chrony安装完成之后,会有两个可执行程序:
- chronyc: chrony命令行工具
- chronyd: chrony的守护进程
Chrony 的配置文件
Chrony的配置文件是/etc/chrony.conf,下面列出了示例chrony.conf文件:
[root@server1 ~]# cat /etc/chrony.conf
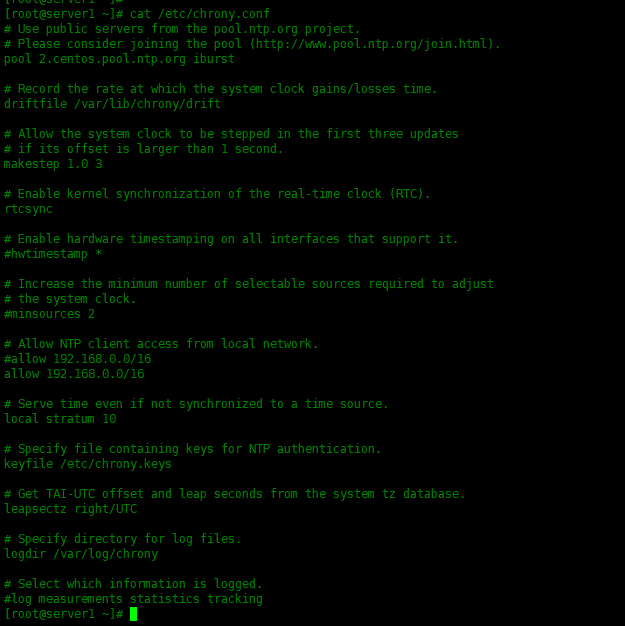
pool 2.centos.pool.ntp.org iburst chrony将从中获取时间的远程NTP服务器。driftfile /var/lib/chrony/drift 系统时钟频率都有小小的误差,这个就是为什么计算机运行一段时间后时间会不精确。NTP会自动来监测我们时钟的误差值并予以调整,所以它会把记录下来的误差先写入driftfile,重新启动系统后,之前的计算结果也就不会丢失了。keyfile /etc/chrony.keys 该文件包含用于NTP身份验证的密钥。logdir /var/log/chrony 它是记录Chrony的日志文件。
测试 chrony
就像ntpdate命令一样,我们可以使用chronyd手动将Linux服务器的时间与远程NTP服务器进行同步。语法:
chronyd -q ‘server {ntp_server_name} iburst’
下面使用实例:
[root@server1 ~]# chronyd -q 'server s1a.time.edu.cn iburst'
2021-05-25T01:59:38Z chronyd version 3.5 starting (+CMDMON +NTP +REFCLOCK +RTC +PRIVDROP +SCFILTER +SIGND +ASYNCDNS +SECHASH +IPV6 +DEBUG)
2021-05-25T01:59:38Z Initial frequency -4.035 ppm
2021-05-25T01:59:42Z System clock wrong by -0.006248 seconds (step)
2021-05-25T01:59:42Z chronyd exiting

从上面的输出中可以看到,chrony已校正了系统时间。
Start 和 Enable chronyd 服务
运行以下命令以启用chronyd服务:
[root@server1 ~]# systemctl enable chronyd
[root@server1 ~]# systemctl start chronyd
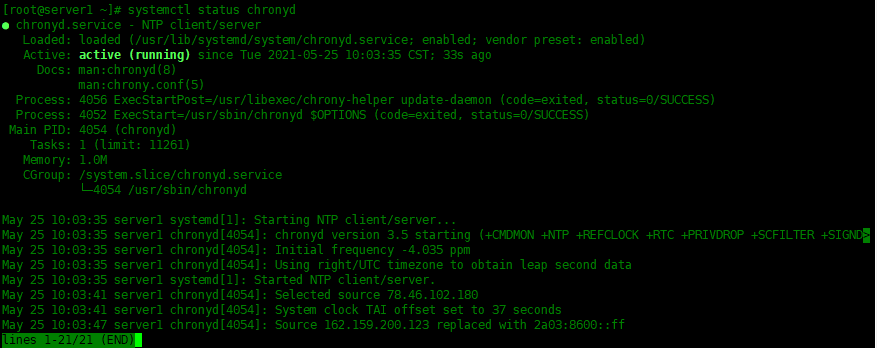
运行下面命令查看chronyd的服务状态:
[root@server1 ~]# systemctl status chronyd
验证 chrony 的同步
要验证系统时间是否已使用chrony同步,使用以下命令查看:
[root@server1 ~]# chronyc tracking
Reference ID    : 4E2E66B4 (electrode.felixc.at)
Stratum         : 4
Ref time (UTC)  : Tue May 25 02:04:47 2021
System time     : 0.000002501 seconds slow of NTP time
Last offset     : +0.016273908 seconds
RMS offset      : 0.016273908 seconds
Frequency       : 98.064 ppm fast
Residual freq   : +1.774 ppm
Skew            : 155.311 ppm
Root delay      : 0.227135062 seconds
Root dispersion : 0.028634518 seconds
Update interval : 64.4 seconds
Leap status     : Normal
Reference ID 是系统时间当前同步到的服务器的ID和名称。
检查 chrony 来源
要列出有关chronyd使用的当前时间源的信息,请运行以下命令:
[root@server1 ~]# chronyc sources
210 Number of sources = 4
MS Name/IP address         Stratum Poll Reach LastRx Last sample
===============================================================================
^- electrode.felixc.at           3   6   377    29    -14ms[  -14ms] +/-  137ms
^- ntp7.flashdance.cx            2   6   377    91  +2336us[+2505us] +/-  174ms
^? ntp8.flashdance.cx            0   6     0     -     +0ns[   +0ns] +/-    0ns
^* 111.230.189.174               2   6   377    28   +423us[ +648us] +/-   50ms

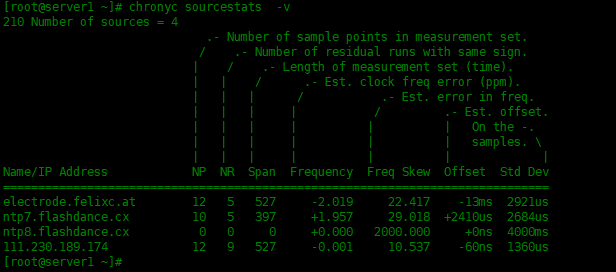
要列出有关chronyd使用的每个源的漂移速度和偏移估计的信息,请运行以下命令:
[root@server1 ~]# chronyc sourcestats  -v
210 Number of sources = 4
                             .- Number of sample points in measurement set.
                            /    .- Number of residual runs with same sign.
                           |    /    .- Length of measurement set (time).
                           |   |    /      .- Est. clock freq error (ppm).
                           |   |   |      /           .- Est. error in freq.
                           |   |   |     |           /         .- Est. offset.
                           |   |   |     |          |          |   On the -.
                           |   |   |     |          |          |   samples. \
                           |   |   |     |          |          |             |
Name/IP Address            NP  NR  Span  Frequency  Freq Skew  Offset  Std Dev
==============================================================================
electrode.felixc.at        12   5   527     -2.019     22.417    -13ms  2921us
ntp7.flashdance.cx         10   5   397     +1.957     29.018  +2410us  2684us
ntp8.flashdance.cx          0   0     0     +0.000   2000.000     +0ns  4000ms
111.230.189.174            12   9   527     -0.001     10.537    -60ns  1360us
配置 Chrony NTP 服务
如果你要将Linux服务器配置为所有内部系统的Chrony NTP服务器。我们需要在/etc/chrony.conf配置文件中稍作修改:
[root@server1 ~]# sed -i "s/#local stratum 10/local stratum 10/g" /etc/chrony.conf
[root@server1 ~]# sed -i "s/#allow 192.168.0.0\/16/allow 192.168.0.0\/16/" /etc/chrony.conf
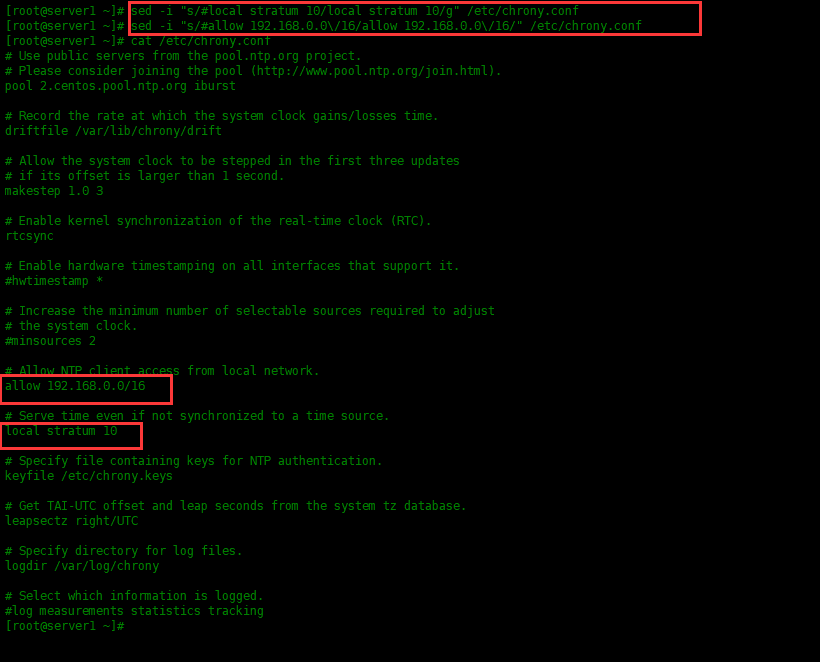
当我们取消注释local stratum 10行时,则使我们的Linux服务器成为实时NTP服务器,即使它与网络断开连接也可以继续正常工作。而allow 192.168.0.0/26表示允许该网段的设备连接到我们的Chrony NTP服务器以进行时间同步。更改后,重启chrony服务并跟踪chrony:
[root@server1 ~]# systemctl restart chronyd ; watch chronyc tracking

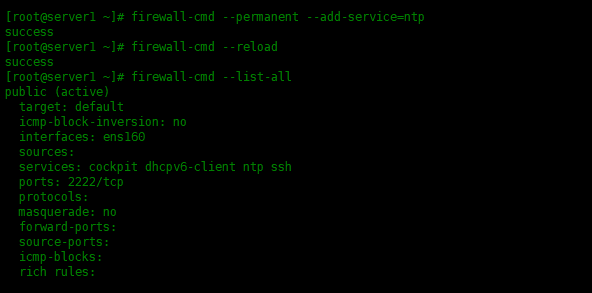
使用以下命令在防火墙中允许NTP服务:
[root@server1 ~]# firewall-cmd --permanent --add-service=ntp
success
[root@server1 ~]# firewall-cmd --reload
success
总 结
这就是本文的全部内容,希望你能了解如何使用chrony服务将Linux的时间与NTP服务器同步。


