虽然Git从本质上讲是监控和跟踪文本的更改,但它的定位依然是版本控制系统。你可能已经以某种方式使用过git;由于其分布式特性,git成为了事实上的代码版本控制标准,与集中式Apache Subversion (SVN)截然相反。
安装Git
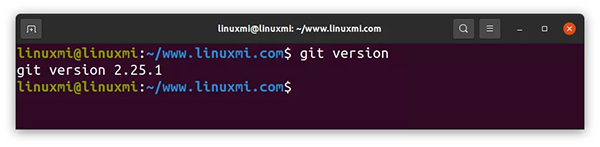
要检查是否在终端中安装了Git,请运行:
git version
# git version 2.25.1
- 1.
- 2.
Ubuntu用户可以使用apt安装:sudo apt install git。
配置Git
我们需要配置的东西不多:
git config --global user.name "John Doe" && # your name
git config --global user.email johndoe@example.com && # your email
git config --global init.defaultbranch main # default branch name, to be compatible with GitHub
- 1.
- 2.
- 3.
你可以通过以下方式查看当前的全局配置:
git config --global --list
# Type ":q" to close
- 1.
- 2.
git以纯文本形式存储配置,当然你也可以直接在~/.gitconfig或~/.config/git/config中编辑全局配置。
正如命令所建议的那样,删除--global将使这些命令的范围限定为当前文件夹。为了测试这一点,我们需要一个存储库。
创建新的存储仓库
存储仓库就是一个包含要跟踪的所有内容的文件夹。创建存储仓库请运行:
mkdir gitexample &&
cd gitexample &&
git init
# gitexample git:(main)
- 1.
- 2.
- 3.
- 4.
此命令在gitexample文件夹中创建了文件夹.git。隐藏的.git文件夹是一个存储仓库:所有本地配置和更改都存储在那里。
做一些变更
让我们在存储库中创建一些东西:
echo "Hello, Git" >> hello.txt
- 1.
如果我们运行git status,我们将看到新创建的未被跟踪的文件:
git status
# On branch main
#
# No commits yet
#
# Untracked files:
#  (use "git add <file>..." to include in what will be committed)
#   hello.txt
#
# nothing added to commit but untracked files present (use "git add" to track)
- 1.
- 2.
- 3.
- 4.
- 5.
- 6.
- 7.
- 8.
- 9.
- 10.
接下来让我们来添加文件,可以直接这样做:
git add . # Or `git add hello.txt`, if we don't want all files
- 1.
如果你现在检查存储库状态,你将看到文件已添加(也称为已暂存),但尚未提交:
git status
# On branch main
#
# No commits yet
#
# Changes to be committed:
#  (use "git rm --cached <file>..." to unstage)
#   new file:   hello.txt
- 1.
- 2.
- 3.
- 4.
- 5.
- 6.
- 7.
- 8.
要记录更改,先提交:
git commit -m "Add hello.txt"
# [main (root-commit) a07ee27] Adds hello.txt
# 1 file changed, 2 insertions(+)
# create mode 100644 hello.txt
- 1.
- 2.
- 3.
- 4.
小提示:git commit -m <MESSAGE>是一个简写命令,你也可以使用git commit打开编辑器(主要是vim)并提供详细的提交描述。
让我们来检查更改记录:
git log
# type :q to close
- 1.
- 2.
将显示如下内容:
commit a07ee270d6bd0419a50d1936ad89b9de0332f375 (HEAD -> main)
Author: Your Name <your@email.address>
Date:   Sun Jul 11 11:47:16 2021 +0200
    Adds hello.txt
(END)
- 1.
- 2.
- 3.
- 4.
- 5.
创建分支
在很多情况下,拥有单独版本的初始代码会很有用:例如在测试不确定的功能时,也可以在协同工作时避免代码冲突。这就需要git分支登场了:它是从历史记录的某个特定点发展开来的。
要创建分支可以运行git branch NAME,切换分支可以运行git checkout NAME。或者干脆就这样做:
git checkout -b dev # switches to a new branch called "dev"
# Switched to a new branch 'dev'
# gitexample git:(dev)
- 1.
- 2.
- 3.
让我们更改hello.txt文件中的内容并提交更改:
echo "\nHello, Git Branch" >> hello.txt &&
git commit -am "Change hello.txt"
- 1.
- 2.
现在让我们切换回主版本:
git checkout main &&
cat hello.txt
# Switched to branch 'main'
# Hello, Git
- 1.
- 2.
- 3.
- 4.
如你所见,文件内容仍与原来相同。要比较分支,我们可以运行:
git diff dev
# diff --git a/hello.txt b/hello.txt
# index 360c923..b7aec52 100644
# --- a/hello.txt
# +++ b/hello.txt
# @@ -1,3 +1 @@
# Hello, Git
# -
# -Hello, Git Branch
# (END)
# type ":q" to close
- 1.
- 2.
- 3.
- 4.
- 5.
- 6.
- 7.
- 8.
- 9.
- 10.
- 11.
让我们也对主分支进行更改:
echo "\nHi from Main Branch" >> hello.txt &&
git commit -am "Change hello.txt from main"
# [main 9b60c4b] Change hello.txt from main
# 1 file changed, 2 insertions(+)
- 1.
- 2.
- 3.
- 4.
现在让我们尝试合并更改:
git merge dev
# Auto-merging hello.txt
# CONFLICT (content): Merge conflict in hello.txt
# Automatic merge failed; fix conflicts and then commit the result.
- 1.
- 2.
- 3.
- 4.
因为文件在同一个地方被更改了两次,所以有了冲突。看文件:
cat hello.txt
<<<<<<< HEAD
Hello, Git
Hi from Main Branch
=======
Hello, Git
>>>>>>> dev
- 1.
- 2.
- 3.
- 4.
- 5.
- 6.
- 7.
还有一个工具可以用来分别查看更改:
git diff --ours # :q to close
git diff --theirs #:q to close
- 1.
- 2.
你可以手动编辑文件并提交更改,但这里假设我们只需要其中一个版本。我们首先中止合并:
git merge --abort
- 1.
并使用theirs策略重新开始合并,这意味着在发生冲突时,我们将始终使用传入分支的内容:
git merge -X theirs dev
# Auto-merging hello.txt
# Merge made by the 'recursive' strategy.
# hello.txt | 5 +----
# 1 file changed, 1 insertion(+), 4 deletions(-)
- 1.
- 2.
- 3.
- 4.
- 5.
与此策略相反的是ours策略。将两个更改合并在一起需要手动编辑(或使用git mergetool)。
要查看所有分支的列表,请运行:
git branch # type :q to close
#  dev
# * main
- 1.
- 2.
- 3.
最后,是如何删除分支:
git branch -d dev
# Deleted branch dev (was 6259828).
- 1.
- 2.
Rebase命令
分支从git历史记录中的特定点开始“生长”,rebase命令允许更改这些特定点。让我们创建另一个分支并再次对hello.txt添加一些更改:
git checkout -b story &&
echo "Once upon a time there was a file">>story.txt &&
git add story.txt &&
git commit -m "Add story.txt"
# Switched to a new branch 'story'
# [story eb996b8] Add story.txt
# 1 file changed, 1 insertion(+)
# create mode 100644 story.txt
- 1.
- 2.
- 3.
- 4.
- 5.
- 6.
- 7.
- 8.
现在,让我们回到主分支并添加更改:
git checkout main &&
echo "Other changes" >> changes.txt &&
git add changes.txt &&
git commit -m "Add changes.txt"
- 1.
- 2.
- 3.
- 4.
要重现我们在main中对story分支所做的更改,请运行:
git checkout story &&
git rebase main
# Successfully rebased and updated refs/heads/story.
- 1.
- 2.
- 3.
你可以看到在main分支中创建的新文件被添加到story分支:
ls
# changes.txt hello.txt   story.txt
- 1.
- 2.
注意:不要重新rebase其他人可能使用过的分支,例如主分支。此外,请记住,远程存储库上的每个历史操作都需要强制这些更改生效。
远程存储仓库
如果你还没有存储库,那么请创建一个GitHub帐户,登录并创建一个新的空存储库(私有或公共)。
假设存储库名称是example,运行以下命令(用你自己的用户名替换):
git remote add origin git@github.com:USERNAME/example.git &&
git push -u origin main
- 1.
- 2.
你可以刷新页面并查看主分支中的文件。要将所有本地分支推送到远程存储库,请运行:
git push --all origin
- 1.
让我们在GitHub上编辑一些内容:单击任意文件和pencil图标。你想要什么文本都可以通过一行代码添加进去,然后按Commit changes。
现在在本地运行此命令以获取远程更改:
git checkout main &&
git pull
- 1.
- 2.
管理未提交的更改
如果要保存本地更改以供以后使用,可以使用git stash:
echo "Changes" >> hello.txt &&
git stash
- 1.
- 2.
然后你可以使用以下命令来检查、应用或放弃这些更改:
git stash list
# stash@{0}: WIP on main: 92354c8 Update changes.txt
git stash pop # to apply changes
git stash drop # to drop changes
- 1.
- 2.
- 3.
- 4.
提示:你可以使用stash编号,即git stash pop 0来应用特定的stash或通过git stash drop 0来删除它。
如果你想放弃所有本地更改并简单地将存储库恢复到上次提交的更改,运行:
git restore .
- 1.
管理已提交的更改
创建提交后,此更改将保存在本地git历史记录中。如前所述,所有影响远程历史的更改都需要git push --force。以下所有命令都值得一记。
让我们从编辑最后一条提交消息开始:
git commit --amend # type :wq to save and close
# Press "i" to edit, "Esc" to stop editing
- 1.
- 2.
我们把一切都重置到一开始怎么样?
要查找最开始提交的ID,请运行此命令并滚动(向下箭头)到最后:
git log --abbrev-commit
# commit a07ee27
# Author: Your Name <your@email.address>
Date:   Sun Jul 11 11:47:16 2021 +0200
    Adds hello.txt
(END)
# type ":q" to close
- 1.
- 2.
- 3.
- 4.
- 5.
- 6.
- 7.
现在来重置存储库,但保持所有更改未暂存:
git reset --soft COMMIT # e.g. a07ee27
- 1.
与此相反,你也可以使用git reset --hard COMMIT进行强制重置并摆脱所有更改。你可以从git文档中了解其他几种类型的重置。
别名
大多数情况下,你将只用到少量命令(大多数情况下为checkout、add、commit、pull、push 和merge),但多了解一些总是有备无患。
另一种方法是git别名。要配置别名,只需在配置中设置即可。例如,我经常使用的一个别名是git tree,它以树的形式打印漂亮的历史日志:
git config --global alias.tree 'log --graph --decorate --pretty=oneline --abbrev-commit'
# Try it with `git tree`
- 1.
- 2.
另一个有用的别名是删除所有合并的分支:
git config --global alias.clbr '!git branch --merged | grep -v \* | xargs git branch -D'
- 1.
如你所见,它使用!作为前缀,这允许我们使用其他命令,而不仅仅是git命令。
今天就到这里,希望对你的开发之旅有所帮助。