文末本文转载自微信公众号「程序员千羽 」,作者程序员千羽。转载本文请联系程序员千羽公众号。
GitHub:https://github.com/nateshao/ssm/tree/master/110-springmvc-intercepter
什么是拦截器?
Spring MVC中的拦截器(Interceptor)类似于Servlet中的过滤器(Filter),它主要用于拦截用户请求并作相应的处理。例如通过拦截器可以进行权限验证、记录请求信息的日志、判断用户是否登录等。
要使用Spring MVC中的拦截器,就需要对拦截器类进行定义和配置。通常拦截器类可以通过两种方式来定义。
- 第一种:通过实现HandlerInterceptor接口,或继承HandlerInterceptor接口的实现类(如HandlerInterceptorAdapter)来定义。
- 第二种:通过实现WebRequestInterceptor接口,或继承WebRequestInterceptor接口的实现类来定义。
以实现HandlerInterceptor接口方式为例,自定义拦截器类的代码如下:
- public class CustomInterceptor implements HandlerInterceptor {
- /**
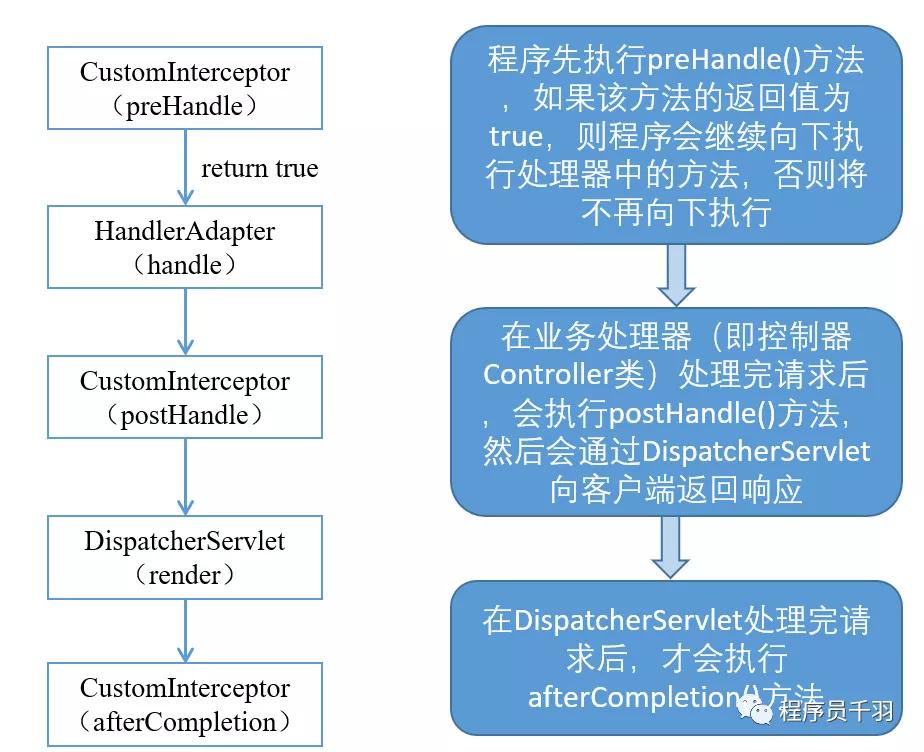
- * 该方法会在控制器方法前执行,其返回值表示是否中断后续操作。
- * 当其返回值为true时,表示继续向下执行;
- * 当其返回值为false时,会中断后续的所有操作。
- * @param request
- * @param response
- * @param handler
- * @return
- * @throws Exception
- */
- @Override
- public boolean preHandle(HttpServletRequest request,
- HttpServletResponse response, Object handler) throws Exception {
- System.out.println("CustomInterceptor...preHandle");
- //对拦截的请求进行放行处理
- return true;
- }
- /**
- * 该方法会在控制器方法调用之后,且解析视图之前执行。
- * 可以通过此方法对请求域中的模型和视图做出进一步的修改。
- * @param request
- * @param response
- * @param handler
- * @param modelAndView
- * @throws Exception
- */
- @Override
- public void postHandle(HttpServletRequest request,
- HttpServletResponse response, Object handler,
- ModelAndView modelAndView) throws Exception {
- System.out.println("CustomInterceptor...postHandle");
- }
- /**
- * 该方法会在整个请求完成,即视图渲染结束之后执行。
- * 可以通过此方法实现一些资源清理、记录日志信息等工作。
- * @param request
- * @param response
- * @param handler
- * @param ex
- * @throws Exception
- */
- @Override
- public void afterCompletion(HttpServletRequest request,
- HttpServletResponse response, Object handler,
- Exception ex) throws Exception {
- System.out.println("CustomInterceptor...afterCompletion");
- }
- }
要使自定义的拦截器类生效,还需要在Spring MVC的配置文件中进行配置。
- <mvc:interceptors>
- <!-- 全局拦截器,拦截所有请求 -->
- <bean class="com.nateshao.interceptor.CustomInterceptor"/>//
- <mvc:interceptor>
- <!-- **配置,表示拦截所有路径 -->
- <mvc:mapping path="/**"/>
- <!-- 配置不需要拦截的路径 -->
- <mvc:exclude-mapping path=""/>
- <bean class="com.nateshao.interceptor.Interceptor1"/>
- </mvc:interceptor>
- <mvc:interceptor>
- <!-- /hello表示拦截所有以“/hello”结尾的路径 -->
- <mvc:mapping path="/hello"/>
- <bean class="com.nateshao.interceptor.Interceptor2"/>
- </mvc:interceptor>
- ...
- </mvc:interceptors>
注意:< mvc:interceptor >中的子元素必须按照上述代码的配置顺序进行编写,否则文件会报错。
2. 拦截器的执行流程
在运行程序时,拦截器的执行是有一定顺序的,该顺序与配置文件中所定义的拦截器的顺序相关。
单个拦截器,在程序中的执行流程如下图所示:
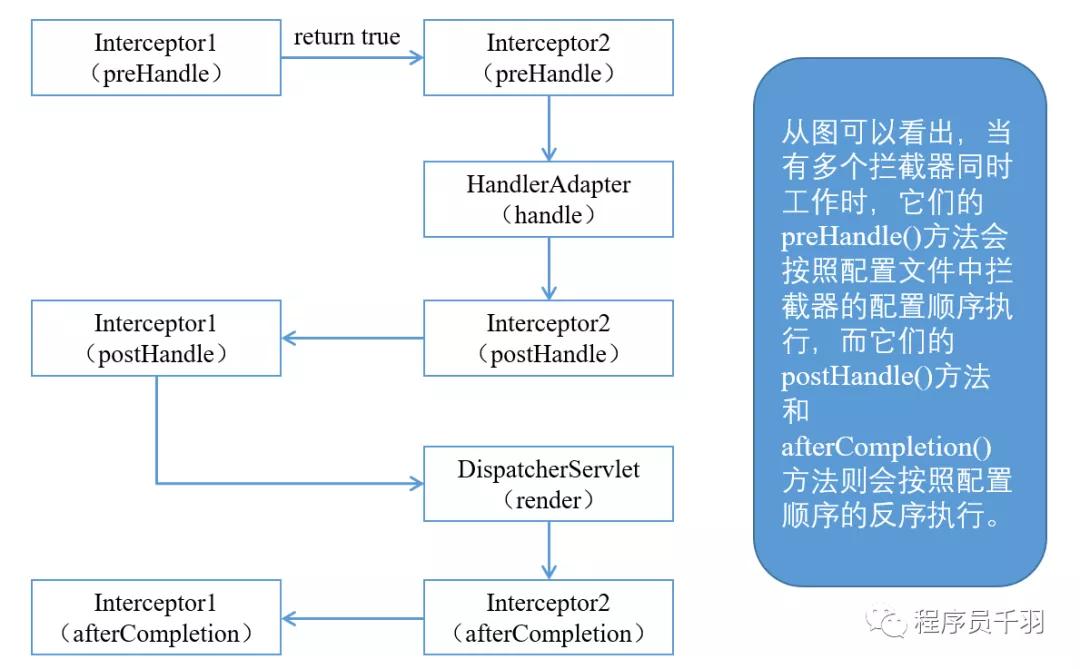
多个拦截器的执行流程
“多个拦截器(假设有两个拦截器Interceptor1和Interceptor2,并且在配置文件中, Interceptor1拦截器配置在前),在程序中的执行流程如下图所示:
3. 应用案例
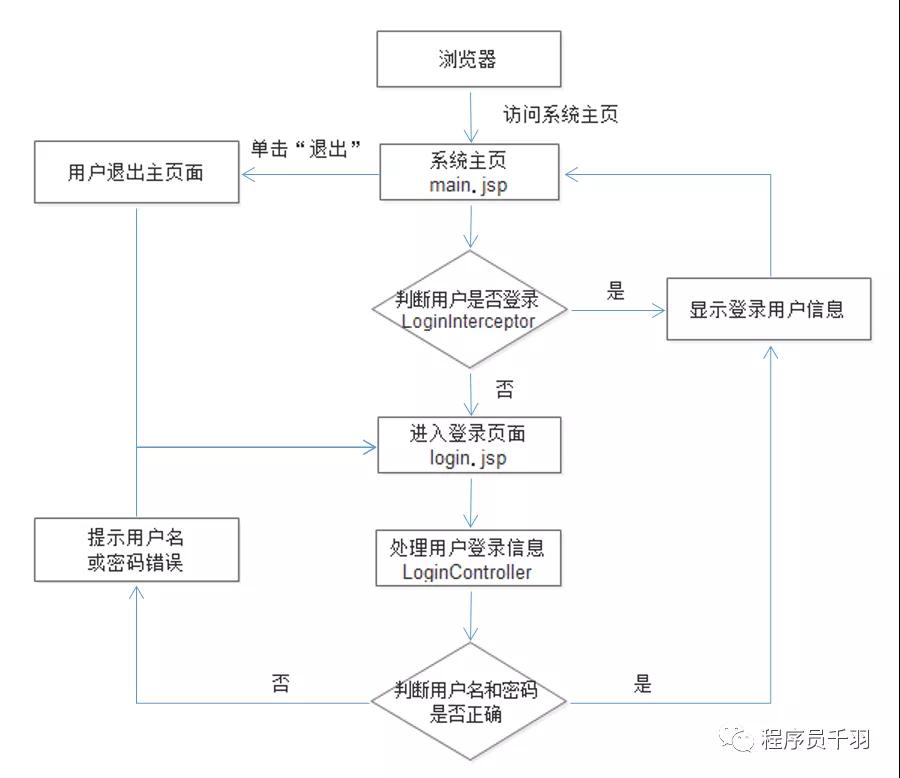
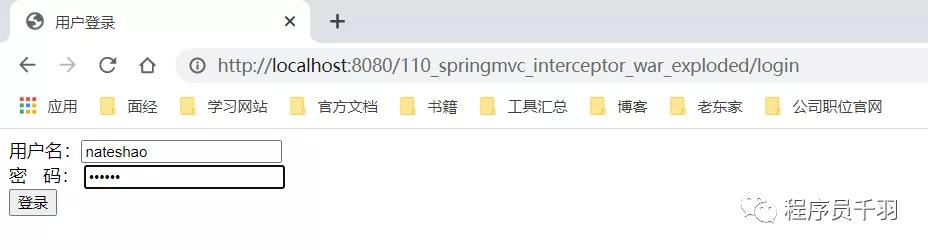
案例说明 : 实现用户登录权限验证
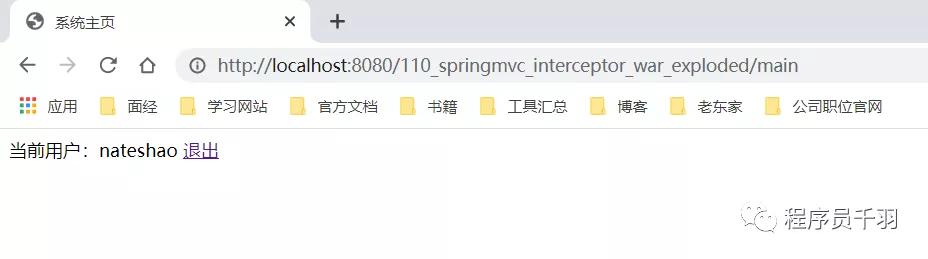
“案例中,只有登录后的用户才能访问系统中的主页面,如果没有登录系统而直接访问主页面,则拦截器会将请求拦截,并转发到登录页面,同时在登录页面中给出提示信息。如果用户名或密码错误,也会在登录页面给出相应的提示信息。当已登录的用户在系统主页中单击“退出”链接时,系统同样会回到登录页面。
login.jsp
- <%@ page language="java" contentType="text/html; charset=UTF-8"
- pageEncoding="UTF-8"%>
- <html>
- <head>
- <meta http-equiv="Content-Type" content="text/html; charset=UTF-8">
- <title>系统主页</title>
- </head>
- <body>
- 当前用户:${USER_SESSION.username}
- <a href="${pageContext.request.contextPath }/logout">退出</a>
- </body>
- </html>
LoginInterceptor.java
- package com.nateshao.interceptor;
- import com.nateshao.po.User;
- import org.springframework.web.servlet.HandlerInterceptor;
- import org.springframework.web.servlet.ModelAndView;
- import javax.servlet.http.HttpServletRequest;
- import javax.servlet.http.HttpServletResponse;
- import javax.servlet.http.HttpSession;
- /**
- * @date Created by 邵桐杰 on 2021/10/22 12:50
- * @微信公众号 程序员千羽
- * @个人网站 www.nateshao.cn
- * @博客 https://nateshao.gitee.io
- * @GitHub https://github.com/nateshao
- * @Gitee https://gitee.com/nateshao
- * Description: 登录拦截器
- */
- public class LoginInterceptor implements HandlerInterceptor {
- @Override
- public boolean preHandle(HttpServletRequest request,
- HttpServletResponse response, Object handler) throws Exception {
- // 获取请求的URL
- String url = request.getRequestURI();
- // URL:除了login.jsp是可以公开访问的,其它的URL都进行拦截控制
- if (url.indexOf("/login") >= 0) {
- return true;
- }
- // 获取Session
- HttpSession session = request.getSession();
- User user = (User) session.getAttribute("USER_SESSION");
- // 判断Session中是否有用户数据,如果有,则返回true,继续向下执行
- if (user != null) {
- return true;
- }
- // 不符合条件的给出提示信息,并转发到登录页面
- request.setAttribute("msg", "您还没有登录,请先登录!");
- request.getRequestDispatcher("/WEB-INF/jsp/login.jsp")
- .forward(request, response);
- return false;
- }
- @Override
- public void postHandle(HttpServletRequest request,
- HttpServletResponse response, Object handler,
- ModelAndView modelAndView) throws Exception {
- }
- @Override
- public void afterCompletion(HttpServletRequest request,
- HttpServletResponse response, Object handler, Exception ex)
- throws Exception {
- }
- }
UserController.java
- package com.nateshao.controller;
- import com.nateshao.po.User;
- import org.springframework.stereotype.Controller;
- import org.springframework.ui.Model;
- import org.springframework.web.bind.annotation.RequestMapping;
- import org.springframework.web.bind.annotation.RequestMethod;
- import javax.servlet.http.HttpSession;
- /**
- * @date Created by 邵桐杰 on 2021/10/22 12:47
- * @微信公众号 程序员千羽
- * @个人网站 www.nateshao.cn
- * @博客 https://nateshao.gitee.io
- * @GitHub https://github.com/nateshao
- * @Gitee https://gitee.com/nateshao
- * Description:
- */
- @Controller
- public class UserController {
- /**
- * 向用户登录页面跳转
- */
- @RequestMapping(value = "/login", method = RequestMethod.GET)
- public String toLogin() {
- return "login";
- }
- /**
- * 用户登录
- */
- @RequestMapping(value = "/login", method = RequestMethod.POST)
- public String login(User user, Model model, HttpSession session) {
- // 获取用户名和密码
- String username = user.getUsername();
- String password = user.getPassword();
- // 此处模拟从数据库中获取用户名和密码后进行判断
- if (username != null && username.equals("nateshao")
- && password != null && password.equals("123456")) {
- // 将用户对象添加到Session
- session.setAttribute("USER_SESSION", user);
- // 重定向到主页面的跳转方法
- return "redirect:main";
- }
- model.addAttribute("msg", "用户名或密码错误,请重新登录!");
- return "login";
- }
- /**
- * 向用户主页面跳转
- */
- @RequestMapping(value = "/main")
- public String toMain() {
- return "main";
- }
- /**
- * 退出登录
- */
- @RequestMapping(value = "/logout")
- public String logout(HttpSession session) {
- // 清除Session
- session.invalidate();
- // 重定向到登录页面的跳转方法
- return "redirect:login";
- }
- }
main.jsp
- <%@ page language="java" contentType="text/html; charset=UTF-8"
- pageEncoding="UTF-8"%>
- <html>
- <head>
- <meta http-equiv="Content-Type" content="text/html; charset=UTF-8">
- <title>系统主页</title>
- </head>
- <body>
- 当前用户:${USER_SESSION.username}
- <a href="${pageContext.request.contextPath }/logout">退出</a>
- </body>
- </html>
验证
浏览器输入:http://localhost:8080/110_springmvc_interceptor_war_exploded/main
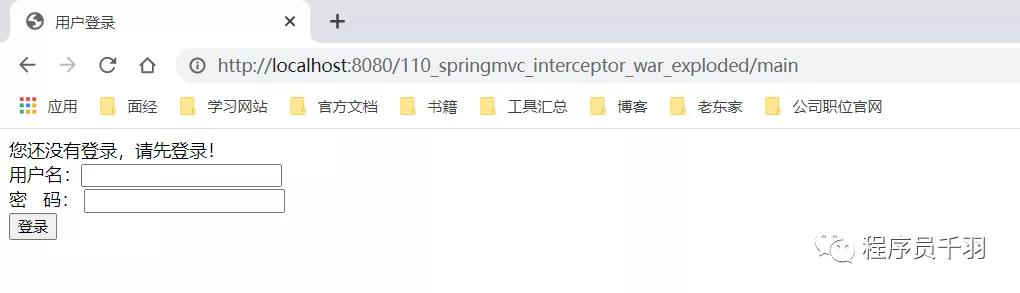
输入用户名密码
总结
这一篇文章主要对Spring MVC中的拦截器使用进行了详细讲解。
首先介绍了如何在Spring MVC项目中定义和配置拦截器,然后详细讲解了单个拦截器和多个拦截器的执行流程,最后通过一个用户登录权限验证的应用案例演示了拦截器的实际应用。
最后我们可以对Spring MVC中拦截器的定义和配置方式有一定的了解,能够熟悉拦截器的执行流程,并能够掌握拦截器的使用。