不知道大家有没有用过 eslint 的注释的配置方式:
- /* eslint-disable no-alert, no-console */
- alert('foo');
- console.log('bar');
- /* eslint-enable no-alert, no-console */
- // eslint-disable-next-line
- alert('foo');
eslint 支持 eslint-disable、eslint-enable、eslint-disable-next-line 等指定某个 rule 是否生效的行内配置,叫做 inline config。
webpack 中也有这种配置方式,可以在动态引入一个模块的时候配置代码分割的方式,叫做 magic comment。
- import(
- /* webpackChunkName: "my-chunk-name" */
- /* webpackMode: "lazy" */
- /* webpackExports: ["default", "named"] */
- 'module'
- );
类似的,terser 也有这种机制,叫做 annotation,可以指定某个 api 是否是纯的,纯函数的话如果没用到可以直接删除。
- var a = /*#__PURE__*/React.createElement("div", null);
可以看到,很多库都用到了这种通过注释来配置的方式,不管是叫 annotation 也好、magic comment 也好,或者 inline config 也好,都指的同一个东西。
既然是这么常见的配置方式,那么他们是怎么实现的呢?
注释中配置的实现原理
我们拿 eslint 的 inline config 的实现来看一下。
eslint 会把源码 parse 成 AST,然后对把 AST 传入一系列 rule 来做检查,检查结果会用 formatter 格式化后输出。
注释的配置是在哪一步生效的呢?
我简化了一下源码,是这样的:
- verify(text) {
- // parse 源码
- const ast = parse(text);
- // 调用 rule,拿到 lint 的问题
- const lintingProblems = runRules(ast);
- // 通过 AST 拿到注释中的配置
- const commentDirectives = getDirectiveComments(ast);
- // 根据注释中的配置过滤问题
- return applyDisableDirectives(lintingProblems, commentDirectives);
- }
可以看到,整体流程是:
- 把源码 parse 成 AST
- 调用 rule 对 AST 做检查,拿到 lint 的 problems
- 通过 AST 拿到注释中的 diectives
- 通过 directives 过滤 problems,就是最终需要报出的问题
也就是说 eslint 的 inline config 是在 lint 完 AST,拿到各种 problems 之后生效的,对 problems 做一次过滤。
那怎么从 AST 中取出 directives 的呢?又是怎么过滤 problems 的呢?
我们分别看一下。
从 AST 取出 directives 的源码简化以后是这样的:
- function getDirectiveComments(ast){
- const directives = [];
- ast.comments.forEach(comment => {
- const match = /^[#@](eslint(?:-env|-enable|-disable(?:(?:-next)?-line)?)?|exported|globals?)(?:\s|$)/u.exec(comment.trim());
- if (match) {
- const directiveText = match[1];
- ...
- directives.push({ type: xxx, line: loc.start.line, column: loc.start.column + 1, ruleId });
- }
- }
- return directives;
- }
其实就是对 AST 中所有的 comments 的内容做一下正则的匹配,如果是支持的 directive,就把它收集起来,并且记录下对应的行列号。
之后就是对 problems 的过滤了。
简化后的源码是这样的:
- function applyDisableDirectives(problems, disableDirectives) {
- const filteredProblems = [];
- const disabledRuleMap = new Map();
- let nextIndex = 0;
- for (const problem of problems) {
- // 对每一个 probelm,都要找到当前被禁用的 rule
- while (
- nextIndex < disableDirectives.length &&
- compareLocations(disableDirectives[nextIndex], problem) <= 0
- ) {
- const directive = disableDirectives[nextIndex++];
- switch (directive.type) {
- case "disable":
- disabledRuleMap.set(directive.ruleId, directive);
- break;
- case "enable":
- disabledRuleMap.delete(directive.ruleId);
- break;
- }
- }
- //如果 problem 对应的 rule 没有被禁用,则返回
- if (!disabledRuleMap.has(problem.ruleId)) {
- filteredProblems.push(problem);
- }
- }
- return filteredProblems;
- }
- function compareLocations(itemA, itemB) {
- return itemA.line - itemB.line || itemA.column - itemB.column;
- }
我们理下思路:
我们要过滤掉 problems 中被 disabled 的 rule 报出的 problem,返回过滤后的 problems。
可以维护一个 disabledRuleMap,表示禁用的 rule。
对每一个 problem,都根据行列号来从 disableDirectives 中取出 directive 的信息,把对应的 rule 放入 disabledRuleMap。
然后看下该 problem 的 rule 是否是被禁用了,也就是是否在 disabledRuleMap 中,如果是,就过滤掉。
这样处理完一遍,返回的 problem 就是可以报出的了。
这就是 eslint 的 eslint-disable、eslint-enable、eslint-disable-next-line 等注释可以配置 rule 是否生效的原理。
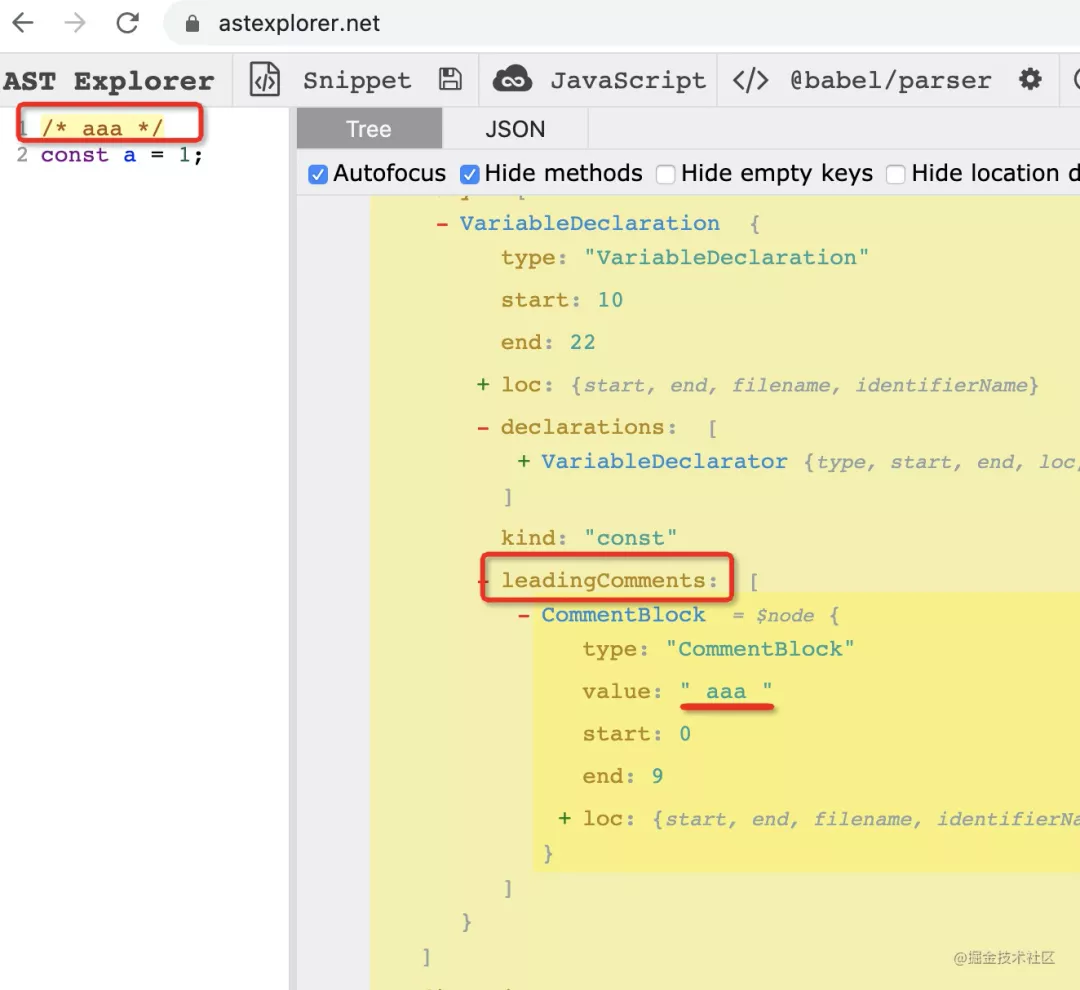
eslint 是根据行列号找到对应的 comment 的,其实很多 AST 中会记录每个节点关联的 comment。
比如 babel 的 AST:
这样可以根据 AST 来取出注释,之后通过正则来判断是否是 directive。
通过行列号来查找 comment,通过 AST 找到关联的 comment,这是两种查找注释的方式。
总结
注释中的配置在 eslint、webpack、terser 等工具中都有应用,分别叫 inline config、magic comment、annotation,但都指的同一个东西。
它们都是找到 AST 中的 comments,通过正则匹配下是否是支持的 directive(指令),然后取出对应的信息。
找到 directive 之后,还要找到 directive 生效的地方,可以用两种方式来查找:一种是根据行列号的比较,一种是根据关联的 AST 来查找。
找到 directive 和对应生效的地方之后,就可以根据 directive 中的信息做各种处理了。
注释中的配置是一种比较常见的配置方式,适合一些局部的配置。理解了它们的实现原理,能够让我们更好的掌握这种机制。


