按照我一向的写作风格,我会在下面列出文章的大纲,以便大家有选择且高效率的阅读和学习:
- GrapesJS 框架基本介绍
- 如何使用 GrapesJS 构建 web 编辑器
- 基于 GrapesJS 构建的开源网页编辑器 craft.js
- 更多可视化编辑器推荐
基本介绍
chrome-capture.gif
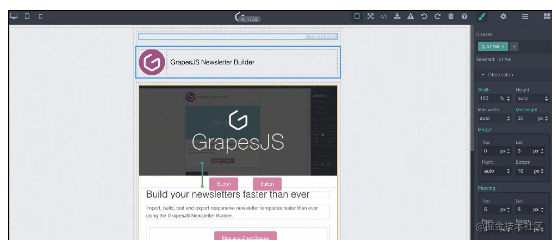
乍眼一看我们可能会认为它只是一个页面/HTML 编辑器,但它能做的不仅仅如此。GrapesJS 是一个多用途的 Web 页面搭建框架,这意味着它允许我们轻松创建一个支持拖放的任何具有类似 HTML 结构的构建器。它所包含的内容远不止网页。我们使用类似 HTML 的结构的场景有:
- 时事通讯(例如 MJML)
- 原生移动应用程序(例如 React Native)
- 本机桌面应用程序(例如 Vuido)
- PDF (例如 React PDF)
并且 GrapesJS 附带的功能和工具使我们能够制作易于使用的编辑器。这使用户无需任何编码知识即可创建复杂的类似 HTML 的模板。
同时 GrapesJS 官网上还给我们提供了3个不同场景的案例, 我们可以参考这些案例快速制作属于我们自己的web编辑器:
- Webpage Builder
- Newsletter Builder
- Newsletter Builder with MJML
那么至于这些搭建框架的实现原理, 我之前的文章中也做了很多剖析和设计, 大家如果感兴趣可以参考研究一下, 接下来我们看看如何安装和使用它.
如何使用 GrapesJS 构建 web 编辑器
1. 安装
我们可以用 umd 的方式来导入:
- <link rel="stylesheet" href="//unpkg.com/grapesjs/dist/css/grapes.min.css">
- <script src="//unpkg.com/grapesjs"></script>
也可以通过 npm 来安装:
- npm i grapesjs -S
之后我们可以通过如下方式导入到项目:
- import 'grapesjs/dist/css/grapes.min.css';
- import grapesjs from 'grapesjs';
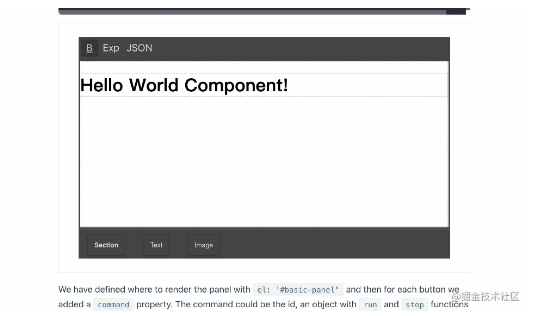
2. 第一个demo
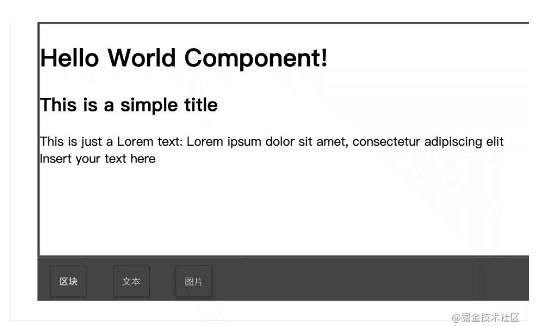
在安装完之后, 我们先实现一个基本的页面编辑demo:
chrome-capture (1).gif
相关代码如下:
- <html>
- <head>
- <link rel="stylesheet" href="//unpkg.com/grapesjs/dist/css/grapes.min.css">
- <script src="//unpkg.com/grapesjs"></script>
- <style>
- #gjs {
- border: 3px solid #444;
- }
- .gjs-cv-canvas {
- top: 0;
- width: 100%;
- height: 100%;
- }
- </style>
- </head>
- <body>
- <div id="gjs">
- <h1>Hello World Component!</h1>
- </div>
- <script>
- const editor = grapesjs.init({
- container: '#gjs',
- // 我们也可以使用可选的: `components: '<h1>Hello World Component!</h1>'`,
- fromElement: true,
- // 编辑器尺寸
- height: '300px',
- width: 'auto',
- // 禁用存储管理, 下面的文章我会介绍
- storageManager: false,
- panels: { defaults: [] },
- });
- </script>
- </body>
- </html>
这样就实现了一个简单的编辑器, 是不是很简单呢? 我们接下来继续探索更强大的功能。
3. 添加和定义组件
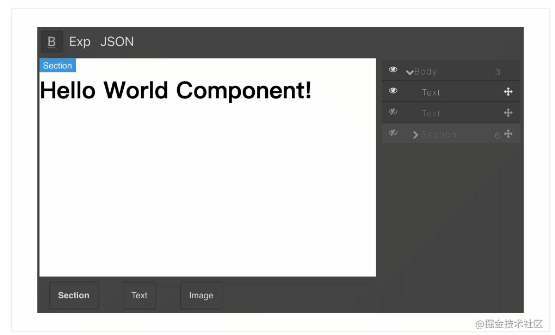
我们都知道网页编辑器需要提供非常丰富的组件, 这样能帮助用户更轻松的搭建页面, 同样 grapesjs 支持添加各种自定义组件, 也内置了常用的基础组件, 我们来看一个 demo :
chrome-capture (2).gif
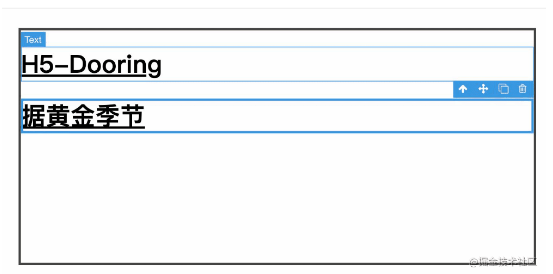
由以上 demo 我们可以看到添加了3个基本组件: 区块, 文本, 图片。基本实现代码如下:
- const editor = grapesjs.init({
- // ...其他配置
- blockManager: {
- appendTo: '#blocks',
- blocks: [
- {
- id: 'section',
- label: '<b>Section</b>',
- attributes: { class:'gjs-block-section' },
- content: `<section>
- <h1>H5-Dooring</h1>
- <div>积木式搭建H5页面</div>
- </section>`,
- }, {
- id: 'text',
- label: 'Text',
- content: '<div data-gjs-type="text">My Baby</div>',
- }, {
- id: 'image',
- label: 'Image',
- select: true,
- content: { type: 'image' },
- activate: true,
- }
- ]
- },
- });
由代码我们可以发现我们只需要在 blockManager 的 blocks 里添加指定的组件即可。同时我们还可以动态的添加组件:
- editor.BlockManager.add('my-block-id', {
- // ...其他配置如label
- content: {
- tagName: 'div',
- draggable: false,
- attributes: { 'some-attribute': 'some-value' },
- components: [
- {
- tagName: 'span',
- content: '<b>DooringX</b>',
- }, {
- tagName: 'div',
- components: '<span>无限可能</span>',
- }
- ]
- }
- })
至于更详细的组件配置文档, 大家可以参考文档: grapesjs组件如何工作
image.png
4. 添加功能面板
仅仅实现组件添加还不够, 一个有尊严的编辑器还应该有各种功能按钮, 来实现不同用户的需求。
现在我们有了画布和自定义组件,让我们看看如何创建一个功能面板,里面有按钮(使用Panels API)。
chrome-capture (3).gif
我们可以看到顶部有3个功能按钮:
- 是否显示组件边线
- 显示源码
- 显示json
首先我们需要定义用来展示功能面板的元素(样式可以自定义):
- <div class="panel__top">
- <div class="panel__basic-actions"></div>
- </div>
其次我们来定义挂载功能面板:
- editor.Panels.addPanel({
- id: 'panel-top',
- el: '.panel__top',
- });
- editor.Panels.addPanel({
- id: 'basic-actions',
- el: '.panel__basic-actions',
- buttons: [
- {
- id: 'visibility',
- active: true,
- className: 'btn-toggle-borders',
- label: '<u>B</u>',
- command: 'sw-visibility',
- }, {
- id: 'export',
- className: 'btn-open-export',
- label: 'Exp',
- command: 'export-template',
- context: 'export-template',
- }, {
- id: 'show-json',
- className: 'btn-show-json',
- label: 'JSON',
- context: 'show-json',
- command(editor) {
- editor.Modal.setTitle('Components JSON')
- .setContent(`<textarea style="width:100%; height: 250px;">
- ${JSON.stringify(editor.getComponents())}
- </textarea>`)
- .open();
- },
- }
- ],
- });
我们可以定义更多的功能, 大家可以参考文档来学习使用。
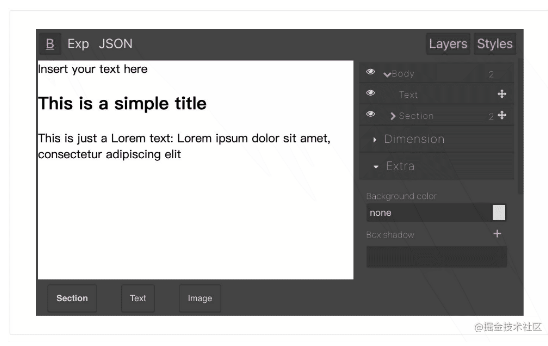
5. 添加图层管理面板
在处理 Web 元素时,我们可能会发现另一个常见的工具是图层管理器。它是树状结构的,使我们能够轻松地对页面元素进行管理。要启用它,我们只需指定要渲染它的位置:
- const editor = grapesjs.init({
- // ...
- layerManager: {
- appendTo: '.layers-container'
- },
- // 我们能定义一个默认的面板作为侧边图层管理器
- panels: {
- defaults: [{
- id: 'layers',
- el: '.panel__right',
- // 定义面板能否拖拽
- resizable: {
- maxDim: 350,
- minDim: 200,
- tc: 0,
- cl: 1, // 左侧可拖拽
- cr: 0,
- bc: 0,
- keyWidth: 'flex-basis',
- },
- }]
- }
- });
效果如下:
chrome-capture (4).gif
我们可以看到右侧的图层面板, 可以轻松管理我们页面上的元素。
6. 添加样式配置面板
样式面板也很简单, 我们先定义对应的容器:
- <div class="panel__right">
- <div class="layers-container"></div>
- <div class="styles-container"></div>
- </div>
然后初始化对应的配置脚本:
- const editor = grapesjs.init({
- // ...
- panels: {
- defaults: [
- // ...
- {
- id: 'panel-switcher',
- el: '.panel__switcher',
- buttons: [{
- id: 'show-layers',
- active: true,
- label: 'Layers',
- command: 'show-layers',
- // Once activated disable the possibility to turn it off
- togglable: false,
- }, {
- id: 'show-style',
- active: true,
- label: 'Styles',
- command: 'show-styles',
- togglable: false,
- }],
- }
- ]
- },
- selectorManager: {
- appendTo: '.styles-container'
- },
- styleManager: {
- appendTo: '.styles-container',
- sectors: [{
- name: 'Dimension',
- open: false,
- buildProps: ['width', 'min-height', 'padding'],
- properties: [
- {
- type: 'integer',
- name: 'The width',
- property: 'width',
- units: ['px', '%'],
- defaults: 'auto',
- min: 0,
- }
- ]
- },{
- name: 'Extra',
- open: false,
- buildProps: ['background-color', 'box-shadow', 'custom-prop'],
- properties: [
- {
- id: 'custom-prop',
- name: 'Custom Label',
- property: 'font-size',
- type: 'select',
- defaults: '32px',
- options: [
- { value: '12px', name: 'Tiny' },
- { value: '18px', name: 'Medium' },
- { value: '32px', name: 'Big' },
- ],
- }
- ]
- }]
- },
- });
- // 定义指令
- editor.Commands.add('show-layers', {
- getRowEl(editor) { return editor.getContainer().closest('.editor-row'); },
- getLayersEl(row) { return row.querySelector('.layers-container') },
- run(editor, sender) {
- const lmEl = this.getLayersEl(this.getRowEl(editor));
- lmEl.style.display = '';
- },
- stop(editor, sender) {
- const lmEl = this.getLayersEl(this.getRowEl(editor));
- lmEl.style.display = 'none';
- },
- });
- editor.Commands.add('show-styles', {
- getRowEl(editor) { return editor.getContainer().closest('.editor-row'); },
- getStyleEl(row) { return row.querySelector('.styles-container') },
- run(editor, sender) {
- const smEl = this.getStyleEl(this.getRowEl(editor));
- smEl.style.display = '';
- },
- stop(editor, sender) {
- const smEl = this.getStyleEl(this.getRowEl(editor));
- smEl.style.display = 'none';
- },
- });
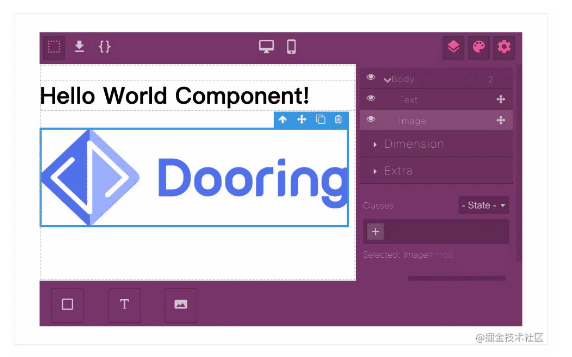
我们可以看看配置后的效果:
chrome-capture (5).gif
7. 更多用法演示
除了以上介绍的功能, 我们还能实现:
- 定义响应模式(pc, 移动, ipad),
- 设置存储和加载数据的模式
- 自定义主题
- 国际化 i18n 支持
这里就不一一介绍了, 我们直接看一下配置后的演示效果:
chrome-capture (6).gif
基于 GrapesJS 构建的开源网页编辑器 craft.js
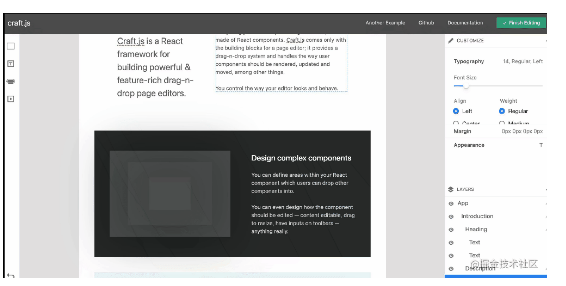
那么 GrapesJS 还有很多有意思的功能我们可以挖掘, 接下来我和大家分享一款基于GrapesJS 二次封装的一个开源编辑器框架 craft.js。
chrome-capture (7).gif
我们可以使用它插件化的搭建我们自己的编辑器, 如下是一个应用在React中的例子:
- import {Editor, Frame, Canvas, Selector} from "@craftjs/core";
- // 定义本文组件
- import {useNode} from "@craftjs/core";
- const TextComponent = ({text}) => {
- const { connectors: {drag} } = useNode();
- return (
- <div ref={drag}>
- <h2>{text}</h2>
- </div>
- )
- }
- // 初始化编辑器
- const App = () => {
- return (
- <div>
- <Editor>
- // 可编辑的区域
- <Frame resolver={TextComponent, Container}>
- <Canvas>
- <TextComponent text="趣谈前端 - 徐小夕" />
- </Canvas>
- </Frame>
- </Editor>
- </div>
- )
- }
更多可视化编辑器推荐
- h5-Dooring | H5编辑器, 积木式搭建H5页面
- v6.dooring | 可视化大屏搭建解决方案
- craft | 基于React的拖拽页面生成器
- dooringx-lib | 快速高效搭建可视化拖拽平台
最后
后期我会在数据可视化和工程化上输出更多实用的开源项目和框架,如果有其他问题或需求,可以和笔者交流学习。
本文转载自微信公众号「趣谈前端」,可以通过以下二维码关注。转载本文请联系趣谈前端公众号。


