我回来了
这次感冒可耽误我太多时间了,中间断断续续去了几趟医院和诊所,终于差不多好了,于是心里又暗暗下定决定,一定要好好养身体(可能过两天又忘了??)
总之大家也都多注意身体吧,身体垮了啥也干不了。
废话不多说,开始今天的Android之旅~
前言
上次我们说到View的Mearsure流程,今天接着说说layout。
关于layout,很多朋友知道它是负责布局的,那么具体是怎么布局的?viewGroup和view的layout方法又有什么不同?一起来看看吧。
View layout方法
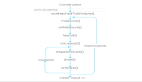
首先,还是从ViewRootImpl说起,界面的绘制会触发performMeasure、performLayout方法,而在performLayout方法中就会调用mView的layout方法开始一层层View的布局工作。
- private void performLayout(WindowManager.LayoutParams lp, int desiredWindowWidth,
- int desiredWindowHeight) {
- final View host = mView;
- host.layout(0, 0, host.getMeasuredWidth(), host.getMeasuredHeight());
- }
mView我们都知道了,就是顶层View——DecorView,那么就进去看看DecorView的layout方法:
不好意思,DecorView中并没有layout方法...
所以,我们直接看看View的layout方法:
- public void layout(int l, int t, int r, int b) {
- boolean changed = isLayoutModeOptical(mParent) ?
- setOpticalFrame(l, t, r, b) : setFrame(l, t, r, b);
- if (changed || (mPrivateFlags & PFLAG_LAYOUT_REQUIRED) == PFLAG_LAYOUT_REQUIRED) {
- onLayout(changed, l, t, r, b);
- }
- }
- protected void onLayout(boolean changed, int left, int top, int right, int bottom) {
- }
- 首先,方法传入了四个参数,分别代表view的左、上、下、右四个值。
- 然后通过setOpticalFrame方法或者setFrame方法判断布局参数是否改变。
具体判断过程就是通过老的上下左右值和新的上下左右值进行比较,逻辑就在setFrame方法中:
- protected boolean setFrame(int left, int top, int right, int bottom) {
- boolean changed = false;
- if (mLeft != left || mRight != right || mTop != top || mBottom != bottom) {
- changed = true;
- // Remember our drawn bit
- int drawn = mPrivateFlags & PFLAG_DRAWN;
- int oldWidth = mRight - mLeft;
- int oldHeight = mBottom - mTop;
- int newWidth = right - left;
- int newHeight = bottom - top;
- boolean sizeChanged = (newWidth != oldWidth) || (newHeight != oldHeight);
- // Invalidate our old position
- invalidate(sizeChanged);
- mLeft = left;
- mTop = top;
- mRight = right;
- mBottom = bottom;
- mRenderNode.setLeftTopRightBottom(mLeft, mTop, mRight, mBottom);
- }
- return changed;
- }
如果上下左右有一个参数值发生了改变,就说明这个View的布局发生了改变,然后重新计算View的宽度高度(newWidth、newHeight),并赋值了View新的上下左右参数值。
在这个layout方法中主要涉及到了四个参数:mLeft、mTop、mBottom、mRight,分别代表了View的左坐标、上坐标、下坐标和右坐标,你可以把View理解为一个矩形,确定了这四个值,就能确定View矩形的四个顶点值,也就能确定View在画布中的具体位置。
所以,layout方法到底干了啥?
就是传入上下左右值、然后赋值上下左右值、完毕。
然后我们就可以根据这些值获取View的一系列参数,比如View宽度:
- public final int getWidth() {
- return mRight - mLeft;
- }
至此,View的layout方法就结束了,主要就是通过对上下左右参数的赋值完成对View的布局,非常简单。
下面看看ViewGroup。
ViewGroup layout方法
- @Override
- public final void layout(int l, int t, int r, int b) {
- if (!mSuppressLayout && (mTransition == null || !mTransition.isChangingLayout())) {
- if (mTransition != null) {
- mTransition.layoutChange(this);
- }
- super.layout(l, t, r, b);
- } else {
- mLayoutCalledWhileSuppressed = true;
- }
- }
额,还是调用到View的layout方法,难道说ViewGroup和View的布局过程是一样的,就是确定了本身的位置?
那ViewGroup的子View怎么办呢?不急,我们刚才说layout方法的时候还漏了一个onLayout方法,只不过这个方法在View里面是空实现,而到了ViewGroup中变成了一个抽象方法:
- @Override
- protected abstract void onLayout(boolean changed,
- int l, int t, int r, int b);
也就是任何ViewGroup都必须实现这个方法,来完成对子View的布局摆放。
具体的布局摆放逻辑就是在onLayout方法中一个个调用子View的layout方法,然后完成每个子View的布局,最终完成绘制工作。
接下来我们就来自己实现一个垂直线性布局(类似LinearLayout),正好复习下上一节的onMearsure和这一节的onLayout。
自定义垂直布局VerticalLayout
首先,我们要确定我们这个自定义ViewGroup的作用,是类似垂直方向的LinearLayout功能,在该ViewGroup下的子View可以按垂直线性顺序依次往下排放。我们给它起个名字叫VerticalLayout~
继承ViewGroup
首先,我们这个布局肯定要继承自ViewGroup,并且实现相应的构造方法:
- public class VerticalLayout : ViewGroup {
- constructor(context: Context, attrs: AttributeSet?, defStyleAttr: Int = 0) : super(
- context,
- attrs,
- defStyleAttr
- )
- constructor(context: Context, attrs: AttributeSet?) : super(context, attrs) {
- }
- }
重写generateLayoutParams方法
自定义ViewGroup还需要重写的一个方法是generateLayoutParams,这一步是为了让我们的ViewGroup支持Margin,后续我们就可以通过MarginLayoutParams来获取子View的Margin值。
- override fun generateLayoutParams(attrs: AttributeSet?): LayoutParams? {
- return MarginLayoutParams(context, attrs)
- }
重写测量方法onMeasure
然后,我们需要对我们的布局进行测量,也就是重写onMeasure方法。
在该方法中,我们需要对我们的布局进行测量,并且将测量好的宽高传入setMeasuredDimension方法,完成测量。
- protected final void setMeasuredDimension(int measuredWidth, int measuredHeight)
之前我们说过,onMeasure方法会传进来两个参数,widthMeasureSpec和heightMeasureSpec。
里面包含了父View根据当前View的LayoutParams和父View的测量规格进行计算,得出的对当前View期望的测量模式和测量大小:
- 当测量模式为MeasureSpec.EXACTLY
也就是当宽或者高为确定值时,那么当前布局View的宽高也就是设定为父View给我们设置好的测量大小即可。比如宽为400dp,那么我们无需重新测量直接调用setMeasuredDimension传入这个固定值即可。
- 当测量模式为MeasureSpec.AT_MOST 或者 UNSPECIFIED:
这时候,说明父View对当前View的要求不固定,是可以为任意大小或者不超过最大值的情况,比如设置这个VerticalLayout的高度为wrap_content。那么我们就必须重新进行高度测量了,因为只有我们设计者知道这个自适应高度需要怎么计算。具体就是VerticalLayout是一个垂直线性布局,所以高度很自然就是所有子View的高度之和。
至此,onMeasure方法的逻辑也基本摸清了:
- override fun onMeasure(widthMeasureSpec: Int, heightMeasureSpec: Int) {
- super.onMeasure(widthMeasureSpec, heightMeasureSpec)
- //获取宽高的测量模式和测量大小
- val widthMode = MeasureSpec.getMode(widthMeasureSpec)
- val heightMode = MeasureSpec.getMode(heightMeasureSpec)
- val sizeWidth = MeasureSpec.getSize(widthMeasureSpec)
- val sizeHeight = MeasureSpec.getSize(heightMeasureSpec)
- var mHeight = 0
- var mWidth = 0
- //遍历子View,获取总高度
- for (i in 0 until childCount) {
- val childView = getChildAt(i)
- //测量子View的宽和高
- measureChild(childView, widthMeasureSpec, heightMeasureSpec)
- val lp = childView.layoutParams as MarginLayoutParams
- val childWidth = childView.measuredWidth + lp.leftMargin + lp.rightMargin
- val childHeight = childView.measuredHeight + lp.topMargin + lp.bottomMargin
- //计算得出最大宽度
- mWidth = Math.max(mWidth, childWidth)
- //累计计算高度
- mHeight += childHeight
- }
- //设置宽高
- setMeasuredDimension(
- if (widthMode == MeasureSpec.EXACTLY) sizeWidth else mWidth,
- if (heightMode == MeasureSpec.EXACTLY) sizeHeight else mHeight
- )
- }
主要的逻辑就是遍历子View,得出VerticalLayout的实际宽高:
最终ViewGroup的高 = 所有子View的 (高 + margin值)
最终ViewGroup的宽 = 最大子View的 (宽 + margin值)
最后调用setMeasuredDimension 根据测量模式 传入宽高。
重写布局方法onLayout
上文说过,作为一个ViewGroup,必须重写onLayout方法,来保证子View的正常布局摆放。
垂直线性布局VerticalLayout亦是如此,那么在这个布局中onLayout方法的关键逻辑又是什么呢?
还是那句话,确定位置,也就是确定左、上、右、下四个参数值,而在VerticalLayout中,最关键的参数就是这个上,也就是top值。
每个View的top值必须是上一个View的bottom值,也就是接着上一个View进行摆放,这样才会是垂直线性的效果,所以我们需要做的就是动态计算每个View的top值,其实也就是不断累加View的高度,作为下一个View的top值。
- override fun onLayout(changed: Boolean, l: Int, t: Int, r: Int, b: Int) {
- var childWidth = 0
- var childHeight = 0
- var childTop = 0
- var lp: MarginLayoutParams
- //遍历子View,布局每个子View
- for (i in 0 until childCount) {
- val childView = getChildAt(i)
- childHeight = childView.measuredHeight
- childWidth = childView.measuredWidth
- lp = childView.layoutParams as MarginLayoutParams
- //累计计算top值
- childTop += lp.topMargin
- //布局子View
- childView.layout(
- lp.leftMargin,
- childTop,
- lp.leftMargin + childWidth,
- childTop + childHeight
- );
- childTop += childHeight + lp.bottomMargin
- }
- }
逻辑还是挺简单的,
left是固定的子View的leftMargin。
top是累加计算的子View的高度 + Margin值。
right是left + 子View的宽度。
bottom是top + 子View的高度。
最后调用子View的layout方法,对每个子View进行布局。
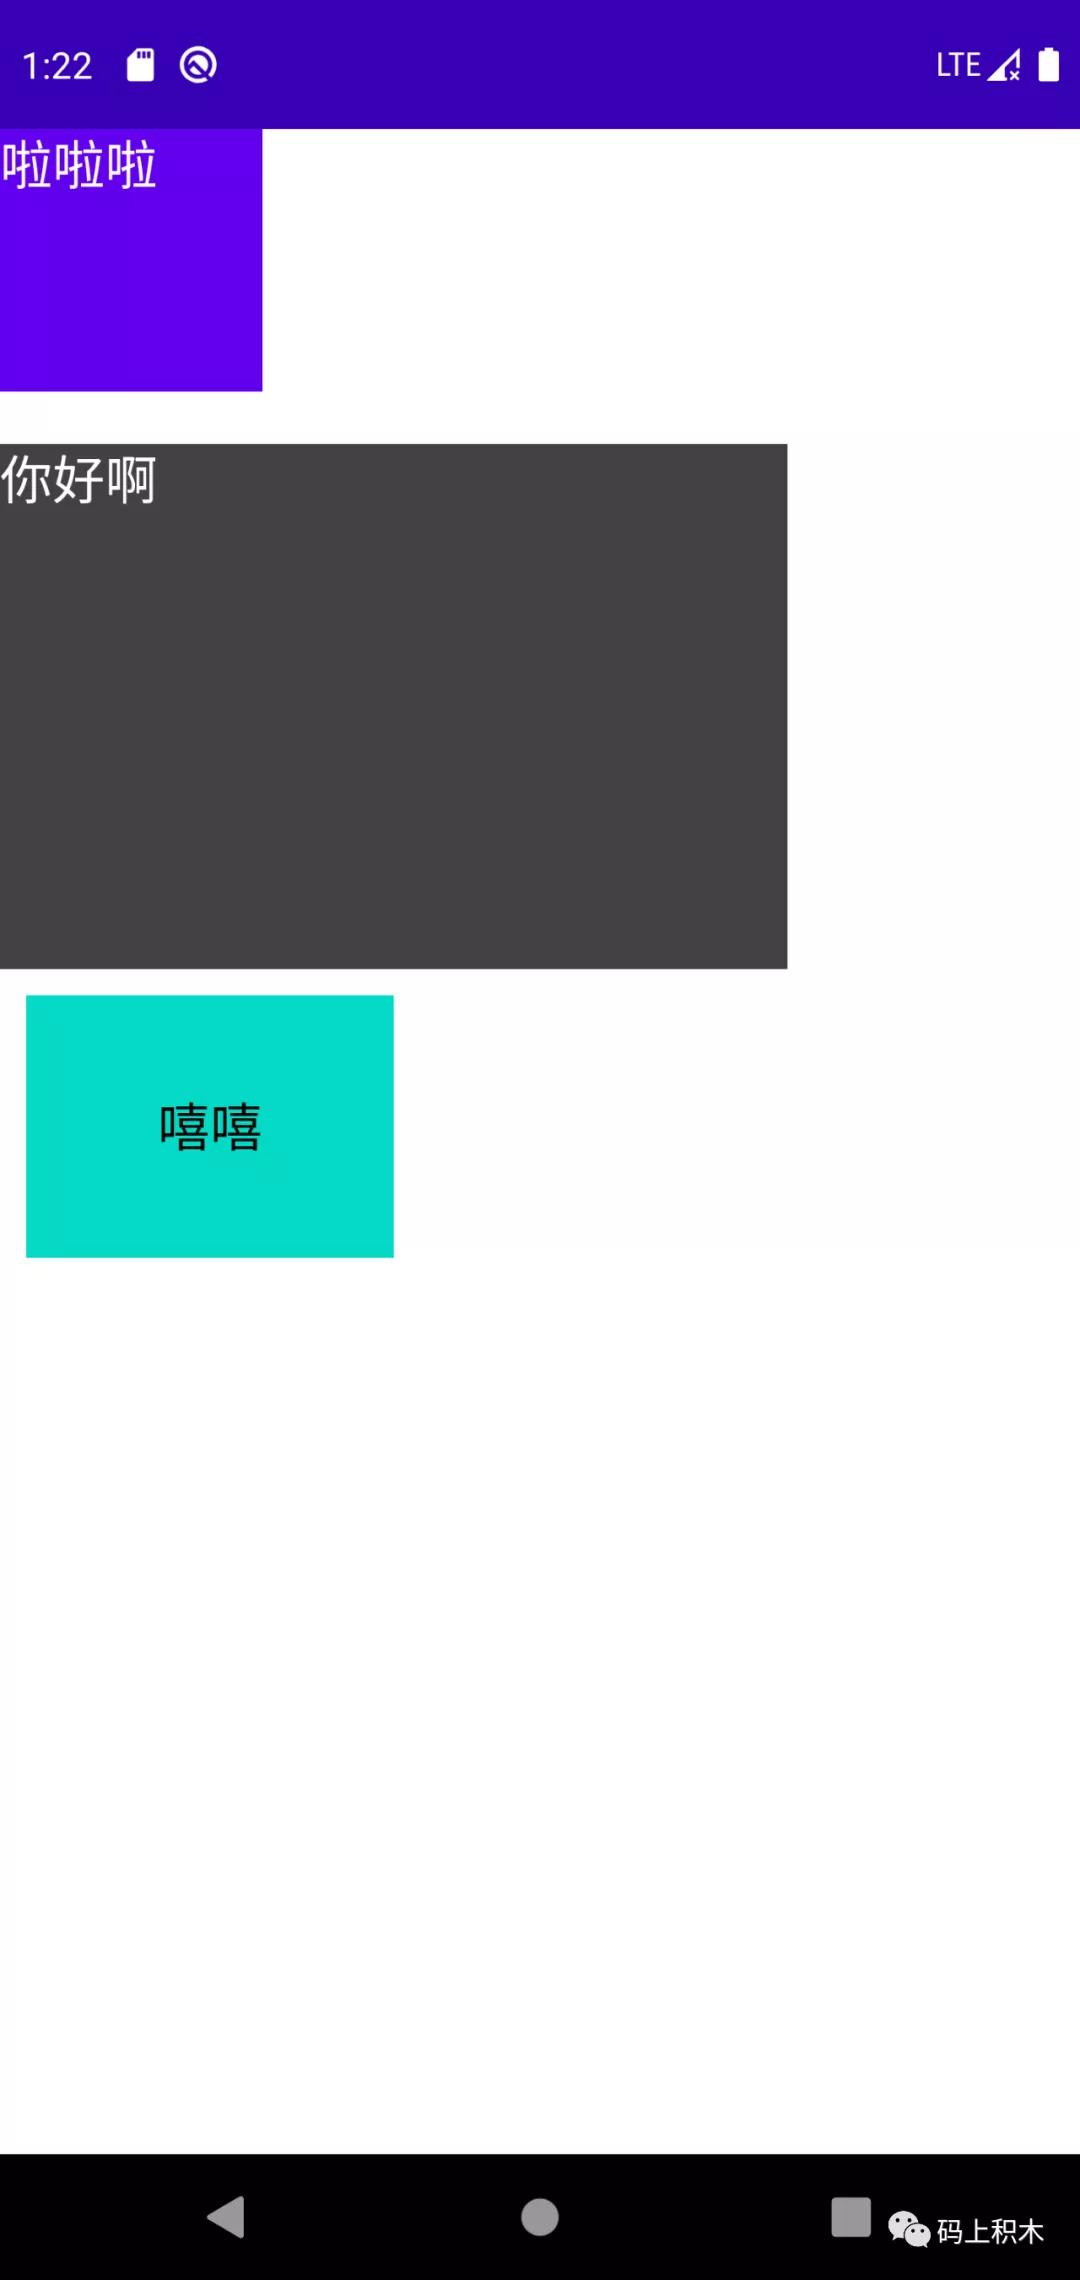
大功告成,最后看看我们这个自定义垂直线性布局的效果吧~
效果展示
- <com.panda.studynote3.VerticalLayout
- android:layout_width="wrap_content"
- android:layout_height="wrap_content">
- <TextView
- android:layout_width="100dp"
- android:layout_height="100dp"
- android:text="啦啦啦"
- android:textSize="20sp"
- android:textColor="@color/white"
- android:background="@color/design_default_color_primary"
- />
- <TextView
- android:layout_width="300dp"
- android:layout_height="200dp"
- android:layout_marginTop="20dp"
- android:background="@color/cardview_dark_background"
- android:textSize="20sp"
- android:textColor="@color/white"
- android:text="你好啊"
- />
- <TextView
- android:layout_width="140dp"
- android:layout_height="100dp"
- android:text="嘻嘻"
- android:layout_marginLeft="10dp"
- android:layout_marginTop="10dp"
- android:textSize="20sp"
- android:gravity="center"
- android:textColor="@color/black"
- android:background="@color/teal_200"
- />
- </com.panda.studynote3.VerticalLayout>
本文转载自微信公众号「码上积木」,可以通过以下二维码关注。转载本文请联系码上积木公众号。