https://harmonyos.51cto.com/#zz
1、menu弹出菜单
这是微信小程序没有的一个组件,提供了一个可唤起的轻量级弹出菜单。menu的子组件为option。
<menu id="userMenu" onselected="menuSelect">
    <option value="login">登录</option>
    <option value="register">注册</option>
</menu>
- 1.
- 2.
- 3.
- 4.
在hml中写好菜单,但这时启动app是不会显示出来的,且不会占用任何页面空间。
menu需要在方法中被唤起,因此需要设置id属性。这里通过点击“点击登录/注册“文本框唤起菜单:
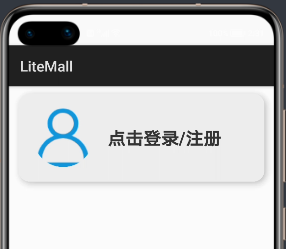
<text if="{{ !userInfo }}" onclick="showUserMenu" class="info_hint">
    点击登录/注册
</text>
- 1.
- 2.
- 3.
showUserMenu() {
    this.$element("userMenu").show();
}
- 1.
- 2.
- 3.
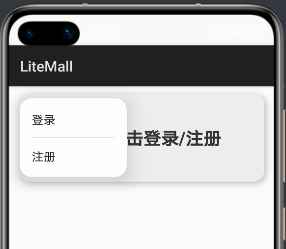
使用无参的show()方法,菜单在页面的左上角被唤起弹出。
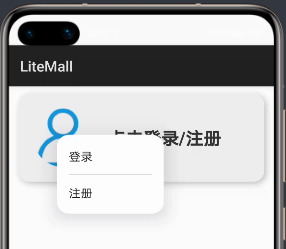
show方法还有一个重载方法,可以设置菜单弹出的x轴和y轴偏移量。x和y需要给数值类型,单位为px。
showUserMenu() {
    this.$element("userMenu").show({
        x: 100,
        y: 100
    });
}
- 1.
- 2.
- 3.
- 4.
- 5.
- 6.
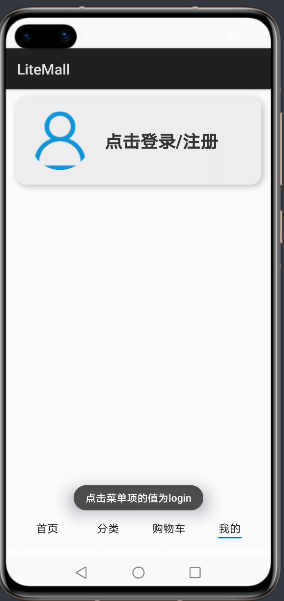
菜单项的选中事件通过onselect属性绑定,event.value即为选中的option的value属性。
menuSelect(event) {
    let value = event.value;
    prompt.showToast({
        message: "点击菜单项的值为" + value,
        duration: 3000
    })
}
- 1.
- 2.
- 3.
- 4.
- 5.
- 6.
- 7.
option一定要设置value属性,否则编译不通过。value重复倒是不会报错,但这样无法判断选中了哪一个菜单项,不建议。

2、Toast提示框
鸿蒙js开发模式至今无法通过console.log()等方法打印日志(mac系统如此),但在写程序时不免要进行调试,提示框就是一种很好的方法。
在js文件中引入prompt模块:
import prompt from '@system.prompt';
- 1.
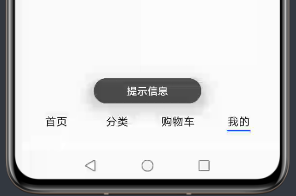
调用prompt.showToast()弹出提示框:
prompt.showToast({
    message: "提示信息",
    duration: 3000
});
- 1.
- 2.
- 3.
- 4.
这个方法只能传递message和duration两个参数,弹出位置是在页面接近最下方中间位置,而且字有点小。
源码注释中说明,duration取值是1500到10000,如果不在范围中会自动更改为边界值。
再看看微信小程序的Toast,使用wx.showToast弹出。
wx.showToast({
    title: '提示信息',
    duration: 3000
})
- 1.
- 2.
- 3.
- 4.
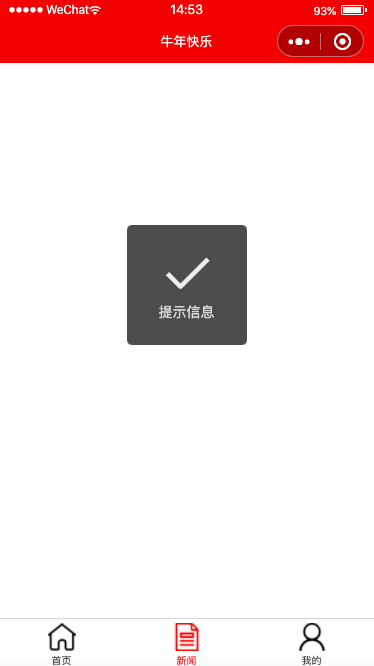
弹出位置在页面正中,且可以切换预置,或自定义图标。
wx.showToast({
    title: '常回家看看',
    duration: 3000,
    icon: 'none',
    image: "/icon/index1.png"
})
- 1.
- 2.
- 3.
- 4.
- 5.
- 6.
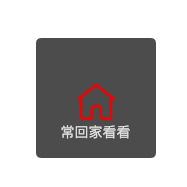
就是这个图标位置怪怪的,但个人感觉这种提示弹窗更加明显,可扩展性也更强。
3、prompt模块的对话框dialog
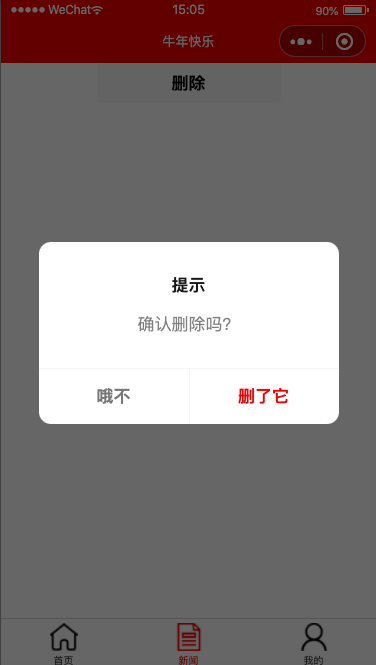
需要用户确认操作的功能十分常用,比如是否删除,是否下单等。在微信小程序中采用的是wx.showModal(),弹窗内容、按钮内容和颜色都可以自定义,事件在success函数中进行捕获:
wx.showModal({
  title: "提示",
  content: "确认删除吗?",
  confirmColor: "#e20a0b",
  confirmText: "对,删了它",
  cancelColor: "#777777",
  cancelText: "再考虑一下",
  success: res => {
    if(res.confirm) {
      console.log("删除成功!");
    } else if(res.cancel) {
      console.log("取消删除操作。")
    }
  }
})
- 1.
- 2.
- 3.
- 4.
- 5.
- 6.
- 7.
- 8.
- 9.
- 10.
- 11.
- 12.
- 13.
- 14.
- 15.
在鸿蒙中,prompt模块的showDialog()方法提供了弹出对话框:
prompt.showDialog({
title: "操作提示",
message: "确认删除吗?",
buttons: [
{
text: "我要删除",
color: "#e20a0b"
},
{
text: "取消操作",
color: "#777777"
}
],
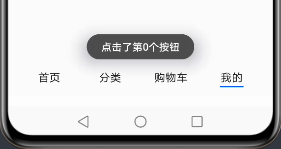
success: res => {
prompt.showToast({
message: "点击了第" + res.index + "个按钮"
})
}
})
- 1.
- 2.
- 3.
- 4.
- 5.
- 6.
- 7.
- 8.
- 9.
- 10.
- 11.
- 12.
- 13.
- 14.
- 15.
- 16.
- 17.
- 18.
- 19.
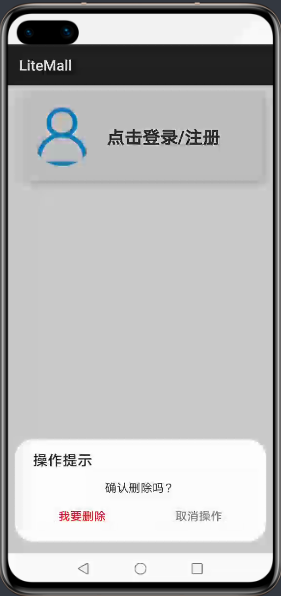
对话框也是在底部弹出的,且按钮可以自行定义。点击按钮后,success方法会获取按钮的索引值,根据索引进行业务逻辑的编写。
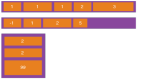
想要设置三个按钮也是可以的,这个功能微信小程序的showModal()是没有的。
prompt.showDialog({
        title: "操作提示",
        message: "确认删除吗?",
        buttons: [
            {
                text: "我要删除",
                color: "#e20a0b"
            },
            {
                text: "取消操作",
                color: "#777777"
            },
            {
                text: "附加按钮",
                color: "#333333"
            }
        ],
        success: res => {
            prompt.showToast({
                message: "点击了第" + res.index + "个按钮"
            })
        }
    })
- 1.
- 2.
- 3.
- 4.
- 5.
- 6.
- 7.
- 8.
- 9.
- 10.
- 11.
- 12.
- 13.
- 14.
- 15.
- 16.
- 17.
- 18.
- 19.
- 20.
- 21.
- 22.
- 23.

4、dialog对话框组件
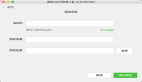
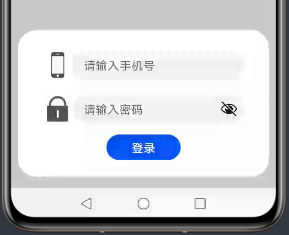
prompt.showDialog()只能弹出具有提示文字和按钮的对话框,如果需要更丰富的模态对话框功能,鸿蒙还提供了dialog组件,这个组件在微信小程序中也是没有的。和menu一样,写在hml中的dialog并不会显示,也不会占用页面空间,需要通过id在方法中被唤起。
<dialog id="loginDialog">
    <div class="loginDialog">
        <div class="formItem">
            <image src="{{ phone ? (imgUrl + 'phone.png') : (imgUrl + 'phone1.png') }}"></image>
            <input id="phoneInput" type="number" placeholder="请输入手机号" onchange="inputPhone"></input>
        </div>
        <div class="formItem">
            <image src="{{ pwd ? (imgUrl + 'password.png') : (imgUrl + 'password1.png') }}"></image>
            <input id="pwdInput" type="password" placeholder="请输入密码" onchange="inputPwd"></input>
        </div>
        <button class="inputBtn" onclick="login">登录</button>
    </div>
</dialog>
- 1.
- 2.
- 3.
- 4.
- 5.
- 6.
- 7.
- 8.
- 9.
- 10.
- 11.
- 12.
- 13.
这里需注意,官方文档中说的“支持单个子组件”的意思是,dialog中只能有一个直接子组件,即需要用一个div将内容套起来。

同样地,根据id找到元素,使用show()方法唤起对话框。对话框的show()方法无重载,会在页面底部弹出。dialog的大小取决于子组件div的大小,div给样式即可。
menuSelect(event) {
     let value = event.value;
     if ("login" == value) {
         this.phone = "";
         this.pwd = "";
         this.$element("loginDialog").show();
     } else if ("register" == value) {
         this.phone = "";
         this.pwd = "";
         this.$element("registerDialog").show();
     }
 },
- 1.
- 2.
- 3.
- 4.
- 5.
- 6.
- 7.
- 8.
- 9.
- 10.
- 11.
- 12.
可用close()方法关闭它。
this.$element("registerDialog").close();
- 1.
附上本页面的代码,后台功能自己搭建了Spring Boot服务器进行交互。下篇将讲解表单组件:
<!-- 我的 -->
  <div class="myPage">
      <div class="userInfo">
          <image src="{{ userInfo && userInfo.avatar != '0' ? userInfo.avatar : (imgUrl + 'user.png')}}"></image>
          <div class="info_desc">
              <text if="{{ !userInfo }}" onclick="showUserMenu" class="info_hint">
                  点击登录/注册
              </text>
              <text if="{{ userInfo }}" class="info_name">
                  {{ userInfo.nickname ? userInfo.nickname : userInfo.username }}
              </text>
              <text if="{{ userInfo }}" class="info_detail">
                  {{ userInfo.age }}  {{ userInfo.gender == 1 ? '男' : (userInfo.gender == 2 ? '女' : '性别保密') }}
              </text>
          </div>
      </div>
      <menu id="userMenu" onselected="menuSelect">
          <option value="login">登录</option>
          <option value="register">注册</option>
      </menu>
      <dialog id="loginDialog">
          <div class="loginDialog">
              <div class="formItem">
                  <image src="{{ phone ? (imgUrl + 'phone.png') : (imgUrl + 'phone1.png') }}"></image>
                  <input id="phoneInput" type="number" placeholder="请输入手机号" onchange="inputPhone"></input>
              </div>
              <div class="formItem">
                  <image src="{{ pwd ? (imgUrl + 'password.png') : (imgUrl + 'password1.png') }}"></image>
                  <input id="pwdInput" type="password" placeholder="请输入密码" onchange="inputPwd"></input>
              </div>
              <button class="inputBtn" onclick="login">登录</button>
          </div>
      </dialog>
  </div>
  <!-- 我的end -->
- 1.
- 2.
- 3.
- 4.
- 5.
- 6.
- 7.
- 8.
- 9.
- 10.
- 11.
- 12.
- 13.
- 14.
- 15.
- 16.
- 17.
- 18.
- 19.
- 20.
- 21.
- 22.
- 23.
- 24.
- 25.
- 26.
- 27.
- 28.
- 29.
- 30.
- 31.
- 32.
- 33.
- 34.
- 35.
css:
/*我的*/
.userInfo {
    width: 92%;
    height: 240px;
    margin: 20px 0 20px 0;
    border-radius: 30px;
    box-shadow: 5px 5px 15px #bbbbbb;
    background-color: #eeeeee;
    display: flex;
    align-items: center;
}
.userInfo>image {
    margin: 0 40px 0 40px;
    width: 160px;
    height: 160px;
    border-radius: 90px;
    object-fit: contain;
}
.info_desc {
    height: 200px;
    margin-right: 20px;
    flex: 1;
    display: flex;
    flex-direction: column;
    justify-content: center;
}
.info_hint {
    font-size: 48px;
    font-weight: bold;
    color: #333333;
}
.info_name {
    font-size: 40px;
    font-weight: 600;
    height: 100px;
    color: #333333;
}
.info_detail {
    font-size: 34px;
    color: #666666;
}
.loginDialog {
    width: 80%;
    height: 400px;
    display: flex;
    flex-direction: column;
    align-items: center;
    justify-content: center;
}
.formItem {
    width: 100%;
    height: 100px;
    display: flex;
    align-items: center;
    justify-content: space-between;
    margin-bottom: 20px;
}
.formItem>image {
    width: 70px;
    height: 70px;
    margin: 0 10px 0 10px;
}
input {
    flex: 1;
}
.inputBtn {
    width: 200px;
    height: 70px;
}
- 1.
- 2.
- 3.
- 4.
- 5.
- 6.
- 7.
- 8.
- 9.
- 10.
- 11.
- 12.
- 13.
- 14.
- 15.
- 16.
- 17.
- 18.
- 19.
- 20.
- 21.
- 22.
- 23.
- 24.
- 25.
- 26.
- 27.
- 28.
- 29.
- 30.
- 31.
- 32.
- 33.
- 34.
- 35.
- 36.
- 37.
- 38.
- 39.
- 40.
- 41.
- 42.
- 43.
- 44.
- 45.
- 46.
- 47.
- 48.
- 49.
- 50.
- 51.
- 52.
- 53.
- 54.
- 55.
- 56.
- 57.
- 58.
- 59.
- 60.
- 61.
- 62.
- 63.
- 64.
- 65.
- 66.
- 67.
- 68.
- 69.
js:(省略data部分)
// 弹出菜单
 showUserMenu() {
     this.$element("userMenu").show();
 },
 // 菜单选中
 menuSelect(event) {
     let value = event.value;
     if ("login" == value) {
         this.phone = "";
         this.pwd = "";
         this.$element("loginDialog").show();
     } else if ("register" == value) {
         this.phone = "";
         this.pwd = "";
         // this.$element("registerDialog").show();
     }
 },
 // 手机号输入框
 inputPhone(e) {
     this.phone = e.value;
 },
 // 密码输入框
 inputPwd(e) {
     this.pwd = e.value;
 },
 // 登录
 login() {
     fetch.fetch({
         url: this.url + "/litemall/user/login?phone=" + this.phone + "&pwd=" + this.pwd,
         responseType: "json",
         success: res => {
             let data = JSON.parse(res.data);
             if (0 != data.code) {
                 prompt.showToast({
                     message: data.msg,
                     duration: 3000
                 })
             } else {
                 this.userInfo = data.data;
                 this.$element("loginDialog").close();
             }
         }
     })
 }
- 1.
- 2.
- 3.
- 4.
- 5.
- 6.
- 7.
- 8.
- 9.
- 10.
- 11.
- 12.
- 13.
- 14.
- 15.
- 16.
- 17.
- 18.
- 19.
- 20.
- 21.
- 22.
- 23.
- 24.
- 25.
- 26.
- 27.
- 28.
- 29.
- 30.
- 31.
- 32.
- 33.
- 34.
- 35.
- 36.
- 37.
- 38.
- 39.
- 40.
- 41.
- 42.
- 43.
- 44.
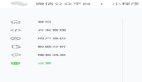
登录成功效果:

https://harmonyos.51cto.com/#zz