https://harmonyos.51cto.com/#zz
1、鸿蒙的数据绑定
微信小程序的数据绑定是类似于Vue的,wxml文件用 {{ }} 和对应js文件中的data对象中的属性进行绑定。
<view class="city">
    {{ now.location.name }}市
</view>
- 1.
- 2.
- 3.
data: {
    now: {
      location: {
        name: "南京"
      },
  }
}
- 1.
- 2.
- 3.
- 4.
- 5.
- 6.
- 7.

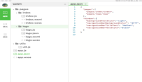
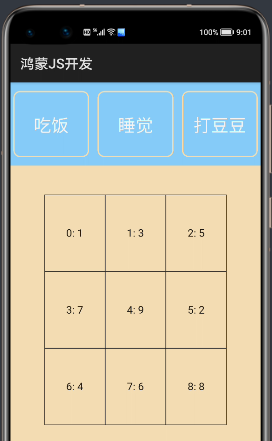
那么鸿蒙中是否也是这样绑定呢?尝试在hml文件的div标签中使用 {{ }} 绑定js文件中的属性值,但却什么都没有显示。
<!--错误代码-->
<div class="container">
    <div class="top">
        <div class="topItem">
            {{t1}}
        </div>
        <div class="topItem">
            {{t2}}
        </div>
        <div class="topItem">
            {{t3}}
        </div>
    </div>
...
</div>
- 1.
- 2.
- 3.
- 4.
- 5.
- 6.
- 7.
- 8.
- 9.
- 10.
- 11.
- 12.
- 13.
- 14.
- 15.
export default {
    data: {
        t1: "吃饭",
        t2: "睡觉",
        t3: "打豆豆"
    }
}
- 1.
- 2.
- 3.
- 4.
- 5.
- 6.
- 7.

其实是因为div标签中直接放文字是不会显示的,需要将文字放在
<div class="container">
    <div class="top">
        <div class="topItem">
            <text>
                {{t1}}
            </text>
        </div>
        <div class="topItem">
            <text>
                {{t2}}
            </text>
        </div>
        <div class="topItem">
            <text>
                {{t3}}
            </text>
        </div>
    </div>
...
</div>
- 1.
- 2.
- 3.
- 4.
- 5.
- 6.
- 7.
- 8.
- 9.
- 10.
- 11.
- 12.
- 13.
- 14.
- 15.
- 16.
- 17.
- 18.
- 19.
- 20.
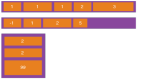
在一个数组中循环取值的方式和微信小程序也是类似的,可用一个
<div class="content">
    <div class="contentItem">
        <block for="{{array}}">
            <div class="item">
                <text>{{$idx}}: {{$item}}</text>
            </div>
        </block>
    </div>
</div>
- 1.
- 2.
- 3.
- 4.
- 5.
- 6.
- 7.
- 8.
- 9.
export default {
    data: {
        t1: "吃饭",
        t2: "睡觉",
        t3: "打豆豆",
        array: [1, 3, 5, 7, 9, 2, 4, 6, 8]
    }
}
- 1.
- 2.
- 3.
- 4.
- 5.
- 6.
- 7.
- 8.
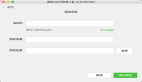
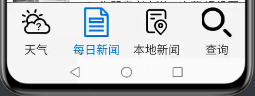
2、自定义tabBar
在微信小程序中可以直接在app.json中定义一个tabBar。
"tabBar": {
    "color": "#333333",
    "backgroundColor": "#fdfdfd",
    "selectedColor": "#E20A0B",
    "list": [
      {
        "pagePath": "pages/weather/weather",
        "text": "天气",
        "iconPath": "icon/weather.png",
        "selectedIconPath": "icon/weather1.png"
      },
    ...
    ]
}
- 1.
- 2.
- 3.
- 4.
- 5.
- 6.
- 7.
- 8.
- 9.
- 10.
- 11.
- 12.
- 13.
- 14.

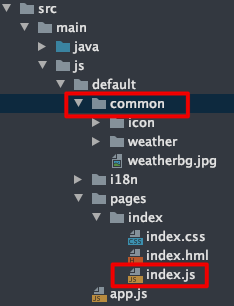
鸿蒙没有这种在json中继承的配置项,但我们可以用flex布局自己写一个,甚至可以加上动画等更丰富的功能。考虑到每一个菜单项有选中和未选中两种状态,各需准备两张图片。将图片放在/entry/src/main/js/default/common文件夹中,并在js文件中定义菜单栏数据。此处需要注意虽然在目录结构上common文件夹和页面js文件存在父级目录的关系,但在js加载时common被认定为同一级目录,图片目录定义处需注意。
export default {
    data: {
        tabBar: [
            {
                text: "天气",
                img1: "./common/icon/weather.png",
                img2: "./common/icon/weather1.png"
            },
            {
                text: "每日新闻",
                img1: "./common/icon/news.png",
                img2: "./common/icon/news1.png"
            },
            {
                text: "本地新闻",
                img1: "./common/icon/local.png",
                img2: "./common/icon/local1.png"
            },
            {
                text: "查询",
                img1: "./common/icon/search2.png",
                img2: "./common/icon/search1.png"
            }
        ],
        barIdx: 0,
    }
}
- 1.
- 2.
- 3.
- 4.
- 5.
- 6.
- 7.
- 8.
- 9.
- 10.
- 11.
- 12.
- 13.
- 14.
- 15.
- 16.
- 17.
- 18.
- 19.
- 20.
- 21.
- 22.
- 23.
- 24.
- 25.
- 26.
- 27.
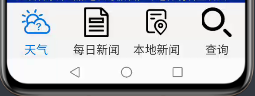
页面设计上,采用position: fixed;将菜单栏固定在页面底部,并结合flex布局使页面美观。判断当前选中哪一项,则可以使用三元表达式。
<!-- 底部菜单栏 -->
    <div class="tabBar">
        <block for="{{ tabBar }}">
            <div class="cell" onclick="changeMenu($idx)">
                <div class="image">
                    <image src="{{ barIdx == $idx ? $item.img2: $item.img1 }}"></image>
                </div>
                <div class="text">
                    <text class="{{ barIdx == $idx ? 'a' : 'b' }}">
                        {{ $item.text }}
                    </text>
                </div>
            </div>
        </block>
    </div>
- 1.
- 2.
- 3.
- 4.
- 5.
- 6.
- 7.
- 8.
- 9.
- 10.
- 11.
- 12.
- 13.
- 14.
- 15.
/*底部菜单*/
.tabBar {
    width: 100%;
    height: 170px;
    position: fixed;
    bottom: 0px;
    border-top: 1px solid #444444;
    display: flex;
    justify-content: space-around;
    align-items: center;
    background-color: #f5f5f5;
}
.cell {
    width: 20%;
    height: 160px;
    display: flex;
    flex-direction: column;
}
.image {
    width: 100%;
    height: 110px;
    display: flex;
    justify-content: center;
    align-items: center;
}
.image>image {
    width: 90px;
    height: 90px;
}
.a {
    color: #0074DD;
}
.b {
    color: #333333;
}
.text {
    width: 100%;
    height: 50px;
    display: flex;
    justify-content: center;
    align-items: center;
}
.text>text {
    font-size: 35px;
}
- 1.
- 2.
- 3.
- 4.
- 5.
- 6.
- 7.
- 8.
- 9.
- 10.
- 11.
- 12.
- 13.
- 14.
- 15.
- 16.
- 17.
- 18.
- 19.
- 20.
- 21.
- 22.
- 23.
- 24.
- 25.
- 26.
- 27.
- 28.
- 29.
- 30.
- 31.
- 32.
- 33.
- 34.
- 35.
- 36.
- 37.
- 38.
- 39.
- 40.
- 41.
- 42.
- 43.
- 44.
- 45.
div的点击事件处理属性为onclick,其不会像微信小程序一样自动传入一个事件对象,而需要我们自行定义传入的参数。如上的onclick="changeMenu($idx)"就是鸿蒙传入点击事件的方法。这个函数只需要改变barIdx的值便可以实现点击切换tabBar对应项的颜色和图片,达到“四两拨千斤”的效果。
changeMenu(idx) {
        this.barIdx = idx;
}
- 1.
- 2.
- 3.
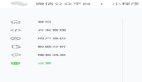
这里又出现了和微信小程序的不同处,微信小程序改变data中的值需要使用wx.setData()函数进行设置,而鸿蒙中直接使用this.key = value即可。
点一下其他菜单项:
3、结合swiper进行翻页
tabBar完成了,但这个菜单栏是写在一个页面中的,要怎样进行翻页呢?有一个在一个js页面中实现“翻页”的方式,就是结合swiper。和微信小程序中的swiper组件一样,它是一个可滑动的组件,多用于轮播图、滚动通知等。
鸿蒙的swiper需要定义一个页面唯一的id属性,用于点击事件联动页面滑动。index属性为当前的索引值。
<!-- 划页swiper -->
    <swiper id="pager" index="0" class="pager" onchange="changePage" indicator="false">
    <!--4个div作为4页-->
    </swiper>
- 1.
- 2.
- 3.
- 4.
/*划页swiper*/
.pager {
    width: 100%;
    height: 100%;
}
.pager>div {
    display: flex;
    flex-direction: column;
}
- 1.
- 2.
- 3.
- 4.
- 5.
- 6.
- 7.
- 8.
- 9.
现需要实现两个功能,滑动swiper实现tabBar联动样式变化,以及点击tabBar中的项联动swiper页面滑动。更改changeMenu方法:
changeMenu(idx) {
    this.barIdx = idx;
    this.$element("pager").swipeTo({
        index: idx
    });
}
- 1.
- 2.
- 3.
- 4.
- 5.
- 6.
鸿蒙通过this.$element(id)找到页面中对应id的组件,如为swiper组件则可使用swipeTo()方法实现滑动,其index属性则为滑动到的页面索引值(0开始)。
changePage方法,只需要改变barIdx的值即可。通过swiper的onchange属性绑定方法名,滑动到的index的值会作为event.index被传入。
changePage(event) {
    this.barIdx = event.index;
}
- 1.
- 2.
- 3.
大功告成。
©著作权归作者和HarmonyOS技术社区共同所有,如需转载,请注明出处,否则将追究法律责任。
https://harmonyos.51cto.com/#zz