Nginx 是一个很强大的高性能 Web 和反向代理服务,它具有很多非常优越的特性,在连接高并发的情况下,Nginx 是 Apache 服务不错的替代品。其特点是占有内存少,并发能力强,事实上 nginx 的并发能力在同类型的网页服务器中表现较好,因此国内知名大厂例如:淘宝,京东,百度,新浪,网易,腾讯等等都在使用 Nginx 网站。
在我们的日常工作学习中,我们会该如何去优化自己的 Nginx 服务器?遇到以下问题我们该如何处理呢?
一、自定义返回客户端的404错误页面
1)优化前,客户端使用浏览器访问不存在的页面,会提示404文件未找到
- # firefox http://192.168.4.5/xxxxx //访问一个不存在的页面
2)修改 Nginx 配置文件,自定义报错页面
- [root@proxy ~]# vim /usr/local/nginx/conf/nginx.conf
- .. ..
- charset utf-8; //仅在需要中文时修改该选项
- error_page 404 /404.html; //自定义错误页面
- .. ..
- # vim /usr/local/nginx/html/404.html //生成错误页面
- Oops,No NO no page …
- # nginx -s reload
- # 请先确保 nginx 是启动状态,否则运行该命令会报错,报错信息如下:
- #[error] open() "/usr/local/nginx/logs/nginx.pid" failed (2: No such file or directory)
3)优化后,客户端使用浏览器访问不存在的页面,会提示自己定义的 40x.html 页面
- # firefox http://192.168.4.5/xxxxx //访问一个不存在的页面
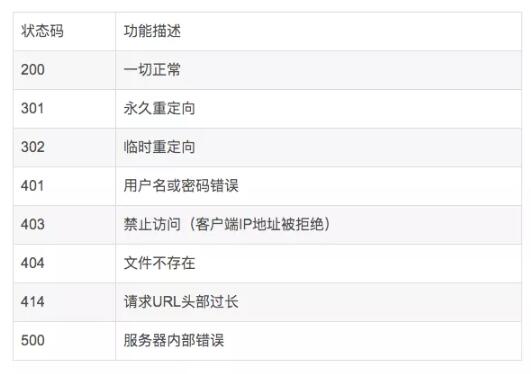
常见的 http 状态码可用参考表所示
二、查看服务器状态信息
1)编译安装时使用--with-http_stub_status_module开启状态页面模块
- # tar -zxvf nginx-1.12.2.tar.gz
- # cd nginx-1.12.2
- # ./configure \
- > --with-http_ssl_module //开启SSL加密功能
- > --with-stream //开启TCP/UDP代理模块
- > --with-http_stub_status_module //开启status状态页面
- # make && make install //编译并安装
2)启用 Nginx 服务并查看监听端口状态
ss 命令可以查看系统中启动的端口信息,该命令常用选项如下:
- -a 显示所有端口的信息
- -n 以数字格式显示端口号
- -t 显示TCP连接的端口
- -u 显示UDP连接的端口
- -l 显示服务正在监听的端口信息,如httpd启动后,会一直监听80端口
- -p 显示监听端口的服务名称是什么(也就是程序名称)
注意:在 RHEL7 系统中可以使用ss命令替代 netstat 命令,功能一样,选项一样。
- # /usr/local/nginx/sbin/nginx
- # netstat -anptu | grep nginx
- tcp 0 0 0.0.0.0:80 0.0.0.0:* LISTEN 10441/nginx
- # ss -anptu | grep nginx
3)修改 Nginx 配置文件,定义状态页面
- # cat /usr/local/nginx/conf/nginx.conf
- … …
- location /status {
- stub_status on;
- #allow IP地址;
- #deny IP地址;
- }
- … …
- # /usr/local/nginx/sbin/nginx -s reload
4)优化后,查看状态页面信息
- # curl http://192.168.4.5/status
- Active connections: 1
- server accepts handled requests
- 10 10 3
- Reading: 0 Writing: 1 Waiting: 0
Active connections:当前活动的连接数量。
Accepts:已经接受客户端的连接总数量。
Handled:已经处理客户端的连接总数量。
(一般与accepts一致,除非服务器限制了连接数量)。
Requests:客户端发送的请求数量。
Reading:当前服务器正在读取客户端请求头的数量。
Writing:当前服务器正在写响应信息的数量。
Waiting:当前多少客户端在等待服务器的响应。
三、优化 Nginx 并发量
1)优化前使用ab高并发测试
- # ab -n 2000 -c 2000 http://192.168.4.5/
- Benchmarking 192.168.4.5 (be patient)
- socket: Too many open files (24) //提示打开文件数量过多
2)修改 Nginx 配置文件,增加并发量
- # vim /usr/local/nginx/conf/nginx.conf
- .. ..
- worker_processes 2; //与CPU核心数量一致
- events {
- worker_connections 65535; //每个worker最大并发连接数
- }
- .. ..
- # /usr/local/nginx/sbin/nginx -s reload
3)优化 Linux 内核参数(最大文件数量)
- # ulimit -a //查看所有属性值
- # ulimit -Hn 100000 //设置硬限制(临时规则)
- # ulimit -Sn 100000 //设置软限制(临时规则)
- # vim /etc/security/limits.conf
- .. ..
- * soft nofile 100000
- * hard nofile 100000
- #该配置文件分4列,分别如下:10.#用户或组 硬限制或软限制 需要限制的项目 限制的值
4)优化后测试服务器并发量(因为客户端没调内核参数,所以在proxy测试)
- # ab -n 2000 -c 2000 http://192.168.4.5/
四、优化 Nginx 数据包头缓存
1)优化前,使用脚本测试长头部请求是否能获得响应
- [root@proxy ~]# cat lnmp_soft/buffer.sh
- #!/bin/bash
- URL=http://192.168.4.5/index.html?
- for i in {1..5000}
- do
- URL=${URL}v$i=$i
- done
- curl $URL //经过5000次循环后,生成一个长的URL地址栏
- [root@proxy ~]# ./buffer.sh
- .. ..
- <center><h1>414 Request-URI Too Large</h1></center> //提示头部信息过大
2)修改 Nginx 配置文件,增加数据包头部缓存大小
- # vim /usr/local/nginx/conf/nginx.conf
- ... ..
- http {
- client_header_buffer_size 1k; //默认请求包头信息的缓存
- large_client_header_buffers 4 4k; //大请求包头部信息的缓存个数与容量
- .. ..
- }
- # /usr/local/nginx/sbin/nginx -s reload
3)优化后,使用脚本测试长头部请求是否能获得响应
- 1.[root@proxy ~]# cat buffer.sh
- 2.#!/bin/bash
- 3.URL=http://192.168.4.5/index.html?
- 4.for i in {1..5000}
- 5.do
- 6. URL=${URL}v$i=$i
- 7.done
- 8.curl $URL
- 9.[root@proxy ~]# ./buffer.sh
五、浏览器本地缓存静态数据
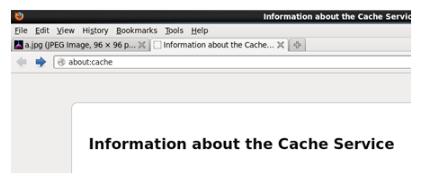
1)使用Firefox浏览器查看缓存
以Firefox浏览器为例,在Firefox地址栏内输入about:cache将显示Firefox浏览器的缓存信息,如图所示,点击List Cache Entries可以查看详细信息。
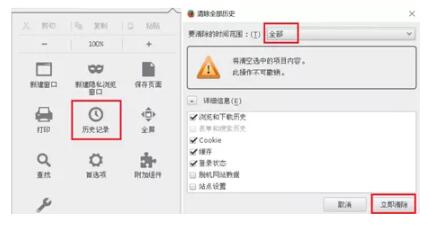
2)清空firefox本地缓存数据,如图所示。
3)改Nginx配置文件,定义对静态页面的缓存时间
- # vim /usr/local/nginx/conf/nginx.conf
- server {
- listen 80;
- server_name localhost;
- location / {
- root html;
- index index.html index.htm;
- }
- location ~* \.(jpg|jpeg|gif|png|css|js|ico|xml)$ {
- expires 30d; //定义客户端缓存时间为30天
- }
- }
- # cp /usr/share/backgrounds/day.jpg /usr/local/nginx/html
- # /usr/local/nginx/sbin/nginx -s reload
- #请先确保nginx是启动状态,否则运行该命令会报错,报错信息如下:16.#[error] open() "/usr/local/nginx/logs/nginx.pid" failed (2: No such file or directory)
4)优化后,使用Firefox浏览器访问图片,再次查看缓存信息
- # firefox http://192.168.4.5/day.jpg
在 firefox 地址栏内输入 about:cache,查看本地缓存数据,查看是否有图片以及过期时间是否正确。