本文是该系列的第七篇。
现在我们已经完成了后端,让我们转到前端。 我将采用单页应用程序方案。
首先,我们创建一个 static/index.html 文件,内容如下。
<!DOCTYPE html>
<html lang="en">
<head>
    <meta charset="utf-8">
    <meta name="viewport" content="width=device-width, initial-scale=1.0">
    <title>Messenger</title>
    <link rel="shortcut icon" href="data:,">
    <link rel="stylesheet" href="/styles.css">
    <script src="/main.js" type="module"></script>
</head>
<body></body>
</html>
- 1.
- 2.
- 3.
- 4.
- 5.
- 6.
- 7.
- 8.
- 9.
- 10.
- 11.
- 12.
这个 HTML 文件必须为每个 URL 提供服务,并且使用 JavaScript 负责呈现正确的页面。
因此,让我们将注意力转到 main.go 片刻,然后在 main() 函数中添加以下路由:
router.Handle("GET", "/...", http.FileServer(SPAFileSystem{http.Dir("static")}))

type SPAFileSystem struct {
    fs http.FileSystem
}

func (spa SPAFileSystem) Open(name string) (http.File, error) {
    f, err := spa.fs.Open(name)
    if err != nil {
        return spa.fs.Open("index.html")
    }
    return f, nil
}
- 1.
- 2.
- 3.
- 4.
- 5.
- 6.
- 7.
- 8.
- 9.
- 10.
- 11.
- 12.
- 13.
我们使用一个自定义的文件系统,因此它不是为未知的 URL 返回 404 Not Found,而是转到 index.html。
路由器
在 index.html 中我们加载了两个文件:styles.css 和 main.js。我把样式留给你自由发挥。
让我们移动到 main.js。 创建一个包含以下内容的 static/main.js 文件:
import { guard } from './auth.js'
import Router from './router.js'

let currentPage
const disconnect = new CustomEvent('disconnect')
const router = new Router()

router.handle('/', guard(view('home'), view('access')))
router.handle('/callback', view('callback'))
router.handle(/^\/conversations\/([^\/]+)$/, guard(view('conversation'), view('access')))
router.handle(/^\//, view('not-found'))

router.install(async result => {
    document.body.innerHTML = ''
    if (currentPage instanceof Node) {
        currentPage.dispatchEvent(disconnect)
    }
    currentPage = await result
    if (currentPage instanceof Node) {
        document.body.appendChild(currentPage)
    }
})

function view(pageName) {
    return (...args) => import(`/pages/${pageName}-page.js`)
        .then(m => m.default(...args))
}
- 1.
- 2.
- 3.
- 4.
- 5.
- 6.
- 7.
- 8.
- 9.
- 10.
- 11.
- 12.
- 13.
- 14.
- 15.
- 16.
- 17.
- 18.
- 19.
- 20.
- 21.
- 22.
- 23.
- 24.
- 25.
- 26.
- 27.
如果你是这个博客的关注者,你已经知道它是如何工作的了。 该路由器就是在 这里 显示的那个。 只需从 @nicolasparada/router 下载并保存到 static/router.js 即可。
我们注册了四条路由。 在根路由 / 处,我们展示 home 或 access 页面,无论用户是否通过身份验证。 在 /callback 中,我们展示 callback 页面。 在 /conversations/{conversationID} 上,我们展示对话或 access 页面,无论用户是否通过验证,对于其他 URL,我们展示一个 not-found 页面。
我们告诉路由器将结果渲染为文档主体,并在离开之前向每个页面调度一个 disconnect 事件。
我们将每个页面放在不同的文件中,并使用新的动态 import() 函数导入它们。
身份验证
guard() 是一个函数,给它两个函数作为参数,如果用户通过了身份验证,则执行第一个函数,否则执行第二个。它来自 auth.js,所以我们创建一个包含以下内容的 static/auth.js 文件:
export function isAuthenticated() {
    const token = localStorage.getItem('token')
    const expiresAtItem = localStorage.getItem('expires_at')
    if (token === null || expiresAtItem === null) {
        return false
    }

    const expiresAt = new Date(expiresAtItem)
    if (isNaN(expiresAt.valueOf()) || expiresAt <= new Date()) {
        return false
    }

    return true
}

export function guard(fn1, fn2) {
    return (...args) => isAuthenticated()
        ? fn1(...args)
        : fn2(...args)
}

export function getAuthUser() {
    if (!isAuthenticated()) {
        return null
    }

    const authUser = localStorage.getItem('auth_user')
    if (authUser === null) {
        return null
    }

    try {
        return JSON.parse(authUser)
    } catch (_) {
        return null
    }
}
- 1.
- 2.
- 3.
- 4.
- 5.
- 6.
- 7.
- 8.
- 9.
- 10.
- 11.
- 12.
- 13.
- 14.
- 15.
- 16.
- 17.
- 18.
- 19.
- 20.
- 21.
- 22.
- 23.
- 24.
- 25.
- 26.
- 27.
- 28.
- 29.
- 30.
- 31.
- 32.
- 33.
- 34.
- 35.
- 36.
- 37.
isAuthenticated() 检查 localStorage 中的 token 和 expires_at,以判断用户是否已通过身份验证。getAuthUser() 从 localStorage 中获取经过身份验证的用户。
当我们登录时,我们会将所有的数据保存到 localStorage,这样才有意义。
Access 页面

access page screenshot
让我们从 access 页面开始。 创建一个包含以下内容的文件 static/pages/access-page.js:
const template = document.createElement('template')
template.innerHTML = `
    <h1>Messenger</h1>
    <a href="/api/oauth/github" onclick="event.stopPropagation()">Access with GitHub</a>
`

export default function accessPage() {
    return template.content
}
- 1.
- 2.
- 3.
- 4.
- 5.
- 6.
- 7.
- 8.
- 9.
因为路由器会拦截所有链接点击来进行导航,所以我们必须特别阻止此链接的事件传播。
单击该链接会将我们重定向到后端,然后重定向到 GitHub,再重定向到后端,然后再次重定向到前端; 到 callback 页面。
Callback 页面
创建包括以下内容的 static/pages/callback-page.js 文件:
import http from '../http.js'
import { navigate } from '../router.js'

export default async function callbackPage() {
    const url = new URL(location.toString())
    const token = url.searchParams.get('token')
    const expiresAt = url.searchParams.get('expires_at')

    try {
        if (token === null || expiresAt === null) {
            throw new Error('Invalid URL')
        }

        const authUser = await getAuthUser(token)

        localStorage.setItem('auth_user', JSON.stringify(authUser))
        localStorage.setItem('token', token)
        localStorage.setItem('expires_at', expiresAt)
    } catch (err) {
        alert(err.message)
    } finally {
        navigate('/', true)
    }
}

function getAuthUser(token) {
    return http.get('/api/auth_user', { authorization: `Bearer ${token}` })
}
- 1.
- 2.
- 3.
- 4.
- 5.
- 6.
- 7.
- 8.
- 9.
- 10.
- 11.
- 12.
- 13.
- 14.
- 15.
- 16.
- 17.
- 18.
- 19.
- 20.
- 21.
- 22.
- 23.
- 24.
- 25.
- 26.
- 27.
- 28.
callback 页面不呈现任何内容。这是一个异步函数,它使用 URL 查询字符串中的 token 向 /api/auth_user 发出 GET 请求,并将所有数据保存到 localStorage。 然后重定向到 /。
HTTP
这里是一个 HTTP 模块。 创建一个包含以下内容的 static/http.js 文件:
import { isAuthenticated } from './auth.js'

async function handleResponse(res) {
    const body = await res.clone().json().catch(() => res.text())

    if (res.status === 401) {
        localStorage.removeItem('auth_user')
        localStorage.removeItem('token')
        localStorage.removeItem('expires_at')
    }

    if (!res.ok) {
        const message = typeof body === 'object' && body !== null && 'message' in body
            ? body.message
            : typeof body === 'string' && body !== ''
                ? body
                : res.statusText
        throw Object.assign(new Error(message), {
            url: res.url,
            statusCode: res.status,
            statusText: res.statusText,
            headers: res.headers,
            body,
        })
    }

    return body
}

function getAuthHeader() {
    return isAuthenticated()
        ? { authorization: `Bearer ${localStorage.getItem('token')}` }
        : {}
}

export default {
    get(url, headers) {
        return fetch(url, {
            headers: Object.assign(getAuthHeader(), headers),
        }).then(handleResponse)
    },

    post(url, body, headers) {
        const init = {
            method: 'POST',
            headers: getAuthHeader(),
        }
        if (typeof body === 'object' && body !== null) {
            init.body = JSON.stringify(body)
            init.headers['content-type'] = 'application/json; charset=utf-8'
        }
        Object.assign(init.headers, headers)
        return fetch(url, init).then(handleResponse)
    },

    subscribe(url, callback) {
        const urlWithToken = new URL(url, location.origin)
        if (isAuthenticated()) {
            urlWithToken.searchParams.set('token', localStorage.getItem('token'))
        }
        const eventSource = new EventSource(urlWithToken.toString())
        eventSource.onmessage = ev => {
            let data
            try {
                data = JSON.parse(ev.data)
            } catch (err) {
                console.error('could not parse message data as JSON:', err)
                return
            }
            callback(data)
        }
        const unsubscribe = () => {
            eventSource.close()
        }
        return unsubscribe
    },
}
- 1.
- 2.
- 3.
- 4.
- 5.
- 6.
- 7.
- 8.
- 9.
- 10.
- 11.
- 12.
- 13.
- 14.
- 15.
- 16.
- 17.
- 18.
- 19.
- 20.
- 21.
- 22.
- 23.
- 24.
- 25.
- 26.
- 27.
- 28.
- 29.
- 30.
- 31.
- 32.
- 33.
- 34.
- 35.
- 36.
- 37.
- 38.
- 39.
- 40.
- 41.
- 42.
- 43.
- 44.
- 45.
- 46.
- 47.
- 48.
- 49.
- 50.
- 51.
- 52.
- 53.
- 54.
- 55.
- 56.
- 57.
- 58.
- 59.
- 60.
- 61.
- 62.
- 63.
- 64.
- 65.
- 66.
- 67.
- 68.
- 69.
- 70.
- 71.
- 72.
- 73.
- 74.
- 75.
- 76.
- 77.
这个模块是 fetch 和 EventSource API 的包装器。最重要的部分是它将 JSON web 令牌添加到请求中。
Home 页面
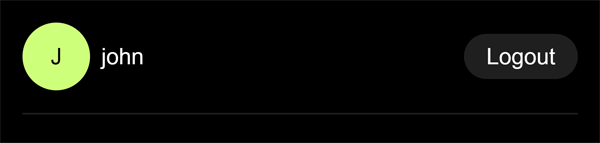
home page screenshot
因此,当用户登录时,将显示 home 页。 创建一个具有以下内容的 static/pages/home-page.js 文件:
import { getAuthUser } from '../auth.js'
import { avatar } from '../shared.js'

export default function homePage() {
    const authUser = getAuthUser()
    const template = document.createElement('template')
    template.innerHTML = `
        <div>
            <div>
                ${avatar(authUser)}
                <span>${authUser.username}</span>
            </div>
            <button id="logout-button">Logout</button>
        </div>
        <!-- conversation form here -->
        <!-- conversation list here -->
    `
    const page = template.content
    page.getElementById('logout-button').onclick = onLogoutClick
    return page
}

function onLogoutClick() {
    localStorage.clear()
    location.reload()
}
- 1.
- 2.
- 3.
- 4.
- 5.
- 6.
- 7.
- 8.
- 9.
- 10.
- 11.
- 12.
- 13.
- 14.
- 15.
- 16.
- 17.
- 18.
- 19.
- 20.
- 21.
- 22.
- 23.
- 24.
- 25.
- 26.
对于这篇文章,这是我们在 home 页上呈现的唯一内容。我们显示当前经过身份验证的用户和注销按钮。
当用户单击注销时,我们清除 localStorage 中的所有内容并重新加载页面。
Avatar
那个 avatar() 函数用于显示用户的头像。 由于已在多个地方使用,因此我将它移到 shared.js 文件中。 创建具有以下内容的文件 static/shared.js:
export function avatar(user) {
    return user.avatarUrl === null
        ? `<figure class="avatar" data-initial="${user.username[0]}"></figure>`
        : `<img class="avatar" src="${user.avatarUrl}" alt="${user.username}'s avatar">`
}
- 1.
- 2.
- 3.
- 4.
- 5.
如果头像网址为 null,我们将使用用户的姓名首字母作为初始头像。
你可以使用 attr() 函数显示带有少量 CSS 样式的首字母。
.avatar[data-initial]::after {
    content: attr(data-initial);
}
- 1.
- 2.
- 3.
仅开发使用的登录
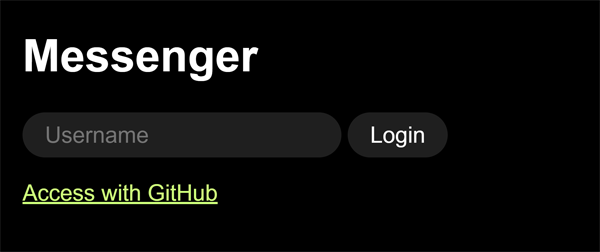
access page with login form screenshot
在上一篇文章中,我们为编写了一个登录代码。让我们在 access 页面中为此添加一个表单。 进入 static/ages/access-page.js,稍微修改一下。
import http from '../http.js'

const template = document.createElement('template')
template.innerHTML = `
    <h1>Messenger</h1>
    <form id="login-form">
        <input type="text" placeholder="Username" required>
        <button>Login</button>
    </form>
    <a href="/api/oauth/github" onclick="event.stopPropagation()">Access with GitHub</a>
`

export default function accessPage() {
    const page = template.content.cloneNode(true)
    page.getElementById('login-form').onsubmit = onLoginSubmit
    return page
}

async function onLoginSubmit(ev) {
    ev.preventDefault()

    const form = ev.currentTarget
    const input = form.querySelector('input')
    const submitButton = form.querySelector('button')

    input.disabled = true
    submitButton.disabled = true

    try {
        const payload = await login(input.value)
        input.value = ''

        localStorage.setItem('auth_user', JSON.stringify(payload.authUser))
        localStorage.setItem('token', payload.token)
        localStorage.setItem('expires_at', payload.expiresAt)

        location.reload()
    } catch (err) {
        alert(err.message)
        setTimeout(() => {
            input.focus()
        }, 0)
    } finally {
        input.disabled = false
        submitButton.disabled = false
    }
}

function login(username) {
    return http.post('/api/login', { username })
}
- 1.
- 2.
- 3.
- 4.
- 5.
- 6.
- 7.
- 8.
- 9.
- 10.
- 11.
- 12.
- 13.
- 14.
- 15.
- 16.
- 17.
- 18.
- 19.
- 20.
- 21.
- 22.
- 23.
- 24.
- 25.
- 26.
- 27.
- 28.
- 29.
- 30.
- 31.
- 32.
- 33.
- 34.
- 35.
- 36.
- 37.
- 38.
- 39.
- 40.
- 41.
- 42.
- 43.
- 44.
- 45.
- 46.
- 47.
- 48.
- 49.
- 50.
- 51.
我添加了一个登录表单。当用户提交表单时。它使用用户名对 /api/login 进行 POST 请求。将所有数据保存到 localStorage 并重新加载页面。
记住在前端完成后删除此表单。
这就是这篇文章的全部内容。在下一篇文章中,我们将继续使用主页添加一个表单来开始对话,并显示包含最新对话的列表。