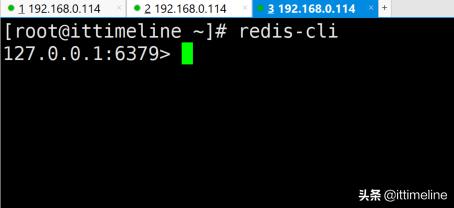
Redis概述
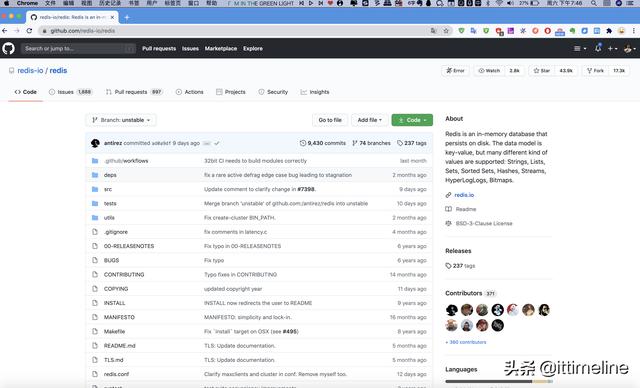
Redis的作者Salvatore Sanfilippo在开发一个叫做LLOOGG的网站时,需要实现一个高性能的队列功能,最开始是使用MySQL实现,但是无论怎么优化SQL语句也没办法提高网站的性能,后来决定做一个专属于LLOOGG的数据库,这个就是Redis的前身,后来将Redis1.0的源码开放到GitHub上。redis github
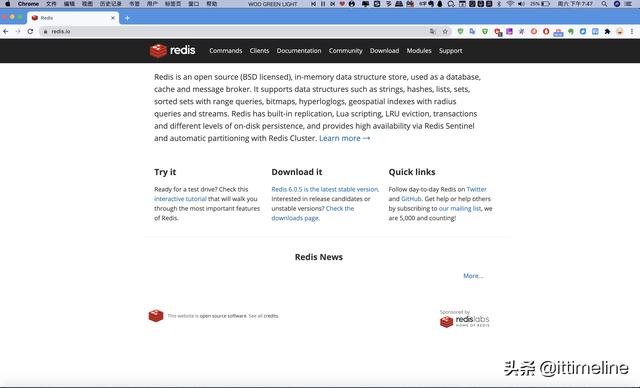
Redis是一种开源、基于键值对(key-value)的NoSQL数据库,但是与很对键值对数据库不同的是Redis中的值可以由string(字符串)、hash(哈希)、list(列表)、set(集合)、zset(有序集合)、bitmaps(位图)、HyperLogLog、GEO(地理信息定位)等多种数据结构和算法组成。而且因为Redis会将所有的数据放在内存中,所以它的读写性能是惊人的,不仅如此,Redis还可以将内存中的数据利用快照和日志的形式保存到硬盘上,这样发生类似断点或者是机器故障的时候,内存中的数据不会丢失。除此以外Redis还提供了键过期、发布订阅、事务、流水线、Lua脚本等附加功能。redis官网
目前国外的Github、stackoverflow、Twitter以及国内的阿里巴巴、腾讯、新浪、美团、百度等都在使用Redis,无论你是开发人员还是运维人员Redis已经是你必须要掌握的一项技能。
Redis特性
- 速度快Redis的数据存储在内存中,而内存的IO性能相比普通磁盘和固态磁盘的IO性能要高得多,这也是Redis高性能最主要的原因,而且Redis是使用C语言开发的,C语言相对于其他语言运行效率更高。同时采用单线程的架构,也避免了多线程可能产生的竞争问题。
- 持久化Redis的数据存储在内存中,容易造成机器断点后丢失数据,因此提供了持久化的功能,用于对数据的更新将异步的保存在磁盘上。
- 多种数据结构Redis提供了string(字符串)、hash(哈希)、list(列表)、set(集合)、zset(有序集合)、bitmaps(位图)、HyperLogLog、GEO(地理信息定位)等多种数据结构和算法组成。
- 支持多种主流的编程语言Java,Python,Go,Scala,Lua等主流编程语言
- 功能丰富支持发布订阅、Lua脚本、事务以及pipline等功能
- 简单Redis单机版的核心代码23000行,不依赖外部的库,使用单线程模型。
- 主从复制Redis提供了主从复制的功能,实现将服务器的数据复制到从服务器上,也是实现高可用和分布式的基础。
- 高可用、分布式Redis在2.8版本以后提供了Redis-Sentinel来支持高可用。Redis3.0提供了Redis-Cluster来支持分布式。
Redis典型的应用场景
- 缓存系统
- 计数器(例如微博的转发数、评论数)
- 简单的消息队列系统
- 排行榜
- 社交网络
- 实时系统
Redis单机安装
本次演示的环境是基于CentOS7.8和Redis6.0.5,Redis官方没有提供Windows版本的下载
在安装Redis之前,首先需要下载Redis6.0.5
使用wget命令将redis6.0.5下载到/opt/soft目录下
- [root@ittimeline opt]# mkdir /opt/soft
- [root@ittimeline opt]# wget http://download.redis.io/releases/redis-6.0.5.tar.gz
- --2020-07-04 18:02:53-- http://download.redis.io/releases/redis-6.0.5.tar.gz
- 正在解析主机 download.redis.io (download.redis.io)... 45.60.125.1
- 正在连接 download.redis.io (download.redis.io)|45.60.125.1|:80... 已连接。
- 已发出 HTTP 请求,正在等待回应... 200 OK
- 长度:2217666 (2.1M) [application/octet-stream]
- 正在保存至: “redis-6.0.5.tar.gz”
- 100%[=======================================================================================>] 2,217,666 4.58MB/s 用时 0.5s
- 2020-07-04 18:02:54 (4.58 MB/s) - 已保存 “redis-6.0.5.tar.gz” [2217666/2217666])
下载完成以后解压redis6.0.5
- [root@ittimeline opt]# tar -xzf redis-6.0.5.tar.gz
- [root@ittimeline opt]# ll|grep redis
- drwxrwxr-x. 7 root root 4096 6月 9 18:19 redis-6.0.5
- -rw-r--r--. 1 root root 2217666 6月 27 23:51 redis-6.0.5.tar.gz
解压缩完成之后建立一个软链接,方便管理和升级
- [root@ittimeline opt]# ln -s redis-6.0.5 redis
- [root@ittimeline opt]# ll|grep redis
- lrwxrwxrwx. 1 root root 11 7月 4 18:07 redis -> redis-6.0.5
- drwxrwxr-x. 7 root root 4096 7月 4 18:04 redis-6.0.5
- -rw-r--r--. 1 root root 2217666 6月 27 23:51 redis-6.0.5.tar.gz
然后进入redis的目录使用make&&make install进行编译和安装
- [root@ittimeline opt]# cd redis
- [root@ittimeline redis]# pwd
- /opt/redis
- [guanglei@ittimeline redis]$ make&&make install
如果在编译时出现如下错误提示
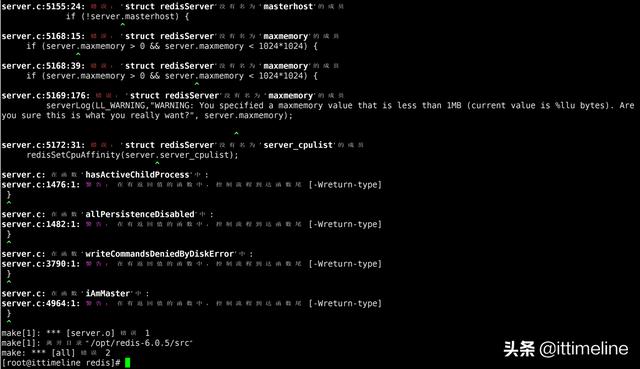
需要执行如下命令
- [root@ittimeline opt]#yum install cpp
- [root@ittimeline opt]#yum install binutils
- [root@ittimeline opt]#yum install glibc
- [root@ittimeline opt]#yum install glibc-kernheaders
- [root@ittimeline opt]#yum install glibc-common
- [root@ittimeline opt]#yum install glibc-devel
- [root@ittimeline opt]#yum install gcc
- [root@ittimeline opt]#yum install make
- [root@ittimeline opt]#yum -y install centos-release-scl
- [root@ittimeline opt]#yum -y install devtoolset-9-gcc devtoolset-9-gcc-c++ devtoolset-9-binutils
- [root@ittimeline opt]#scl enable devtoolset-9 bash
然后再执行make&&make install命令安装redis
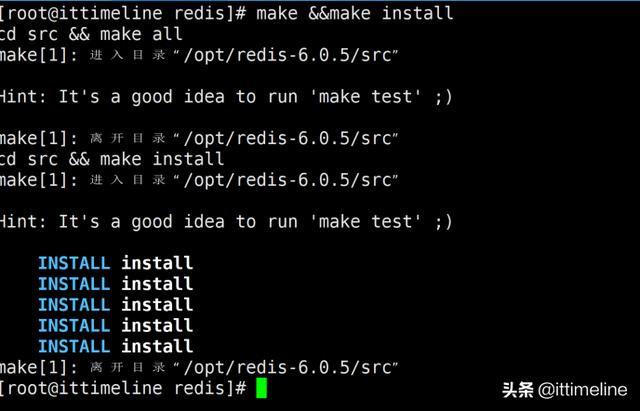
编译安装完成后在/opt/redis/src目录下生成几个常用的可执行文件
- [root@ittimeline redis]# cd src/
- [root@ittimeline src]# pwd
- /opt/redis/src
- [root@ittimeline src]# ll|grep redis*
- 匹配到二进制文件 redis-benchmark
- 匹配到二进制文件 redis-check-aof
- 匹配到二进制文件 redis-check-rdb
- 匹配到二进制文件 redis-cli
- 匹配到二进制文件 redis-sentinel
- 匹配到二进制文件 redis-server
- redis-server redis服务器
- redis-cli redis客户端
- redis-benchmark (基准测试)
- redis-check-aof (aof持久化修复工具)
- redis-check-dump(RDB文件检查工具)
- redis-sentinel(Redis Sentinel服务器)
Redis三种启动方法
在Redis编译、安装完成以后,可以使用最简启动、动态参数启动和配置文件启动三种方式启动。
- 最简启动
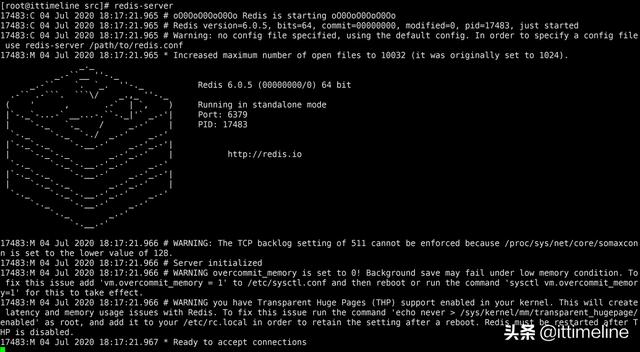
直接在Linux终端上的任意路径输入redis-server命令就可以启动Redis服务器,此时默认的端口是6379。
- [root@ittimeline src]# redis-server
redis服务器成功启动
Redis启动的验证方法
- ps -ef|grep redis
- netstat -antpl|grep redis
- redis-cli -h ip -p port ping
- 动态参数启动
如果想要使用动态参数的方式启动,只需要在redis-server 后面加上参数即可,例如redis-server --port 6380
当执行此条命令时,redis服务器就会使用6380端口启动。
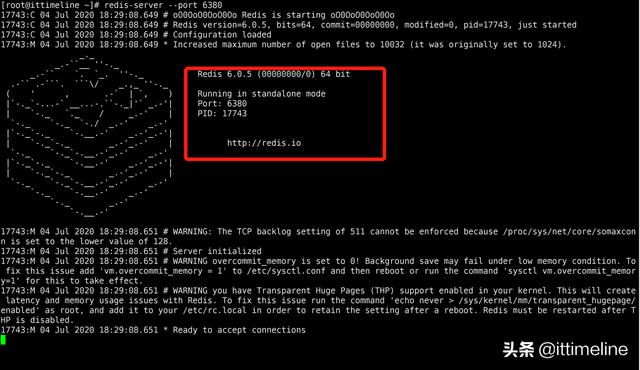
- redis-server --port 6380
当Redis服务启动成功后,可以使用命令ps -ef|grep redis-server|grep -v grep命令来查看redis-server的进程信息
- [root@ittimeline ~]# ps -ef|grep redis-server|grep -v grep
- root 17483 16967 0 18:17 pts/1 00:00:00 redis-server *:6379
- root 17743 17696 0 18:29 pts/3 00:00:00 redis-server *:6380
也可以使用命令netstat -antpl|grep redis-server 来查看redis-server的端口信息
- [root@ittimeline ~]# netstat -antpl|grep redis-server
- tcp 0 0 0.0.0.0:6379 0.0.0.0:* LISTEN 17483/redis-server
- tcp 0 0 0.0.0.0:6380 0.0.0.0:* LISTEN 17743/redis-server
- tcp 0 0 127.0.0.1:6379 127.0.0.1:36548 ESTABLISHED 17483/redis-server
- tcp6 0 0 :::6379 :::* LISTEN 17483/redis-server
- tcp6 0 0 :::6380 :::* LISTEN 17743/redis-server
- 配置文件启动
生产环境建议使用配置文件启动,因为单机多实例配置文件可以使用端口区分开。
首先在/opt/redis目录下创建一个config目录
然后将redis的配置文件redis.conf复制到/opt/redis/config/目录下
- [root@ittimeline redis]# mkdir config
- [root@ittimeline redis]# cp redis.conf ./config/redis.conf
然后将/opt/redis/config的redis.conf文件重命名,根据端口区分不同的配置
- [root@ittimeline config]# mv redis.conf redis-6381.conf
- [root@ittimeline config]# ll
- 总用量 84
- -rw-rw-r--. 1 root root 82645 7月 4 18:44 redis-6381.conf
然后使用命令简化(删除注释的说明)redis-6381.conf的内容并重定向到redis-6382.conf文件中
- [root@ittimeline config]# cat redis-6381.conf |grep -v "#" |grep -v "^$" >redis-6382.conf
可以使用命令vim -d redis-6381.conf redis-6382.conf来比较两个文件的差异后理解上述命令的作用
redis服务端常用配置选项说明
redis.conf配置文件中提供了许多redis服务器运行的配置,目前现阶段只要关注如下配置即可。
daemonize 是否是守护进程,默认是no,建议设置为yesport 启动端口,单机多实例必须配置,默认端口是6379logfile Redis系统日志dir Redis工作目录, 日志文件、持久化文件存储路径
redis-6382.config配置内容
- [root@ittimeline config]# cat redis-6382.conf
- daemonize yes
- port 6382
- dir "/opt/redis/data"
- logfile "redis-6382.log"
- ~
在启动服务之前需要在/opt/redis目录下创建data目录
- [root@ittimeline config]# mkdir /opt/redis/data
然后使用指定配置文件启动的方式启动redis服务器,并使用ps命令查看6382端口的redis-server进程是否启动
- [root@ittimeline config]# redis-server redis-6382.conf
- [root@ittimeline config]# ps -ef|grep redis-server|grep 6382
- root 18645 1 0 19:10 ? 00:00:00 redis-server *:6382
服务启动之后可以使用cat命令来查看redis-server的服务启动日志
- [root@ittimeline config]# cat /opt/redis/data/redis-6382.log
- 18819:C 04 Jul 2020 19:16:39.150 # oO0OoO0OoO0Oo Redis is starting oO0OoO0OoO0Oo
- 18819:C 04 Jul 2020 19:16:39.150 # Redis version=6.0.5, bits=64, commit=00000000, modified=0, pid=18819, just started
- 18819:C 04 Jul 2020 19:16:39.150 # Configuration loaded
- 18820:M 04 Jul 2020 19:16:39.152 * Increased maximum number of open files to 10032 (it was originally set to 1024).
- 18820:M 04 Jul 2020 19:16:39.153 * Running mode=standalone, port=6382.
- 18820:M 04 Jul 2020 19:16:39.153 # WARNING: The TCP backlog setting of 511 cannot be enforced because /proc/sys/net/core/somaxconn is set to the lower value of 128.
- 18820:M 04 Jul 2020 19:16:39.153 # Server initialized
- 18820:M 04 Jul 2020 19:16:39.153 # WARNING overcommit_memory is set to 0! Background save may fail under low memory condition. To fix this issue add 'vm.overcommit_memory = 1' to /etc/sysctl.conf and then reboot or run the command 'sysctl vm.overcommit_memory=1' for this to take effect.
- 18820:M 04 Jul 2020 19:16:39.153 # WARNING you have Transparent Huge Pages (THP) support enabled in your kernel. This will create latency and memory usage issues with Redis. To fix this issue run the command 'echo never > /sys/kernel/mm/transparent_hugepage/enabled' as root, and add it to your /etc/rc.local in order to retain the setting after a reboot. Redis must be restarted after THP is disabled.
- 18820:M 04 Jul 2020 19:16:39.153 * Ready to accept connections
Redis客户端连接
使用redis-cli工具连接redis服务器,通过-p选项指定redis服务器的端口,通过-h指定服务器的主机,127.0.0.1表示本机,即客户端和服务器在同一台服务器上。
- [root@ittimeline ~]# redis-cli -p 6379 -h 127.0.0.1
- 127.0.0.1:6379>
当客户端连接服务器成功之后就可以使用set/get命令来设值和取值,当输入set命令时客户端会提示set命令的使用方法。

设置name属性的值为tony

- 127.0.0.1:6379> set name tony
set值以后就可以使用get来获取对应的属性值
- 127.0.0.1:6379> get name
- "tony"
当客户端输入ping时,服务端会返回PONG
- 127.0.0.1:6379> ping
- PONG
如果客户端想要退出,只需要输入exit就可以。
- exit

退出连接
redis-cli客户端连接服务端默认的端口是6379,默认的ip就是127.0.0.1,因此如果客户端和服务端在一台机器上时,直接输入redis-cli就可以连接redis服务器。
