【51CTO.com快译】数据科学家/机器学习工程师使用Scikit-Learn、TensorFlow、Keras或PyTorch等开发机器学习模型时,最终目标是将其部署到生产环境。从事机器学习项目时,我们常常过于关注探索性数据分析(EDA)、特征工程和超参数调整等,却往往忘了主要目标:从模型预测中提取实际价值。
部署机器学习模型或将模型部署到生产环境意味着将模型提供给最终用户或系统。然而,部署机器学习模型存在复杂性。本文旨在让你开始使用Flask API将经过训练的机器学习模型部署到生产环境。
我将利用线性回归,使用利率和前两个月的销售额来预测第三个月的销售额。
什么是线性回归?
线性回归模型的目的是找到一个或多个特征(独立变量)与连续目标变量(独立变量)之间的关系。如果只有特征,名为单变量线性回归;如果有多个特征,名为多变量线性回归。
线性回归假设
线性回归模型可用下列方程式加以表示:

- Y是预测值
- θ₀是偏项。
- θ₁,…,θn是模型参数
- x 1,x 2,…,x n是特征值。
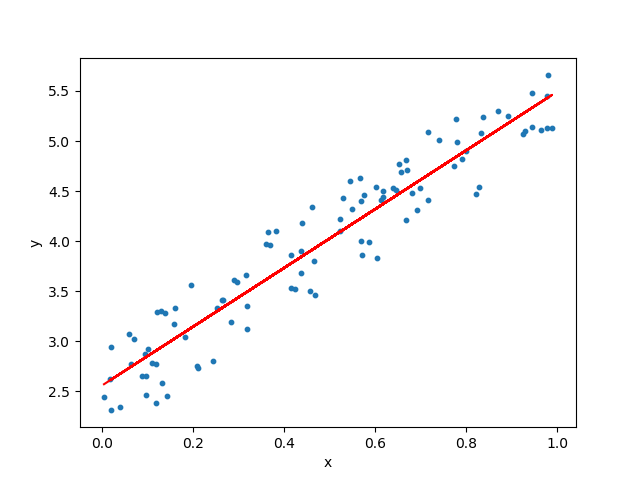
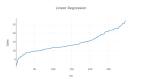
图1. 线性回归图解
为什么使用Flask?
- 易于使用。
- 内置的开发服务器和调试器。
- 集成的单元测试支持。
- 充分利用REST的请求分派。
- 丰富的说明文档。
项目结构
该项目有四个部分:
- model.py——这包含机器学习模型基于头两个月的销售额预测第三个月销售额的代码。
- app.py——这包含通过GUI或API调用接收销售明细,基于我们的模型计算预测值并返回的Flask API。
- request.py —这使用请求模块来调用app.py中定义的API,并显示返回值。
- HTML/CSS——这包含让用户可以输入销售明细并显示第三个月预测销售额的HTML模板和CSS样式。
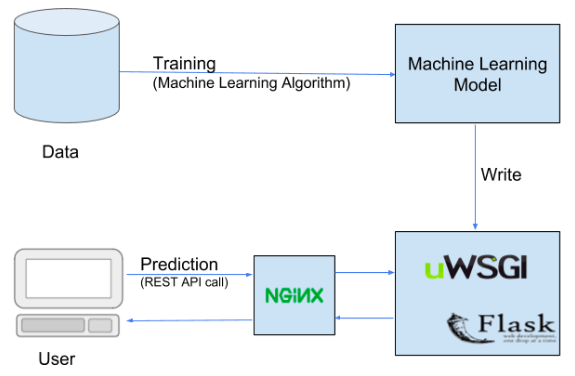
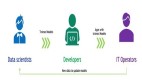
图2. 部署机器学习模型的管道
环境和工具
- scikit-learn
- pandas
- numpy
- flask
代码在哪里?
不妨先从代码开始入手。Github上的整个项目可以在这里(https://github.com/abhinavsagar/Machine-Learning-Deployment-Tutorials)找到。
先从使用HTML构建前端以便用户输入值入手。用户需要填三个字段:利率、第一个月的销售额和第二个月的销售额。
<!DOCTYPE html>
<html >
<head>
  <meta charset="UTF-8">
  <title>Deployment Tutorial 1</title>
  <link href='https://fonts.googleapis.com/css?family=Pacifico' rel='stylesheet' type='text/css'>
<link href='https://fonts.googleapis.com/css?family=Arimo' rel='stylesheet' type='text/css'>
<link href='https://fonts.googleapis.com/css?family=Hind:300' rel='stylesheet' type='text/css'>
<link href='https://fonts.googleapis.com/css?family=Open+Sans+Condensed:300' rel='stylesheet' type='text/css'>
<link rel="stylesheet" href="{{ url_for('static', filename='css/style.css') }}">

</head>

<body style="background: #000;">
 <div class="login">
    <h1>Sales Forecasting</h1>

     <!-- Main Input For Receiving Query to our ML -->
    <form action="{{ url_for('predict')}}"method="post">
        <input type="text" name="rate" placeholder="rate" required="required" />
        <input type="text" name="sales in first month" placeholder="sales in first month" required="required" />
        <input type="text" name="sales in second month" placeholder="sales in second month" required="required" />
        <button type="submit" class="btn btn-primary btn-block btn-large">Predict sales in third month</button>
    </form>

   <br>
   <br>
   {{ prediction_text }}

 </div>
</body>
</html>
- 1.
- 2.
- 3.
- 4.
- 5.
- 6.
- 7.
- 8.
- 9.
- 10.
- 11.
- 12.
- 13.
- 14.
- 15.
- 16.
- 17.
- 18.
- 19.
- 20.
- 21.
- 22.
- 23.
- 24.
- 25.
- 26.
- 27.
- 28.
- 29.
- 30.
- 31.
- 32.
接下来我使用CSS,为输入按钮、登录按钮和背景构建一些样式。
    @import url(https://fonts.googleapis.com/css?family=Open+Sans);

    html { width: 100%; height:100%; overflow:hidden; }

    body {
        width: 100%;
        height:100%;
        font-family: 'Helvetica';
        background: #000;
        color: #fff;
        font-size: 24px;
        text-align:center;
        letter-spacing:1.4px;

    }
    .login {
        position: absolute;
        top: 40%;
        left: 50%;
        margin: -150px 0 0 -150px;
        width:400px;
        height:400px;
    }

    .login h1 { color: #fff; text-shadow: 0 0 10px rgba(0,0,0,0.3); letter-spacing:1px; text-align:center; }

    input {
        width: 100%;
        margin-bottom: 10px;
        background: rgba(0,0,0,0.3);
        border: none;
        outline: none;
        padding: 10px;
        font-size: 13px;
        color: #fff;
        text-shadow: 1px 1px 1px rgba(0,0,0,0.3);
        border: 1px solid rgba(0,0,0,0.3);
        border-radius: 4px;
        box-shadow: inset 0 -5px 45px rgba(100,100,100,0.2), 0 1px 1px rgba(255,255,255,0.2);
        -webkit-transition: box-shadow .5s ease;
        -moz-transition: box-shadow .5s ease;
        -o-transition: box-shadow .5s ease;
        -ms-transition: box-shadow .5s ease;
        transition: box-shadow .5s ease;
    }
view rawstyle.css hosted with ❤ by GitHub
>
- 1.
- 2.
- 3.
- 4.
- 5.
- 6.
- 7.
- 8.
- 9.
- 10.
- 11.
- 12.
- 13.
- 14.
- 15.
- 16.
- 17.
- 18.
- 19.
- 20.
- 21.
- 22.
- 23.
- 24.
- 25.
- 26.
- 27.
- 28.
- 29.
- 30.
- 31.
- 32.
- 33.
- 34.
- 35.
- 36.
- 37.
- 38.
- 39.
- 40.
- 41.
- 42.
- 43.
- 44.
- 45.
- 46.
- 47.
我为这个项目创建了自定义销售数据集,它有四列:利率、第一个月的销售额、第二个月的销售额和第三个月的销售额。
|
rate |
sales_in_first_month |
sales_in_second_month |
sales_in_third_month |
|
|
2 |
500 |
300 |
||
|
4 |
300 |
650 |
||
|
four |
600 |
200 |
400 |
|
|
nine |
450 |
320 |
650 |
|
|
seven |
600 |
250 |
350 |
|
|
five |
550 |
200 |
700 |
view rawsales.csv hosted with ❤ by GitHub
现在,不妨构建一个机器学习模型来预测第三个月的销售额。首先,不妨使用Pandas处理缺失的值。如果没有为一个或多个项提供任何信息,数据会丢失。如果未提供值,我将在利率这列填充零,将在第一个月的销售额这列填充该列的平均值。我使用线性回归作为机器学习算法。
序列化/反序列化
简而言之,序列化是一种在磁盘上写入Python对象(对象可以传输到任何地方),以后由Python脚本反序列化(读回)的方法。
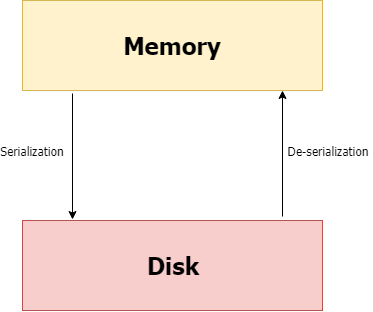
图3. 序列化和反序列化
我使用pickling将Python对象这种形式的模型转换成字符流。其想法是,该字符流含有用另一个Python脚本重新构建对象必需的所有信息。
    import numpy as np
    import matplotlib.pyplot as plt
    import pandas as pd
    import pickle

    dataset = pd.read_csv('sales.csv')

    dataset['rate'].fillna(0, inplace=True)

    dataset['sales_in_first_month'].fillna(dataset['sales_in_first_month'].mean(), inplace=True)

    X = dataset.iloc[:, :3]

    def convert_to_int(word):
        word_dict = {'one':1, 'two':2, 'three':3, 'four':4, 'five':5, 'six':6, 'seven':7, 'eight':8,
                    'nine':9, 'ten':10, 'eleven':11, 'twelve':12, 'zero':0, 0: 0}
        return word_dict[word]

    X['rate'] = X['rate'].apply(lambda x : convert_to_int(x))

    y = dataset.iloc[:, -1]

    from sklearn.linear_model import LinearRegression
    regressor = LinearRegression()

    regressor.fit(X, y)

    pickle.dump(regressor, open('model.pkl','wb'))

    model = pickle.load(open('model.pkl','rb'))
    print(model.predict([[4, 300, 500]]))
view rawmodel.py hosted with ❤ by GitHub
- 1.
- 2.
- 3.
- 4.
- 5.
- 6.
- 7.
- 8.
- 9.
- 10.
- 11.
- 12.
- 13.
- 14.
- 15.
- 16.
- 17.
- 18.
- 19.
- 20.
- 21.
- 22.
- 23.
- 24.
- 25.
- 26.
- 27.
- 28.
- 29.
- 30.
- 31.
- 32.
下一个部分是构建这样一个API:通过GUI收到销售明细后,基于我们的模型来计算预测的销售额。为此,我反序列了Python对象这种形式的pickled模型。我使用index.html设置主页面。一旦使用POST将表单值提交给/predict,我们就获得了预测销售额。
只要对/results提出另一个POST请求,即可显示结果。它收到JSON输入,使用经过训练的模型来进行预测,并返回使用JSON格式的该预测,它可通过API端点来访问。
import numpy as np
from flask import Flask, request, jsonify, render_template
import pickle

app = Flask(__name__)
model = pickle.load(open('model.pkl', 'rb'))

@app.route('/')
def home():
    return render_template('index.html')

@app.route('/predict',methods=['POST'])
def predict():

    int_features = [int(x) for x in request.form.values()]
    final_features = [np.array(int_features)]
    prediction = model.predict(final_features)

    output = round(prediction[0], 2)

    return render_template('index.html', prediction_text='Sales should be $ {}'.format(output))

@app.route('/results',methods=['POST'])
def results():

    data = request.get_json(force=True)
    prediction = model.predict([np.array(list(data.values()))])

    output = prediction[0]
    return jsonify(output)

if __name__ == "__main__":
    app.run(debug=True)
view rawapp.py hosted with ❤ by GitHub
- 1.
- 2.
- 3.
- 4.
- 5.
- 6.
- 7.
- 8.
- 9.
- 10.
- 11.
- 12.
- 13.
- 14.
- 15.
- 16.
- 17.
- 18.
- 19.
- 20.
- 21.
- 22.
- 23.
- 24.
- 25.
- 26.
- 27.
- 28.
- 29.
- 30.
- 31.
- 32.
- 33.
- 34.
最后,我使用请求模块来调用app.py中定义的APP。它显示了第三个月的返回销售额。
import requests
url = 'http://localhost:5000/results'
r = requests.post(url,json={'rate':5, 'sales_in_first_month':200, 'sales_in_second_month':400})
print(r.json())
view rawrequest.py hosted with ❤ by GitHub
- 1.
- 2.
- 3.
- 4.
- 5.
结果
使用该命令运行这个Web应用程序。
$ python app.py
- 1.

图4
在Web浏览器中打开http://127.0.0.1:5000/,应该会出现如下所示的GUI。
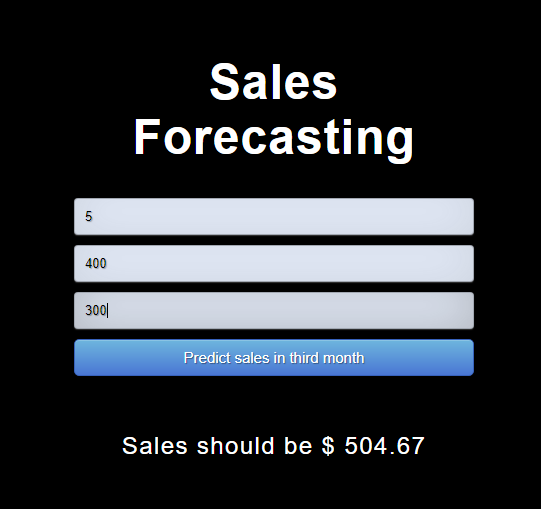
图5. 图形用户界面
结束语
本文演示了部署机器学习模型的一个很简单的方法。我利用线性回归,使用利率和前两个月的销售额来预测第三个月的销售额。你可以利用本文中学到的知识构建一些很酷的模型,并将它们部署到生产环境中,以便别人享受到成果。
原文标题:How to Easily Deploy Machine Learning Models Using Flask,作者:Abhinav Sagar
【51CTO译稿,合作站点转载请注明原文译者和出处为51CTO.com】