通过本文你可以了解到下面这些知识点:
- Future 模式介绍以及核心思想
- 核心线程数、最大线程数的区别,队列容量代表什么;
- ThreadPoolTaskExecutor 饱和策略;
- SpringBoot 异步编程实战,搞懂代码的执行逻辑。
Future 模式
异步编程在处理耗时操作以及多任务处理的场景下非常有用,我们可以更好的让我们的系统利用好机器的 CPU 和 内存,提高它们的利用率。多线程设计模式有很多种,Future模式是多线程开发中非常常见的一种设计模式,本文也是基于这种模式来说明 SpringBoot 对于异步编程的知识。
实战之前我先简单介绍一下 Future 模式的核心思想 吧!。
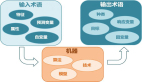
Future 模式的核心思想是 异步调用 。当我们执行一个方法时,假如这个方法中有多个耗时的任务需要同时去做,而且又不着急等待这个结果时可以让客户端立即返回然后,后台慢慢去计算任务。当然你也可以选择等这些任务都执行完了,再返回给客户端。这个在 Java 中都有很好的支持,我在后面的示例程序中会详细对比这两种方式的区别。
SpringBoot 异步编程实战
如果我们需要在 SpringBoot 实现异步编程的话,通过 Spring 提供的两个注解会让这件事情变的非常简单。
- @EnableAsync:通过在配置类或者Main类上加@EnableAsync开启对异步方法的支持。
- @Async 可以作用在类上或者方法上,作用在类上代表这个类的所有方法都是异步方法。
1. 自定义 TaskExecutor
很多人对于 TaskExecutor 不是太了解,所以我们花一点篇幅先介绍一下这个东西。从名字就能看出它是任务的执行者,它领导执行着线程来处理任务,就像司令官一样,而我们的线程就好比一只只军队一样,这些军队可以异步对敌人进行打击👊。
Spring 提供了TaskExecutor接口作为任务执行者的抽象,它和java.util.concurrent包下的Executor接口很像。稍微不同的 TaskExecutor接口用到了 Java 8 的语法@FunctionalInterface声明这个接口口是一个函数式接口。
org.springframework.core.task.TaskExecutor
@FunctionalInterface
public interface TaskExecutor extends Executor {
    void execute(Runnable var1);
}
- 1.
- 2.
- 3.
- 4.
- 5.
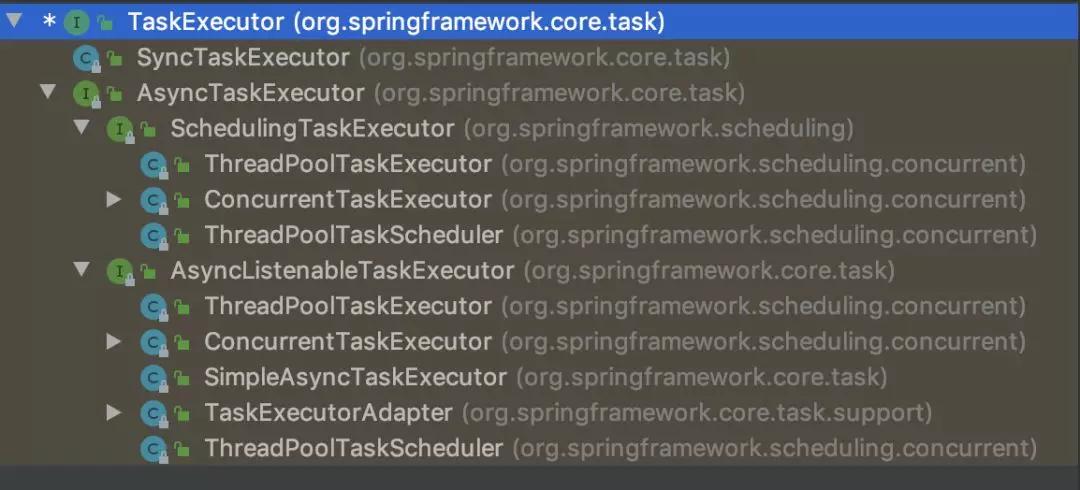
如果没有自定义Executor, Spring 将创建一个 SimpleAsyncTaskExecutor 并使用它。
import org.springframework.context.annotation.Bean;
import org.springframework.context.annotation.Configuration;
import org.springframework.scheduling.annotation.AsyncConfigurer;
import org.springframework.scheduling.annotation.EnableAsync;
import org.springframework.scheduling.concurrent.ThreadPoolTaskExecutor;

import java.util.concurrent.Executor;

/** @author shuang.kou */
@Configuration
@EnableAsync
public class AsyncConfig implements AsyncConfigurer {

  private static final int CORE_POOL_SIZE = 6;
  private static final int MAX_POOL_SIZE = 10;
  private static final int QUEUE_CAPACITY = 100;

  @Bean
  public Executor taskExecutor() {
    // Spring 默认配置是核心线程数大小为1,最大线程容量大小不受限制,队列容量也不受限制。
    ThreadPoolTaskExecutor executor = new ThreadPoolTaskExecutor();
    // 核心线程数
    executor.setCorePoolSize(CORE_POOL_SIZE);
    // 最大线程数
    executor.setMaxPoolSize(MAX_POOL_SIZE);
    // 队列大小
    executor.setQueueCapacity(QUEUE_CAPACITY);
    // 当最大池已满时,此策略保证不会丢失任务请求,但是可能会影响应用程序整体性能。
    executor.setRejectedExecutionHandler(new ThreadPoolExecutor.CallerRunsPolicy());
    executor.setThreadNamePrefix("My ThreadPoolTaskExecutor-");
    executor.initialize();
    return executor;
  }
}
- 1.
- 2.
- 3.
- 4.
- 5.
- 6.
- 7.
- 8.
- 9.
- 10.
- 11.
- 12.
- 13.
- 14.
- 15.
- 16.
- 17.
- 18.
- 19.
- 20.
- 21.
- 22.
- 23.
- 24.
- 25.
- 26.
- 27.
- 28.
- 29.
- 30.
- 31.
- 32.
- 33.
- 34.
ThreadPoolTaskExecutor 常见概念:
- Core Pool Size : 核心线程数线程数定义了最小可以同时运行的线程数量。
- Queue Capacity : 当新任务来的时候会先判断当前运行的线程数量是否达到核心线程数,如果达到的话,信任就会被存放在队列中。
- Maximum Pool Size : 当队列中存放的任务达到队列容量的时候,当前可以同时运行的线程数量变为最大线程数。
一般情况下不会将队列大小设为:Integer.MAX_VALUE,也不会将核心线程数和最大线程数设为同样的大小,这样的话最大线程数的设置都没什么意义了,你也无法确定当前 CPU 和内存利用率具体情况如何。
如果队列已满并且当前同时运行的线程数达到最大线程数的时候,如果再有新任务过来会发生什么呢?
Spring 默认使用的是 ThreadPoolExecutor.AbortPolicy。在Spring的默认情况下,ThreadPoolExecutor 将抛出 RejectedExecutionException 来拒绝新来的任务 ,这代表你将丢失对这个任务的处理。对于可伸缩的应用程序,建议使用 ThreadPoolExecutor.CallerRunsPolicy。当最大池被填满时,此策略为我们提供可伸缩队列。
ThreadPoolTaskExecutor 饱和策略定义:
如果当前同时运行的线程数量达到最大线程数量时,ThreadPoolTaskExecutor 定义一些策略:
ThreadPoolExecutor.AbortPolicy:抛出 RejectedExecutionException来拒绝新任务的处理。
ThreadPoolExecutor.CallerRunsPolicy:调用执行自己的线程运行任务。您不会任务请求。但是这种策略会降低对于新任务提交速度,影响程序的整体性能。另外,这个策略喜欢增加队列容量。如果您的应用程序可以承受此延迟并且你不能任务丢弃任何一个任务请求的话,你可以选择这个策略。
ThreadPoolExecutor.DiscardPolicy: 不处理新任务,直接丢弃掉。
ThreadPoolExecutor.DiscardOldestPolicy:此策略将丢弃最早的未处理的任务请求。
2. 编写一个异步的方法
下面模拟一个查找对应字符开头电影的方法,我们给这个方法加上了@Async注解来告诉 Spring 它是一个异步的方法。另外,这个方法的返回值 CompletableFuture.completedFuture(results)这代表我们需要返回结果,也就是说程序必须把任务执行完成之后再返回给用户。
请留意completableFutureTask方法中的第一行打印日志这句代码,后面分析程序中会用到,很重要!
import org.slf4j.Logger;
import org.slf4j.LoggerFactory;
import org.springframework.scheduling.annotation.Async;
import org.springframework.stereotype.Service;

import java.util.ArrayList;
import java.util.Arrays;
import java.util.List;
import java.util.concurrent.CompletableFuture;
import java.util.stream.Collectors;

/** @author shuang.kou */
@Service
public class AsyncService {

  private static final Logger logger = LoggerFactory.getLogger(AsyncService.class);

  private List<String> movies =
      new ArrayList<>(
          Arrays.asList(
              "Forrest Gump",
              "Titanic",
              "Spirited Away",
              "The Shawshank Redemption",
              "Zootopia",
              "Farewell ",
              "Joker",
              "Crawl"));

  /** 示范使用:找到特定字符/字符串开头的电影 */
  @Async
  public CompletableFuture<List<String>> completableFutureTask(String start) {
    // 打印日志
    logger.warn(Thread.currentThread().getName() + "start this task!");
    // 找到特定字符/字符串开头的电影
    List<String> results =
        movies.stream().filter(movie -> movie.startsWith(start)).collect(Collectors.toList());
    // 模拟这是一个耗时的任务
    try {
      Thread.sleep(1000L);
    } catch (InterruptedException e) {
      e.printStackTrace();
    }
    //返回一个已经用给定值完成的新的CompletableFuture。
    return CompletableFuture.completedFuture(results);
  }
}
- 1.
- 2.
- 3.
- 4.
- 5.
- 6.
- 7.
- 8.
- 9.
- 10.
- 11.
- 12.
- 13.
- 14.
- 15.
- 16.
- 17.
- 18.
- 19.
- 20.
- 21.
- 22.
- 23.
- 24.
- 25.
- 26.
- 27.
- 28.
- 29.
- 30.
- 31.
- 32.
- 33.
- 34.
- 35.
- 36.
- 37.
- 38.
- 39.
- 40.
- 41.
- 42.
- 43.
- 44.
- 45.
- 46.
- 47.
3. 测试编写的异步方法
/** @author shuang.kou */
@RestController
@RequestMapping("/async")
public class AsyncController {
  @Autowired
  AsyncService asyncService;

  @GetMapping("/movies")
  public String completableFutureTask() throws ExecutionException, InterruptedException {
    //开始时间
    long start = System.currentTimeMillis();
    // 开始执行大量的异步任务
    List<String> words = Arrays.asList("F", "T", "S", "Z", "J", "C");
    List<CompletableFuture<List<String>>> completableFutureList =
        words.stream()
            .map(word -> asyncService.completableFutureTask(word))
            .collect(Collectors.toList());
    // CompletableFuture.join()方法可以获取他们的结果并将结果连接起来
    List<List<String>> results = completableFutureList.stream().map(CompletableFuture::join).collect(Collectors.toList());
    // 打印结果以及运行程序运行花费时间
    System.out.println("Elapsed time: " + (System.currentTimeMillis() - start));
    return results.toString();
  }
}
- 1.
- 2.
- 3.
- 4.
- 5.
- 6.
- 7.
- 8.
- 9.
- 10.
- 11.
- 12.
- 13.
- 14.
- 15.
- 16.
- 17.
- 18.
- 19.
- 20.
- 21.
- 22.
- 23.
- 24.
请求这个接口,控制台打印出下面的内容:
2019-10-01 13:50:17.007  WARN 18793 --- [lTaskExecutor-1] g.j.a.service.AsyncService               : My ThreadPoolTaskExecutor-1start this task!
2019-10-01 13:50:17.007  WARN 18793 --- [lTaskExecutor-6] g.j.a.service.AsyncService               : My ThreadPoolTaskExecutor-6start this task!
2019-10-01 13:50:17.007  WARN 18793 --- [lTaskExecutor-5] g.j.a.service.AsyncService               : My ThreadPoolTaskExecutor-5start this task!
2019-10-01 13:50:17.007  WARN 18793 --- [lTaskExecutor-4] g.j.a.service.AsyncService               : My ThreadPoolTaskExecutor-4start this task!
2019-10-01 13:50:17.007  WARN 18793 --- [lTaskExecutor-3] g.j.a.service.AsyncService               : My ThreadPoolTaskExecutor-3start this task!
2019-10-01 13:50:17.007  WARN 18793 --- [lTaskExecutor-2] g.j.a.service.AsyncService               : My ThreadPoolTaskExecutor-2start this task!
Elapsed time: 1010
- 1.
- 2.
- 3.
- 4.
- 5.
- 6.
- 7.
首先我们可以看到处理所有任务花费的时间大概是 1 s。这与我们自定义的 ThreadPoolTaskExecutor 有关,我们配置的核心线程数是 6 ,然后通过通过下面的代码模拟分配了 6 个任务给系统执行。这样每个线程都会被分配到一个任务,每个任务执行花费时间是 1 s ,所以处理 6 个任务的总花费时间是 1 s。
List<String> words = Arrays.asList("F", "T", "S", "Z", "J", "C");
List<CompletableFuture<List<String>>> completableFutureList =
        words.stream()
            .map(word -> asyncService.completableFutureTask(word))
            .collect(Collectors.toList());
- 1.
- 2.
- 3.
- 4.
- 5.
你可以自己验证一下,试着去把核心线程数的数量改为 3 ,再次请求这个接口你会发现处理所有任务花费的时间大概是 2 s。
另外,从上面的运行结果可以看出,当所有任务执行完成之后才返回结果。这种情况对应于我们需要返回结果给客户端请求的情况下,假如我们不需要返回任务执行结果给客户端的话呢? 就比如我们上传一个大文件到系统,上传之后只要大文件格式符合要求我们就上传成功。普通情况下我们需要等待文件上传完毕再返回给用户消息,但是这样会很慢。采用异步的话,当用户上传之后就立马返回给用户消息,然后系统再默默去处理上传任务。这样也会增加一点麻烦,因为文件可能会上传失败,所以系统也需要一点机制来补偿这个问题,比如当上传遇到问题的时候,发消息通知用户。
下面会演示一下客户端不需要返回结果的情况:
将completableFutureTask方法变为 void 类型
@Async
public void completableFutureTask(String start) {
  ......
  //这里可能是系统对任务执行结果的处理,比如存入到数据库等等......
  //doSomeThingWithResults(results);
}
- 1.
- 2.
- 3.
- 4.
- 5.
- 6.
Controller 代码修改如下:
@GetMapping("/movies")
 public String completableFutureTask() throws ExecutionException, InterruptedException {
   // Start the clock
   long start = System.currentTimeMillis();
   // Kick of multiple, asynchronous lookups
   List<String> words = Arrays.asList("F", "T", "S", "Z", "J", "C");
       words.stream()
           .forEach(word -> asyncService.completableFutureTask(word));
   // Wait until they are all done
   // Print results, including elapsed time
   System.out.println("Elapsed time: " + (System.currentTimeMillis() - start));
   return "Done";
 }
- 1.
- 2.
- 3.
- 4.
- 5.
- 6.
- 7.
- 8.
- 9.
- 10.
- 11.
- 12.
- 13.
请求这个接口,控制台打印出下面的内容:
Elapsed time: 0
2019-10-01 14:02:44.052  WARN 19051 --- [lTaskExecutor-4] g.j.a.service.AsyncService               : My ThreadPoolTaskExecutor-4start this task!
2019-10-01 14:02:44.052  WARN 19051 --- [lTaskExecutor-3] g.j.a.service.AsyncService               : My ThreadPoolTaskExecutor-3start this task!
2019-10-01 14:02:44.052  WARN 19051 --- [lTaskExecutor-2] g.j.a.service.AsyncService               : My ThreadPoolTaskExecutor-2start this task!
2019-10-01 14:02:44.052  WARN 19051 --- [lTaskExecutor-1] g.j.a.service.AsyncService               : My ThreadPoolTaskExecutor-1start this task!
2019-10-01 14:02:44.052  WARN 19051 --- [lTaskExecutor-6] g.j.a.service.AsyncService               : My ThreadPoolTaskExecutor-6start this task!
2019-10-01 14:02:44.052  WARN 19051 --- [lTaskExecutor-5] g.j.a.service.AsyncService               : My ThreadPoolTaskExecutor-5start this task!
- 1.
- 2.
- 3.
- 4.
- 5.
- 6.
- 7.
可以看到系统会直接返回给用户结果,然后系统才真正开始执行任务。
待办
- Future vs. CompletableFuture
- 源代码分析
Reference
- https://spring.io/guides/gs/async-method/
- https://medium.com/trendyol-tech/spring-boot-async-executor-management-with-threadpooltaskexecutor-f493903617d