前言
话说前几天在网上浏览到一大牛写的关于Android布局优化的文章,看后感触很深,回过头看看自己写过的代码,发现还是有不少需要改进,今天找不到那天看的文章了,只能自己总结一些,以后有机会再次补充吧~ 。
本文目标
通过举例说明Android开发中的小技巧,让你我更6的玩转Android~
掌握小技巧,助你Coding更上一层楼~
本文将通过以下几点进行举例说明:
- Android Studio 常用快捷键;
- Android Studio 强大的代码补全;
- Android Studio 插件;
- Android 布局优化
Android Studio 常用快捷键
只从接触Android Studio之后,愈发离不开这个开发神器了~也是,越接触,越能感觉Studio的魅力,今天为大家带来LZ开发中常用的一些快捷键。
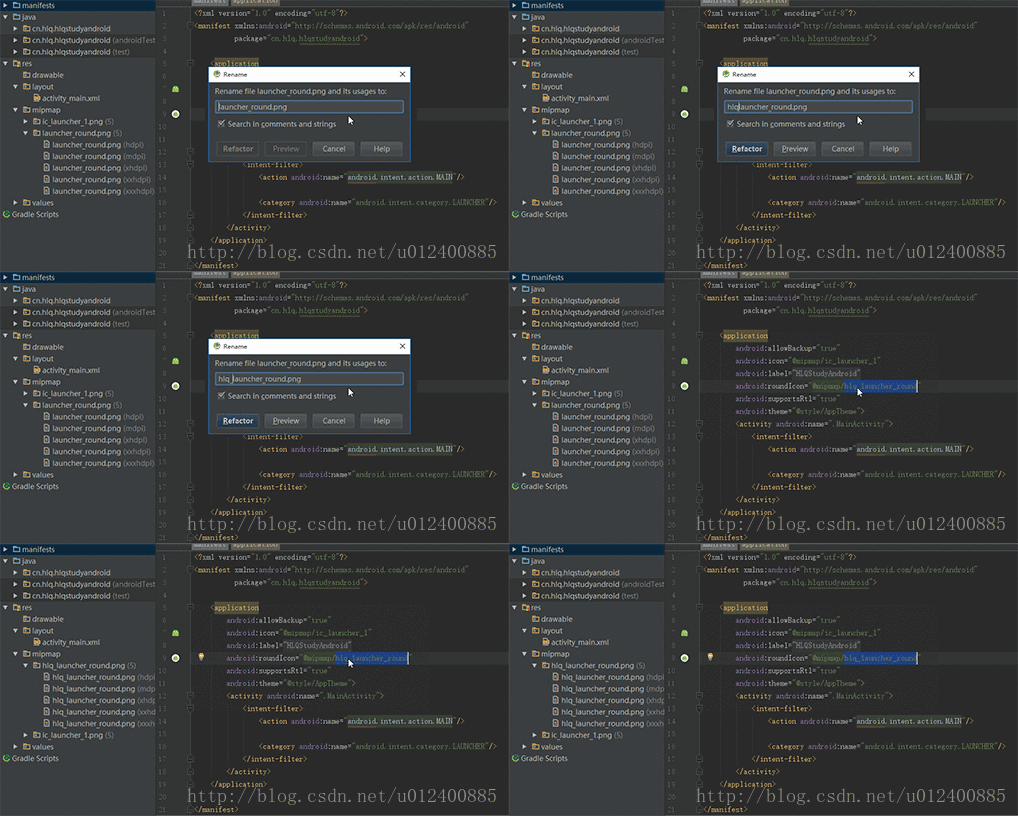
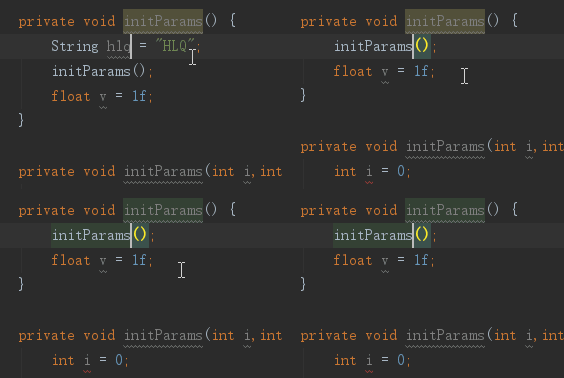
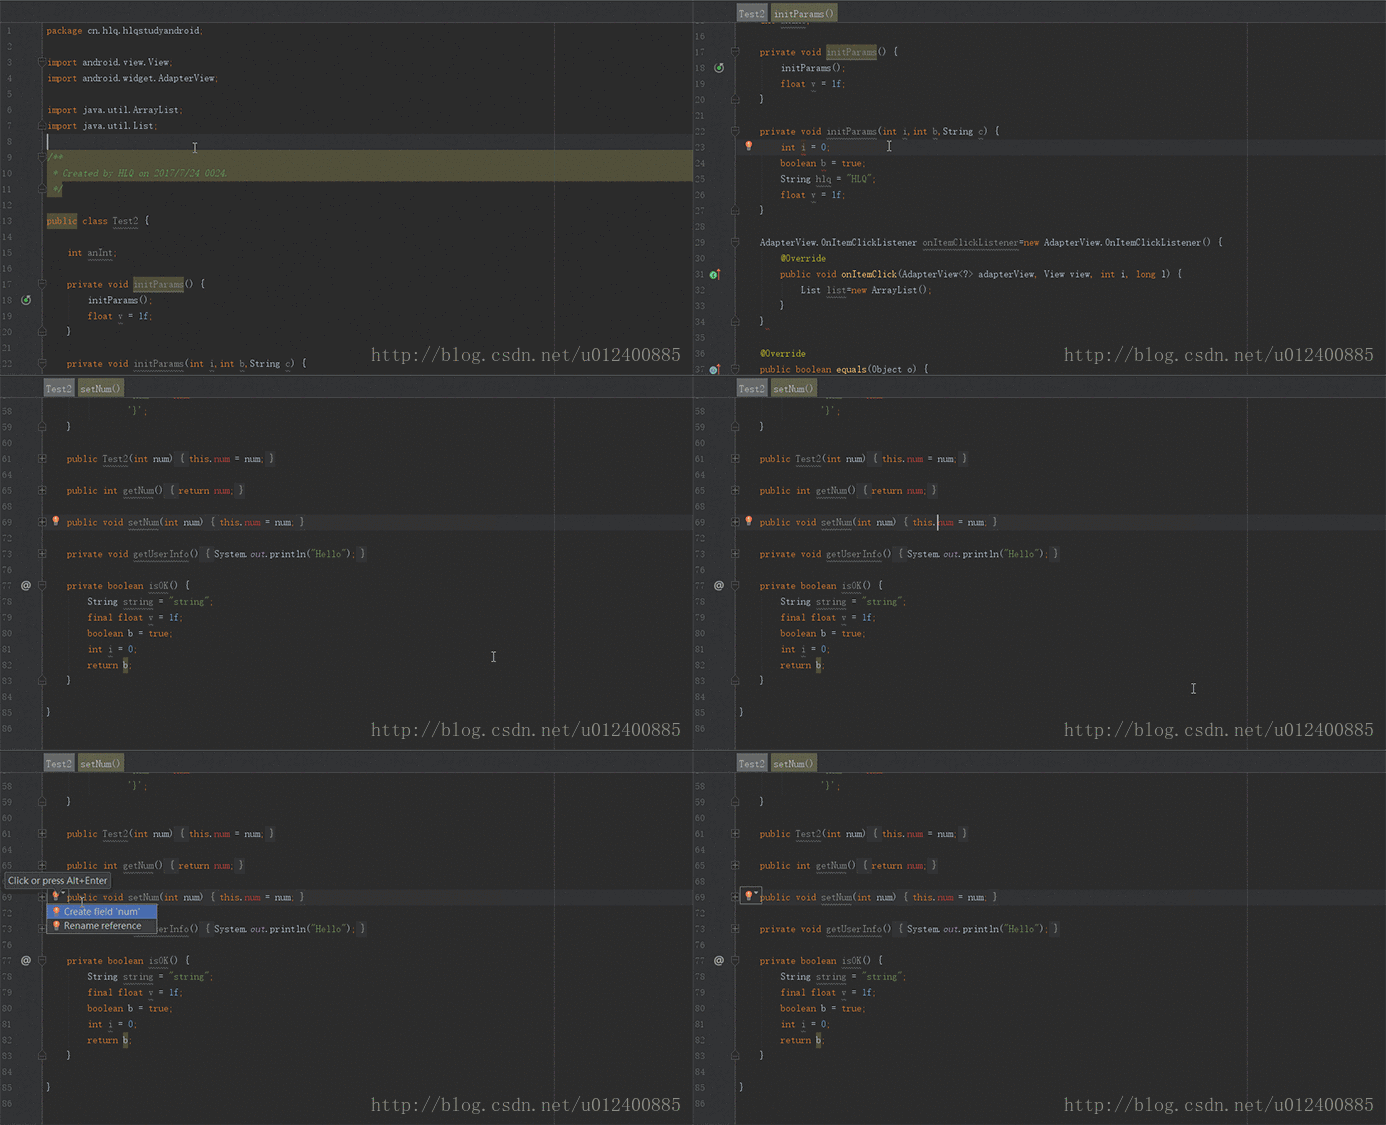
1. Shift+F6 全局修改
LZ一般使用这种方式去改全局变量,或者资源名称。
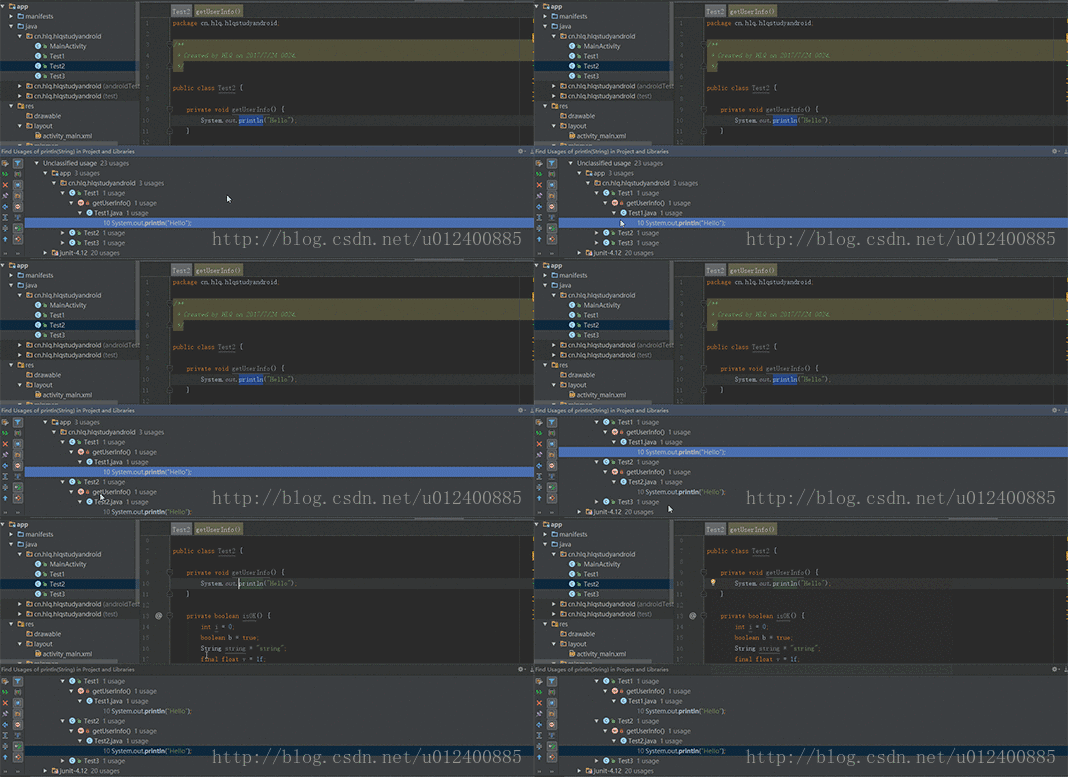
2. Alt+F7 查看全局引用
LZ一般优化时会使用这个去查看某个方法或者变量全局引用
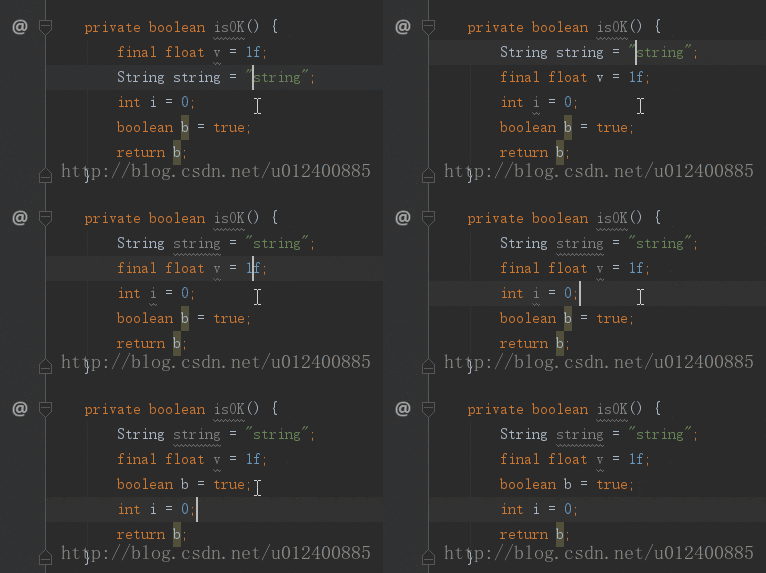
3. Ctrl+Shift+上下键 移动代码
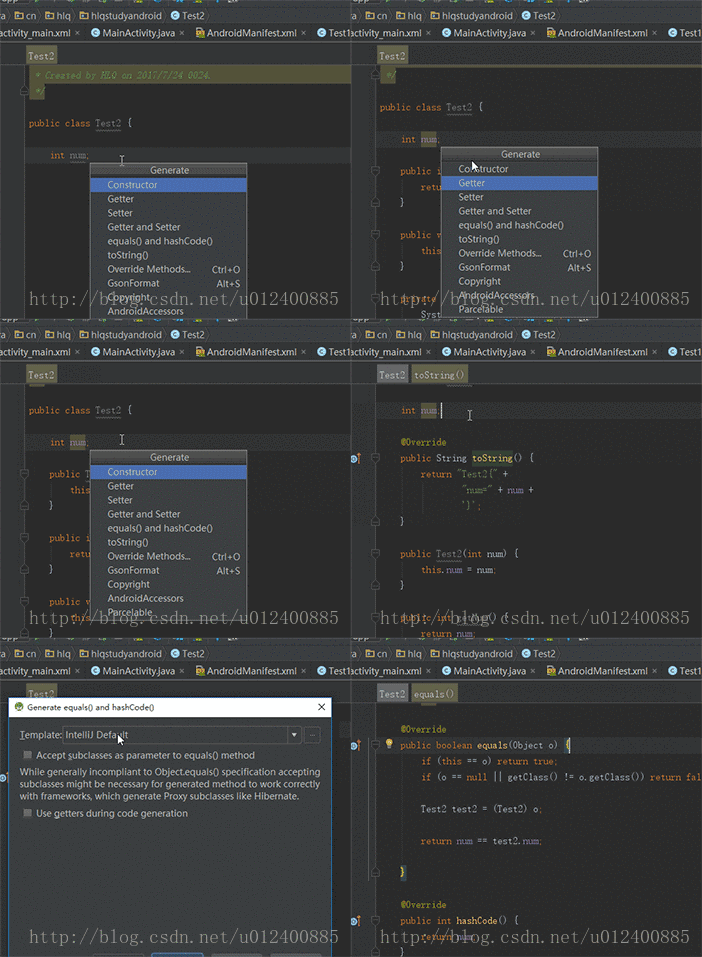
4. 强大的 Alt+Insert
Alt+Insert,这个快捷键异常强大,里面包含生成get,set,toString ... 等一系列,爱不释手~
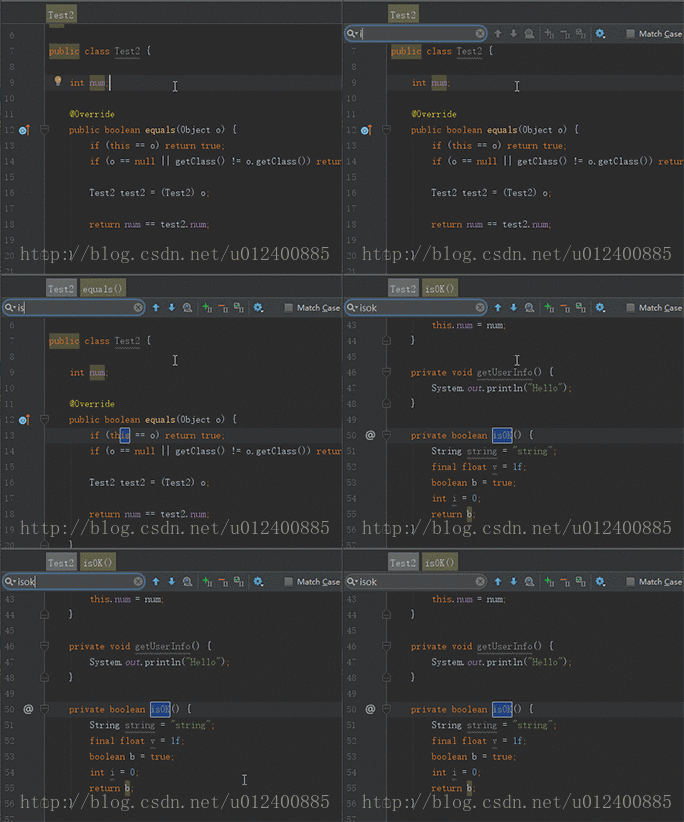
5. Ctrl+F 局部查找
用这个找个方法啥的很6,但是仅限于局部,也就是本类
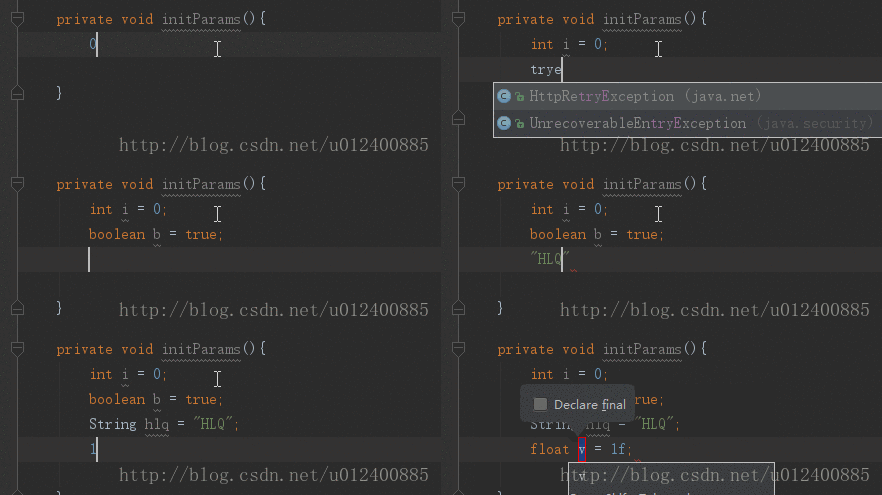
6. Ctrl+Alt+V 自动初始化变量 引入变量类型
只适用于基本类型
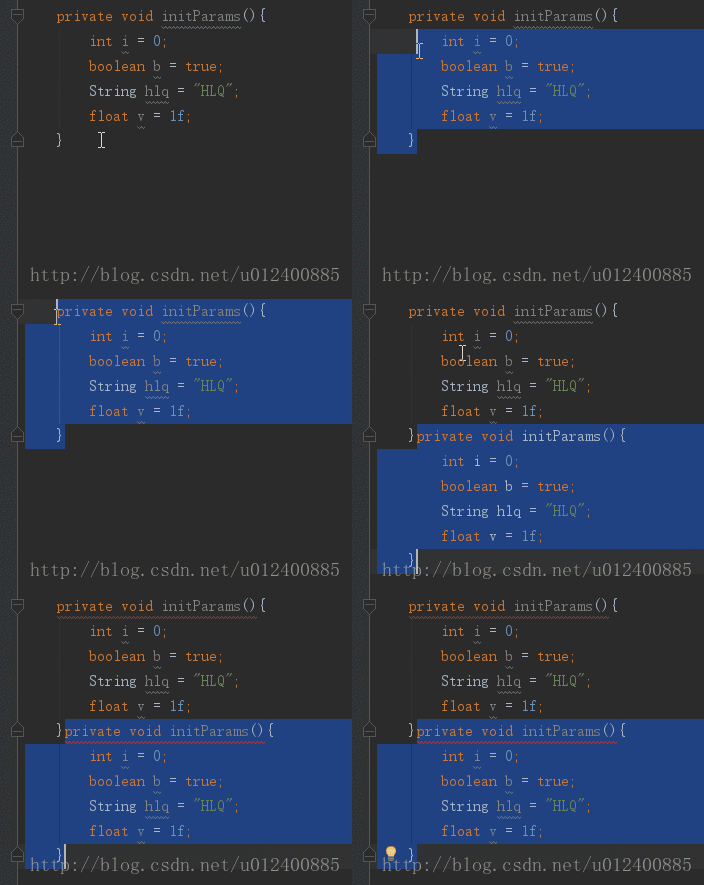
7. Ctrl+D 向下复制
还在Ctrl+C,Ctrl+V嘛?Out了,骚年~
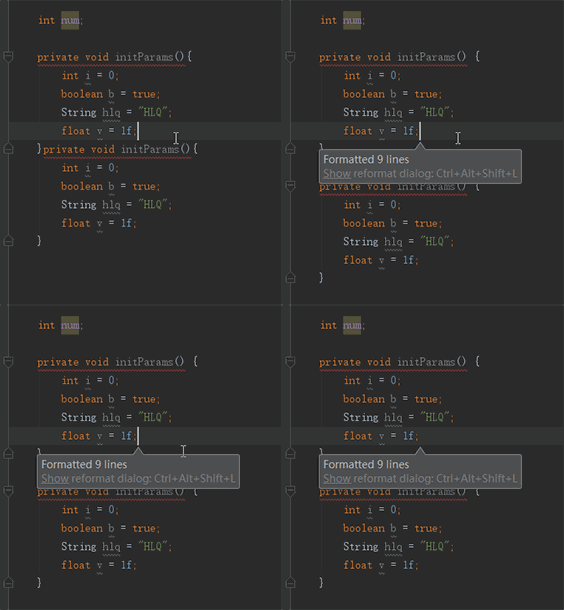
8. Ctrl+Alt+L 格式化代码
这个不得不说,都成为一种习惯,写好一部分总是习惯格式化下代码
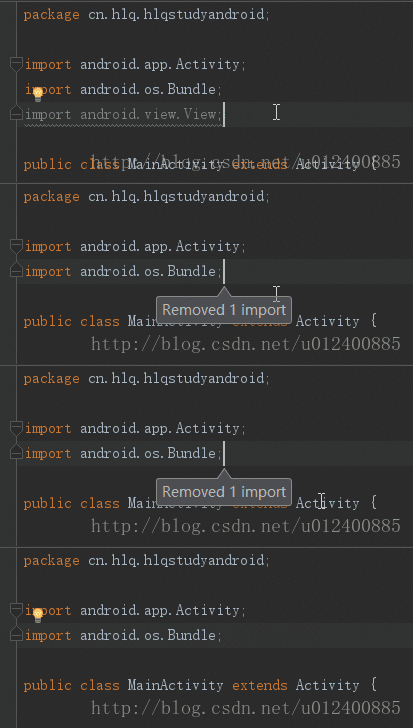
9. Ctrl+Alt+O 去除无效引用(包名)
去除无用引用包以及格式化代码都成为LZ标配了~GGG
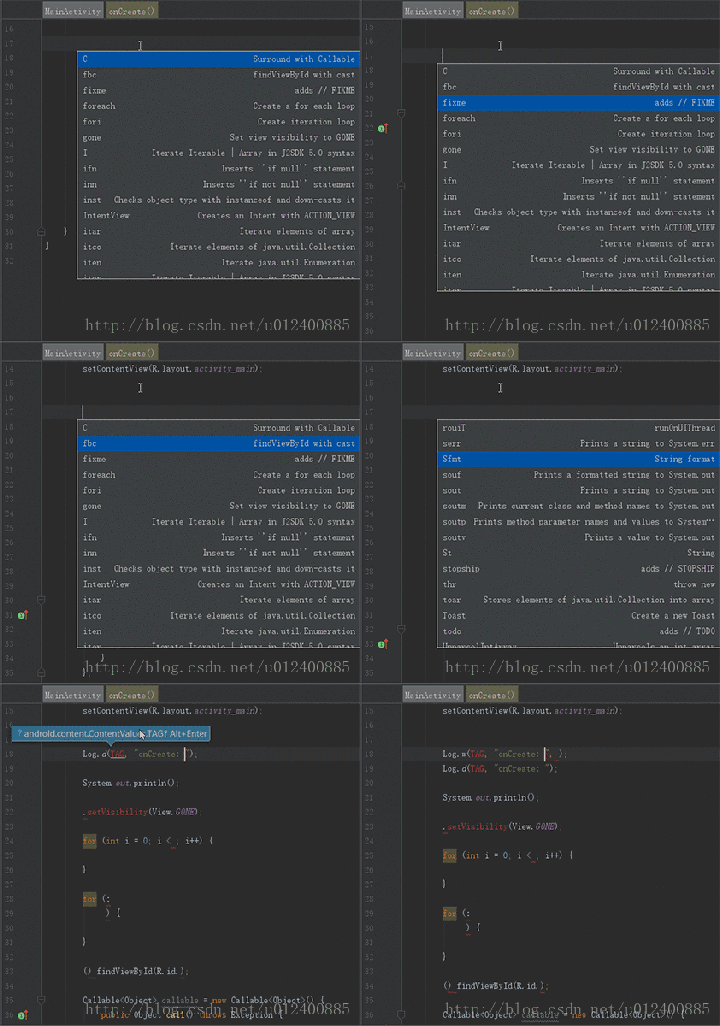
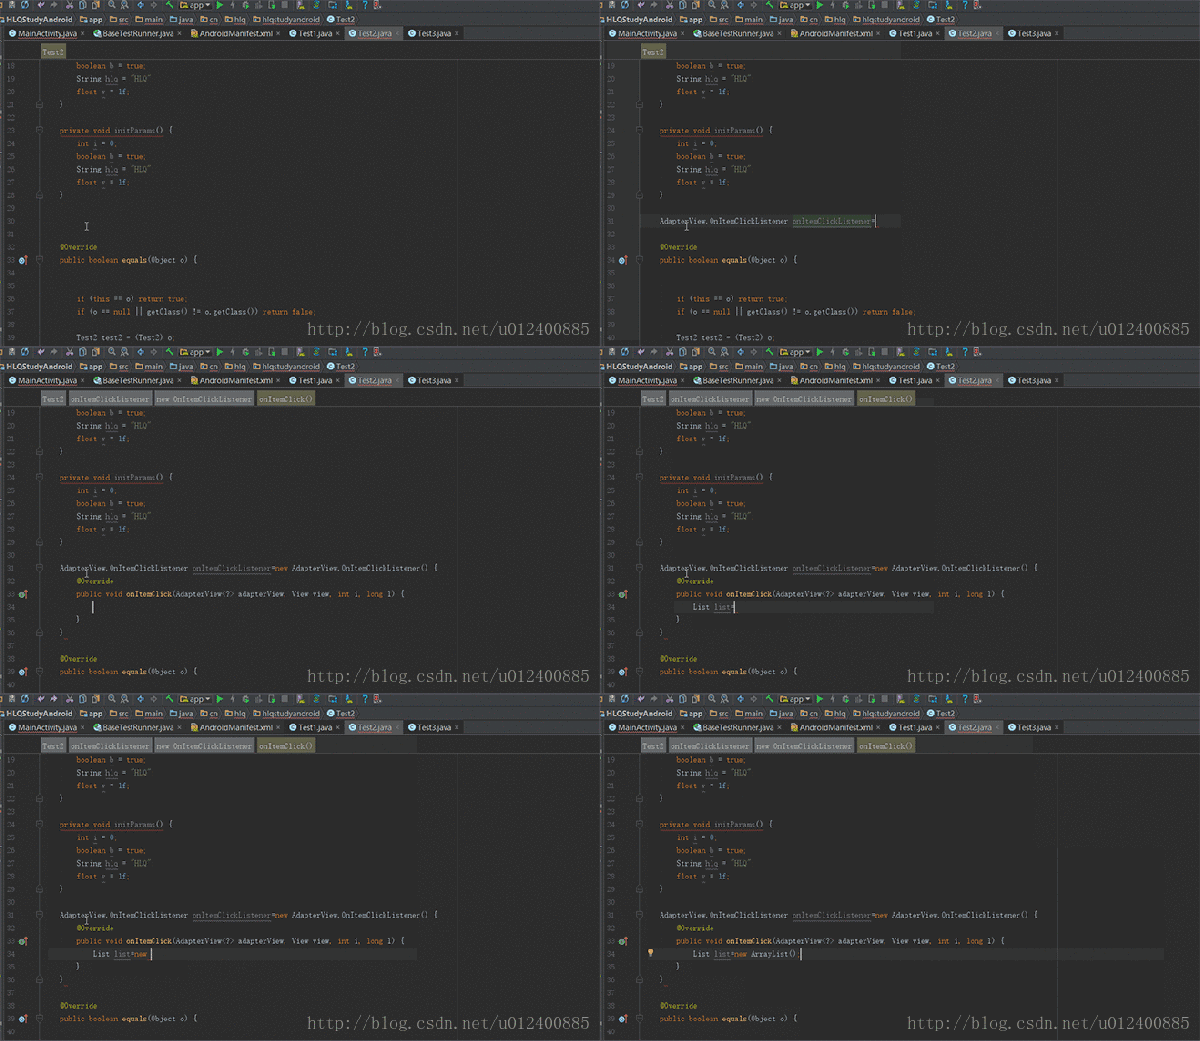
10. Ctrl+J 强大的代码补全
不得不说,这个真的666啊~
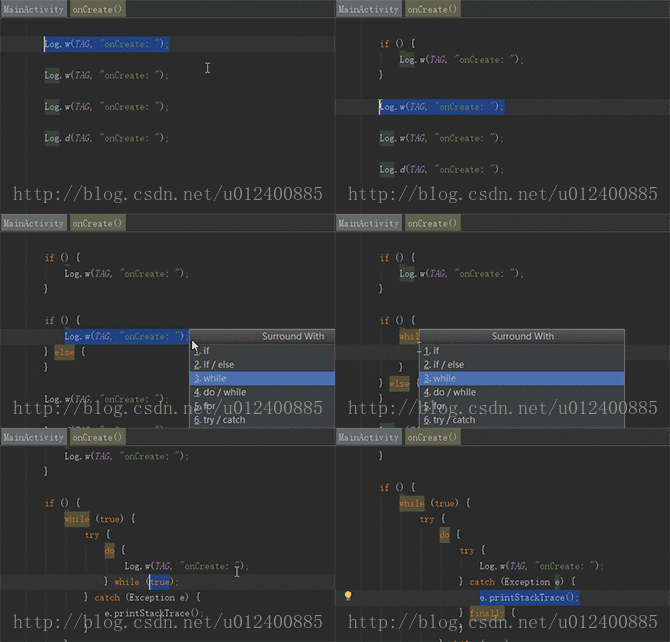
11. Ctrl+Alt+T 快速生成类似try块 if块 while等
这个LZ一般还是用于生成try块方便,在项目中针对某些会出现异常的代码块都需要添加try
块,防止异常导致崩溃
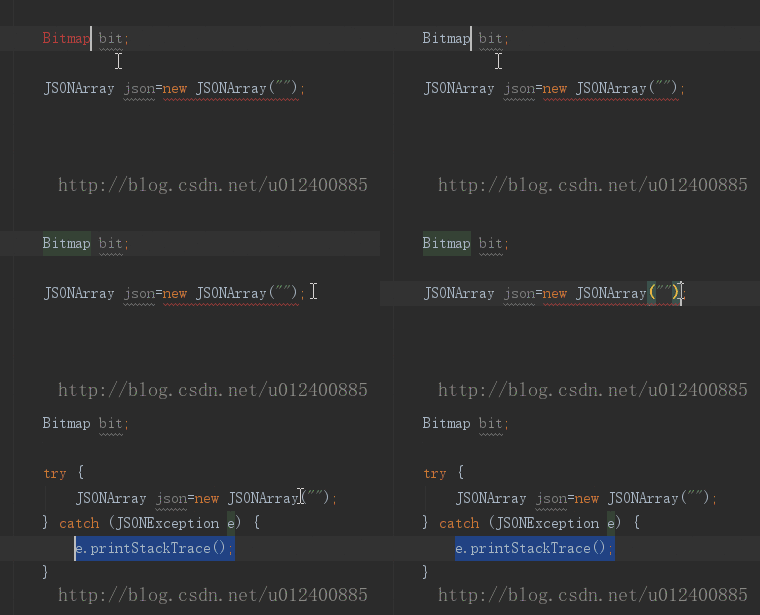
12. 贯穿全局的Alt+Enter
此子可用于导包,或者修正某些异常,类似于某些方法需要抛出异常或者添加try块等
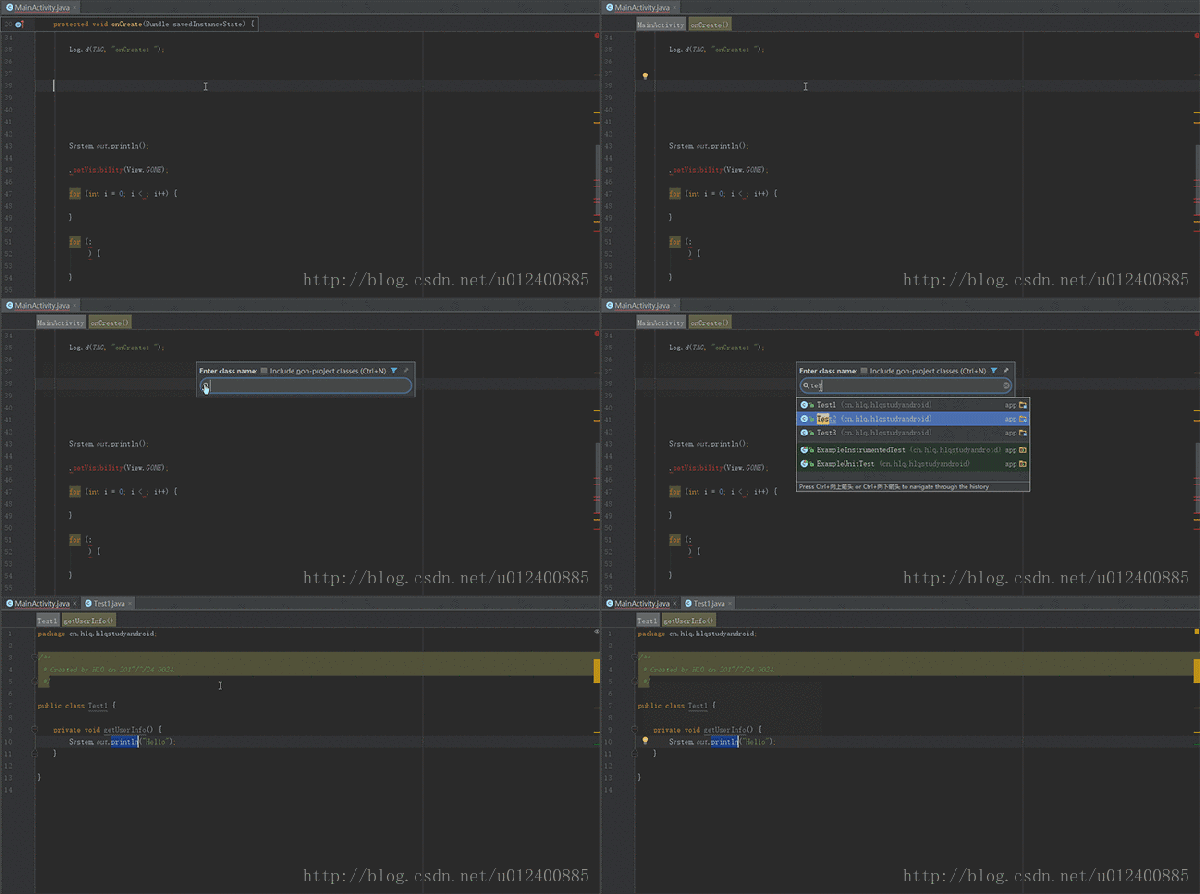
13. Ctrl+N 查找类
不想用鼠标,还想找个类肿么办?Ctrl+N来帮你~
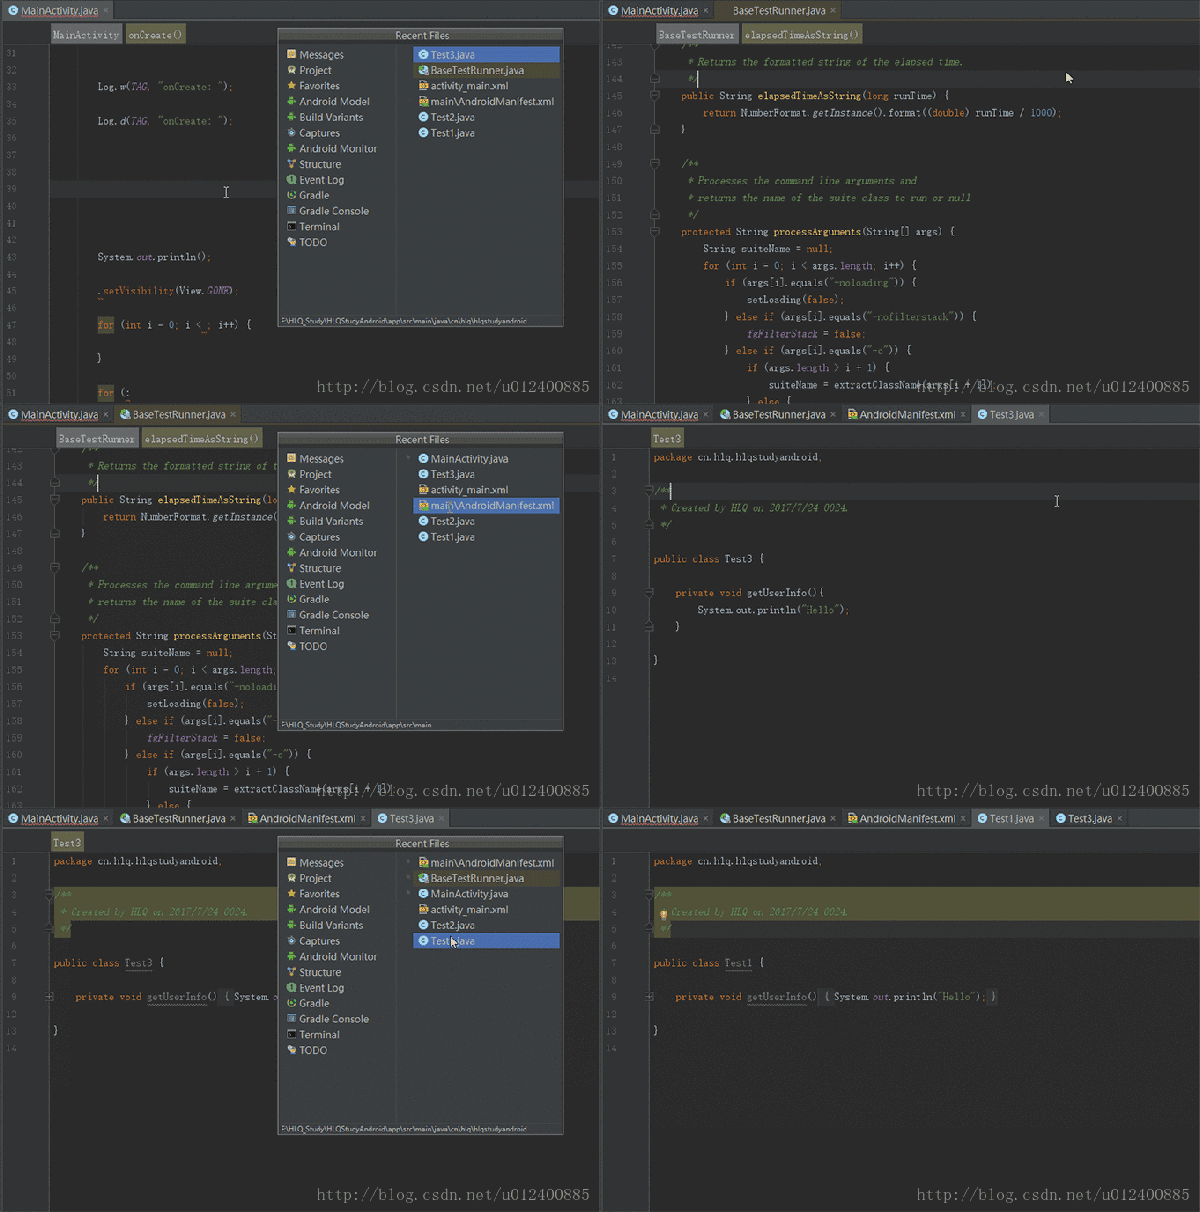
14. Ctrl+E 查看浏览历史
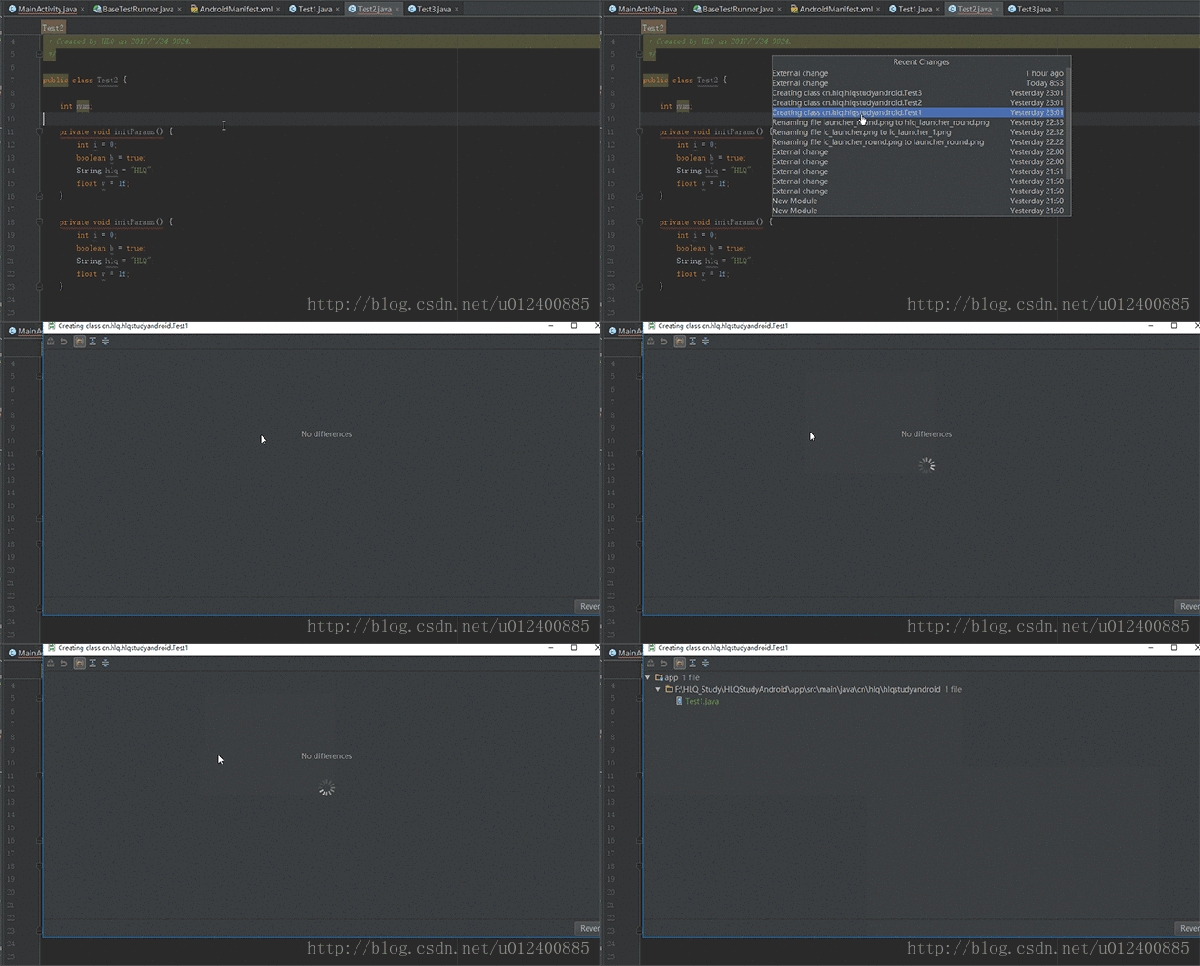
15 .Alt+Shift+C 对比本地历史纪录
这个技能不错,666
16. Ctrl+Shift+Space 自动补全代码
17. Ctrl+Y 删除当前行
18. F2 或Shift+F2 高亮错误或警告快速定位
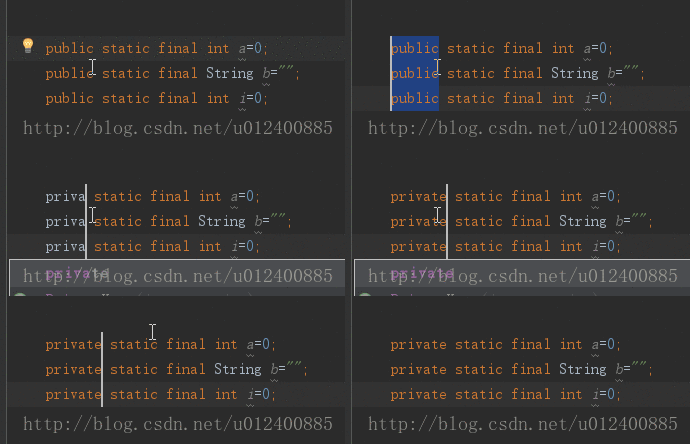
19. Alt+J 多行编辑
想要一次性写多行么?想一次性修改多行么?完全不是梦~
关于常用快捷键介绍到此,以后用到再补充~
Android Studio 强大的代码补全
在上面已经为大家列举LZ个人开发中常用的一些快捷键,下面简单说明下强大的代码补全功能~继续感受Android Studio的魅力~
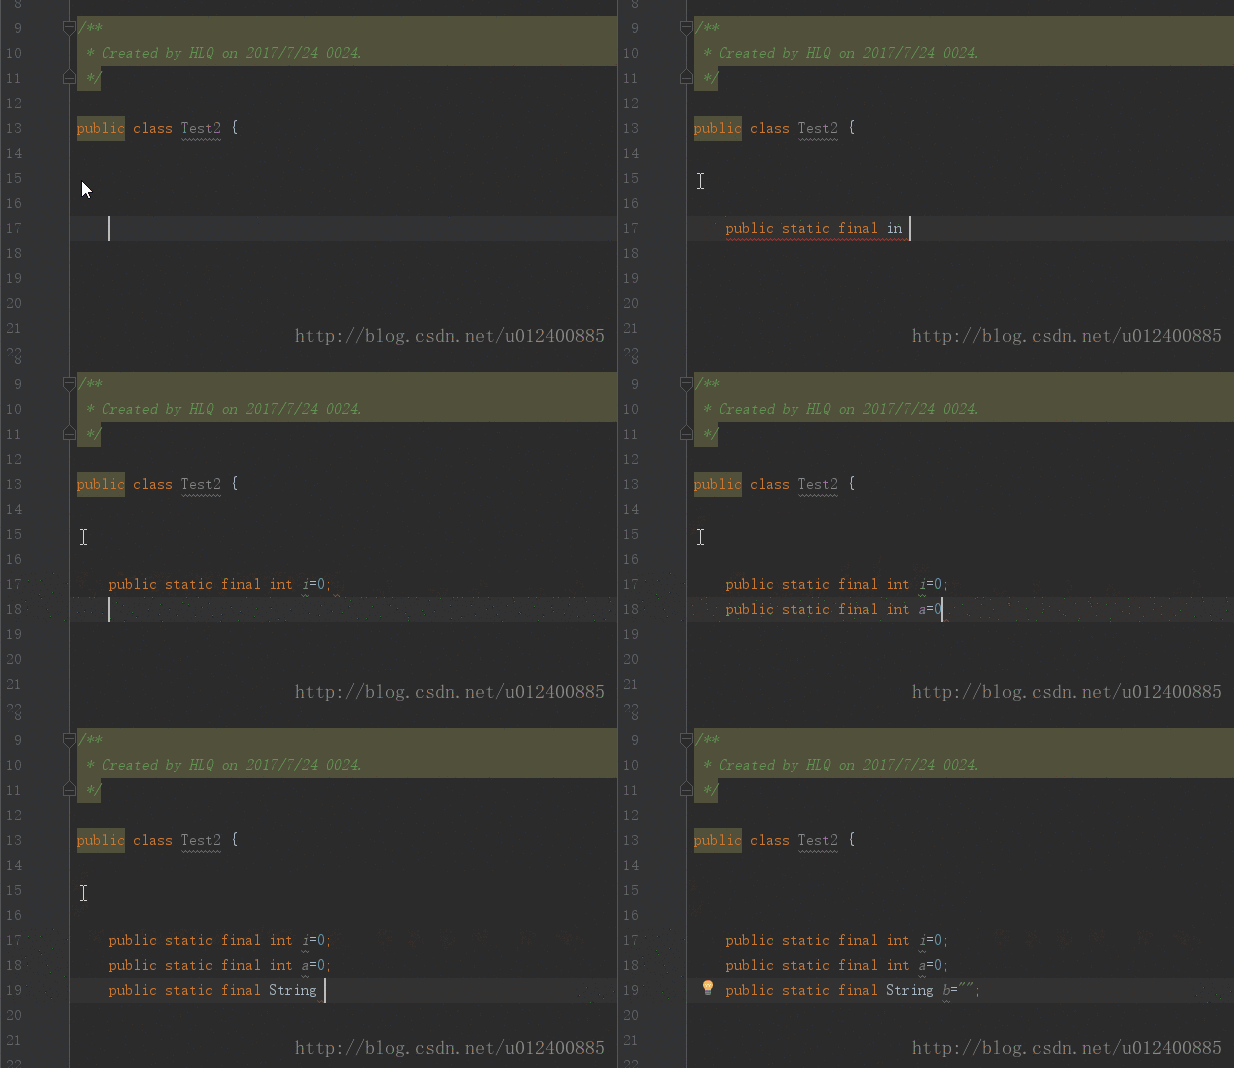
骚年,还在手动写public static final吗?
作为项目中常用也几乎为必备的东西,强大的Studio早已看穿一切~当然LZ这里没有全面,大家可以自行挖掘~或者直接使用快捷键~
Android Studio 插件
强大的Android Studio背后肯定会有n多插件使其更加优秀,下面将列举LZ常用的几种,具体大家可自行发掘~
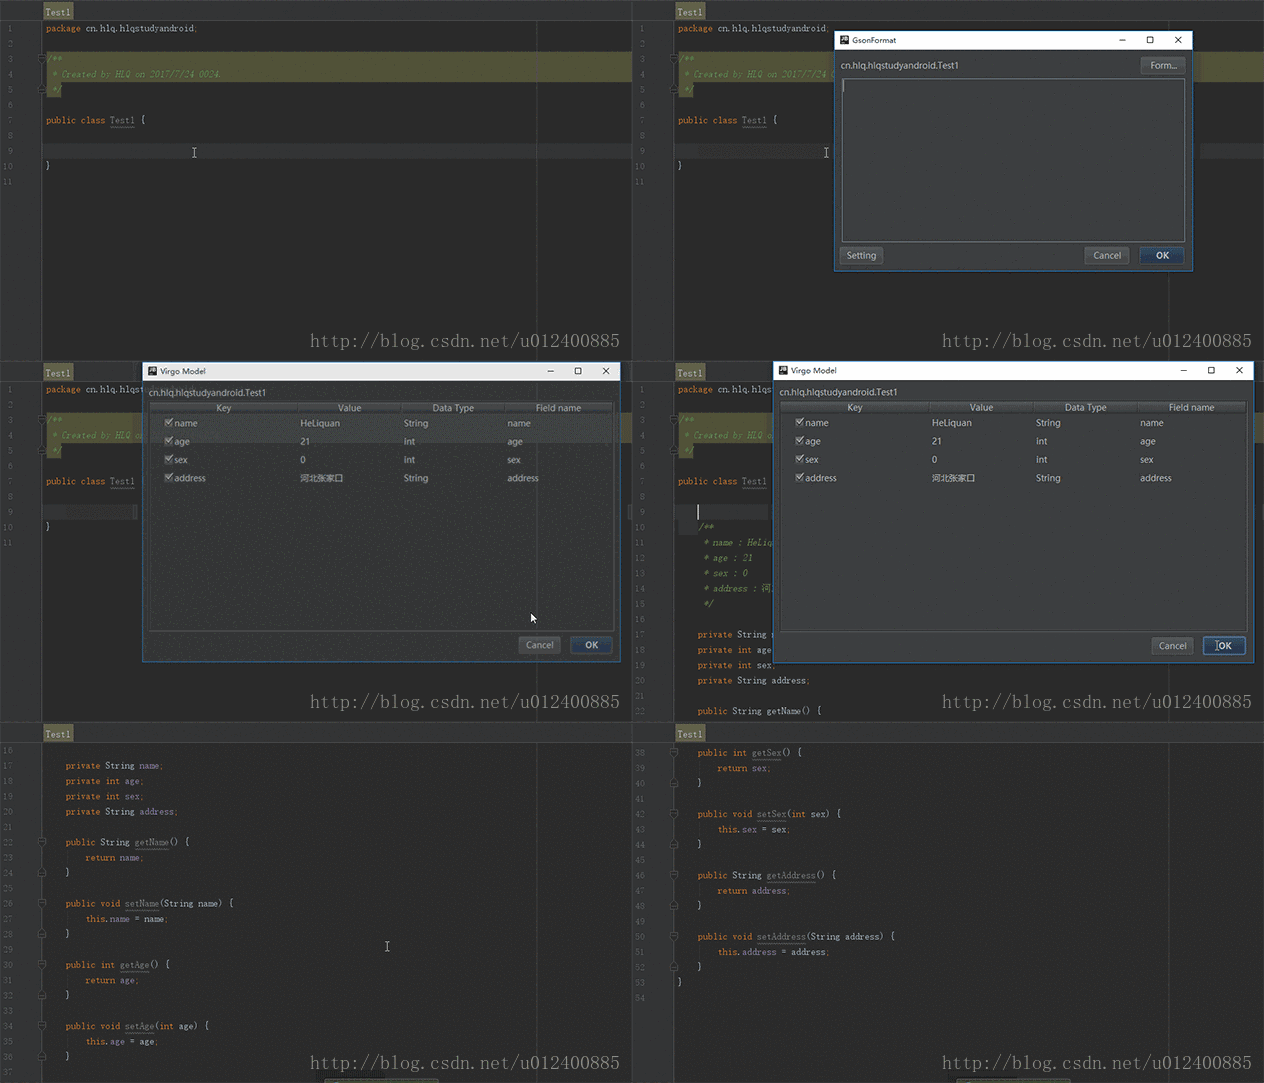
1. GsonFormat json快速生成实体类
还在为Json编写实体类犯愁吗?赶快来使用它~
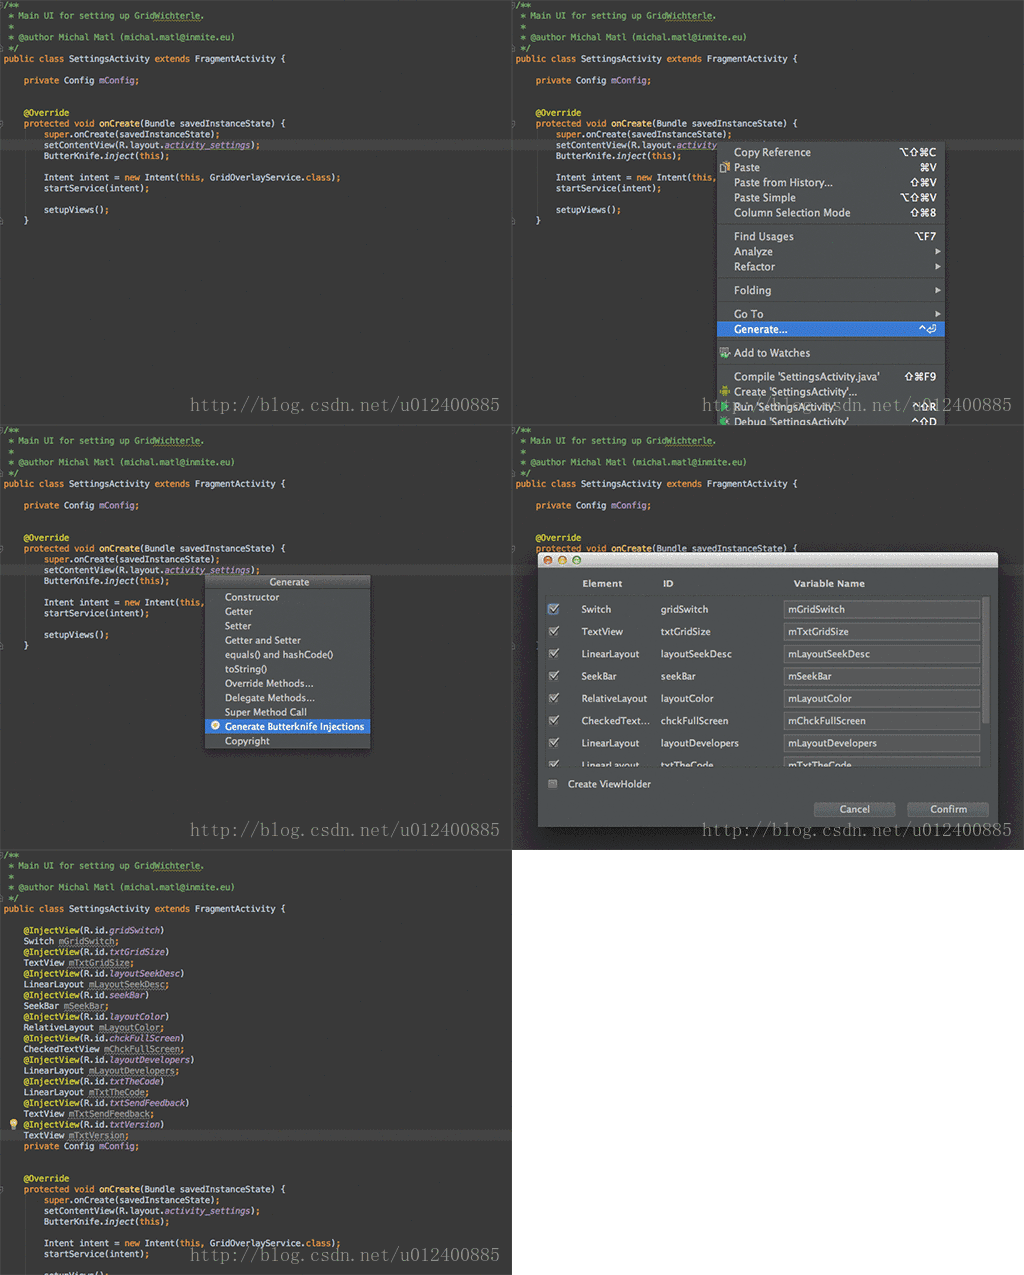
2. ButterKnife Zelezny 一键生成注解 简化代码
使用这个需要添加相应的依赖,为了省事儿,LZ直接盗图了~勿怪
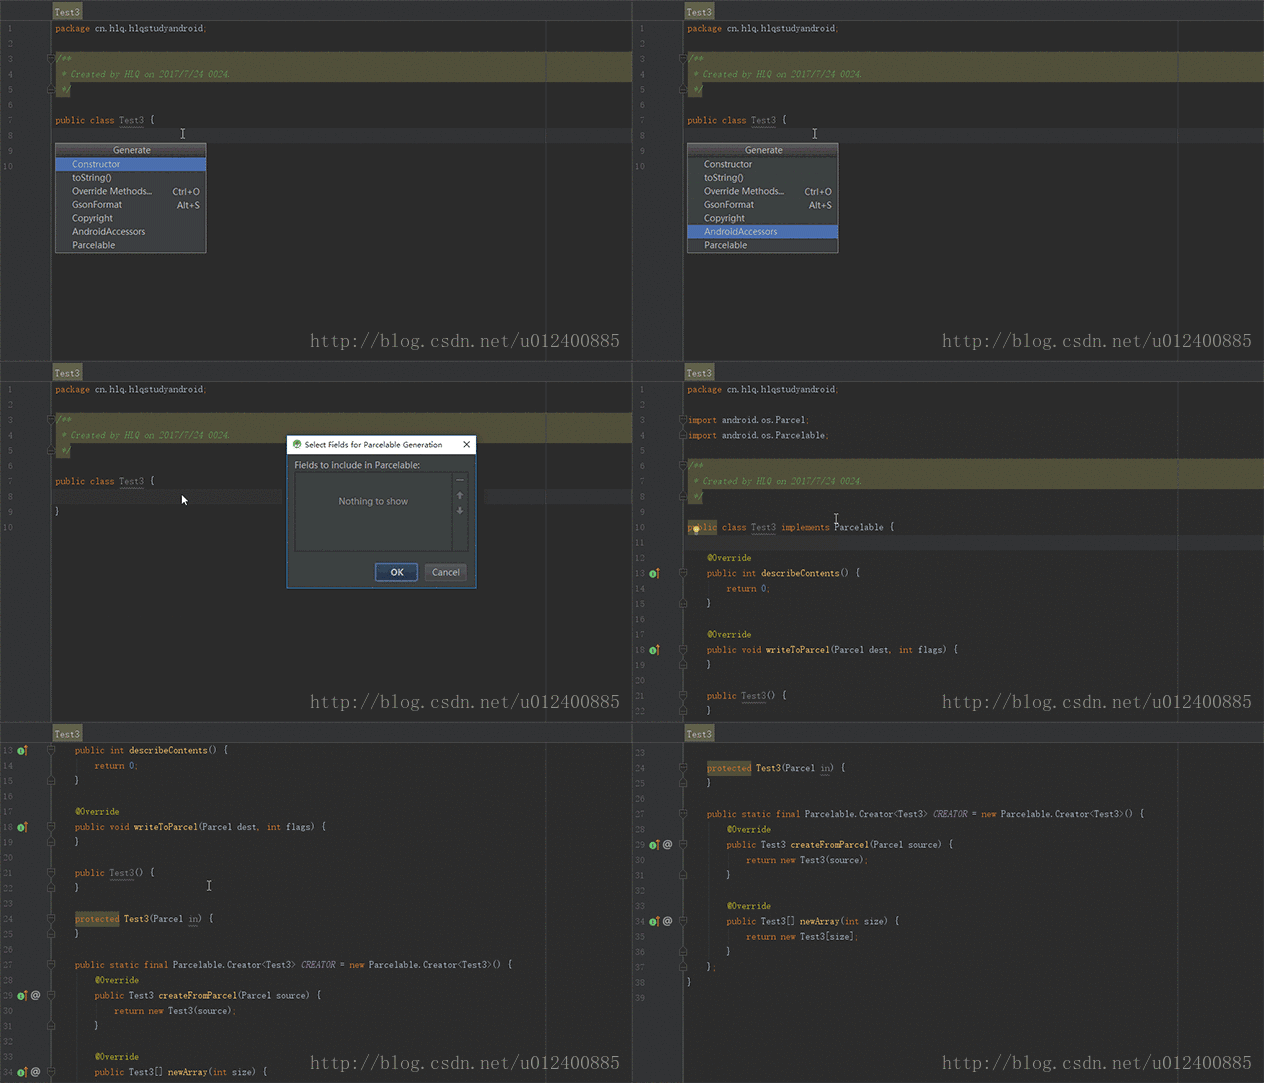
3. Parcelable 序列化
Android中的序列化有两种方式,分别是实现Serializable接口和Parcelable接口,但在Android中是推荐使用Parcelable,而且这边过程比较繁琐,幸好有这神器~
4. Genymotion 优秀的模拟器
不解释,也不截图了,不过现在谷歌推出的模拟器使用起来也还不错,个人比较支持谷歌更新后的模拟器
LZ目前尝试用的也就以上几个,当然,还有很多优秀的插件,附上地址,大家自行浏览选择使用即可~
https://www.zhihu.com/question/28026027
Android 布局优化
布局优化,这是个有意思的话题,下面通过不同例子一起来看看吧~
一、巧用android:drawab系列+Style提高代码可读性以及简洁性
TextView这个东西,想必大家用的都熟透了吧?今天我们来说说如何更好玩转TextView。
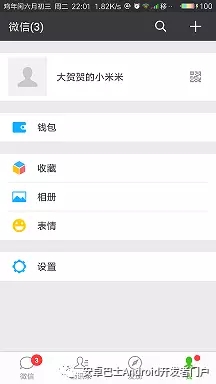
举一个很通用的例子,微信"我"的界面布局
大家注意到"钱包","收藏","相册"等布局了么?
以前,我们会这么写:
- <LinearLayout
- android:layout_width="match_parent"
- android:layout_height="wrap_content"
- android:layout_marginTop="15dp"
- android:background="#FFF"
- android:orientation="horizontal"
- android:padding="15dp">
- <ImageView
- android:layout_width="30dp"
- android:layout_height="30dp"
- android:background="@mipmap/ic_launcher_1"/>
- <TextView
- android:layout_width="match_parent"
- android:layout_height="wrap_content"
- android:layout_gravity="center_vertical"
- android:text="钱包"/>
- </LinearLayout>
- ... ...
如果点击项多的话,反而显得乱,而且多了很多无用的代码,今天我们来尝试新的玩法~
- <TextView
- android:layout_width="match_parent"
- android:layout_height="wrap_content"
- android:layout_marginTop="15dp"
- android:background="#FFF"
- android:drawableLeft="@mipmap/ic_launcher_1"
- android:drawablePadding="10dp"
- android:gravity="center_vertical"
- android:padding="10dp"
- android:text="钱包"/>
- ... ...
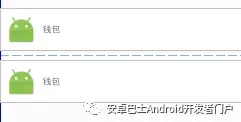
俩者实现效果如下:
TextView多的话还可以提取Style文件,代码简洁易读。
二、TextView跑马灯
附上效果图:
部分代码如下:
- <TextView
- android:id="@+id/id_test"
- android:layout_width="match_parent"
- android:layout_height="wrap_content"
- android:layout_marginTop="15dp"
- android:background="#FFF"
- android:singleLine="true"
- android:ellipsize="marquee"
- android:marqueeRepeatLimit="marquee_forever"
- android:text="失恋算个啥?轻轻的,你走吧,千万别后悔,因为只要你一挥手,就会发现,已经有那等不及的意中人,正偷偷摸摸拉你的手!"/>
记得Activity要设置一个属性,否则无效。
- findViewById(R.id.id_test).setSelected(true);
要想实现跑马灯效果,必须满足一个条件,就是TextView内容必须超出屏幕,否则无效!当然你可以自定义。
三、关于显示价格优化
效果如下:
按照之前的想法,我们会这么玩:
- <TextView
- android:layout_width="wrap_content"
- android:layout_height="wrap_content"
- android:text="您需要支付:"/><TextView
- android:layout_width="wrap_content"
- android:layout_height="wrap_content"
- android:text="¥50"
- android:textColor="@android:color/holo_red_light"/>
可有简单用法,干嘛还多写一个TextView,这不是浪费嘛?瞧着~
string文件中这样写:
- <string name="string_pay_price">您需要支付:%1$s</string> <!-- %1$s:代码***位是String类型,同理,第二位%2$s -->
Activity定义方法:
- private void setPayPrice(String payPrice) {
- tvShow.setText(getString(R.string.string_pay_price, payPrice));
- SpannableStringBuilder builder = new SpannableStringBuilder(tvShow.getText().toString());
- ForegroundColorSpan colorSpan = new ForegroundColorSpan(Color.RED); // 根据要求自定义颜色值
- builder.setSpan(colorSpan, 4, tvShow.getText().toString().length(), Spannable.SPAN_EXCLUSIVE_EXCLUSIVE);
- tvShow.setText(builder);
- }
四、自动链接TextView内容,例如网址,电话,e-mail等
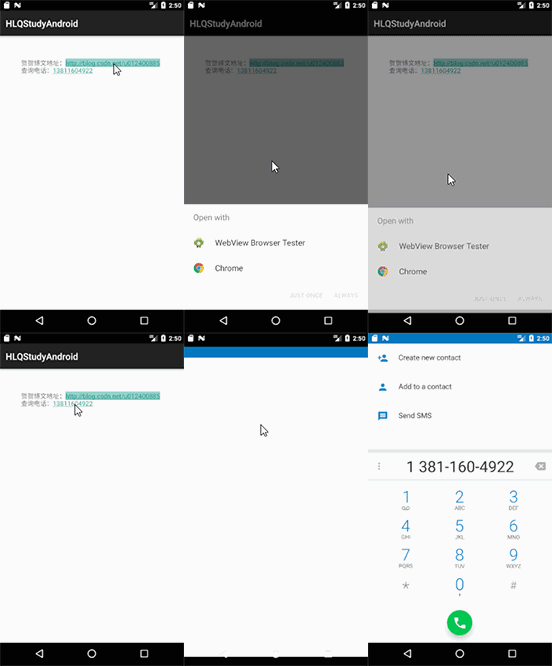
效果如下:
代码部分:
- <TextView
- android:id="@+id/id_test"
- android:layout_width="wrap_content"
- android:autoLink="all"
- android:text="贺贺博文地址:http://blog.csdn.net/u012400885 \n查询电话:13811604922"
- android:layout_height="wrap_content"/>
五、巧用LinearLayout,节省不必要代码~
下面为大家附上一个简单效果图,大家首先想想,如果是你,怎么写?
这里为大家引入另一种写法,也就是小标题如何巧用LinearLayout
首先编写shape文件,很简单,设置高度和颜色。
- <shape xmlns:android="http://schemas.android.com/apk/res/android">
- <size android:height="15dp"/>
- <solid android:color="#FFF000"/></shape>
其次,在布局文件中设置divider以及showDividers属性即可。
- <?xml version="1.0" encoding="utf-8"?><LinearLayout
- xmlns:android="http://schemas.android.com/apk/res/android"
- xmlns:tools="http://schemas.android.com/tools"
- android:layout_width="match_parent"
- android:layout_height="match_parent"
- android:background="#FFF"
- android:divider="@drawable/shape_0"
- android:orientation="vertical"
- android:showDividers="middle|beginning|end"
- tools:context="cn.hlq.hlqstudyandroid.MainActivity">
- <TextView
- android:layout_width="match_parent"
- android:layout_height="wrap_content"
- android:drawableLeft="@mipmap/ic_launcher_1"
- android:drawablePadding="10dp"
- android:gravity="center_vertical"
- android:padding="10dp"
- android:text="item项111"/>
- <TextView
- android:layout_width="match_parent"
- android:layout_height="wrap_content"
- android:drawableLeft="@mipmap/ic_launcher_1"
- android:drawablePadding="10dp"
- android:gravity="center_vertical"
- android:padding="10dp"
- android:text="item项222"/></LinearLayout>
下面简单介绍下android:showDividers属性:
android:showDividers="middle|beginning|end":鉴名其意,三个属性值分别为 中间 开始部分 结束部分,也就是在三个部分显示分割线。
有个哥儿们会说了,不是还有v7包下LinearLayoutCompat不也能实现分割线吗?
确实,不过我试了下,感觉俩者一样,这里就不做过分说明了~
六、禁止截屏功能,间接保护App
想想实现禁止应用截屏,只需要一行代码,如下:
- getWindow().addFlags(WindowManager.LayoutParams.FLAG_SECURE);
防止setContentView后即可,之后截屏的时候,会提示以下内容:
结束语
东西很简单,LZ简单总结了下,给自己留点东西~


