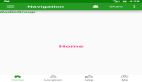
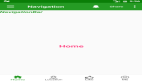
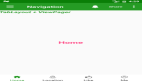
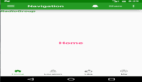
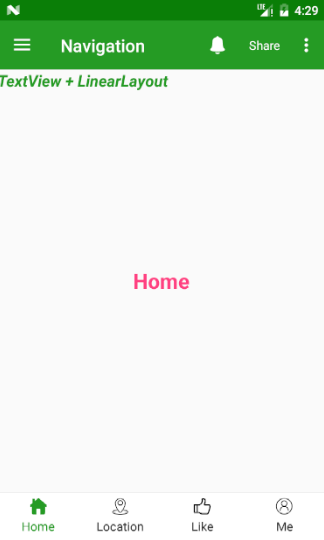
这里简单记录下通过TextView+LinearLayout+Fragment来实现Android底部导航栏。
布局
<!--fragment_text_tab.xml-->

<?xml version="1.0" encoding="utf-8"?>
<LinearLayout xmlns:android="http://schemas.android.com/apk/res/android"
              android:layout_width="match_parent"
              android:layout_height="match_parent"
              android:orientation="vertical">

    <FrameLayout
        android:id="@+id/sub_content"
        android:layout_width="match_parent"
        android:layout_height="0dp"
        android:layout_weight="1">

        <TextView
            android:id="@+id/activity_text_view"
            android:layout_width="wrap_content"
            android:layout_height="wrap_content"
            android:layout_centerHorizontal="true"
            android:text="@string/tips"
            android:textColor="@color/colorPrimary"
            android:textSize="18sp"
            android:textStyle="bold|italic"/>
    </FrameLayout>

    <View
        android:layout_width="match_parent"
        android:layout_height="1px"
        android:background="@color/grey_300"/>

    <include layout="@layout/tab_layout_for_bottom"/>

</LinearLayout>


<!--tab_layout_for_bottom-->

<?xml version="1.0" encoding="utf-8"?>


<LinearLayout
    xmlns:android="http://schemas.android.com/apk/res/android"
    xmlns:tools="http://schemas.android.com/tools"
    android:layout_width="match_parent"
    android:layout_height="56dp"
    android:background="@color/white"
    android:orientation="horizontal"
    tools:showIn="@layout/fragment_text_tab">

    <TextView
        android:id="@+id/tv_home"
        style="@style/viewpager_navigation_bar_tab_style"
        android:drawableTop="@drawable/home"
        android:text="@string/item_home"/>

    <TextView
        android:id="@+id/tv_location"
        style="@style/viewpager_navigation_bar_tab_style"
        android:drawableTop="@drawable/location"
        android:text="@string/item_location"/>

    <TextView
        android:id="@+id/tv_like"
        style="@style/viewpager_navigation_bar_tab_style"
        android:drawableTop="@drawable/like"
        android:text="@string/item_like"/>

    <TextView
        android:id="@+id/tv_person"
        style="@style/viewpager_navigation_bar_tab_style"
        android:drawableTop="@drawable/person"
        android:text="@string/item_person"/>
</LinearLayout>
- 1.
- 2.
- 3.
- 4.
- 5.
- 6.
- 7.
- 8.
- 9.
- 10.
- 11.
- 12.
- 13.
- 14.
- 15.
- 16.
- 17.
- 18.
- 19.
- 20.
- 21.
- 22.
- 23.
- 24.
- 25.
- 26.
- 27.
- 28.
- 29.
- 30.
- 31.
- 32.
- 33.
- 34.
- 35.
- 36.
- 37.
- 38.
- 39.
- 40.
- 41.
- 42.
- 43.
- 44.
- 45.
- 46.
- 47.
- 48.
- 49.
- 50.
- 51.
- 52.
- 53.
- 54.
- 55.
- 56.
- 57.
- 58.
- 59.
- 60.
- 61.
- 62.
- 63.
- 64.
- 65.
- 66.
- 67.
- 68.
- 69.
- 70.
- 71.
- 72.
- 73.
- 74.
代码
mTHome.setOnClickListener(this);
    mTLocation.setOnClickListener(this);
    mTLike.setOnClickListener(this);
    mTMe.setOnClickListener(this);
    setDefaultFragment();//设置默认显示Fragment

    @Override
    public void onClick(View view) {
        resetTabState();//reset the tab state
        switch (view.getId()) {
            case R.id.tv_home:
                setTabState(mTHome, R.drawable.home_fill, getColor(R.color.colorPrimary));//设置Tab状态
                switchFrgment(0);//切换Fragment
                break;
            case R.id.tv_location:
                setTabState(mTLocation, R.drawable.location_fill, getColor(R.color.colorPrimary));
                switchFrgment(1);
                break;
            case R.id.tv_like:
                setTabState(mTLike, R.drawable.like_fill, getColor(R.color.colorPrimary));
                switchFrgment(2);
                break;
            case R.id.tv_person:
                setTabState(mTMe, R.drawable.person_fill, getColor(R.color.colorPrimary));
                switchFrgment(3);
                break;
        }
    }
- 1.
- 2.
- 3.
- 4.
- 5.
- 6.
- 7.
- 8.
- 9.
- 10.
- 11.
- 12.
- 13.
- 14.
- 15.
- 16.
- 17.
- 18.
- 19.
- 20.
- 21.
- 22.
- 23.
- 24.
- 25.
- 26.
- 27.
- 28.
Fragment的切换
/**
     * switch the fragment accordting to id
     * @param i id
     */
    private void switchFrgment(int i) {
        FragmentTransaction transaction = getChildFragmentManager().beginTransaction();
        switch (i) {
            case 0:
                if (mHomeFragment == null) {
                    mHomeFragment = mHomeFragment.newInstance(getString(R.string.item_home));
                }
                transaction.replace(R.id.sub_content, mHomeFragment);
                break;
            case 1:
                if (mLocationFragment == null) {
                    mLocationFragment = LocationFragment.newInstance(getString(R.string.item_location));
                }
                transaction.replace(R.id.sub_content, mLocationFragment);
                break;
            case 2:
                if (mLikeFragment == null) {
                    mLikeFragment = LikeFragment.newInstance(getString(R.string.item_like));
                }
                transaction.replace(R.id.sub_content, mLikeFragment);
                break;
            case 3:
                if (mPersonFragment == null) {
                    mPersonFragment = PersonFragment.newInstance(getString(R.string.item_person));
                }
                transaction.replace(R.id.sub_content, mPersonFragment);
                break;
        }
        transaction.commit();
    }
- 1.
- 2.
- 3.
- 4.
- 5.
- 6.
- 7.
- 8.
- 9.
- 10.
- 11.
- 12.
- 13.
- 14.
- 15.
- 16.
- 17.
- 18.
- 19.
- 20.
- 21.
- 22.
- 23.
- 24.
- 25.
- 26.
- 27.
- 28.
- 29.
- 30.
- 31.
- 32.
- 33.
- 34.
这里面值得注意的地方就是要用getChildFragmentManager(),否则会出现切换Fragment内容不显示的情况。
设置Tab状态
/**
     * set the tab state of bottom navigation bar
     *
     * @param textView the text to be shown
     * @param image    the image
     * @param color    the text color
     */
    private void setTabState(TextView textView, int image, int color) {
        textView.setCompoundDrawablesRelativeWithIntrinsicBounds(0, image, 0, 0);//Call requires API level 17
        textView.setTextColor(color);
    }


    /**
     * revert the image color and text color to black
     */
    private void resetTabState() {
        setTabState(mTHome, R.drawable.home, getColor(R.color.black_1));
        setTabState(mTLocation, R.drawable.location, getColor(R.color.black_1));
        setTabState(mTLike, R.drawable.like, getColor(R.color.black_1));
        setTabState(mTMe, R.drawable.person, getColor(R.color.black_1));

    }
- 1.
- 2.
- 3.
- 4.
- 5.
- 6.
- 7.
- 8.
- 9.
- 10.
- 11.
- 12.
- 13.
- 14.
- 15.
- 16.
- 17.
- 18.
- 19.
- 20.
- 21.
- 22.
- 23.
- 24.
说明:这几篇文章没有过多的文字叙述,因为这些东西也不是很难,而且都是常用的,相信很多人都了如指掌了,多说亦是废话,直接上代码看的反而更清楚。