预览
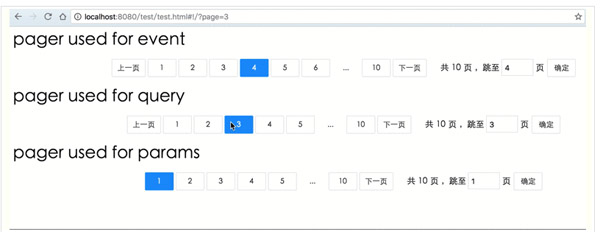
先上一波效果图:
基本元素
首先,翻页组件(以下称“pager组件”)一般拥有的元素有:
- 上一页
- ***页
- 中间显示的页码
- ***一页
- 下一页
初始化时需要的配置有:
- totalPage(总页数)
- initPage(初始页)
- showPrev(是否显示上一页)
- showNext(是否显示下一页)
- showItems(中间显示几页)
- showJump(是否显示跳转到第几页)
这些可以通过vue的props来接收。
另外,pager组件本身需要有一个记录当前页的currentPage,pages数组用来容纳中间显示的页码,jumpPage绑定输入的跳转页码。
基本实现
对应的代码为:
<template>
    <div class="pager-wrapper" v-if="totalPage > 0">
        <div class="pager-pages">
            <a v-show="currentPage > 1 && showPrev" @click="go(currentPage - 1)">上一页</a>
            <a :class="{active: currentPage == 1 ? true : false}" @click="go(1)">1</a>
            <strong v-show="pages[0] > 2">...</strong>
            <a v-for="page in pages" :class="{active: currentPage == page ? true : false}" @click="go(page)">{{page}}</a>
            <strong v-show="pages[pages.length-1] < totalPage - 1">...</strong>
            <a v-if="totalPage > 1" :class="{active: currentPage == totalPage ? true : false}" @click="go(totalPage)">{{totalPage}}</a>
            <a v-show="currentPage < totalPage && showNext" @click="go(currentPage + 1)">下一页</a>
        </div>
        <div v-if="showJump" v-show="totalPage > 1" class="pager-jump">
            <span>共<em class="jump-total">{{totalPage}}</em>页 ,跳至</span>
            <input type="number" min="1" :max="totalPage" v-model="jumpPage" class="jump-input">
            <span>页</span>
            <a @click="go(jumpPage)">确定</a>
        </div>
    </div>
</template>
<script>
  export default {
        props: {
            totalPage: { // 总页数
                type: Number,
                default: 1,
                required: true
            },
            showItems: { // 显示出来的页数,如: 1 ... 34[5]67 ... 10
                type: Number,
                default: 5
            },
            showPrev: { // 是否显示“上一页”
                type: Boolean,
                default: true
            },
            showNext: { // 是否显示“下一页”
                type: Boolean,
                default: true
            },
            showJump: { // 是否显示“跳转”
                type: Boolean,
                default: true
            },
            initPage: {
                type: Number,
                default: 1
            }
        },
        data () {
            return {
                currentPage: 0,
                pages: [],
                jumpPage: 0,
            }
        },
        created () {// 初始化时currentPage赋值
            this.currentPage = this.initPage
        }
        methods: {
            go (page) {
                if(page < 1) {
                    page = 1
                }
                if(page > this.totalPage) {
                    page = this.totalPage
                }
                if(page === this.currentPage) {
                    return
                }
                this.currentPage = parseInt(page,10)
                this.$emit('go-page',{
                    page: this.currentPage
                })
            }
        },
        watch: {
            currentPage (newVal) {
                this.jumpPage = newVal
            },
            initPage (newVal) {
                if(this.currentPage !== newVal) {
                    this.currentPage = newVal
                }
            }
        }
    }
</script>
- 1.
- 2.
- 3.
- 4.
- 5.
- 6.
- 7.
- 8.
- 9.
- 10.
- 11.
- 12.
- 13.
- 14.
- 15.
- 16.
- 17.
- 18.
- 19.
- 20.
- 21.
- 22.
- 23.
- 24.
- 25.
- 26.
- 27.
- 28.
- 29.
- 30.
- 31.
- 32.
- 33.
- 34.
- 35.
- 36.
- 37.
- 38.
- 39.
- 40.
- 41.
- 42.
- 43.
- 44.
- 45.
- 46.
- 47.
- 48.
- 49.
- 50.
- 51.
- 52.
- 53.
- 54.
- 55.
- 56.
- 57.
- 58.
- 59.
- 60.
- 61.
- 62.
- 63.
- 64.
- 65.
- 66.
- 67.
- 68.
- 69.
- 70.
- 71.
- 72.
- 73.
- 74.
- 75.
- 76.
- 77.
- 78.
- 79.
- 80.
- 81.
- 82.
- 83.
- 84.
- 85.
- 86.
- 87.
接下来就是pages数组的值如何获取到。由于pages始终是跟当前页currentPage以及配置中需要显示的showItems强相关的,那么完全可以将pages改为计算属性:
computed: {
    pages () {
        // 根据起始页码和结束页码得到页码数组
        let getPages = (start,end) => {
            if(start <= 1 || start > end || start >= this.totalPage) {
                start = 2
            }
            if(end >= this.totalPage || end < start || end <= 1) {
                end = this.totalPage - 1
            }
            let arr = []
            for(let i = start; i <= end; i++) {
                arr.push(i)
            }
            return arr
        }
        let counts = this.showItems
        if(this.totalPage < counts + 2) {
            return getPages(2,this.totalPage)
        } else {
            if(this.currentPage <= Math.ceil(counts/2)) {
                return getPages(2,counts)
            } else if(this.currentPage >= this.totalPage - Math.floor(counts/2)) {
                return getPages(this.totalPage + 1 - counts,this.totalPage - 1)
            } else {
                let half = Math.ceil(counts/2) - 1
                let end = this.currentPage + half
                if(counts % 2 === 0) {
                    end++
                }
                return getPages(this.currentPage - half,end)
            }
        }
    }
}
- 1.
- 2.
- 3.
- 4.
- 5.
- 6.
- 7.
- 8.
- 9.
- 10.
- 11.
- 12.
- 13.
- 14.
- 15.
- 16.
- 17.
- 18.
- 19.
- 20.
- 21.
- 22.
- 23.
- 24.
- 25.
- 26.
- 27.
- 28.
- 29.
- 30.
- 31.
- 32.
- 33.
- 34.
- 35.
功能拓展
到这里一个普通的翻页组件基本上就实现了(样式自己可以去定制)。但是很多时候(特别是一些管理后台),结合vue-router做成SPA,通常会有这样的需求:
翻到某个列表的某一页之后,点击某一项到编辑页,编辑完成后希望能够返回到跳转之前的那一页。
这个需求如果仅仅用上面的pager组件,实现起来就不是很方便。也许有人会说结合vuex可以,但是这样的话需要在state中记录下跳转前的页码。假如有很多个翻页列表,就需要记录多个,这显然并不优雅。
不过因为vue-router实现的优雅,我们要满足上面的需求也很简单:
首先props上增加mode配置,由于当mode为params时,跳转需要知道是在哪一个路由下,所以:
mode: {
    type: String,
    default: 'event' // 'event' | 'query' | 'params'
},
routeName: {
    type: String
}
- 1.
- 2.
- 3.
- 4.
- 5.
- 6.
- 7.
然后再在实际跳转的逻辑方法go(page)里面,做点更改:
go (page) {
    if(page < 1) {
        page = 1
    }
    if(page > this.totalPage) {
        page = this.totalPage
    }
    if(page === this.currentPage) {
        return
    }
    this.currentPage = parseInt(page,10)
    if(this.mode == 'query') {
        let query = this.$route.query
        query.page = this.currentPage
        this.$router.go({query: query})
    } else if(this.mode == 'params') {
        let params = this.$route.params
        params.page = this.currentPage
        this.$router.go({name: this.routeName,params: params})
    } else {
        this.$emit('go-page',{
            page: this.currentPage
        })
    }
}
- 1.
- 2.
- 3.
- 4.
- 5.
- 6.
- 7.
- 8.
- 9.
- 10.
- 11.
- 12.
- 13.
- 14.
- 15.
- 16.
- 17.
- 18.
- 19.
- 20.
- 21.
- 22.
- 23.
- 24.
- 25.
这样基本上就完成了一个简单且通用的翻页组件啦,接下里就是发不到仓库里供大家使用了。
本文最终实现的翻页组件已经发布,大家可以看一波源码:
总结
总体上讲的比较浅显,希望能有帮助。