进度条用于显示任务的进度。例如。当你从互联网上上传或下载的东西,这更好地显示下载进度/上传给用户。
在Android中有一类叫做ProgressDialog,允许创建进度条。为了做到这一点,需要实例化这个类的一个对象。其语法如下:
- ProgressDialog progress = new ProgressDialog(this);
现在,可以设置此对话框的某些属性。比如,它的风格,文本等
- progress.setMessage("Downloading Music :) ");
- progress.setProgressStyle(ProgressDialog.STYLE_HORIZONTAL);
- progress.setIndeterminate(true);
除了这些方法,ProgressDialog类中还提供的其它方法:
| Sr. NO | 标题与描述 |
|---|---|
| 1 | getMax() 此方法返回进度的***值 |
| 2 | incrementProgressBy(int diff) 此方法增加了进度条由值作为参数传递的区别 |
| 3 | setIndeterminate(boolean indeterminate) 此方法设置进度指示确定或不确定 |
| 4 | setMax(int max) 此方法设置进度对话框的***值 |
| 5 | setProgress(int value) 此方法用于更新对话框进度某些特定的值 |
| 6 | show(Context context, CharSequence title, CharSequence message) 这是一个静态方法,用来显示进度对话框 |
示例
这个例子说明使用对话框水平进度,事实上这是一个进度条。它在按下按钮时显示进度条。
为了测试这个例子,需要按照以下步骤开发应用程序后,在实际设备上运行。
| Steps | 描述 |
|---|---|
| 1 | 使用Android Studio创建Android应用程序,并将其命名为ProgressDialogDemo。在创建这个项目时,确保目标SDK和编译在Android SDK***版本和使用更高级别的API |
| 2 | 修改src/MainActivity.java文件中添加进度代码显示对话框进度 |
| 3 | 修改res/layout/activity_main.xml文件中添加相应的XML代码 |
| 4 | 修改res/values/string.xml文件,添加一个消息作为字符串常量 |
| 5 | 运行应用程序并选择运行Android设备,并在其上安装的应用并验证结果。 |
以下是修改后的主活动文件的内容 src/com.yiibai.progressdialog/MainActivity.java.
- package com.example.progressdialog;
- import com.example.progressdialog.R;
- import android.os.Bundle;
- import android.app.Activity;
- import android.app.ProgressDialog;
- import android.view.Menu;
- import android.view.View;
- public class MainActivity extends Activity {
- private ProgressDialog progress;
- @Override
- protected void onCreate(Bundle savedInstanceState) {
- super.onCreate(savedInstanceState);
- setContentView(R.layout.activity_main);
- progress = new ProgressDialog(this);
- }
- public void open(View view){
- progress.setMessage("Downloading Music :) ");
- progress.setProgressStyle(ProgressDialog.STYLE_HORIZONTAL);
- //progress.setIndeterminate(true);
- progress.show();
- final int totalProgressTime = 100;
- final Thread t = new Thread(){
- @Override
- public void run(){
- int jumpTime = 0;
- while(jumpTime < totalProgressTime){
- try {
- sleep(200);
- jumpTime += 5;
- progress.setProgress(jumpTime);
- } catch (InterruptedException e) {
- // TODO Auto-generated catch block
- e.printStackTrace();
- }
- }
- }
- };
- t.start();
- }
- @Override
- public boolean onCreateOptionsMenu(Menu menu) {
- // Inflate the menu; this adds items to the action bar if it is present.
- getMenuInflater().inflate(R.menu.main, menu);
- return true;
- }
- }
修改 res/layout/activity_main.xml 的内容如下
- <RelativeLayout xmlns:android="http://schemas.android.com/apk/res/android"
- xmlns:tools="http://schemas.android.com/tools"
- android:layout_width="match_parent"
- android:layout_height="match_parent"
- android:paddingBottom="@dimen/activity_vertical_margin"
- android:paddingLeft="@dimen/activity_horizontal_margin"
- android:paddingRight="@dimen/activity_horizontal_margin"
- android:paddingTop="@dimen/activity_vertical_margin"
- tools:context=".MainActivity" >
- <Button
- android:id="@+id/button1"
- android:layout_width="wrap_content"
- android:layout_height="wrap_content"
- android:layout_alignParentTop="true"
- android:layout_centerHorizontal="true"
- android:layout_marginTop="150dp"
- android:onClick="open"
- android:text="@string/download_button" />
- <TextView
- android:id="@+id/textView1"
- android:layout_width="wrap_content"
- android:layout_height="wrap_content"
- android:layout_alignParentRight="true"
- android:layout_alignParentTop="true"
- android:layout_marginTop="19dp"
- android:text="@string/download_text"
- android:textAppearance="?android:attr/textAppearanceLarge" />
- </RelativeLayout>
修改 res/values/string.xml 以下内容
- <?xml version="1.0" encoding="utf-8"?>
- <resources>
- <string name="app_name">ProgressDialog</string>
- <string name="action_settings">Settings</string>
- <string name="hello_world">Hello world!</string>
- <string name="download_button">Download</string>
- <string name="download_text">Press the button to download music</string>
- </resources>
这是默认的 AndroidManifest.xml 文件
- <?xml version="1.0" encoding="utf-8"?>
- <manifest xmlns:android="http://schemas.android.com/apk/res/android"
- package="com.yiibai.progressdialog"
- android:versionCode="1"
- android:versionName="1.0" >
- <uses-sdk
- android:minSdkVersion="8"
- android:targetSdkVersion="17" />
- <application
- android:allowBackup="true"
- android:icon="@drawable/ic_launcher"
- android:label="@string/app_name"
- android:theme="@style/AppTheme" >
- <activity
- android:name="com.yiibai.progressdialog.MainActivity"
- android:label="@string/app_name" >
- <intent-filter>
- <action android:name="android.intent.action.MAIN" />
- <category android:name="android.intent.category.LAUNCHER" />
- </intent-filter>
- </activity>
- </application>
- </manifest>
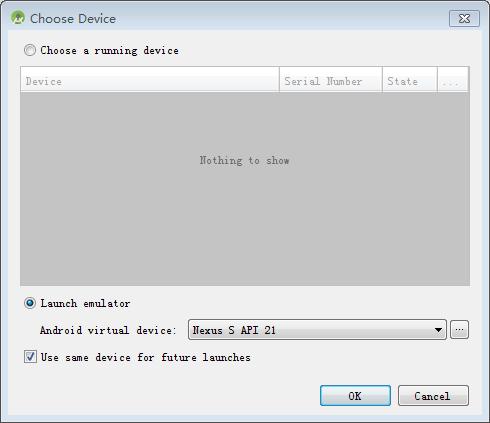
让我们试着运行ProgressDialogDemo应用程序。假设你已经连接实际的Android移动设备到计算机。启动应用程序之前,会显示如下窗口,选择要运行的 Android应用程序的选项。

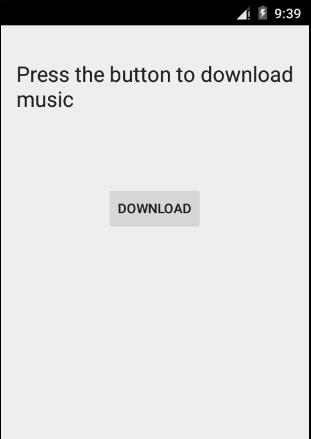
选择移动设备作为一个选项,然后查看移动设备显示如下界面:

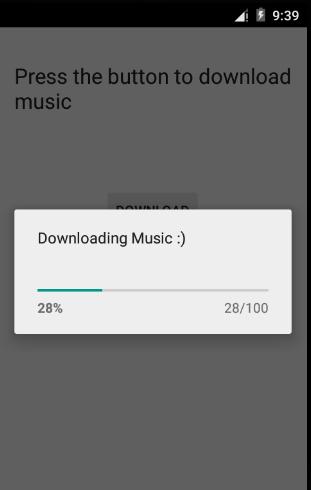
只需按下按钮,启动进度条。按下后,如下面的屏幕显示:

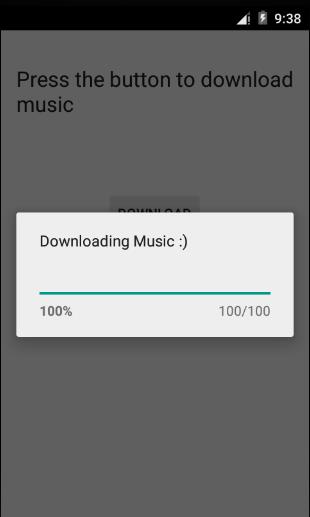
它会不断地自我更新,几秒钟后,出现如下图:


