MongoDB Auto-Sharding 解决了海量存储和动态扩容的问题但离实际生产环境所需的高可靠、高可用还有些距离所以有了” Replica Sets + Sharding”的解决方案。
MongoDB Auto-Sharding 解决了海量存储和动态扩容的问题但离实际生产环境所需的高可靠、高可用还有些距离所以有了” Replica Sets + Sharding”的解决方案。
1、Shard:
使用 Replica Sets确保每个数据节点都具有备份、自动容错转移、自动恢复能力。
2、Config:
使用3 个配置服务器确保元数据完整性
3、Route:
使用3 个路由进程实现负载平衡提高客户端接入性能
以下我们配置一个 Replica Sets + Sharding 的环境架构图如下

开放的端口如下
| 主机 |
ip |
服务及端口 |
| Server A |
192.168.3.231 |
mongod shard1_1:27017
mongod shard2_1:27018
mongod config1:20000
mongs1:30000 |
| Server B |
192.168.3.232 |
mongod shard1_2:27017
mongod shard2_2:27018
mongod config2:20000
mongs2:30000 |
| Server C |
192.168.3.233 |
mongod shard1_3:27017
mongod shard2_3:27018
mongod config3:20000
mongs3:30000 |
创建数据目录
在Server A 上:

在Server B 上:

在Server C 上:

配置Replica Sets
1、配置shard1所用到的Replica Sets
在Server A 上:

在Server B 上:

在Server C 上:

用mongo 连接其中一台机器的27017 端口的mongod初始化Replica Sets“shard1”执行:

配置shard2所用到的Replica Sets
在Server A 上:

在Server B 上:

在Server C 上:

用mongo 连接其中一台机器的27018 端口的mongod,初始化Replica Sets “shard2”,执行:

配置3 台Config Server
在Server A、B、C上执行:

配置3 台Route Process
在Server A、B、C上执行:

配置Shard Cluster

激活数据库及集合的分片

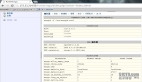
验证Sharding正常工作
连接到其中一台机器的端口30000 的mongos 进程,并切换到test 数据库,以便添加测试数据


可以看到Sharding搭建成功了,跟我们期望的结果一致,至此我们就将Replica Sets与Sharding
结合的架构也学习完毕了。
本文出自 “phper-每天一点点~” 博客,请务必保留此出处http://janephp.blog.51cto.com/4439680/1332140