我曾经写过很多的糟糕的单元测试程序。很多。但我坚持着写,现在我已经喜欢上了些单元测试。我编写单元测试的速度越来越快,当开发完程序,我现在有更多的信心相信它们能按照设计的预期来运行。我不希望我的程序里有bug,很多次,单元测试在很多***的小bug上挽救了我。如果我能这样并带来好处,我相信所有的人都应该写单元测试!
作为一个自由职业者,我经常有机会能看到各种不同的公司内部是如何做开发工作的,我经常吃惊于如此多的公司仍然没有使用测试驱动开发(TDD)。当我问“为什么”,回答通常是归咎于下面的一个或多个常见的错误做法,这些错误是我在实施驱动测试开发中经常遇到的。这样的错误很容易犯,我也是受害者。我曾合作过的很多公司因为这些错误做法而放弃了测试驱动开发,他们会持有这样一种观点:驱动测试开发“增加了不必要的代码维护量”,或“把时间浪费在写测试上是不值得的”。
人们会很合理的推断出这样的结论:
写了单元测试但没有起到任何作用,那还不如不写。
但根据我的经验,我可以很有信心的说:
单元测试能让我的开发更有效率,让我的代码更有保障。
带着这样的认识,下面让我们看看一些我遇到过/犯过的最常见的在测试驱动开发中的错误做法,以及我从中学到的教训。
1、不使用模拟框架
我在驱动测试开发上学到***件事情就是应该在独立的环境中进行测试。这意味着我们需要对测试中所需要的外部依赖条件进行模拟,伪造,或者进行短路,让测试的过程不依赖外部条件。
假设我们要测试下面这个类中的GetByID方法:
public class ProductService : IProductService
{
    private readonly IProductRepository _productRepository;

    public ProductService(IProductRepository productRepository)
    {
        this._productRepository = productRepository;
    }

    public Product GetByID(string id)
    {
        Product product =  _productRepository.GetByID(id);

        if (product == null)
        {
            throw new ProductNotFoundException();
        }

        return product;
    }
}
- 1.
- 2.
- 3.
- 4.
- 5.
- 6.
- 7.
- 8.
- 9.
- 10.
- 11.
- 12.
- 13.
- 14.
- 15.
- 16.
- 17.
- 18.
- 19.
- 20.
- 21.
为了让测试能够进行,我们需要写一个IProductRepository的临时模拟代码,这样ProductService.GetByID就能在独立的环境中运行。模拟出的IProductRepository临时接口应该是下面这样:
[TestMethod]
public void GetProductWithValidIDReturnsProduct()
{
    // Arrange
    IProductRepository productRepository = new StubProductRepository();
    ProductService productService = new ProductService(productRepository);

    // Act
    Product product = productService.GetByID("spr-product");

    // Assert
    Assert.IsNotNull(product);
}

public class StubProductRepository : IProductRepository
{
    public Product GetByID(string id)
    {
        return new Product()
        {
            ID = "spr-product",
            Name = "Nice Product"
        };
    }

    public IEnumerable<Product> GetProducts()
    {
        throw new NotImplementedException();
    }
}
- 1.
- 2.
- 3.
- 4.
- 5.
- 6.
- 7.
- 8.
- 9.
- 10.
- 11.
- 12.
- 13.
- 14.
- 15.
- 16.
- 17.
- 18.
- 19.
- 20.
- 21.
- 22.
- 23.
- 24.
- 25.
- 26.
- 27.
- 28.
- 29.
- 30.
现在让我们用一个无效的产品ID来测试这个方法的报错效果。
[TestMethod]
public void GetProductWithInValidIDThrowsException()
{
    // Arrange
    IProductRepository productRepository = new StubNullProductRepository();
    ProductService productService = new ProductService(productRepository);

    // Act & Assert
    Assert.Throws<ProductNotFoundException>(() => productService.GetByID("invalid-id"));
}

public class StubNullProductRepository : IProductRepository
{
    public Product GetByID(string id)
    {
        return null;
    }

    public IEnumerable<Product> GetProducts()
    {
        throw new NotImplementedException();
    }
}
- 1.
- 2.
- 3.
- 4.
- 5.
- 6.
- 7.
- 8.
- 9.
- 10.
- 11.
- 12.
- 13.
- 14.
- 15.
- 16.
- 17.
- 18.
- 19.
- 20.
- 21.
- 22.
- 23.
在这个例子中,我们为每个测试都做了一个独立的Repository。但我们也可在一个Repository上添加额外的逻辑,例如:
public class StubProductRepository : IProductRepository
{
    public Product GetByID(string id)
    {
        if (id == "spr-product")
        {
            return new Product()
            {
                ID = "spr-product",
                Name = "Nice Product"
            };
        }

        return null;
    }

    public IEnumerable<Product> GetProducts()
    {
        throw new NotImplementedException();
    }
}
- 1.
- 2.
- 3.
- 4.
- 5.
- 6.
- 7.
- 8.
- 9.
- 10.
- 11.
- 12.
- 13.
- 14.
- 15.
- 16.
- 17.
- 18.
- 19.
- 20.
- 21.
在***种方法里,我们写了两个不同的IProductRepository模拟方法,而在第二种方法里,我们的逻辑变得有些复杂。如果我们在这些逻辑中犯了错,那我们的测试就没法得到正确的结果,这又为我们的调试增加了额外的负担,我们需要找到是业务代码出来错还是测试代码不正确。
你也许还会质疑这些模拟代码中的这个没有任何用处的 GetProducts()方法,它是干什么的?因为IProductRepository接口里有这个方法,我们不得不加入这个方法以让程序能编译通过——尽管在我们的测试中这个方法根本不是我们考虑到对象。
使用这样的测试方法,我们不得不写出大量的临时模拟类,这无疑会让我们在维护时愈加头痛。这种时候,使用一个模拟框架,比如JustMock,将会节省我们大量的工作。
让我们重新看一下之前的这个测试例子,这次我们将使用一个模拟框架:
[TestMethod]
public void GetProductWithValidIDReturnsProduct()
{
    // Arrange
    IProductRepository productRepository = Mock.Create<IProductRepository>();
    Mock.Arrange(() => productRepository.GetByID("spr-product")).Returns(new Product());
    ProductService productService = new ProductService(productRepository);

    // Act
    Product product = productService.GetByID("spr-product");

    // Assert
    Assert.IsNotNull(product);
}

[TestMethod]
public void GetProductWithInValidIDThrowsException()
{
    // Arrange
    IProductRepository productRepository = Mock.Create<IProductRepository>();
    ProductService productService = new ProductService(productRepository);

    // Act & Assert
    Assert.Throws<ProductNotFoundException>(() => productService.GetByID("invalid-id"));
}
- 1.
- 2.
- 3.
- 4.
- 5.
- 6.
- 7.
- 8.
- 9.
- 10.
- 11.
- 12.
- 13.
- 14.
- 15.
- 16.
- 17.
- 18.
- 19.
- 20.
- 21.
- 22.
- 23.
- 24.
- 25.
有没有注意到我们写的代码的减少量?在这个例子中代码量减少49%,更准确的说,使用模拟框架测试时代码是28行,而没有使用时是57行。我们还看到了整个测试方法变得可读性更强了!
#p#
2、测试代码组织的太松散
模拟框架让我们在模拟测试中的生成某个依赖类的工作变得非常简单,但有时候太轻易实现也容易产生坏处。为了说明这个观点,请观察下面两个单元测试,看看那一个容易理解。这两个测试程序是测试一个相同的功能:
Test #1
TestMethod]
public void InitializeWithValidProductIDReturnsView()
{
    // Arrange
    IProductView productView = Mock.Create<IProductView>();
    Mock.Arrange(() => productView.ProductID).Returns("spr-product");

    IProductService productService = Mock.Create<IProductService>();
    Mock.Arrange(() => productService.GetByID("spr-product")).Returns(new Product()).OccursOnce();

    INavigationService navigationService = Mock.Create<INavigationService>();
    Mock.Arrange(() => navigationService.GoTo("/not-found"));

    IBasketService basketService = Mock.Create<IBasketService>();
    Mock.Arrange(() => basketService.ProductExists("spr-product")).Returns(true);

    var productPresenter = new ProductPresenter(
                                            productView,
                                            navigationService,
                                            productService,
                                            basketService);

    // Act
    productPresenter.Initialize();

    // Assert
    Assert.IsNotNull(productView.Product);
    Assert.IsTrue(productView.IsInBasket);
}
- 1.
- 2.
- 3.
- 4.
- 5.
- 6.
- 7.
- 8.
- 9.
- 10.
- 11.
- 12.
- 13.
- 14.
- 15.
- 16.
- 17.
- 18.
- 19.
- 20.
- 21.
- 22.
- 23.
- 24.
- 25.
- 26.
- 27.
- 28.
- 29.
Test #2
[TestMethod]
public void InitializeWithValidProductIDReturnsView()
{
    // Arrange
    var view = Mock.Create<IProductView>();
    Mock.Arrange(() => view.ProductID).Returns("spr-product");

    var mock = new MockProductPresenter(view);

    // Act
    mock.Presenter.Initialize();

    // Assert
    Assert.IsNotNull(mock.Presenter.View.Product);
    Assert.IsTrue(mock.Presenter.View.IsInBasket);
}
- 1.
- 2.
- 3.
- 4.
- 5.
- 6.
- 7.
- 8.
- 9.
- 10.
- 11.
- 12.
- 13.
- 14.
- 15.
- 16.
我相信Test #2是更容易理解的,不是吗?而Test #1的可读性不那么强的原因就是有太多的创建测试的代码。在Test #2中,我把复杂的构建测试的逻辑提取到了ProductPresenter类里,从而使测试代码可读性更强。
为了把这个概念说的更清楚,让我们来看看测试中引用的方法:
public void Initialize()
{
    string productID = View.ProductID;
    Product product = _productService.GetByID(productID);

    if (product != null)
    {
        View.Product = product;
        View.IsInBasket = _basketService.ProductExists(productID);
    }
    else
    {
       NavigationService.GoTo("/not-found");
    }
}
- 1.
- 2.
- 3.
- 4.
- 5.
- 6.
- 7.
- 8.
- 9.
- 10.
- 11.
- 12.
- 13.
- 14.
- 15.
这个方法依赖于View, ProductService, BasketService and NavigationService等类,这些类都要模拟或临时构造出来。当遇到这样有太多的依赖关系时,这种需要写出准备代码的副作用就会显现出来,正如上面的例子。
请注意,这还只是个很保守的例子。更多的我看到的是一个类里有模拟一、二十个依赖的情况。
下面就是我在测试中提取出来的模拟ProductPresenter的MockProductPresenter类:
public class MockProductPresenter
{
    public IBasketService BasketService { get; set; }
    public IProductService ProductService { get; set; }
    public ProductPresenter Presenter { get; private set; }

    public MockProductPresenter(IProductView view)
    {
        var productService = Mock.Create<IProductService>();
        var navigationService = Mock.Create<INavigationService>();
        var basketService = Mock.Create<IBasketService>();

        // Setup for private methods
        Mock.Arrange(() => productService.GetByID("spr-product")).Returns(new Product());
        Mock.Arrange(() => basketService.ProductExists("spr-product")).Returns(true);
        Mock.Arrange(() => navigationService.GoTo("/not-found")).OccursOnce();

        Presenter = new ProductPresenter(
                                   view,
                                        navigationService,
                                        productService,
                                        basketService);
    }
}
- 1.
- 2.
- 3.
- 4.
- 5.
- 6.
- 7.
- 8.
- 9.
- 10.
- 11.
- 12.
- 13.
- 14.
- 15.
- 16.
- 17.
- 18.
- 19.
- 20.
- 21.
- 22.
- 23.
- 24.
因为View.ProductID的属性值决定着这个方法的逻辑走向,我们向MockProductPresenter类的构造器里传入了一个模拟的View实例。这种做法保证了当产品ID改变时自动判断需要模拟的依赖。
我们也可以用这种方法处理测试过程中的细节动作,就像我们在第二个单元测试里的Initialize方法里处理product==null的情况:
[TestMethod]
public void InitializeWithInvalidProductIDRedirectsToNotFound()
{
    // Arrange
    var view = Mock.Create<IProductView>();
    Mock.Arrange(() => view.ProductID).Returns("invalid-product");

    var mock = new MockProductPresenter(view);

    // Act
    mock.Presenter.Initialize();

    // Assert
    Mock.Assert(mock.Presenter.NavigationService);
}
- 1.
- 2.
- 3.
- 4.
- 5.
- 6.
- 7.
- 8.
- 9.
- 10.
- 11.
- 12.
- 13.
- 14.
- 15.
这隐藏了一些ProductPresenter实现上的细节处理,测试方法的可读性是***重要的。
#p#
3、一次测试太多的项目
看看下面的单元测试,请在不使用“和”这个词的情况下描述它:
[TestMethod]
public void ProductPriceTests()
{
    // Arrange
    var product = new Product()
    {
        BasePrice = 10m
    };

    // Act
    decimal basePrice = product.CalculatePrice(CalculationRules.None);
    decimal discountPrice = product.CalculatePrice(CalculationRules.Discounted);
    decimal standardPrice = product.CalculatePrice(CalculationRules.Standard);

    // Assert
    Assert.AreEqual(10m, basePrice);
    Assert.AreEqual(11m, discountPrice);
    Assert.AreEqual(12m, standardPrice);
}
- 1.
- 2.
- 3.
- 4.
- 5.
- 6.
- 7.
- 8.
- 9.
- 10.
- 11.
- 12.
- 13.
- 14.
- 15.
- 16.
- 17.
- 18.
- 19.
我只能这样描述这个方法:
“测试中计算基价,打折价和标准价是都能否返回正确的值。”
这是一个简单的方法来判断你是否一次测试了过多的内容。上面这个测试会有三种情况导致它失败。如果测试失败,我们需要去找到那个/哪些出了错。
理想情况下,每一个方法都应该有它自己的测试,例如:
[TestMethod]
public void CalculateDiscountedPriceReturnsAmountOf11()
{
    // Arrange
    var product = new Product()
    {
        BasePrice = 10m
    };

    // Act
    decimal discountPrice = product.CalculatePrice(CalculationRules.Discounted);

    // Assert
    Assert.AreEqual(11m, discountPrice);
}

[TestMethod]
public void CalculateStandardPriceReturnsAmountOf12()
{
    // Arrange
    var product = new Product()
    {
        BasePrice = 10m
    };

    // Act
    decimal standardPrice = product.CalculatePrice(CalculationRules.Standard);

    // Assert
    Assert.AreEqual(12m, standardPrice);
}

[TestMethod]
public void NoDiscountRuleReturnsBasePrice()
{
    // Arrange
    var product = new Product()
    {
        BasePrice = 10m
    };

    // Act
    decimal basePrice = product.CalculatePrice(CalculationRules.None);

    // Assert
    Assert.AreEqual(10m, basePrice);
}
- 1.
- 2.
- 3.
- 4.
- 5.
- 6.
- 7.
- 8.
- 9.
- 10.
- 11.
- 12.
- 13.
- 14.
- 15.
- 16.
- 17.
- 18.
- 19.
- 20.
- 21.
- 22.
- 23.
- 24.
- 25.
- 26.
- 27.
- 28.
- 29.
- 30.
- 31.
- 32.
- 33.
- 34.
- 35.
- 36.
- 37.
- 38.
- 39.
- 40.
- 41.
- 42.
- 43.
- 44.
- 45.
- 46.
- 47.
注意这些非常具有描述性的测试名称。如果一个项目里有500个测试,其中一个失败了,你能根据名称就能知道哪个测试应该为此承担责任。
这样我们可能会有更多的方法,但换来的好处是清晰。我在《代码大全(第2版)》里看到了这句经验之谈:
为方法里的每个IF,And,Or,Case,For,While等条件写出独立的测试方法。
驱动测试开发纯粹主义者可能会说每个测试里只应该有一个断言。我想这个原则有时候可以灵活处理,就像下面测试一个对象的属性值时:
public Product Map(ProductDto productDto)
{
    var product = new Product()
    {
        ID = productDto.ID,
        Name = productDto.ProductName,
        BasePrice = productDto.Price
    };

    return product;
}
- 1.
- 2.
- 3.
- 4.
- 5.
- 6.
- 7.
- 8.
- 9.
- 10.
- 11.
我不认为为每个属性写一个独立的测试方法进行断言是有必要的。下面是我如何写这个测试方法的:
[TestMethod]
public void ProductMapperMapsToExpectedProperties()
{
    // Arrange
    var mapper = new ProductMapper();
    var productDto = new ProductDto()
    {
        ID = "sp-001",
        Price = 10m,
        ProductName = "Super Product"
    };

    // Act
    Product product = mapper.Map(productDto);

    // Assert
    Assert.AreEqual(10m, product.BasePrice);
    Assert.AreEqual("sp-001", product.ID);
    Assert.AreEqual("Super Product", product.Name);
}
- 1.
- 2.
- 3.
- 4.
- 5.
- 6.
- 7.
- 8.
- 9.
- 10.
- 11.
- 12.
- 13.
- 14.
- 15.
- 16.
- 17.
- 18.
- 19.
- 20.
#p#
4、先写程序后写测试
我坚持认为,驱动测试开发的意义远高于测试本身。正确的实施驱动测试开发能巨大的提高开发效率,这是一种良性循环。我看到很多开发人员在开发完某个功能后才去写测试方法,把这当成一种在提交代码前需要完成的行政命令来执行。事实上,补写测试代码只是驱动测试开发的一个内容。
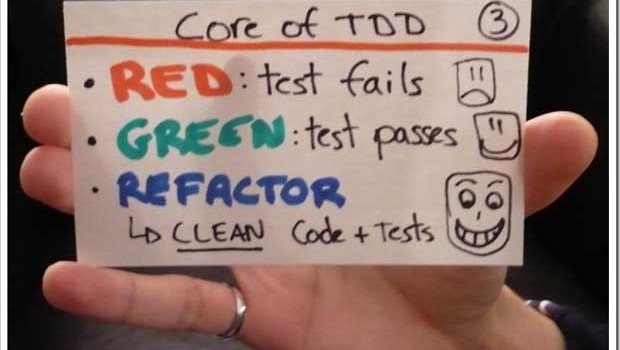
如果不是按照先写测试后写被测试程序的红,绿,重构方法原则,测试编写很可能会变成一种体力劳动。
如果想培养你的单元测试习惯,你可以看一些关于TDD的材料,比如The String Calculator Code Kata。
5、测试的过细
请检查下面的这个方法:
public Product GetByID(string id)
{
    return _productRepository.GetByID(id);
}
- 1.
- 2.
- 3.
- 4.
这个方法真的需要测试吗?不,我也认为不需要。
驱动测试纯粹主义者可能会坚持认为所有的代码都应该被测试覆盖,而且有这样的自动化工具能扫描并报告程序的某部分内容没有被测试覆盖,然而,我们要当心,不要落入这种给自己制造工作量的陷阱。
很多我交谈过的反对驱动测试开发的人都会引用这点来作为不写任何测试代码的主要理由。我对他们的回复是:只测试你需要测试的代码。我的观点是,构造器,geter,setter等方法没必要特意的测试。让我们来加深记忆一下我前面提到的经验论:
为方法里的每个IF,And,Or,Case,For,While等条件写出独立的测试方法。
如果一个方法里没有任何一个上面提到的条件语句,那它真的需要测试吗?
祝测试愉快!
获取文中的代码
文中例子的代码你可以从这里找到。
英文原文:Top 5 TDD Mistakes