Android Widget组件应用学习是本文要介绍的内容,主要是来了解并学习Android Widget组件应用,具体内容的学习来看本文详解。
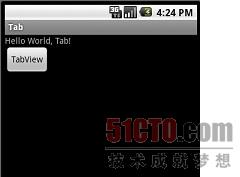
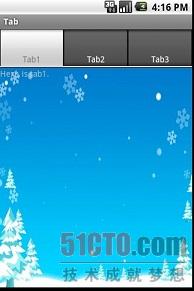
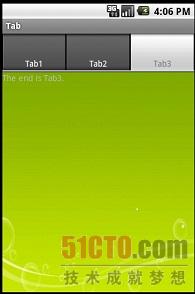
这里是Android基本组件Button和Tab_Widget的简单应用,通过点击Tab1、Tab2、Tab3、来切换查看内容
图为加入TabView按钮的Activity和点击Tab切换效果演示
项目名为:Tab
代码如下:
- package com.tab.demo;
- import android.app.Activity;
- import android.content.Intent;
- import android.os.Bundle;
- import android.view.View;
- import android.widget.Button;
- public class MainActivity extends Activity {
- private Button button; //构建按钮对象
- public void onCreate(Bundle savedInstanceState) {
- super.onCreate(savedInstanceState);
- setContentView(R.layout.main);
- button=(Button)findViewById(R.id.tab_demo_button); //实例化对象,联系到布局文件
- button.setOnClickListener(new Button.OnClickListener() {
- //设置监听器,监听点击事件
- @Override
- public void onClick(View v) {
- // TODO Auto-generated method stub
- Intent intent = new Intent();
- intent.setClass(MainActivity.this, TabDemoActivity.class);
- startActivity(intent); //实现点击跳转
- }
- });
- }
- }
- //跳转到TabDemoActivity的代码
- package com.tab.demo;
- import android.app.TabActivity;
- import android.os.Bundle;
- import android.view.LayoutInflater;
- import android.widget.TabHost;
- public class TabDemoActivity extends TabActivity {
- public void onCreate(Bundle savedInstanceState) {
- super.onCreate(savedInstanceState);
- TabHost tabHost = getTabHost(); //构造一个Tab标签容器TabHost
- LayoutInflater.from(this).inflate(R.layout.tab_demo,
- tabHost.getTabContentView(), true);
- tabHost.addTab(tabHost.newTabSpec("tab1").setIndicator("Tab1")
- .setContent(R.id.view1)); //分别把构造好的标签放入TabHost里面
- tabHost.addTab(tabHost.newTabSpec("tab2").setIndicator("Tab2")
- .setContent(R.id.view2));
- tabHost.addTab(tabHost.newTabSpec("tab3").setIndicator("Tab3")
- .setContent(R.id.view3));
- }
- }
MainActivity的视图布局文件 main xml:
- <?xml version="1.0" encoding="utf-8"?>
- <LinearLayout xmlns:android="http://schemas.android.com/apk/res/android"
- android:orientation="vertical" android:layout_width="fill_parent"
- android:layout_height="fill_parent">
- <TextView android:layout_width="fill_parent"
- android:layout_height="wrap_content" android:text="@string/hello" />
- <Button android:layout_width="wrap_content"
- android:layout_height="wrap_content" android:text="TabView"
- android:id="@+id/tab_demo_button" />
- </LinearLayout>
TabDemoActivity 的视图布局文件 tab_demo xml:
- <?xml version="1.0" encoding="utf-8"?>
- <FrameLayout xmlns:android="http://schemas.android.com/apk/res/android"
- android:layout_width="fill_parent"
- android:layout_height="fill_parent">
- <TextView android:id="@+id/view1"
- android:background="@drawable/one"
- android:layout_width="fill_parent"
- android:layout_height="fill_parent"
- android:text="@string/tab1"/>
- <TextView android:id="@+id/view2"
- android:background="@drawable/three"
- android:layout_width="fill_parent"
- android:layout_height="fill_parent"
- android:text="@string/tab2"/>
- <TextView android:id="@+id/view3"
- android:background="@drawable/two"
- android:layout_width="fill_parent"
- android:layout_height="fill_parent"
- android:text="@string/tab3"/>
- </FrameLayout>
相关信息文件string xml :
- <?xml version="1.0" encoding="utf-8"?>
- <resources>
- <string name="hello">Hello World, Tab!</string>
- <string name="app_name">Tab</string>
- <string name= "tab1">Here is tab1.</string>
- <string name= "tab2">Jump to Tab2.</string>
- <string name= "tab3">The end is Tab3.</string>
- </resources>
应用配置文件 AndroidMainfest xml :
- <?xml version="1.0" encoding="utf-8"?>
- <manifest xmlns:android="http://schemas.android.com/apk/res/android"
- package="com.tab.demo" android:versionCode="1" android:versionName="1.0">
- <application android:icon="@drawable/me" android:label="@string/app_name">
- <activity android:name=".MainActivity" android:label="@string/app_name">
- <intent-filter>
- <action android:name="android.intent.action.MAIN" />
- <category android:name="android.intent.category.LAUNCHER" />
- </intent-filter>
- </activity>
- <activity android:name=".TabDemoActivity"></activity>
- </application>
- </manifest>
小结:解析Android Widget组件应用学习的内容介绍完了,希望通过Android组件Tab_Widget内容的学习能对你有所帮助!