


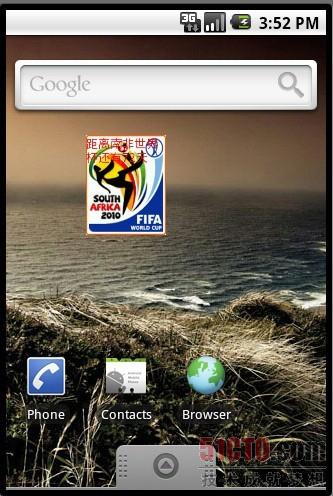
Android Widget开发案例实现是本文要介绍的内容,主要是来了解并学习Android Widget开发应用,今天我们要写一下Android Widget的开发,由于快点凌晨,我就不说的太具体了,同志们就模仿吧!首先看一下效果图:
下面是Demo的详细步骤:
一、新建一个Android工程命名为:WidgetDemo.
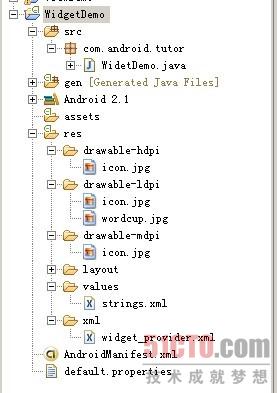
二、准备素材,一个是Widget的图标,一个是Widget的背景。存放目录如下图:
三、修改string.xml文件如下:
- <?xml version="1.0" encoding="utf-8"?>
- <resources>
- <string name="hello">Hello World, WidetDemo!</string>
- <string name="app_name">DaysToWorldCup</string>
- </resources>
四、建立Widget内容提供者文件,我们在res下建立xml文件夹,并且新建一个widget_provider.xml代码入下:
- <?xml version="1.0" encoding="utf-8"?>
- <appwidget-provider xmlns:android="http://schemas.android.com/apk/res/android"
- android:minWidth="50dip"
- android:minHeight="50dip"
- android:updatePeriodMillis="10000"
- android:initialLayout="@layout/main"
- />
五、修改main.xml布局,代码如下:
- <?xml version="1.0" encoding="utf-8"?>
- <LinearLayout xmlns:android="http://schemas.android.com/apk/res/android"
- android:orientation="vertical"
- android:layout_width="fill_parent"
- android:layout_height="fill_parent"
- android:background="@drawable/wordcup"
- >
- <TextView
- android:id="@+id/wordcup"
- android:layout_width="fill_parent"
- android:layout_height="wrap_content"
- android:text="@string/hello"
- android:textSize="12px"
- android:textColor="#ff0000"
- />
- </LinearLayout>
六、修改WidgetDemo.java代码如下:
- package com.android.tutor;
- import java.util.Calendar;
- import java.util.Date;
- import java.util.GregorianCalendar;
- import java.util.Timer;
- import java.util.TimerTask;
- import android.appwidget.AppWidgetManager;
- import android.appwidget.AppWidgetProvider;
- import android.content.ComponentName;
- import android.content.Context;
- import android.widget.RemoteViews;
- public class WidetDemo extends AppWidgetProvider {
- /** Called when the activity is first created. */
- @Override
- public void onUpdate(Context context, AppWidgetManager appWidgetManager,
- int[] appWidgetIds) {
- Timer timer = new Timer();
- timer.scheduleAtFixedRate(new MyTime(context,appWidgetManager), 1, 60000);
- super.onUpdate(context, appWidgetManager, appWidgetIds);
- }
- private class MyTime extends TimerTask{
- RemoteViews remoteViews;
- AppWidgetManager appWidgetManager;
- ComponentName thisWidget;
- public MyTime(Context context,AppWidgetManager appWidgetManager){
- this.appWidgetManager = appWidgetManager;
- remoteViews = new RemoteViews(context.getPackageName(),R.layout.main);
- thisWidget = new ComponentName(context,WidetDemo.class);
- }
- public void run() {
- Date date = new Date();
- Calendar calendar = new GregorianCalendar(2010,06,11);
- long days = (((calendar.getTimeInMillis()-date.getTime())/1000))/86400;
- remoteViews.setTextViewText(R.id.wordcup, "距离南非世界杯还有" + days+"天");
- appWidgetManager.updateAppWidget(thisWidget, remoteViews);
- }
- }
- }
七、修改配置文件AndroidManifest.xml,代码如下:
- <?xml version="1.0" encoding="utf-8"?>
- <manifest xmlns:android="http://schemas.android.com/apk/res/android"
- package="com.android.tutor"
- android:versionCode="1"
- android:versionName="1.0">
- <application android:icon="@drawable/icon" android:label="@string/app_name">
- <receiver android:name=".WidetDemo"
- android:label="@string/app_name">
- <intent-filter>
- <action android:name="android.appwidget.action.APPWIDGET_UPDATE" />
- </intent-filter>
- <meta-data android:name="android.appwidget.provider"
- android:resource="@xml/widget_provider"
- />
- </receiver>
- </application>
- <uses-sdk android:minSdkVersion="7" />
- </manifest>
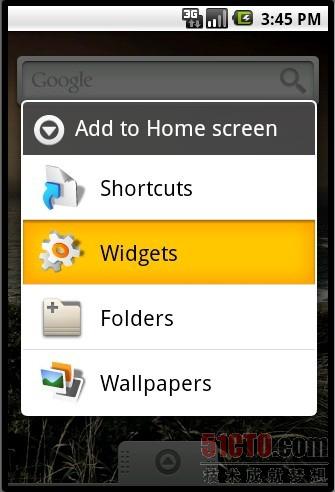
八、点击运行(Ctrl+F11),之,运行成功后,我们长时间点击桌面,会出现如下俩个,依次点击,就可以看到最上面的效果图:

小结:解析Android Widget开发案例实现的内容介绍完了,希望通过Android Widget开发内容的学习能对你有所帮助!


