


今天,和大家讨论一下在ASP.NET中,如何上传图片至数据库,然后再将图片读取显示的问题。欢迎高手提出自己的方法!!!
目前,我主要用到以下两种方法:
1:上传图片的相对路径到数据库中相应字段里,读取显示时,将控件(假设用的是Image控件)的ImageUrl属性指向该相对路径即可。
2:将图片以二进制流的方式整体上传到数据库里,读取显示时,以二进制流的方式整体读出。这种方法稍微麻烦一点,但保存的是图片整体到数据库里。
***种方法,实现起来比较简单,因为存入数据库里的只是图片相对路径,当然,同时也就有很大的局限性,由于是相对路径,所以当本地的图片变换了位置
或移除,或是在其他主机上浏览该图片时,就无法显示了。第二种方法,就比较灵活了,可以用在交互性的页面,比如校友录,因为上传的是整张图片,所以只要读取正确,就能任何主机上显示出来。
下面,分别通过实际的代码,介绍这两种方法。
在这两个方法里,我将用到一个控件:FileUpload,该控件的具体用法参见百度谷歌。。。学习过程中,***的老师就是他们俩。
1:ASP.NET上传图片上传图片相对路径,并读取显示。
数据库里的字段很简单,就两个
Image_ID int identity(1,1) primarykey not null
Image_Wpath varchar(50) null
Image_Wpath 用来保存图片的相对路径
很简单的界面(其实是有点丑。。。。):
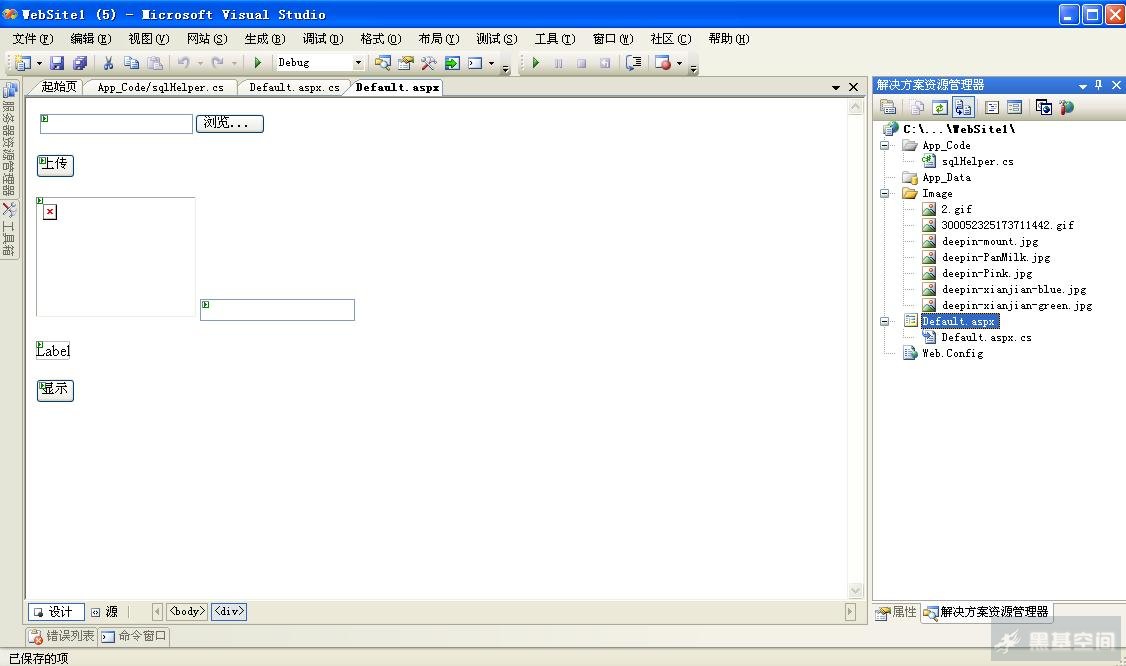
这里注意,我需要上传的文件都放在文件夹“Image”,在后面的上传路径里就需要这个文件夹。
下面是效果图:
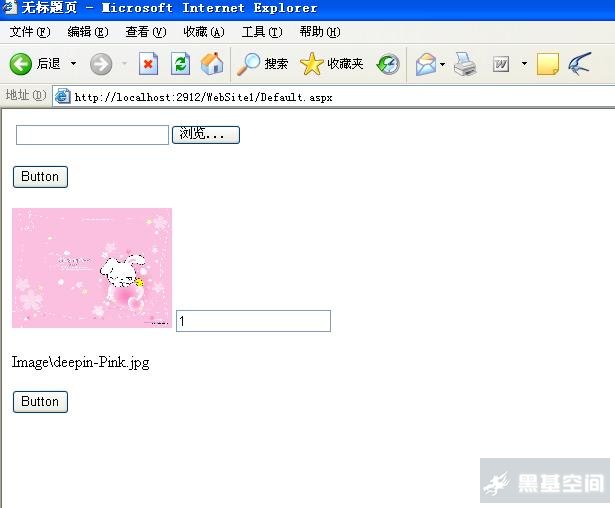
我在输入框里填入Image_ID的值,读取指定的图片,在图片的下面,显示出该图片的相对路径。
接下来,我们看一下具体代码实现上传和读取显示功能。
在项目里,有一个sqlHelper类,是一些常用的数据访问方法。这里就不详细讲了。
上传按钮里的事件:
CODE:
- protected void Button1_Click(object sender, EventArgs e)
- {
- string name = FileUpload1.FileName;//获取文件名
- string type = name.Substring(name.LastIndexOf(".") + 1);
- //获取文件类型
- string ipath = Server.MapPath("Image") + "\\" + name;
- //获取文件路径
- string wpath = "Image\\" + name;
- //[color=red]设置文件保存相对路径
- (这里的路径起始就是我们存放图片的文件夹名)[/color]
- string query1 = "insert into Images values
- ('" + wpath + "')";
- if (type == "jpg" || type == "gif" ||
- type == "bmp" || type == "png")
- {
- FileUpload1.SaveAs(ipath); //服务器保存路径
- sqlHelper.ExecterNonQuery(query1);
- }
- }
显示按钮事件:
CODE:
- protected void Button2_Click(object sender, EventArgs e)
- {
- string query2 = "select * from Images where
- Image_ID=" + Convert.ToInt32(TextBox1.Text);
- SqlDataReader sdr = sqlHelper.GetReader(query2);
- string wpath2 = "";
- while (sdr.Read())
- {
- wpath2 = sdr[1].ToString();
- //获得相对路径
- }
- sdr.Close();
- Image1.ImageUrl = wpath2;
- //图片显示路径就是相对路径
- Label1.Text = wpath2; //显示相对路径
- }
2:以二进制流的方式存入数据库,并读取显示图片。
数据库的字段同样简单:
Image_ID int identity(1,1) primarykey not null
Image_Content image null
Image_Content以二进制形式保存图片
整体看一下例子里的页面组成:
ASP.NET上传图片页面和***种方法一样,同样是用到FileUpload,以及一个Button,具体代码如下:
CODE:
- protected void Button1_Click(object sender, EventArgs e)
- {
- string name = FileUpload1.PostedFile.FileName;
- string type = name.Substring(name.LastIndexOf(".") + 1);
- FileStream fs = File.OpenRead(name);
- byte[] content = new byte[fs.Length];
- fs.Read(content, 0, content.Length);
- fs.Close();
- SqlConnection conn = new SqlConnection("Data
- Source=;Initial Catalog=;Persist Security
- Info=True;User ID=;Pooling=False;Password=");
- SqlCommand cmd = conn.CreateCommand();
- conn.Open();
- cmd.CommandText = "insert into Images
- (Image_Content) values (@content)";
- cmd.CommandType = CommandType.Text;
- if (type == "jpg" || type == "gif" ||
- type == "bmp" || type == "png")
- {
- SqlParameter para = cmd.Parameters.Add
- ("@content", SqlDbType.Image);
- para.Value = content;
- cmd.ExecuteNonQuery();
- }
- }
显示一张图片和显示一组图片有所不同,将会分别说明之。
显示一张图片,要用到Default.aspx和Default2.aspx。Default.aspx中有一个控件Image,它的属性ImageUrl指向Default2.aspx用于显示图片。
Default2.aspx用于读取图片。

Default.aspx.cs
CODE:
- protected void Page_Load(object sender, EventArgs e)
- {
- Image1.ImageUrl = "Default2.aspx";
- }
Default2.aspx.cs
CODE:
- string imgid = Request.QueryString["imgid"];
- SqlConnection conn1 = new SqlConnection
- ("Data Source=;Initial Catalog=;Persist Security
- Info=True;User ID=sa;Pooling=False;Password=");
- SqlCommand cmd1 = new SqlCommand("select Image_Content
- from Images where Image_ID=3", conn1);
- //固定显示Image_ID为3的图片
- conn1.Open();
- SqlDataReader sdr = cmd1.ExecuteReader();
- if (sdr.Read())
- {
- Response.BinaryWrite((byte[])sdr["Image_Content"]);
- }
- Response.End();
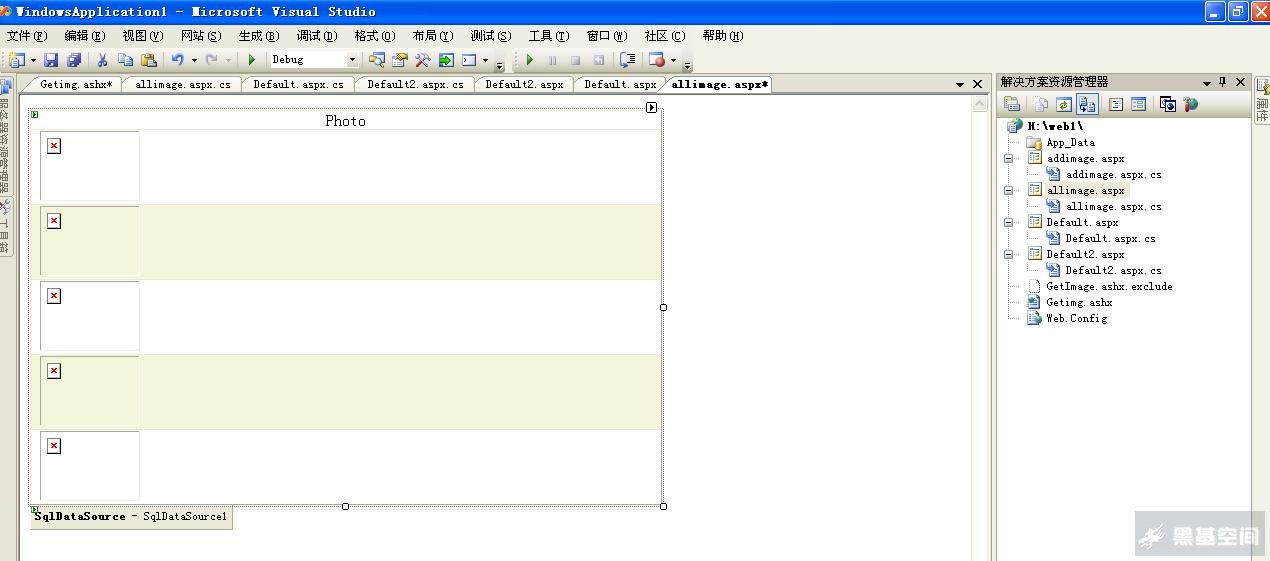
显示一组图片时,用ashx Handle存放图片。同时用GridView以列显示图片。Image控件绑定Image_ID。

allimage.aspx
CODE:
- 〈%@ Page Language="C#" AutoEventWireup="true"
- CodeFile="allimage.aspx.cs" Inherits="allimage" % 〉
- 〈!DOCTYPE html PUBLIC "-//W3C//DTD XHTML
- 1.0 Transitional//EN" "http://www.w3.org/TR/xhtml1
- /DTD/xhtml1-transitional.dtd" 〉
- 〈HTML xmlns="http://www.w3.org/1999/xhtml" 〉
- 〈HEAD runat="server" 〉
- 〈title 〉BindImg〈/title 〉
- 〈/HEAD 〉
- 〈body 〉
- 〈form id="Form1" method="post" runat="server" 〉
- 〈FONT face="宋体" 〉
- 〈asp:DataGrid id="MyDataGrid" runat="server"
- AutoGenerateColumns="False" Width="632px" 〉
- 〈AlternatingItemStyle BackColor="Beige" 〉
- 〈/AlternatingItemStyle 〉
- 〈HeaderStyle HorizontalAlign="Center" 〉
- 〈/HeaderStyle 〉
- 〈Columns 〉
- 〈asp:TemplateColumn HeaderText="Photo" 〉
- 〈ItemTemplate 〉 〈asp:Image ID="Image1" runat="server"
- Height="70px" ImageUrl='
- 〈%# "Getimg.ashx?id="+Eval("Image_ID") % 〉'
- Width="100px" / 〉
- 〈/ItemTemplate 〉
- 〈/asp:TemplateColumn 〉
- 〈/Columns 〉
- 〈/asp:DataGrid 〉〈/FONT 〉
- 〈asp:SqlDataSource ID="SqlDataSource1" runat="server"
- ConnectionString="
- 〈%$ ConnectionStrings:PracticeConnectionString % 〉"
- SelectCommand="SELECT * FROM [Images]" 〉
- 〈/asp:SqlDataSource 〉
- 〈/form 〉
- 〈/body 〉
- 〈/HTML 〉
allimage.aspx.cs
CODE:
- protected void Page_Load(object sender, EventArgs e)
- {
- MyDataGrid.DataSource = SqlDataSource1;
- MyDataGrid.DataBind();
- }
Getimg.ashx
CODE:
- 〈%@ WebHandler Language="C#" Class="Getimg" %〉
- using System;
- using System.Web;
- using System.Data;
- using System.Data.SqlClient;
- using System.Configuration;
- public class Getimg : IHttpHandler {
- public void ProcessRequest (HttpContext context)
- {
- int id = int.Parse(context.Request.QueryString["id"]);
- SqlConnection conn = new SqlConnection
- (@"server=;database=;uid=;pwd=");
- SqlCommand cmd = new SqlCommand
- ("select Image_Content from
- Images where Image_ID='" + id + "'", conn);
- cmd.Parameters.Add("@id", SqlDbType.Int).Value = id;
- conn.Open();
- SqlDataReader dr = cmd.ExecuteReader();
- if (dr.Read())
- {
- context.Response.BinaryWrite((byte[])dr
- ["Image_Content"]);
- }
- dr.Close();
- }
- public bool IsReusable {
- get {
- return false;
- }
- }
- }
总结:
两种ASP.NET上传图片及读取显示方法,各有优点,个人更倾向于用第二种。因为第二种方法达到了真正的将图片上传到数据库。在某些项目中,我们也可能要用到***种方法。本例中,没有严格的判断图片上传的格式,学习的朋友可以自己做严格判断,防止上传的是有害文件。
【编辑推荐】


